
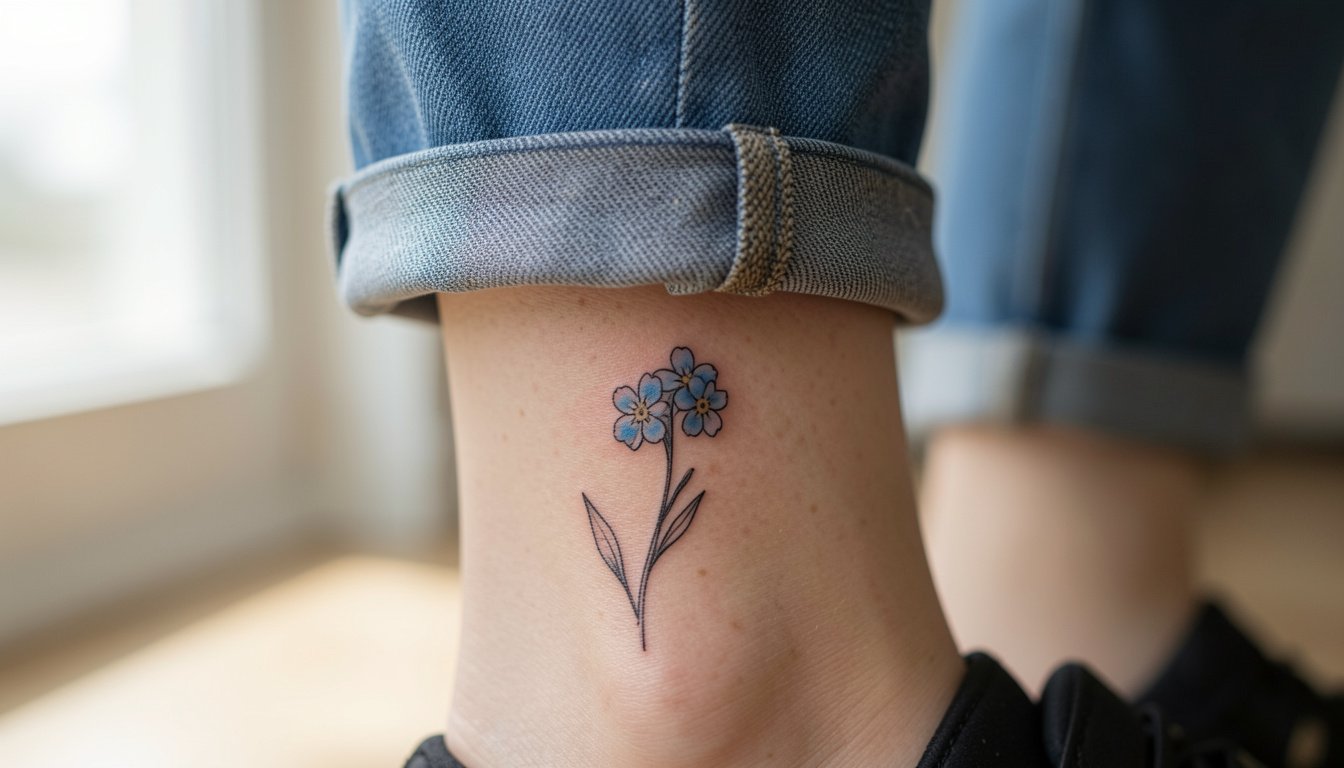
A fine-line forget-me-not can read as private grief or a loud memorial, depending on scale and spacing. Many people assume thinner lines always look more "dainty," but on wrists and fingers that look soft on day one can blur into a smudge by year three. Bigger petals, a slightly stronger stem, and one small name tucked on the shaft keep the intent clear without shouting it. The first idea below shows how to balance subtlety and longevity on the inner forearm.
1. Single Stem, Name on Shaft — Inner Forearm
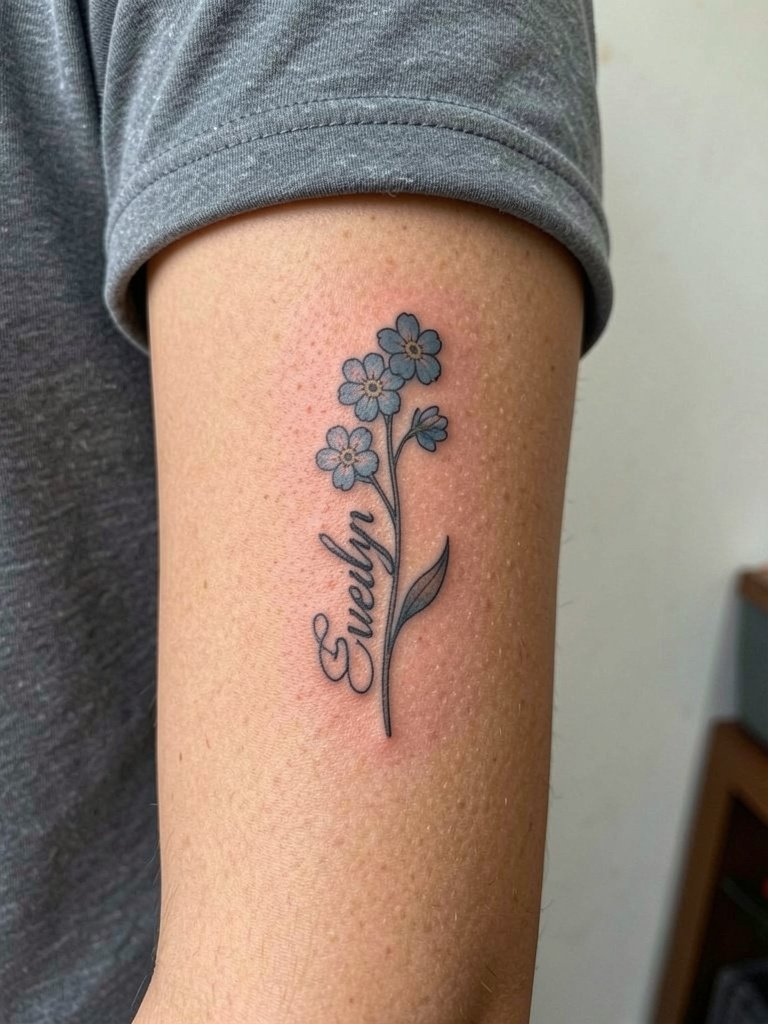
A vertical stem is a natural way to tuck a name into the composition so the lettering reads as part of the plant. For inner-forearm placement plan for a 45 to 75 minute session depending on script complexity and color fill. The common mistake is asking for hair-thin script that vanishes in two years. Instead request slightly heavier stem linework and compact script size so the letters do not fill in. Expect mild soreness along the palm-up surface and a touch-up after about 12 to 18 months if you want crisp edges. For showing it off pair with a rolled-cuff linen button down that frames the forearm.
2. Cluster of Tiny Blue Blooms — Ankle Accent
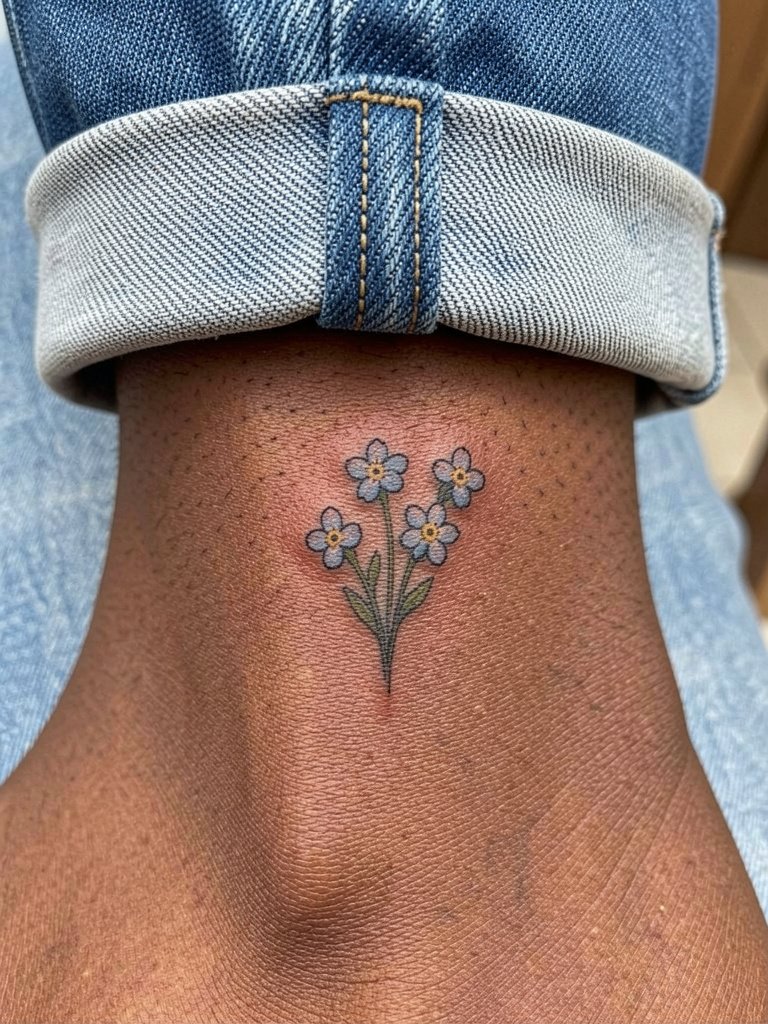
Tiny clusters read like jewelry on the ankle but face constant friction from socks and shoes. Plan a short appointment and accept that high-friction spots need slightly bolder outlines than upper-arm work. A frequent error is packing four or five micro blooms into the same square inch; they will merge over time. Ask for compact spacing that still leaves negative space between petals. Expect touch-up at two to three years if you want saturated blue to remain vivid. For weekend looks wear low-profile sandals or cropped jeans and try ankle strap sandals that show the area without rubbing it.
3. Grandparents’ Initials Worked into Stem — Inner Upper Arm
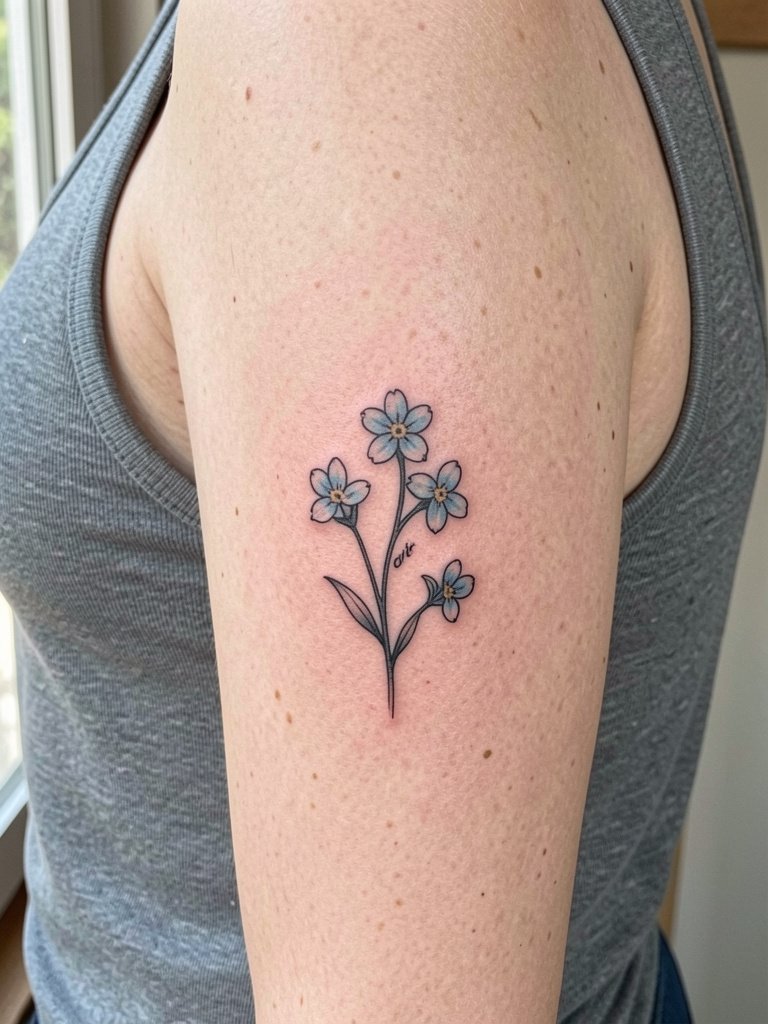
Working initials into the stem keeps the memorial compact and private. The inner upper arm gives enough flat surface for slightly wider spacing, which helps avoid line blur as the piece ages. A common mistake is using cursive so fine it becomes unreadable once healed. Instead request blockier initials scaled to 6 to 8 millimeters tall and shown in a stencil preview. The ribcage-ageing risk is lower here, but note light rubbing from sleeve seams during healing. Session time is typically under an hour. For showing the piece, an oversized tee with roomy armholes frames the inner arm without revealing too much.
4. Butterfly Plus Forget-Me-Not Pairing — Outer Upper Arm
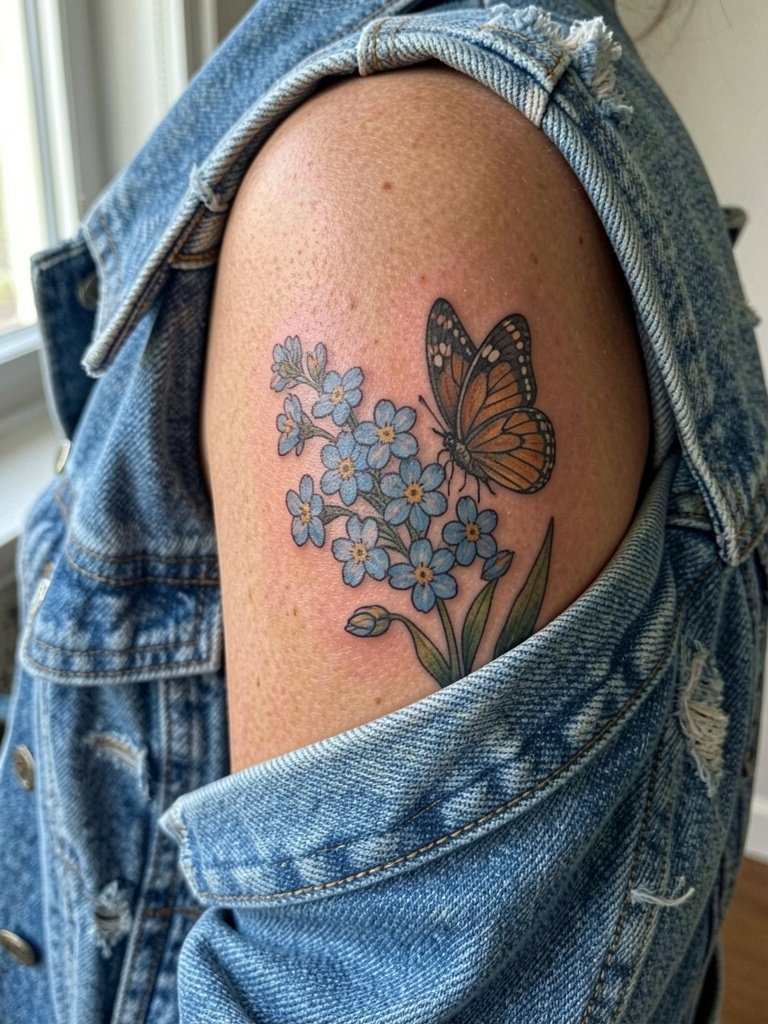
Pairing a butterfly with forget-me-nots adds movement and the idea of ongoing presence. The outer upper arm handles a small narrative composition without crowding. If you want the butterfly to read as detail, plan for a medium-sized piece so wing veins do not blur. A typical rookie error is shrinking the butterfly to micro scale where its pattern washes out in months. Expect a one to two hour session for clean wing and petal separation. Pain is low on the outer arm. Show it off with a racerback tank or cropped jacket.
5. Name Running Along Stem — Wrist to Forearm Transition
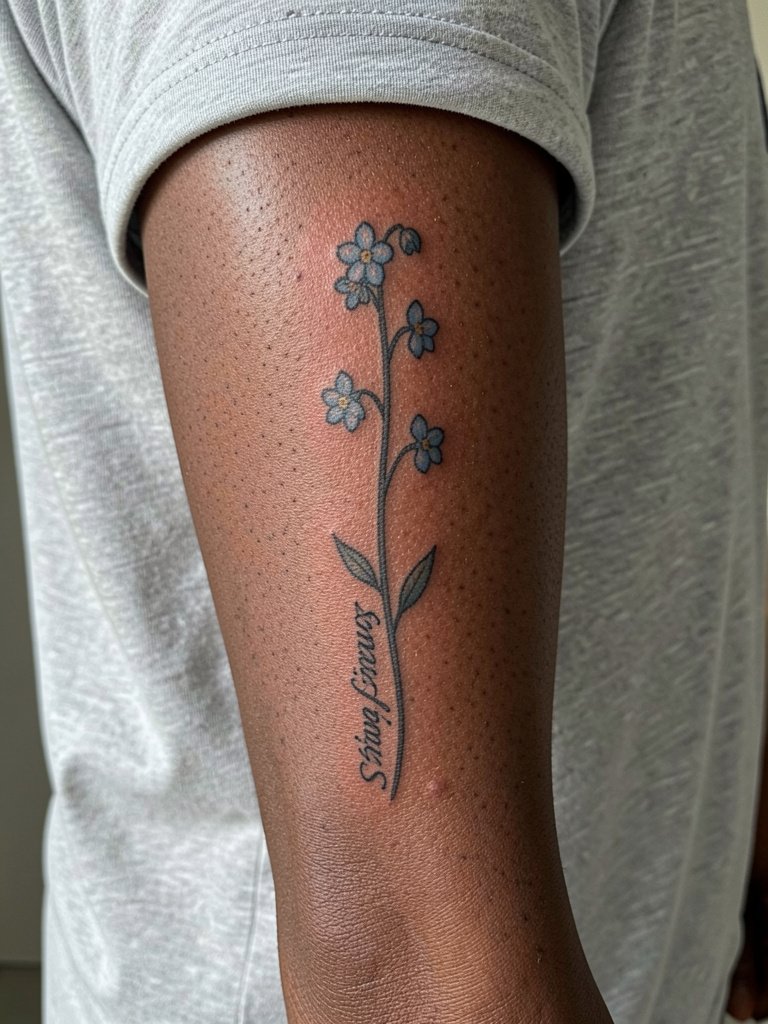
Letting a name run with the stem integrates text so it looks botanical rather than plaque-like. The wrist area is high-movement, so increase the line weight slightly to reduce early blur. The error to avoid is low-contrast thin grey script on the wrist. Ask for ink saturation that keeps letters legible and for the artist to preview how the name reads at three inches versus five. Session time is usually under an hour. For outfits choose a thin bracelet set on the opposite wrist rather than stacking pieces over the fresh ink.
6. Tiny Single Bloom for First-Timers — Wrist
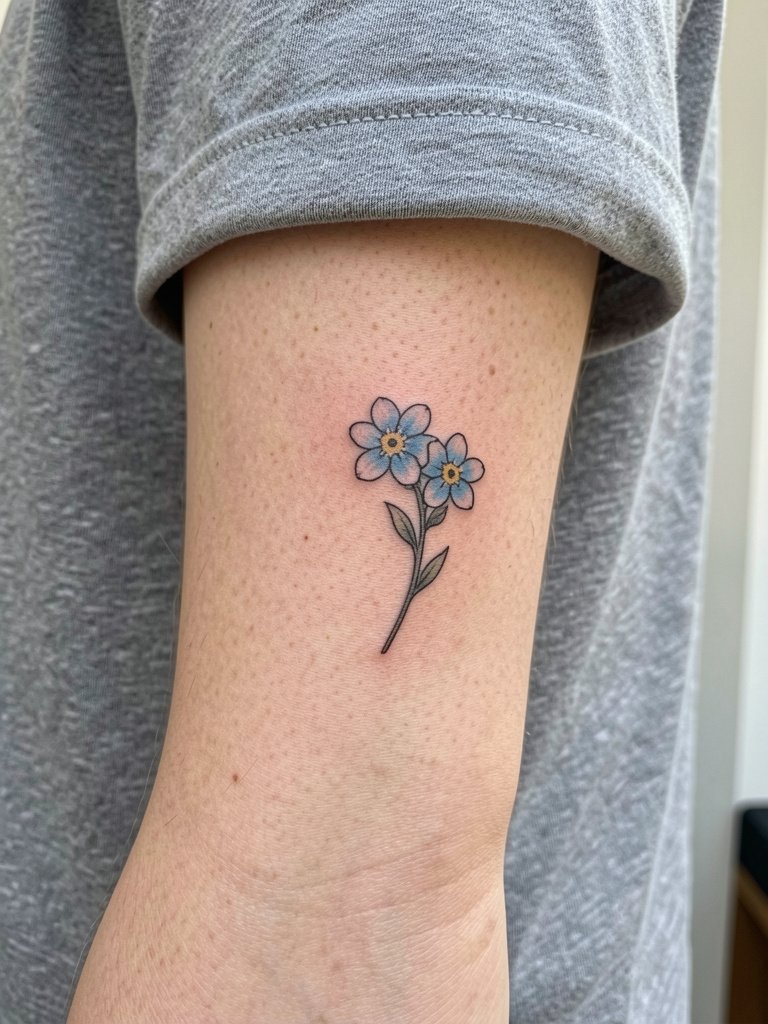
A single bloom is a gentle first tattoo and a discreet memorial. The wrist is sensitive and sees constant washing, which can fade blue faster. Many first-timers pick ultra-thin detail that fills in. Choose a tiny bloom with a modest stem and one small dot of blue pigment for recognizability. The session is brief, often 20 to 40 minutes, and candidly most shops enforce a minimum charge, so expect that. For the appointment wear a short sleeve tee so the artist can work without tugging at fabric.
Session Day Picks
These first six placements include wrists and ankles that heal differently from larger areas, so a few small items smooth the session and the first week.
- Fine mesh stencil transfer sheets. Helps the artist preview script integration on the skin, which matters for name-on-stem pieces and tiny wrist work.
- Topical numbing cream. Numbing applied per product instructions can ease wrist and inner-arm sensitivity for short sessions.
- Thin protective film roll. Useful for high-friction ankle or wrist areas during the first 24 to 48 hours.
- Fragrance-free gentle body wash. Gentle cleansing during showers prevents pigment loss in tiny color fills.
- Aquaphor healing ointment. Thin application for the initial few days protects fine line work without clogging.
7. Inspiration Board Style Ribcage Piece — Private Tribute
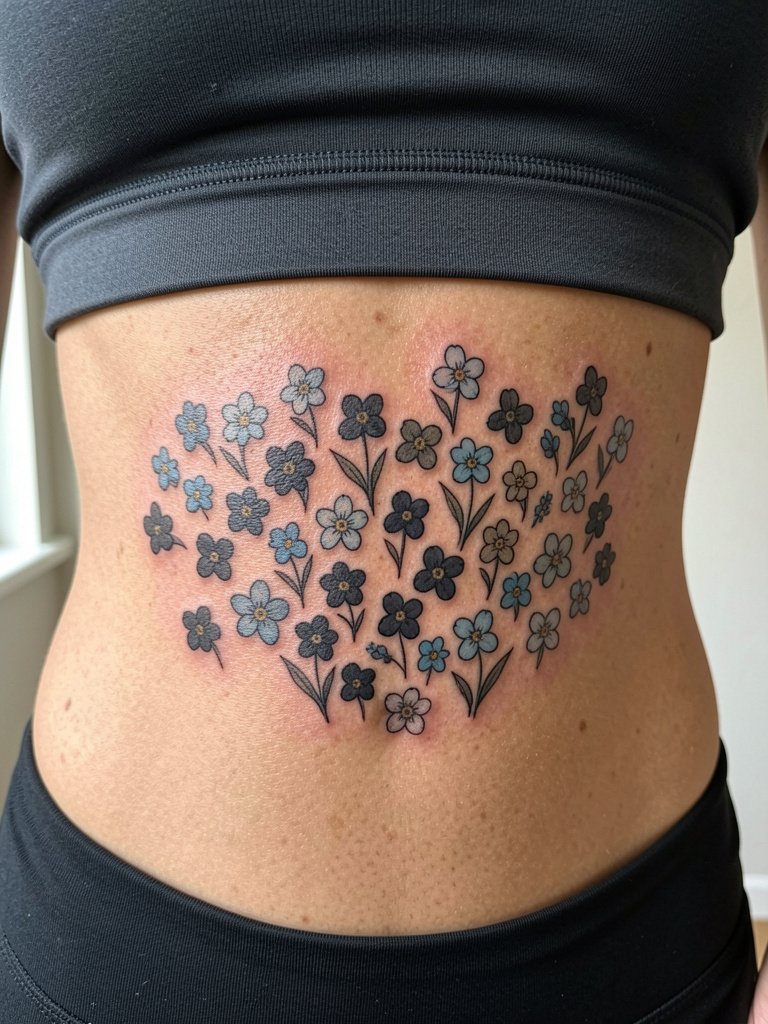
An inspiration-board layout on the ribcage keeps the tribute private and lets you pick favorites from a collage approach. Ribs are a higher pain zone and skin stretches more, so avoid hair-fine stems. Artists split on fine line on ribs. One camp says the stretch and movement blur ultra-thin detail within two years. The other camp says slightly stronger depth and wider spacing settles fine, and they point to healed photos to back that claim. Both views matter. If you want a private piece, specify spacing and ask to see healed rib photos from the artist. Expect a longer session and a higher likelihood of a two-step appointment.
8. Delicate Linework with Blue Accent — Collarbone
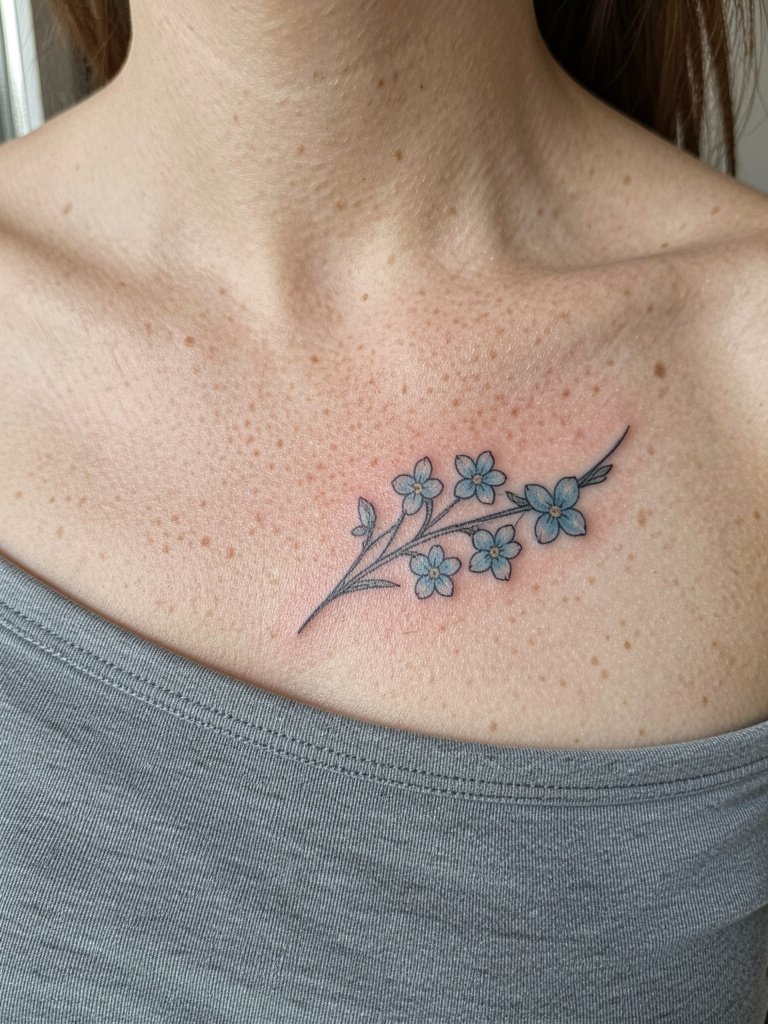
The collarbone shows beautifully with a small horizontal bloom but that skin lies over bone and can be crunchy to tattoo. Fine-line petals photograph well there, but small blue fills can fade on sun-exposed skin. A common mistake is pushing petals too light in a bid for whisper-thin color. Instead plan for slightly denser blue pigment and request healed examples on similar clavicle tones. The session is usually 45 to 75 minutes. Pair the final look with layered necklace sets that sit above the bloom.
9. Symbol-Only Memorial — Ankle or Behind the Ear
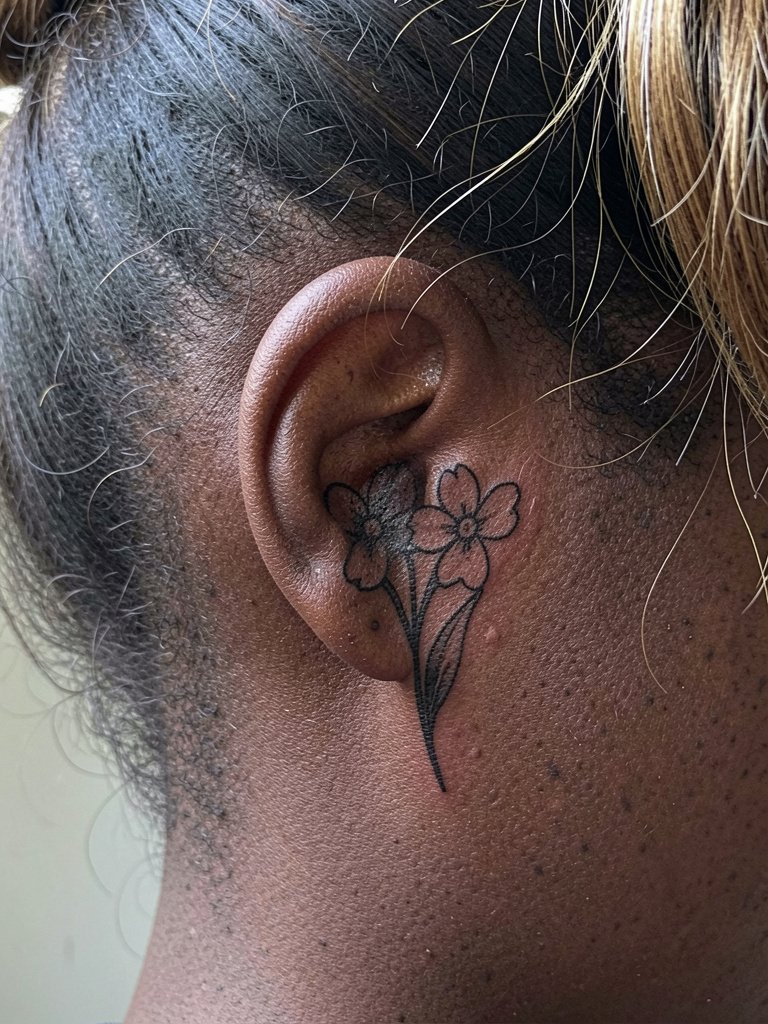
Symbol-only memorials keep meaning private and readable at small scale. The behind-the-ear placement is discreet and low-friction, but it is tiny and needs strong silhouette contrast. The error people make is expecting pale blue to remain visible in that spot. Black silhouettes hold much better for tiny pieces. Session time is brief. For reveal moments try hair-up styles with simple studs or small hoop earrings that frame the area.
10. Shoulder Cap Arc — Curving Cluster
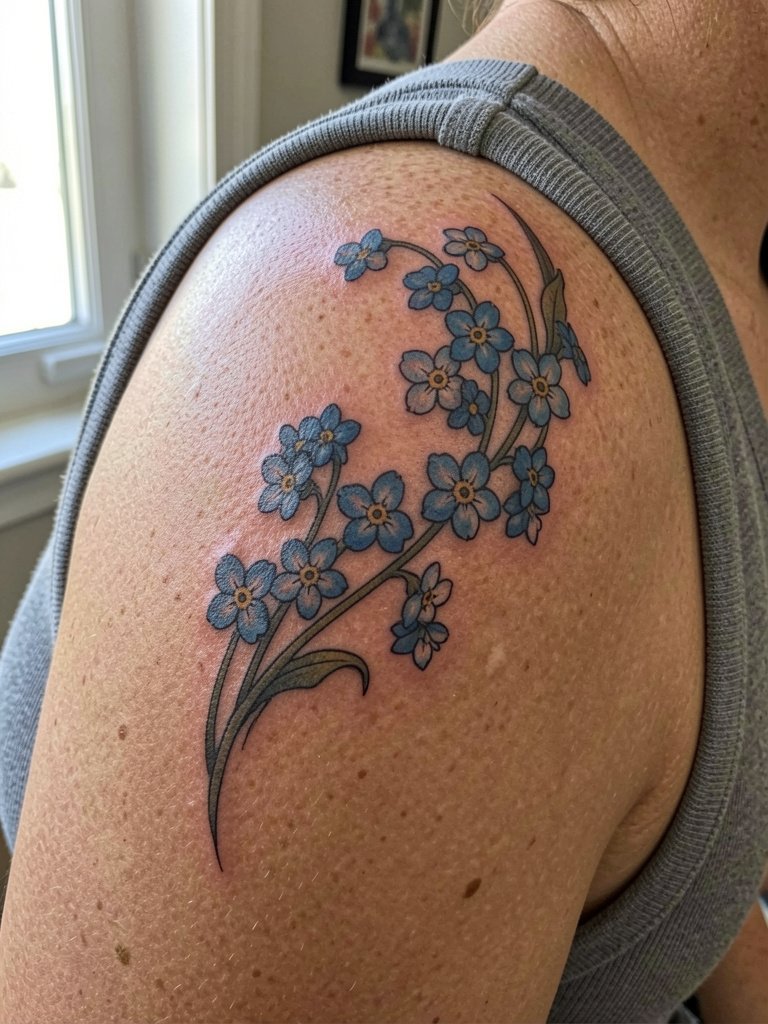
The shoulder cap is forgiving for arcs because of its natural curve. Make sure the stems follow muscle flow so the design never looks like it fights the body. A typical mistake is compressing the arc into a small patch where petals overlap and lose definition later. Ask the artist to show the stencil in motion over the deltoid so you can see how it sits in standing and reaching poses. Sessions vary from 45 minutes to two hours depending on detail. Show the arc with cropped jackets or tank tops.
11. Tiny Bloom Behind the Ear — Mastoid Discreet
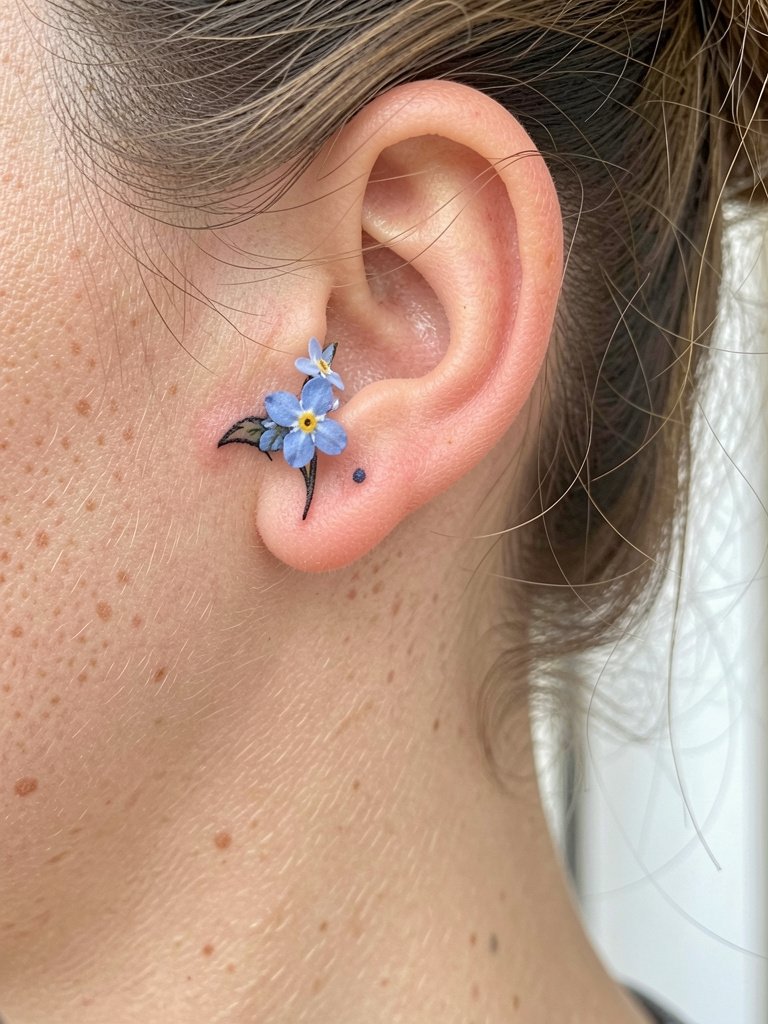
A behind-the-ear bloom is one of the most private placements and it photographs best when kept simple. The main mistake is over-detail; even the smallest petals need negative space to remain distinct. Sessions are short, but note potential for adhesive irritation from aftercare wraps if you wear earrings. For appointments keep hair up in a simple claw or clip and accessorize afterward with hair claw clips to reveal the piece.
12. Watercolor-Like Blue Bloom — Outer Forearm
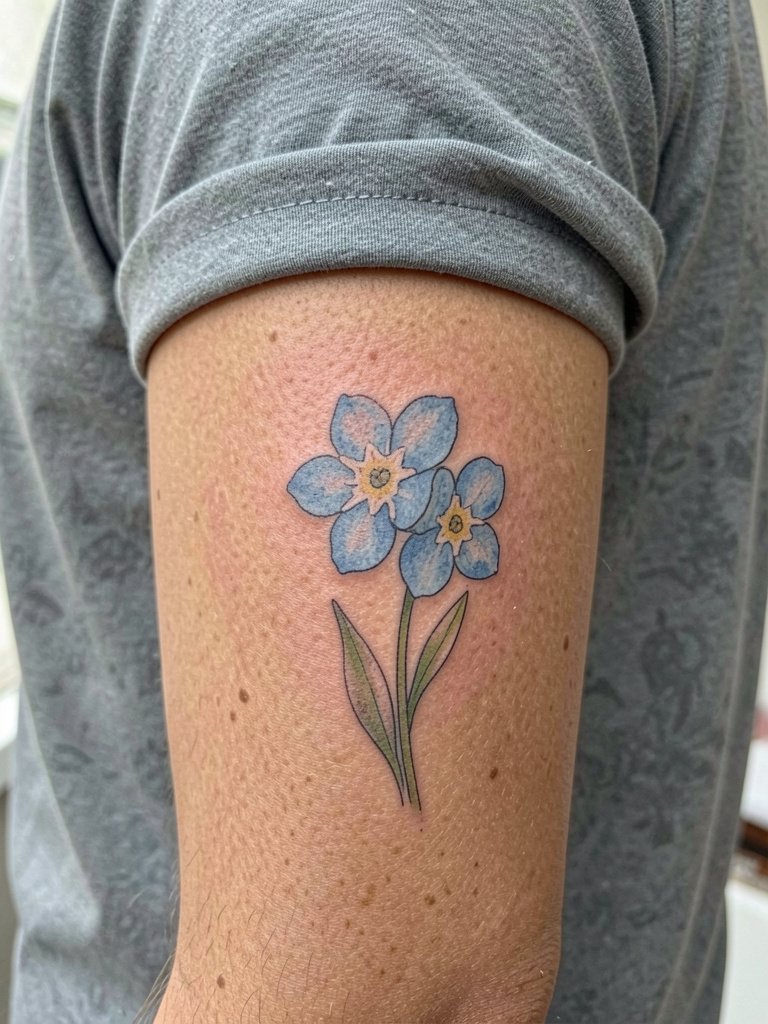
Watercolor petals photograph beautifully on the outer forearm, but soft washes age differently than solid color. Many watercolor-style forget-me-nots look gorgeous fresh and then the blue thins out. To avoid disappointment, ask for a small outline or stipple shading to hold the shape as the wash fades. Expect a one to two hour session if the piece uses layered color. For a casual display try short-sleeve shirts and complement with a minimal watch on the opposite wrist.
13. Script-Forward Sternum Piece — Text with Petal Accent
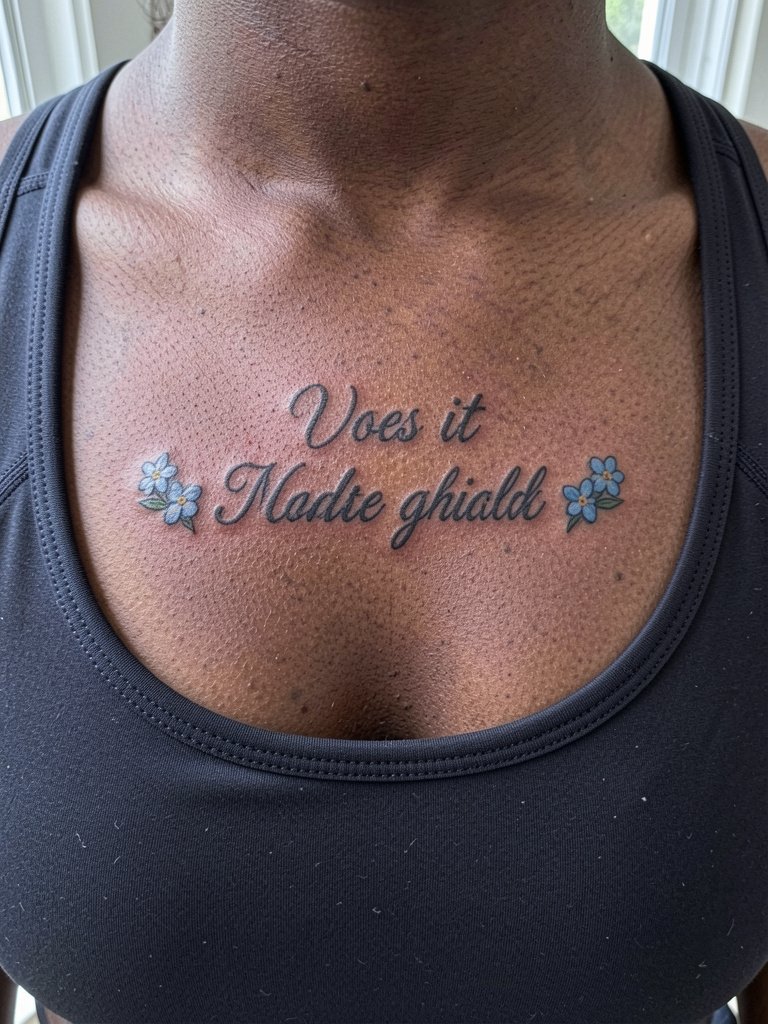
When text sits over the sternum add floral anchors that soften the composition. Sternum skin can be tricky because of movement and curvature, so avoid extremely thin script that could blur across the center line. One error is packing long phrases that end up unreadable. Keep the text concise and set small blooms at the ends to frame it. Pain is moderate to high here depending on proximity to bone. For the session wear a front-opening or sport-style top so access is easy.
14. Minimalist Shadow Petal — Ankle Inside
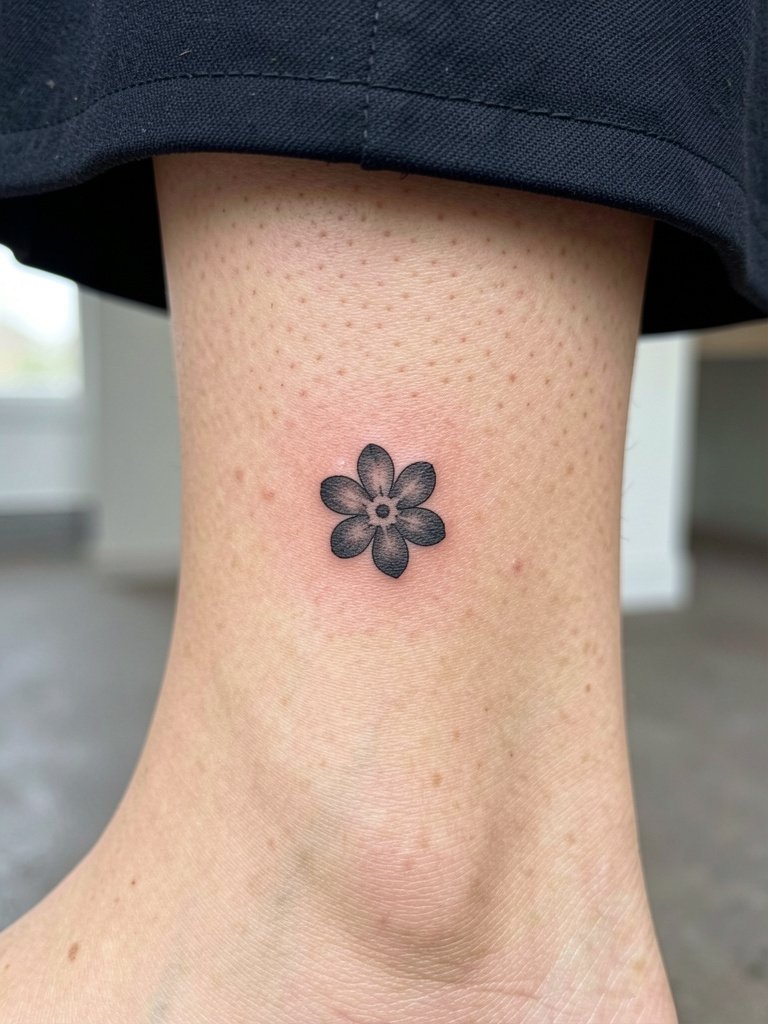
A shadowed petal reads bold at micro scale and avoids the color-fade issue that tiny blue fills can face on ankles. The misstep is choosing a faint blue wash instead of a silhouette. Plan for a small, clean black silhouette and accept that it will age with minimal touch-up. Session time is short. Pair it with cropped hems or midi skirts to show the area without friction from shoes.
15. Birth-Flower Pairing — Inner Thigh
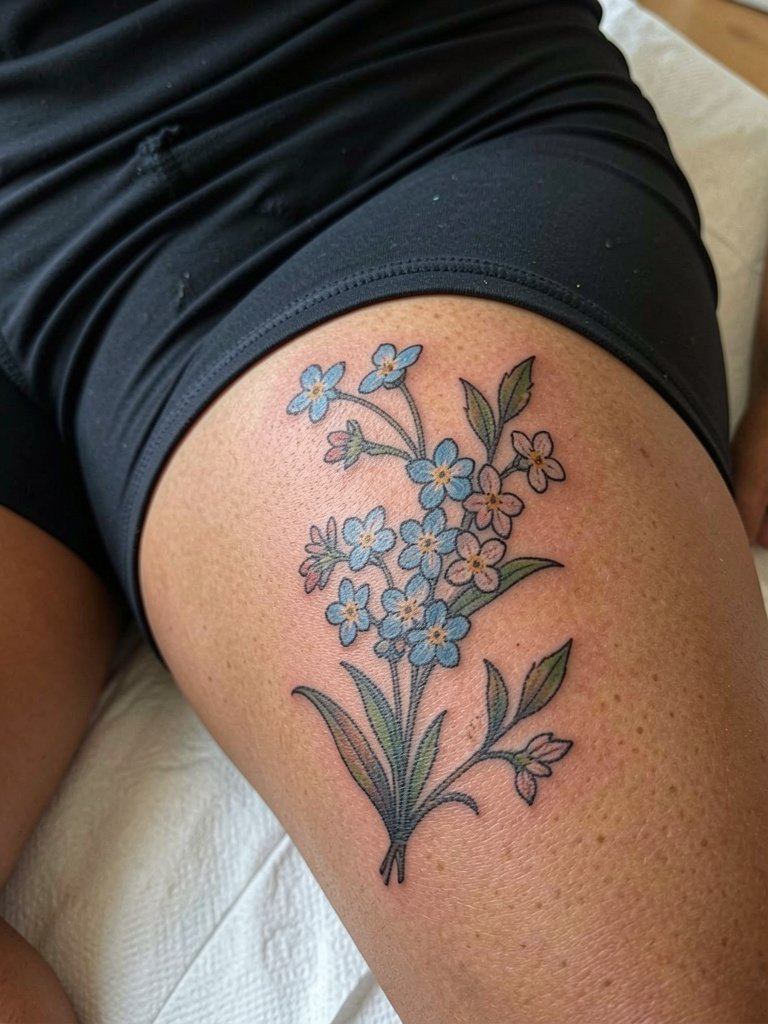
The inner thigh is intimate and holds fine detail because the area sees less sun. A mistake is crowding the flowers so the composition loses clarity when you stand. Size the piece to the thigh canvas and plan for one longer session or two shorter ones. Pain can vary, so discuss breaks and pacing with the artist by specifying exact session length preferences. For post-healing reveals try high-waisted bottoms or loose linen pants that allow a partial peek.
16. Tiny Memorial on the Collarbone Curve — Subtle Arc
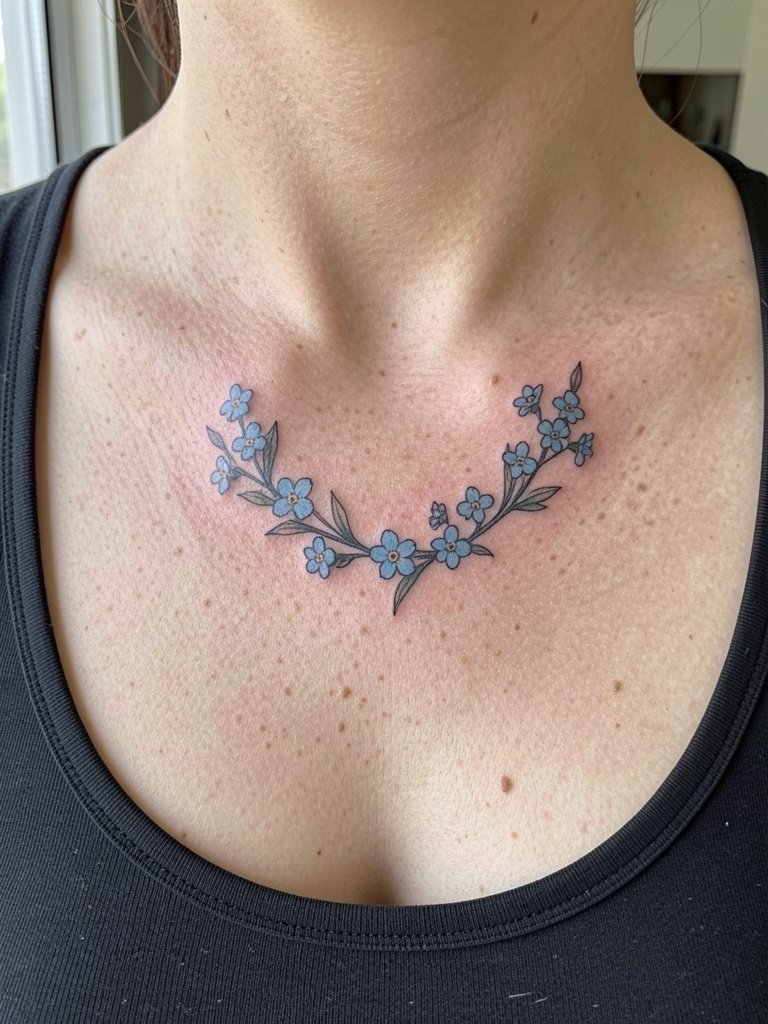
A tiny arc along the collarbone reads feminine and restrained without being overwritten with script. The common error is choosing micro blue fills that fade under sun exposure. Request a small outline or stippling to preserve the petal shapes. Sessions are quick. For evening looks pair with off shoulder tops that frame the clavicle.
17. Single Needle Fine Line Cluster — Upper Back Between Shoulders
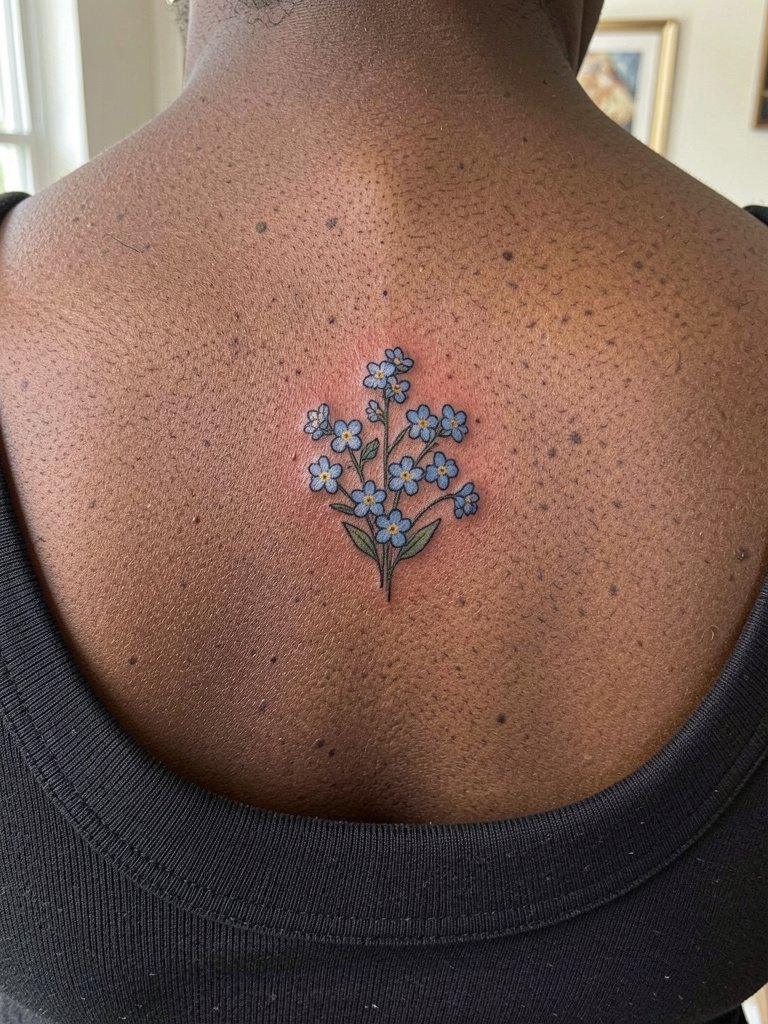
Center-back clusters photograph well and remain private under shirts. The controversy about single-needle longevity appears here too. One group of artists warns that single-needle clusters can spread and lose detail on the back. The opposing group says that with slightly thicker initial strokes and good spacing, healed photos show durable linework. To reconcile this, request a slightly stronger initial line weight and ask for healed examples on upper-back placements. Expect moderate pain and a session of one to two hours.
18. Black-and-Gray Forget-Me-Not — Calf Placement
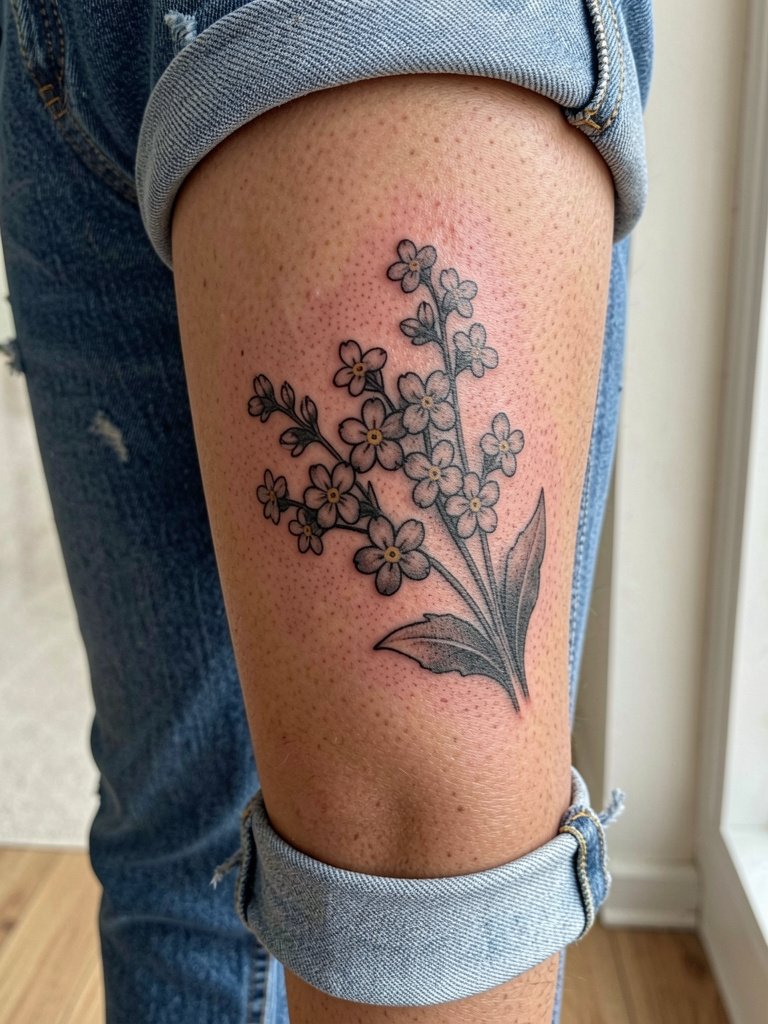
Some clients choose black-and-gray to avoid color fade. One camp argues blue is central to forget-me-not recognition. The other camp argues black-and-gray ages more reliably and photographs better across skin tones. Both sides have merit. If you prioritize longevity and contrast pick black-and-gray with stipple shading. Calf placement tolerates denser saturation and typically needs only occasional touch-up. For casual wear pair with cropped denim and sleeveless tops.
19. Thicker-Line Neo-Illustrative Cluster — Sternum Side
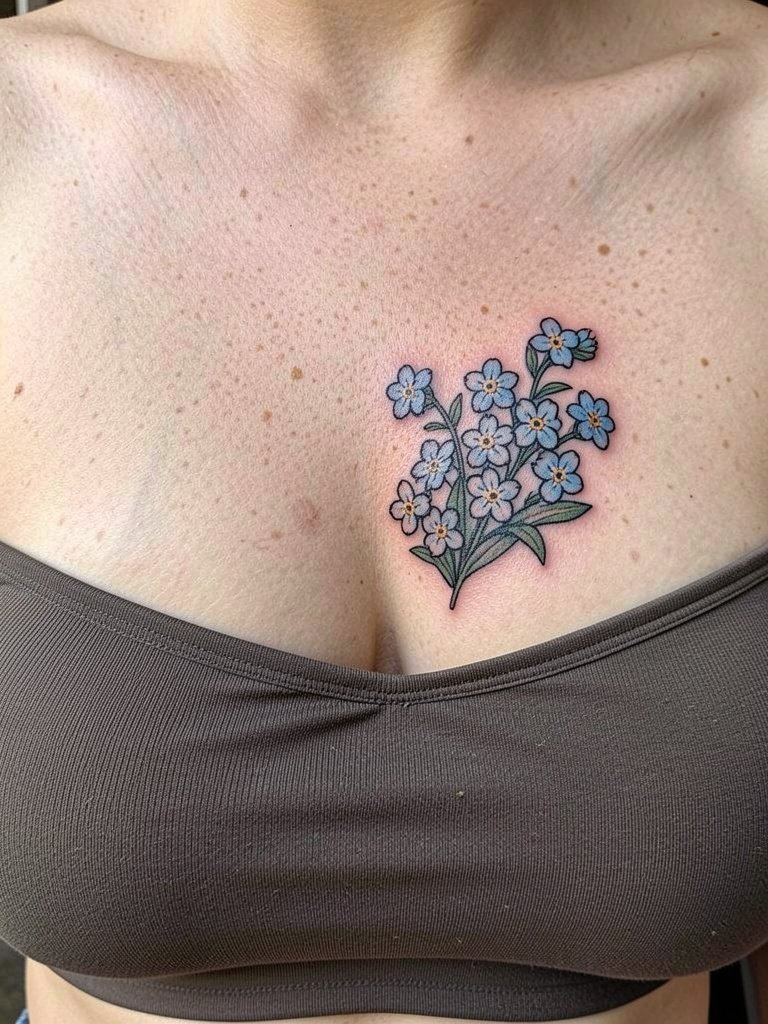
Neo-illustrative thicker lines often age better on the sternum because they read clearly against the skin texture. A mistake is trying single-needle filigree on this spot. Instead request bolder contours and moderate color fills. Expect moderate to high pain and a session that could run longer depending on size. For wearing notes choose layered chains that sit above the piece and avoid chafing fabrics while it heals.
20. Hidden Date in Leaf Veins — Ribcage Secret
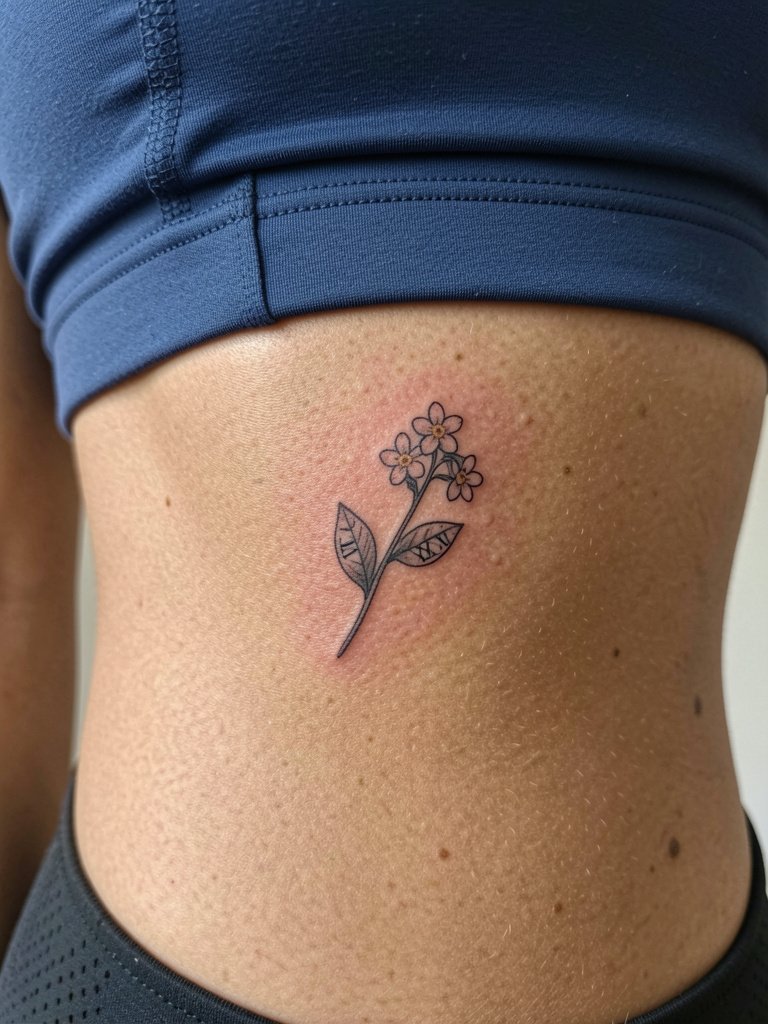
Hiding a date in leaf venation is a subtle personalization trick. The common error is burying it so deep that no one can read it, even the wearer. Work with the artist to scale the numerals to readable size while keeping them decorative. The ribs are a higher pain zone and require careful session planning. Specify break times and session length before booking. For comfort wear a loose waistband or a front-opening top for easy access.
21. Micro-Botanical Band — Upper Arm Wrap
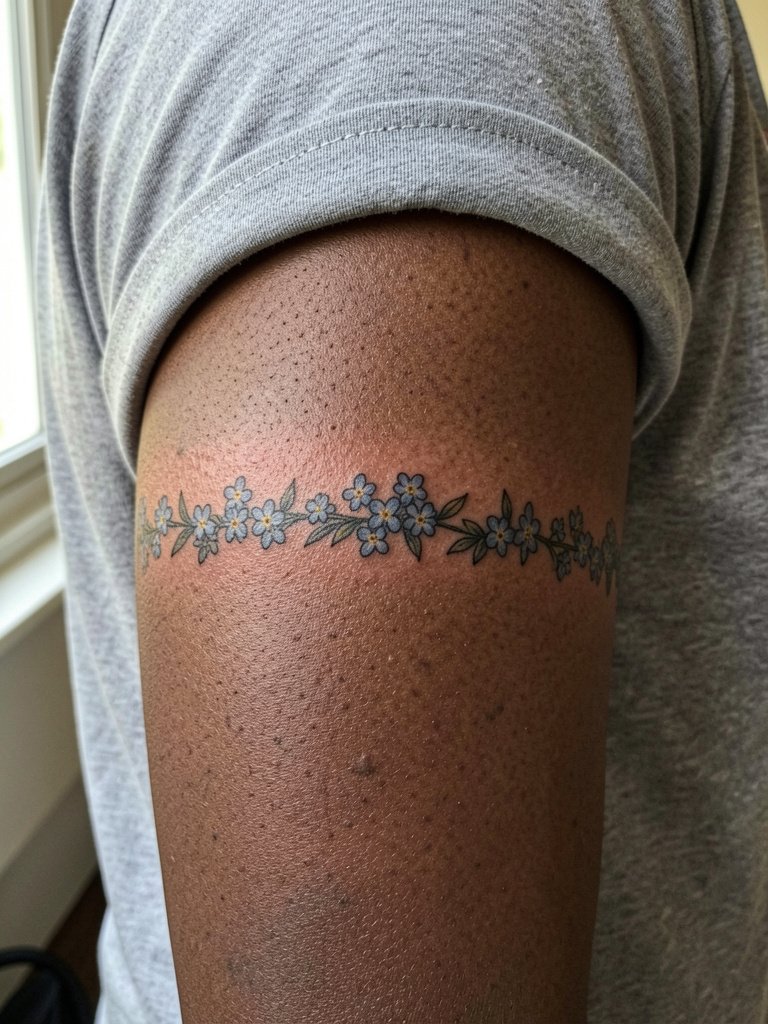
Band-style micro-botanicals give the feel of a bracelet that never comes off. Make sure the repeat spacing gives floral breathing room; tightly packed repeats look muddy after healing. A two-pass session may be necessary for crisp repetition. Expect low to moderate pain and plan for a single touch-up if your skin absorbs color unevenly. For daytime wear try short sleeves with a contrasting hem and add a thin chain bracelet on the opposite arm.
22. Stipple Shading Forget-Me-Not — Thigh Outer
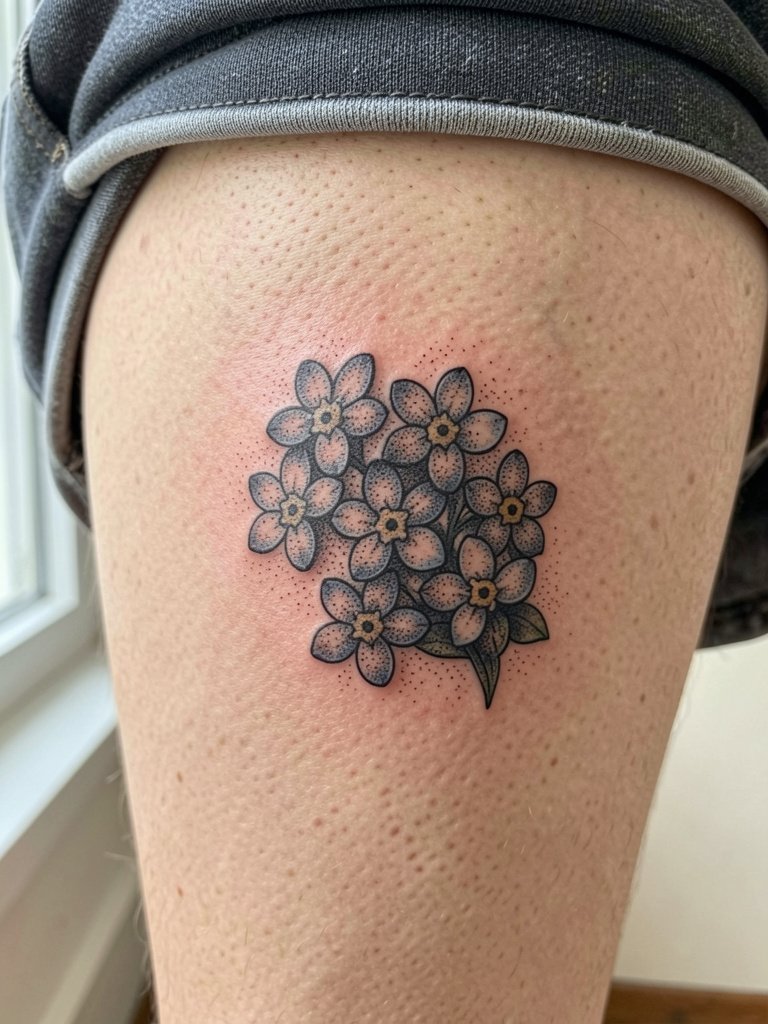
Stipple shading gives botanical texture without color, and the outer thigh tolerates larger compositions. The mistake is compressing too many stipple gradients into a tiny area where dots merge. Instead plan for scale that keeps dot clusters legible. Sessions can be long depending on coverage. For session wear loose bottoms or high waisted shorts that can be rolled slightly without pressure for access.
23. Compact Memorial Band for Finger Base — Subtle Ring
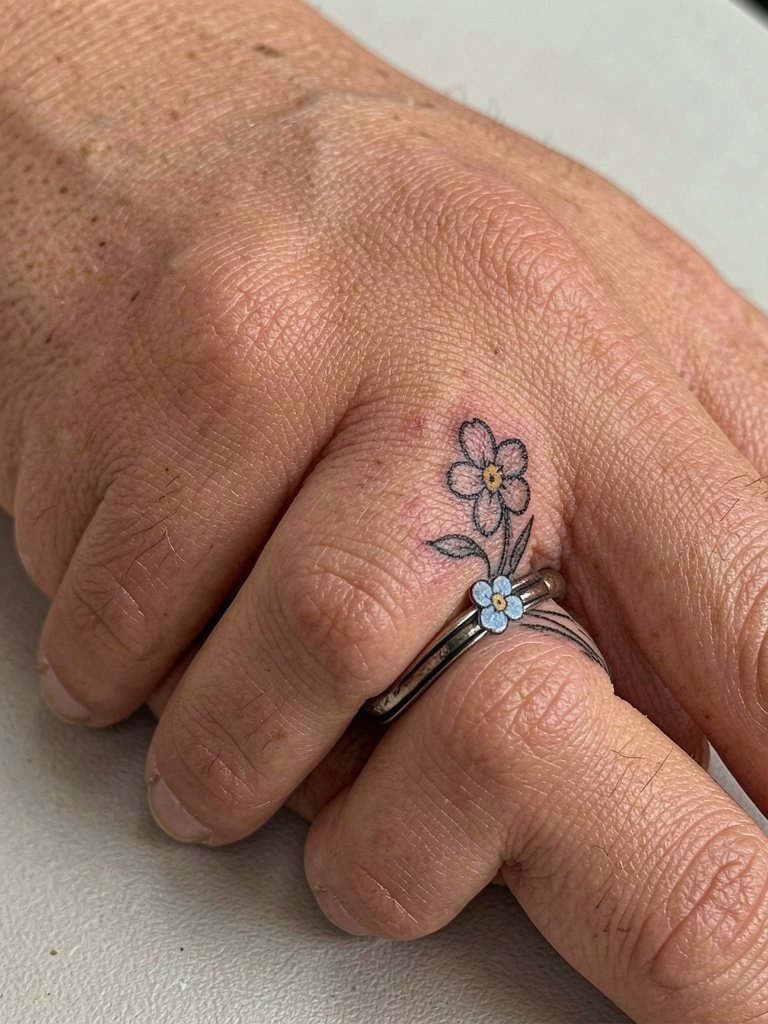
Finger bases and ring placements are charming but high-wear. A common misstep is choosing blue fills on fingers where constant washing and friction remove pigment. Opt for a compact black outline or micro-dot band to preserve the memorial visually. Sessions are brief but expect faster fading and a higher chance of touch-ups every couple of years. For daily wear choose rings that avoid direct rubbing over fresh ink and consider thinner bands on the opposite hand to balance the look.
Frequently Asked Questions
Q: How should I decide between blue petals or black-and-gray for a forget-me-not memorial?
A: Blue petals make the flower instantly recognizable, but they can thin on sun-exposed or high-friction areas. Black-and-gray provides stronger contrast across many skin tones and ages more predictably. One approach is to use black outlines with a restrained blue accent so you get recognition and better longevity.
Q: Will a fine-line forget-me-not hold up on small placements like the wrist or fingers?
A: Artists disagree. One camp says ultra-thin single-needle work on wrists and fingers often fills in within a few years. The other camp says slightly heavier initial line weight and proper spacing solves that problem. Practically, request a preview stencil and ask the artist to show how a slightly bolder stem would look at the same scale.
Q: Where can I find healed examples and local artists who do memorial floral work?
A: Search hashtags like #forgetmenottattoo, #memorialtattoo, #finelinetattoo, and #microfloraltattoo on Instagram and TikTok. Filter results by location to spot nearby portfolios. Use Pinterest to collect layouts but verify healed results on Reddit threads and studio websites. Booksy and local studio portfolio pages help when you want to compare healed photos and artist touch-up policies.
Q: How private can a memorial forget-me-not be while still being personal?
A: Very private designs work when initials are embedded into stems or when dates are hidden in leaf veins. Placements like the ribcage, inner thigh, and behind the ear keep the piece personal. If you prefer visibility only sometimes, pick wrist or forearm with small-scale compositions you can cover with long sleeves.
Q: What should I wear to the appointment for different placements?
A: For inner forearm wear a loose button-down or short sleeve tee. For ribs or sternum choose a front-opening top or fitted sports bra. For ankles wear shorts or cuffed jeans. For shoulders and upper back pick tank tops or wide-neck shirts. A simple loose tank or an open button shirt makes access easy for many placements.
Q: How often should I expect touch-ups for small forget-me-not pieces?
A: Expect the first touch-up around 12 to 24 months for tiny blue fills or single-needle details. High-friction spots like wrists, fingers, and ankles may need touch-ups more frequently. Thicker outlines and black-and-gray work tend to require fewer early touch-ups.
Q: Can I combine a butterfly or another motif with a forget-me-not without making it look crowded?
A: Yes. Butterflies complement the flower when sized to read as an accent. Avoid shrinking the butterfly pattern to micro scale. Ask the artist to balance negative space and demonstrate the composition at the final intended size so each element keeps its identity.
