
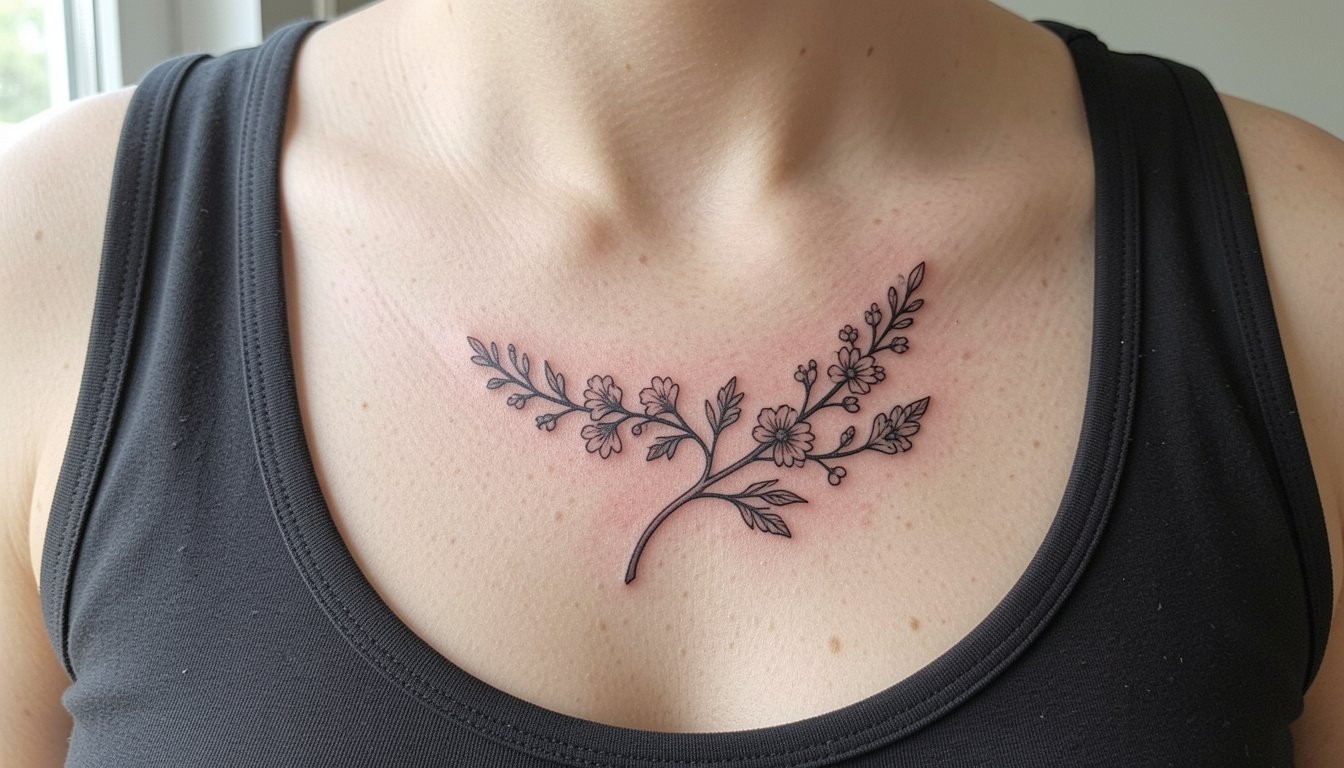
A clean collarbone piece reads like jewelry, so a tiny change in line weight or placement makes all the difference. Pick a small design that follows the bone curve and it will sit naturally, show in tank tops, and be easier to protect while it heals. Below the first idea you will see a healed-photo prompt and specific notes on pain, session time, styling, and what to adjust so the piece still looks crisp after a few years.
1. Fine line butterfly tucked under the clavicle
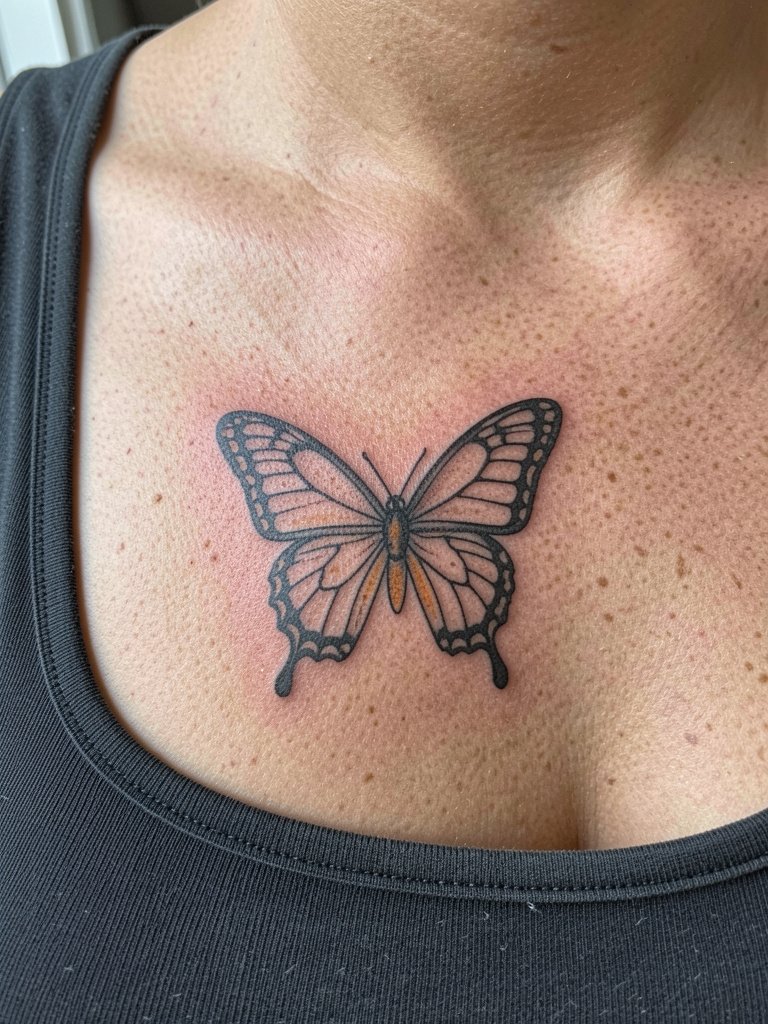
This classic reads feminine without needing a lot of space. For longevity, I recommend slightly firmer linework along the wing veins so they do not blur into haloing. The session feels short, usually 20 to 45 minutes for a one- to two-inch piece, and pain is a 5 out of 10 because bone is close to the skin. A common mistake is asking for single-needle micro veins across tiny wings, which often lose definition after a year. Pair the final piece with a layered delicate chain and a square neck tank top when you want it on display.
2. Single-stem floral sprig that follows the bone
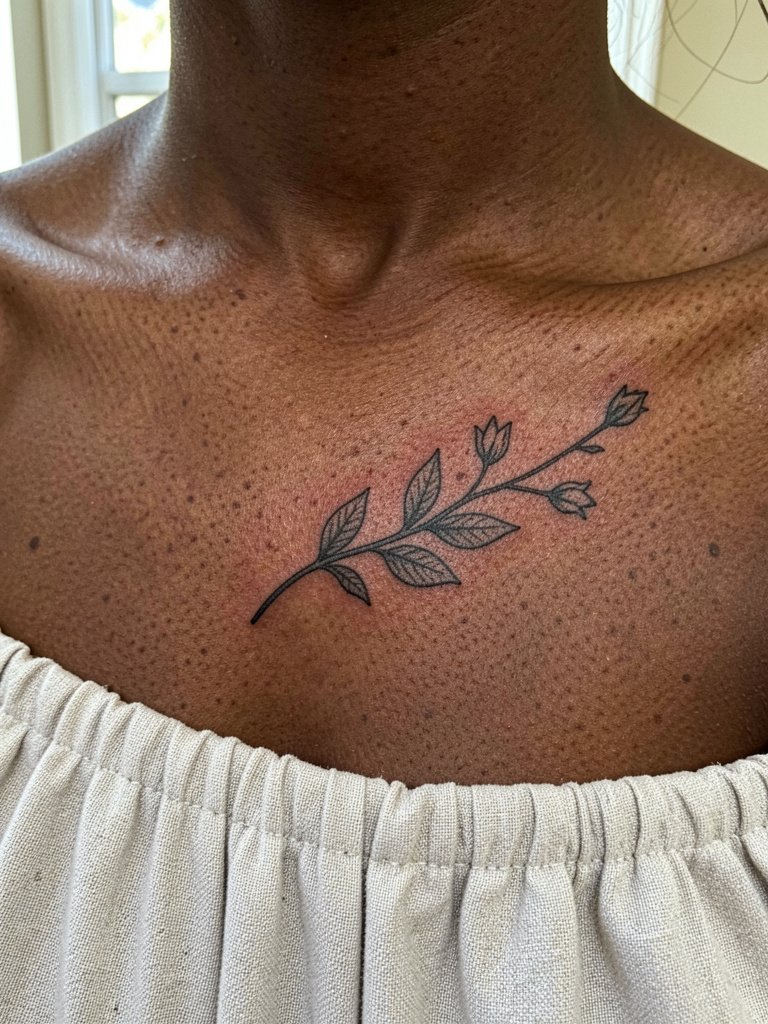
A sprig leans into the collarbone curve so it looks intentional rather than pasted on. Ask for slightly wider spacing between leaves so the negative space protects readable edges as it ages. For consultation bring one close-up reference and one photo of you wearing the tops you typically choose so the artist can scale to your torso. The piece heals fast and touch-ups are rare if the initial line depth is consistent. To show it off, wear an off shoulder blouse that leaves the shoulder bare and frames the vine without jewelry crowding the area.
3. Tiny script word along the clavicle line
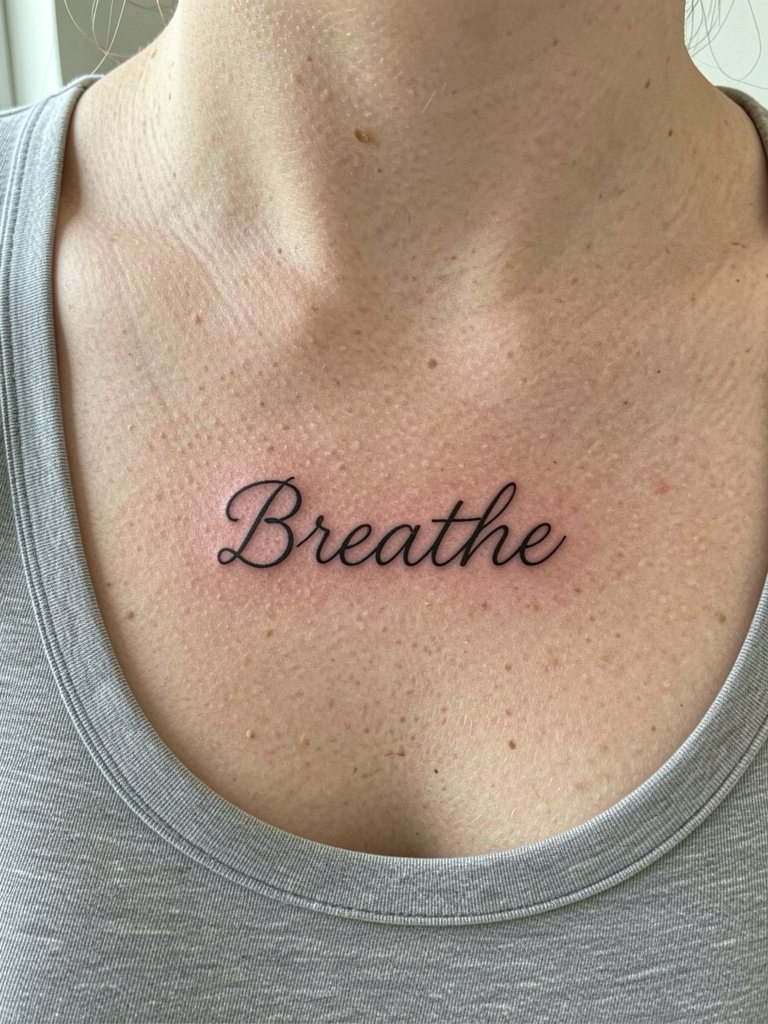
Script on the collarbone looks elegant when it follows the bone, but thin single-needle writing can lose clarity. One camp favors ultra-fine single-needle script for its initial subtlety. Another camp argues for a hair heavier line weight because the area moves and tiny letters can merge within two years. If you prefer script, ask for letter spacing that reads clearly at three months, not just fresh. Expect 20 to 40 minutes of work and a pain rating near 5 out of 10. For session wear slide into a strapless top so the artist has unobstructed access.
4. Micro star cluster tracing the clavicle curve
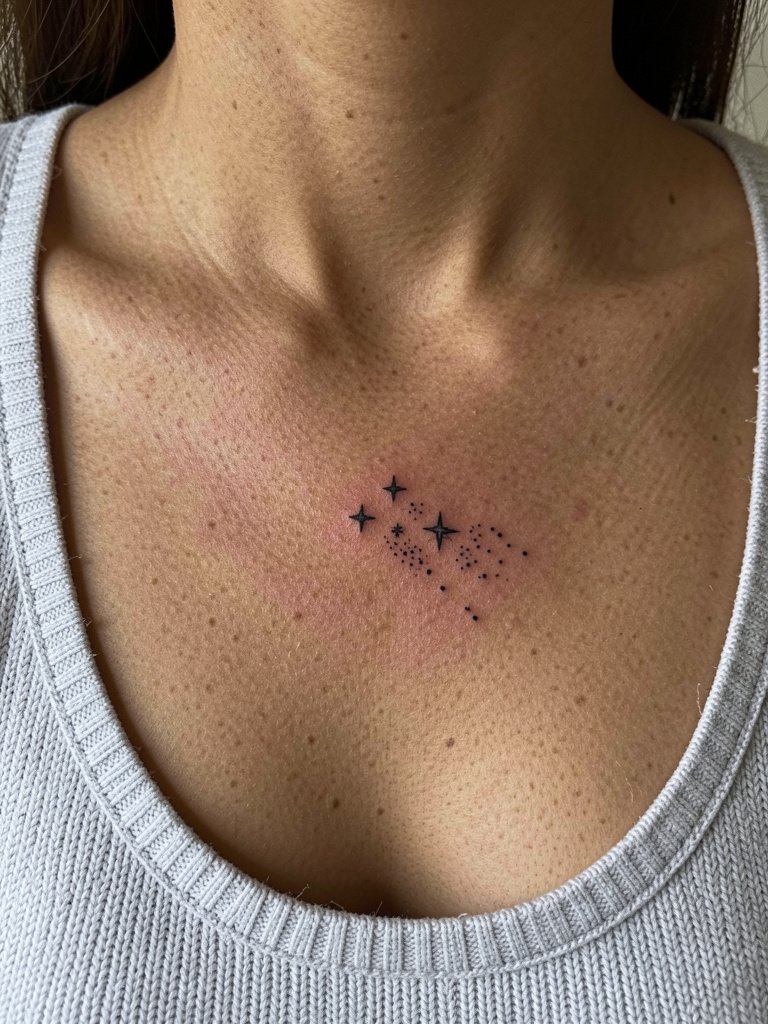
Tiny celestial pieces are low-commitment and they sit well near the collarbone arc. The main technical note is to request dotwork spacing that prevents cluster merging as the ink settles. Healed photos at six months are a good ask during portfolio review so you can see how dotwork holds on comparable skin tones. These usually take 15 to 30 minutes and the pain level is moderate because of shallow tissue over bone. For nights out pair with a square neck tank or a layered delicate necklace so the dots sit like tiny jewelry.
5. Tiny heart outline at the clavicle edge
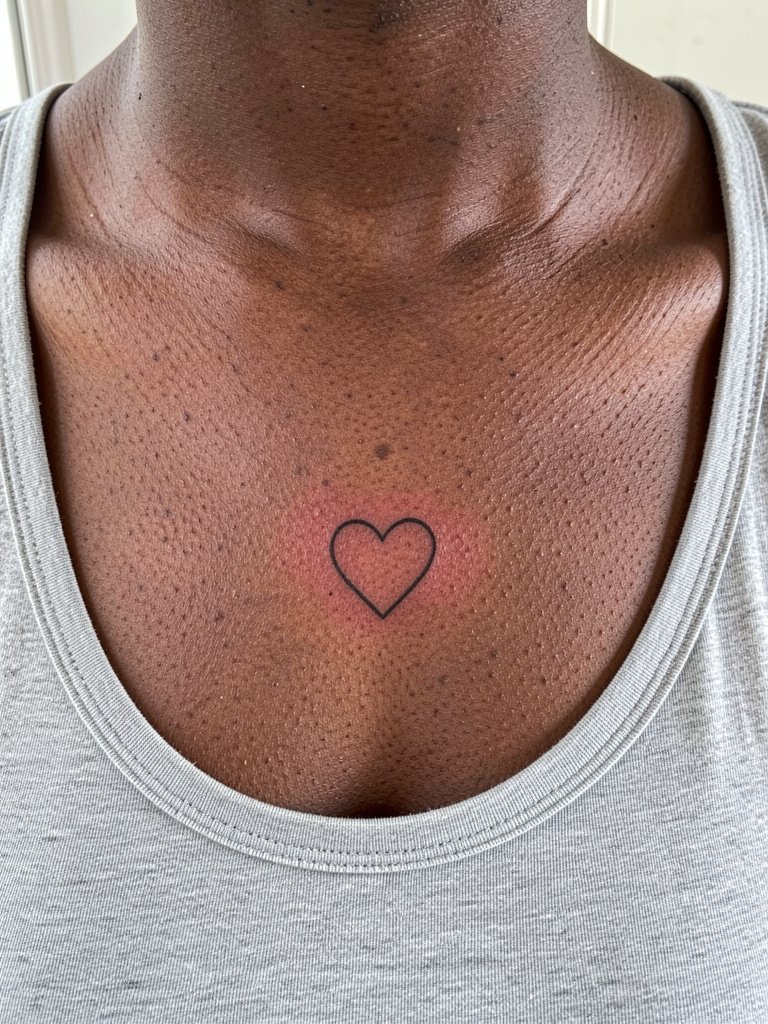
A tiny heart is a classic starter choice, but too-thin outlines often look faint after a year. I suggest a slightly stronger single pass for crisp edges without turning chunky. Session time is short, often under 30 minutes, and pain lands near 4 to 6 depending on placement. Common mistakes include compressing the design into a tiny dot. If you want it visible with summer tops, try a layered delicate necklace that sits just above the tattoo so the piece reads like a neat accent.
6. Ornamental crescent with tiny stars
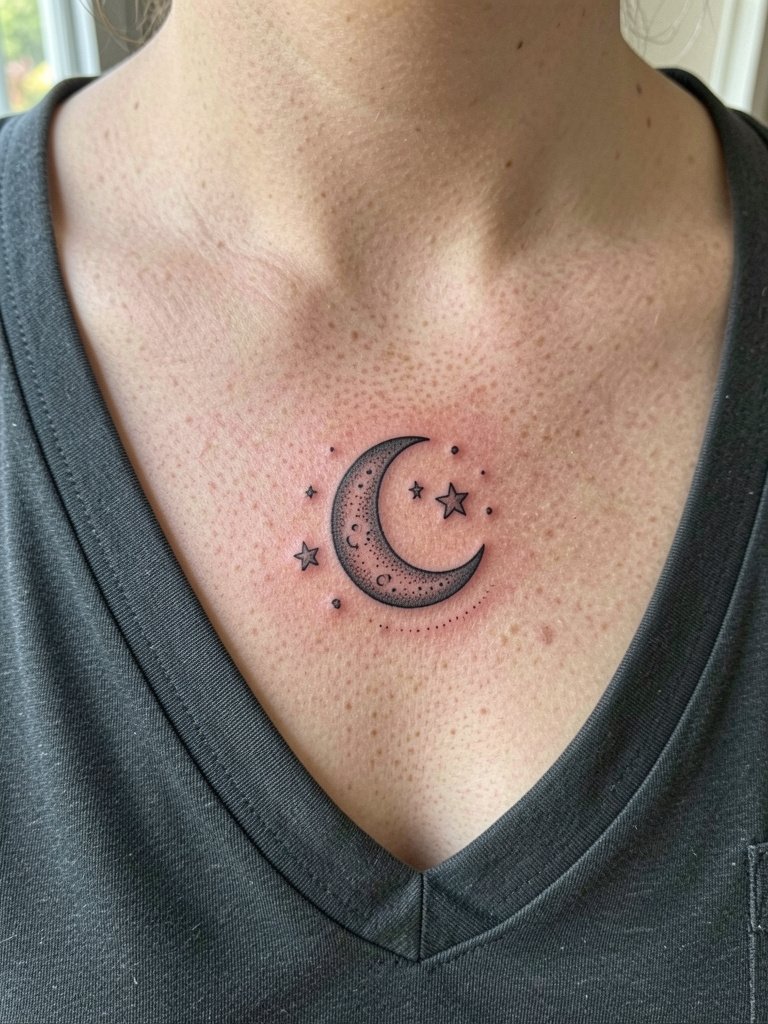
Crescent arrangements read ornamental without taking up much space. The artist should slightly thicken the crescent contour so the negative space inside the moon stays crisp over time. This style favors one session under an hour and feels like a steady vibration on the bone. If you plan to show it in summer, an off-shoulder blouse keeps focus on the crescent without covering the piece. Expect a touch-up at year two if you prefer ultra-fine dots.
Studio Day Picks
Those first six collarbone pieces share similar aftercare needs and session access requirements, so a few targeted items smooth the chair time and the first week of healing.
-
Fragrance-free lightweight tattoo balm alternatives. Lighter balms prevent the "goopy" feeling while keeping tiny linework hydrated during the critical first days.
-
Breathable second-skin recovery strips. These are helpful if you worry about bra or strap friction on the upper chest.
-
Unscented gentle castile-style soap. A mild cleanser that rinses well without leaving residue helps small linework heal cleanly.
-
Fragrance-free, non-greasy moisturizer. Use sparingly after the initial crusting phase to avoid clogging fine channels.
-
Aquaphor healing ointment. A thin layer during the first 24 to 48 hours can protect micro work from excess friction and keep the skin from drying out.
7. Fine line feather angled along the clavicle
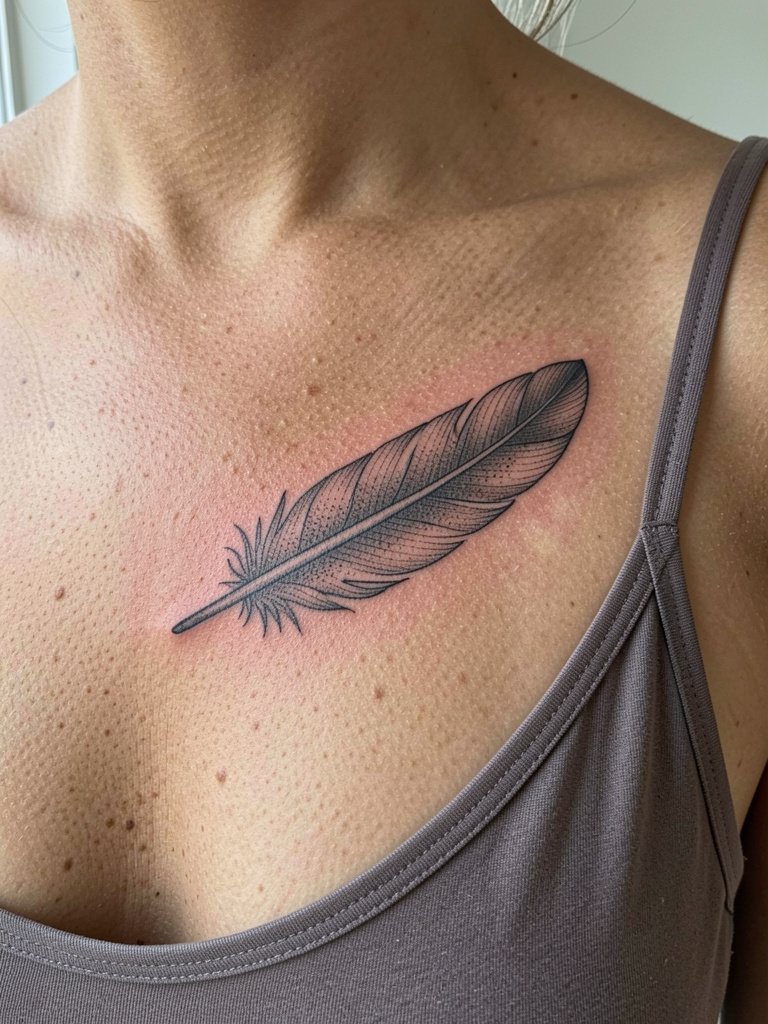
Feathers use the long collarbone canvas to create motion. The usual mistake is adding too many tiny barbs that blur into a gray wash later. For a feather that stays readable, specify bolder shaft lines and airy barbs rather than dense shading. Plan on a 30 to 50 minute session and moderate pain because the area is thin. Pair with an off-shoulder blouse or a wide-strap camisole to let the feather flow visually into the shoulder.
8. Small vine draping from shoulder to collarbone
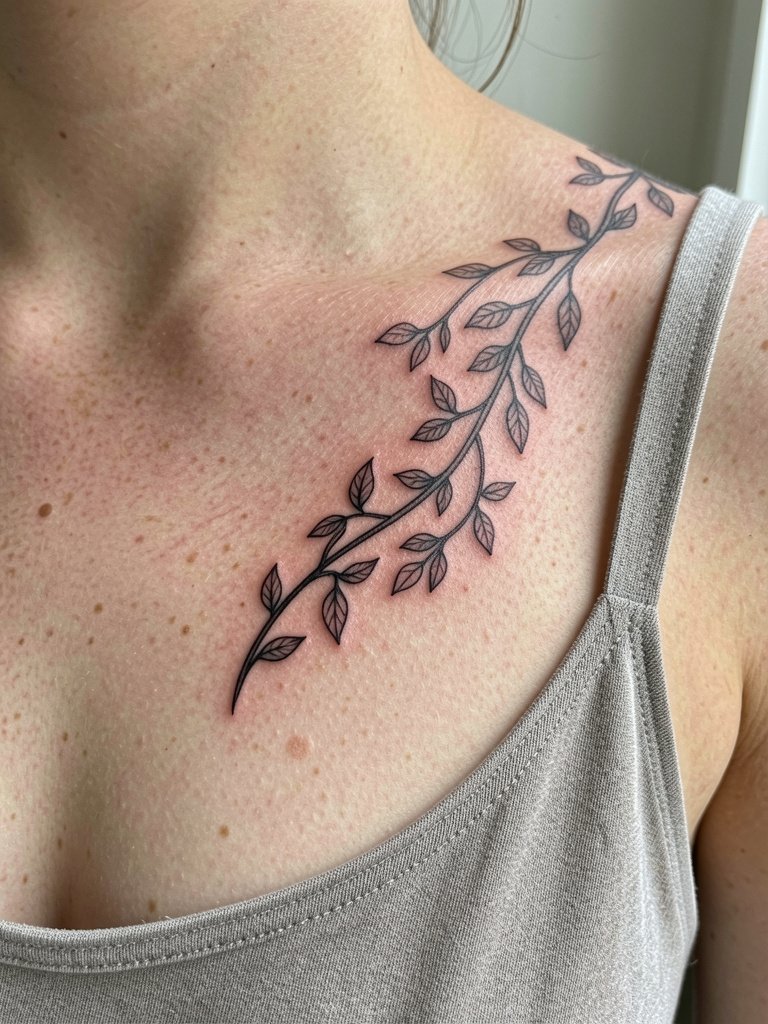
A draped vine looks modern when it starts at the shoulder and sweeps down. Ask the artist to map the curve while you stand to ensure the direction flatters your clavicle length and shoulder slope. Placement near the shoulder can handle slightly more detail than a tiny centered collarbone piece, but keep leaf sizes generous to avoid blurring. Sessions run 30 to 75 minutes depending on length. Show it off with an off shoulder blouse so the vine reads across skin rather than under necklaces.
9. Tiny cross at the collarbone edge
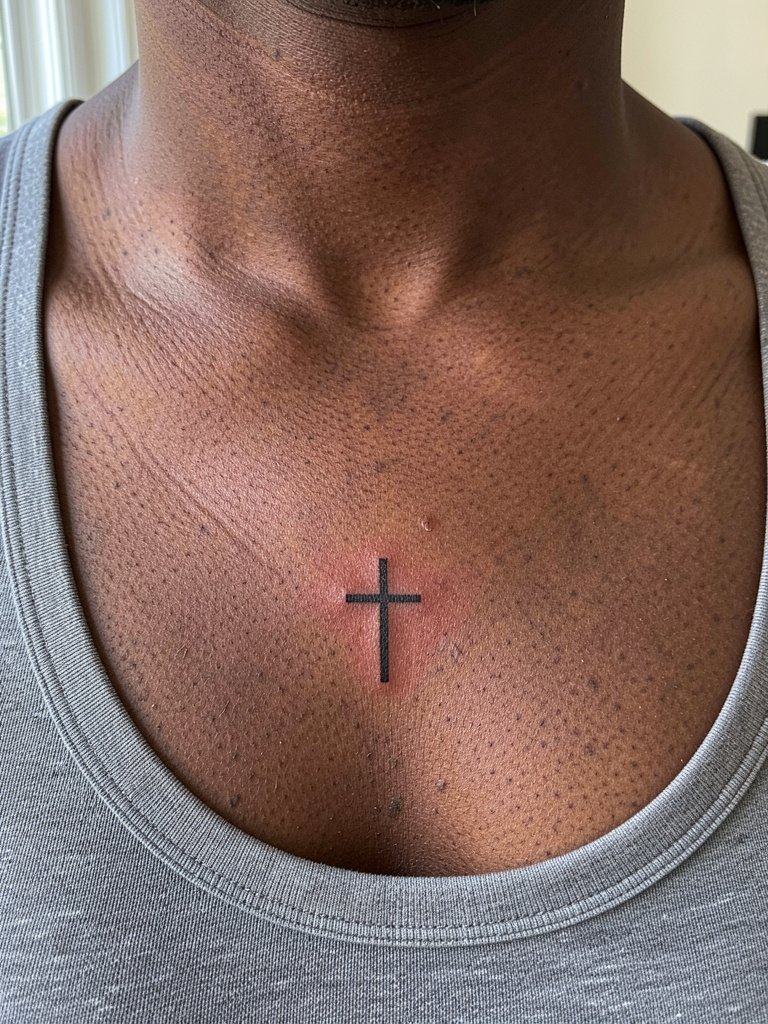
Small faith symbols work because they stay discreet while still being visible in open-neck clothing. For better longevity choose a modestly stronger outline rather than ultra-thin strokes. The session is quick and pain is typically moderate because of bony proximity. If you wear thin chain necklaces, wear a layered delicate necklace that sits above the tattoo so the cross is unobstructed.
10. Tiny semicolon near the clavicle
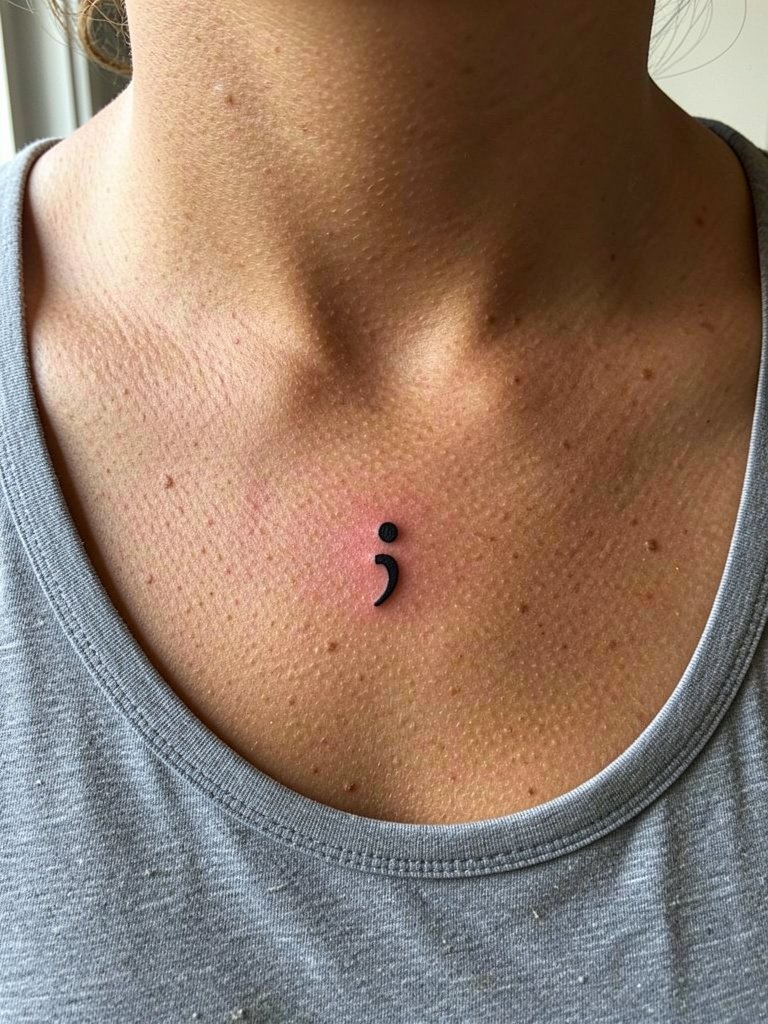
The semicolon is compact and symbolic. For best results the artist should use a slightly heavier dot for the period so it holds as a distinct element. Expect 10 to 25 minutes in the chair and a low to moderate pain level. Because this is small, follow-up touch-ups are common at the one- to two-year mark if you want the dot to remain solid. Session wear is a loose tank or scoop-neck tee to give clean access.
11. Micro-realistic moth or bee tucked under the clavicle
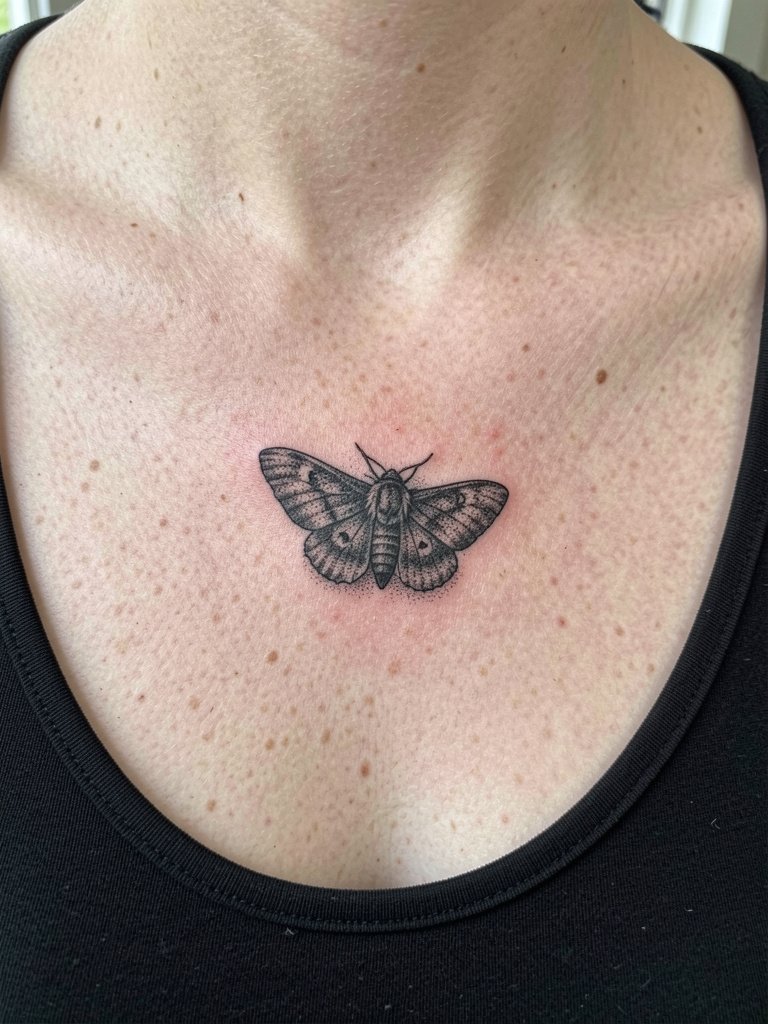
Micro-realism requires an artist experienced with tiny details. There is a heated split in the community about second-skin versus dry healing for these pieces. One group favors second-skin because it shields delicate edges from clothing friction in the first days and reduces picking. The other group prefers a simple wash-and-moisturize routine because adhesives can trap moisture and irritate sensitive skin, especially on the upper chest. If you pick realism, show the artist healed photos of similarly sized work so you know how detail holds on comparable skin types. Expect a longer session and a slightly higher price because of the fine work involved.
12. Handwritten phrase that follows the collarbone arc
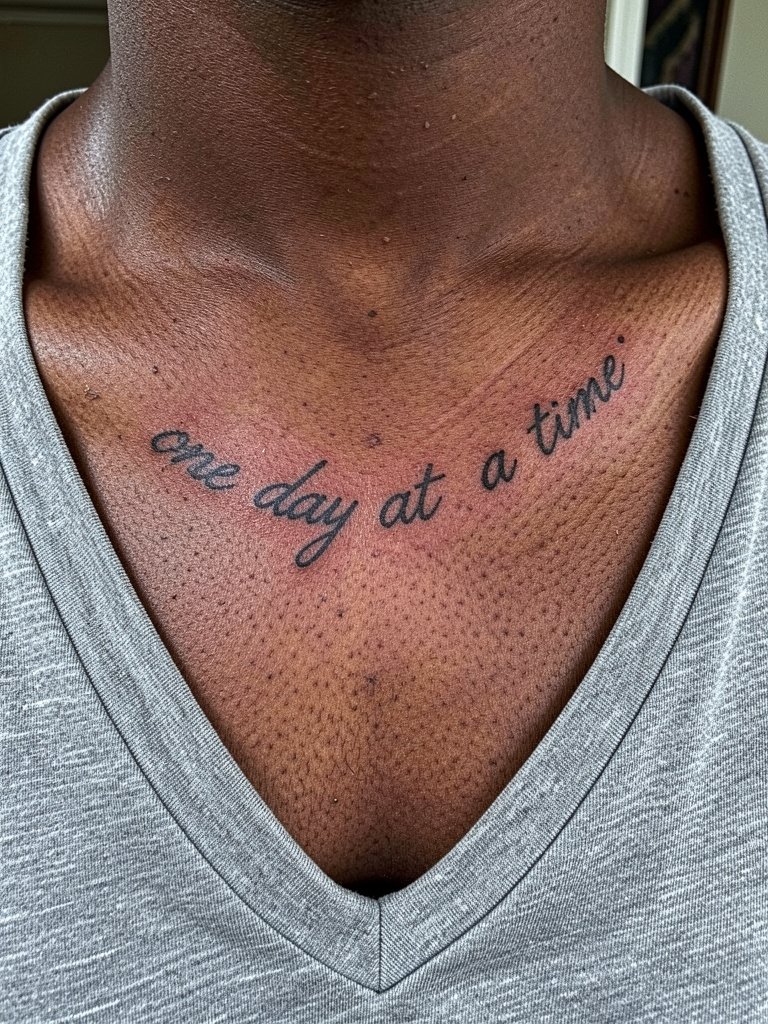
Longer phrases need breathing room on this narrow canvas. The common error is compressing letters so the phrase fits at a tiny scale, which ruins legibility after healing. Bring a version spaced for three inches and another for five inches so the artist can show you how it reads at both sizes. Sessions vary by length but plan for 30 to 60 minutes. For easier access on appointment day choose a button-down linen shirt that opens fully at the chest.
13. Tiny ornamental arrow or minimalist line accent
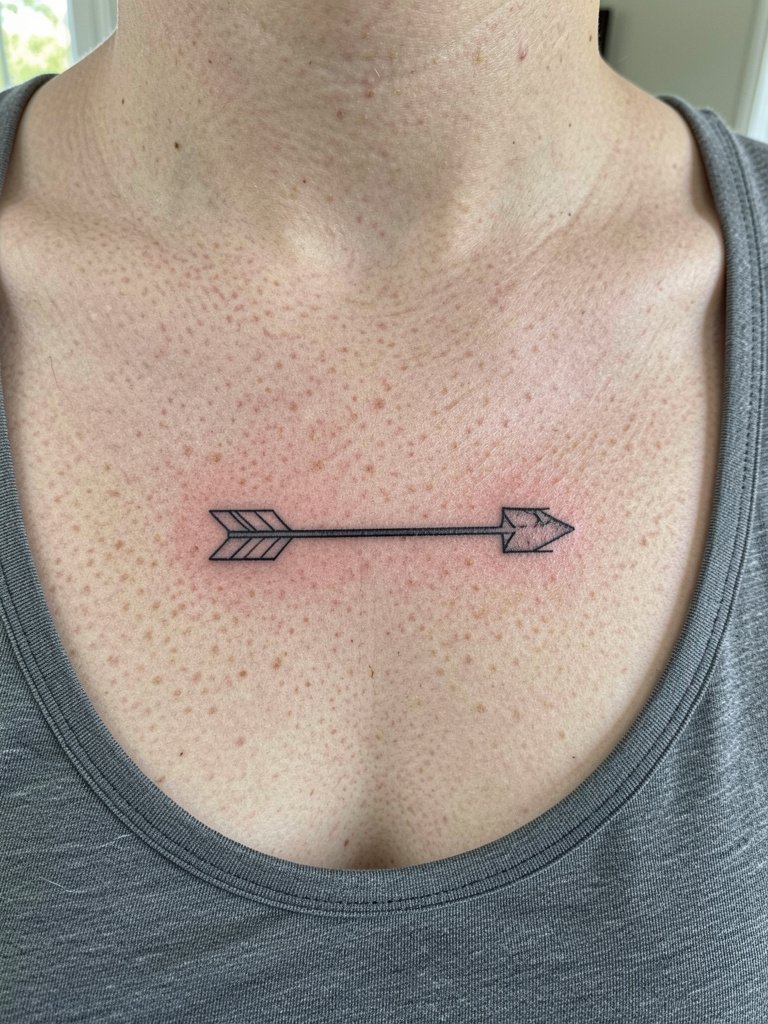
Directional accents complement bone lines and give a subtle sense of flow. Request a slightly stronger shaft line so the arrow keeps its silhouette as the skin relaxes. This is a short session and typically low on pain. If you want the arrow to read like jewelry, pair it with a minimal chain necklace that sits just above the collarbone.
14. Asymmetrical floral cluster sweeping from shoulder
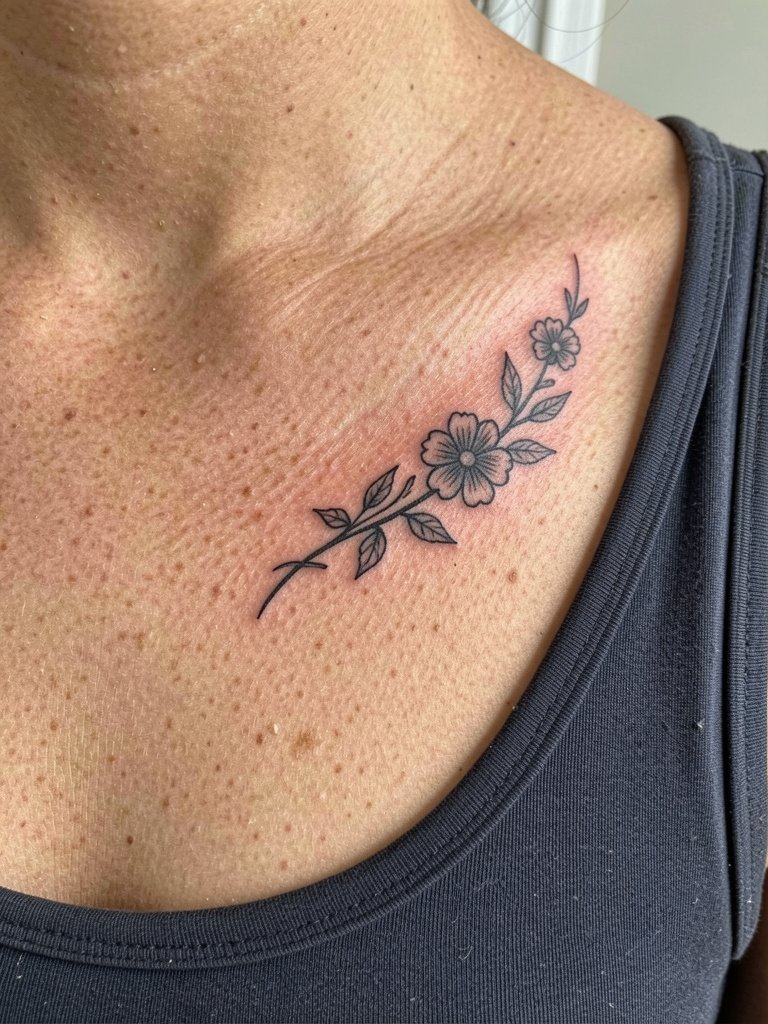
Asymmetry modernizes botanical work and often flatters one shoulder more than centering. The biggest mistake is over-detailing the blooms at a tiny scale. Ask the artist to simplify petal edges and increase line weight subtly so individual flowers read after a year. These pieces can take 45 to 90 minutes depending on spread and usually have moderate pain. Off-shoulder tops and a wide-strap camisole show the sweep without competing jewelry.
15. Minimalist sun with rays hugging the clavicle
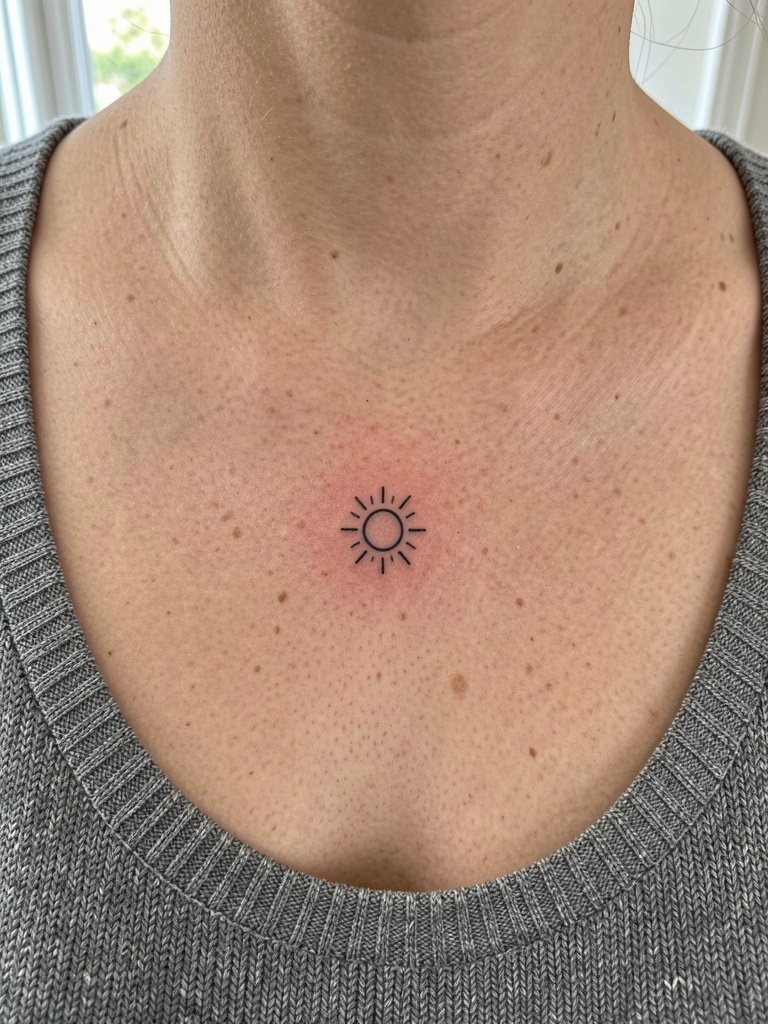
Small suns make for simple focal points that still show in open-neck clothing. Specify compact ray spacing and a slightly bolder center so contrast stays strong as the ink matures. The appointment time is short and the pain level moderate. For daytime styling a scoop-neck tee leaves the area visible while keeping the look casual.
16. Tiny swallow or small bird perched at the clavicle
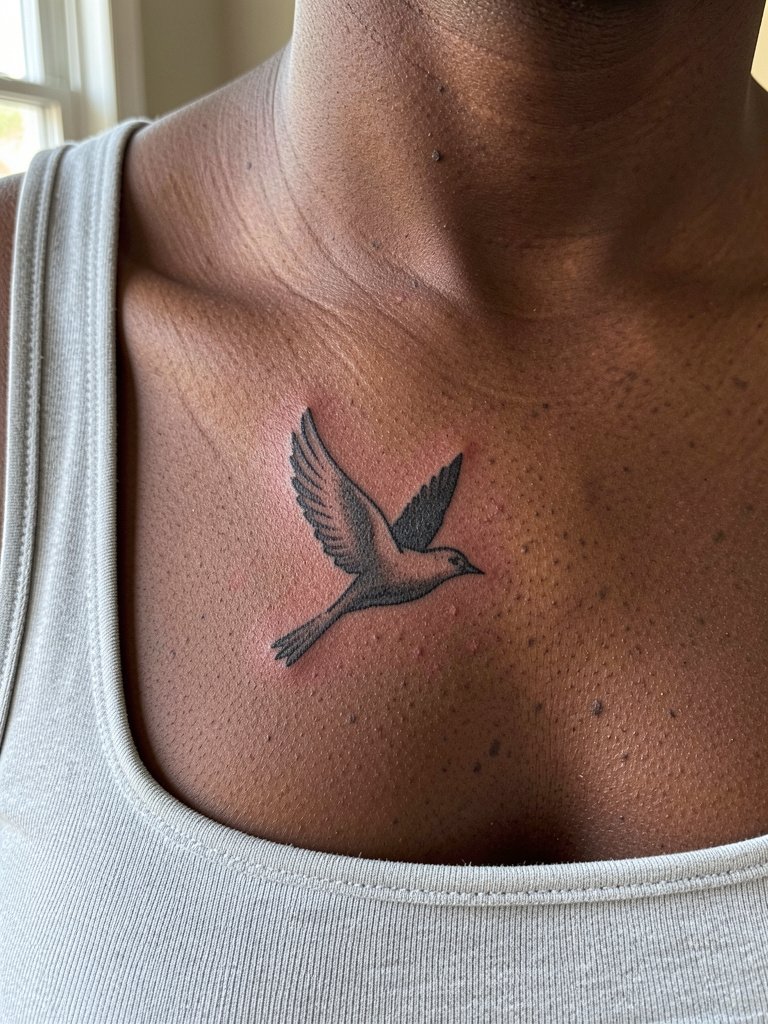
Tiny bird tattoos work because silhouettes age predictably if the outline is clear. Avoid tiny feather detail that the skin will soften. Bring a healed example of a similar-size bird on similar skin to your consultation so you and the artist agree on scale. Sessions are brief and pain depends on proximity to the bone. Pair with an open-back midi dress for evenings when you want the piece to peek out.
17. Single-stroke wave or minimalist ocean line
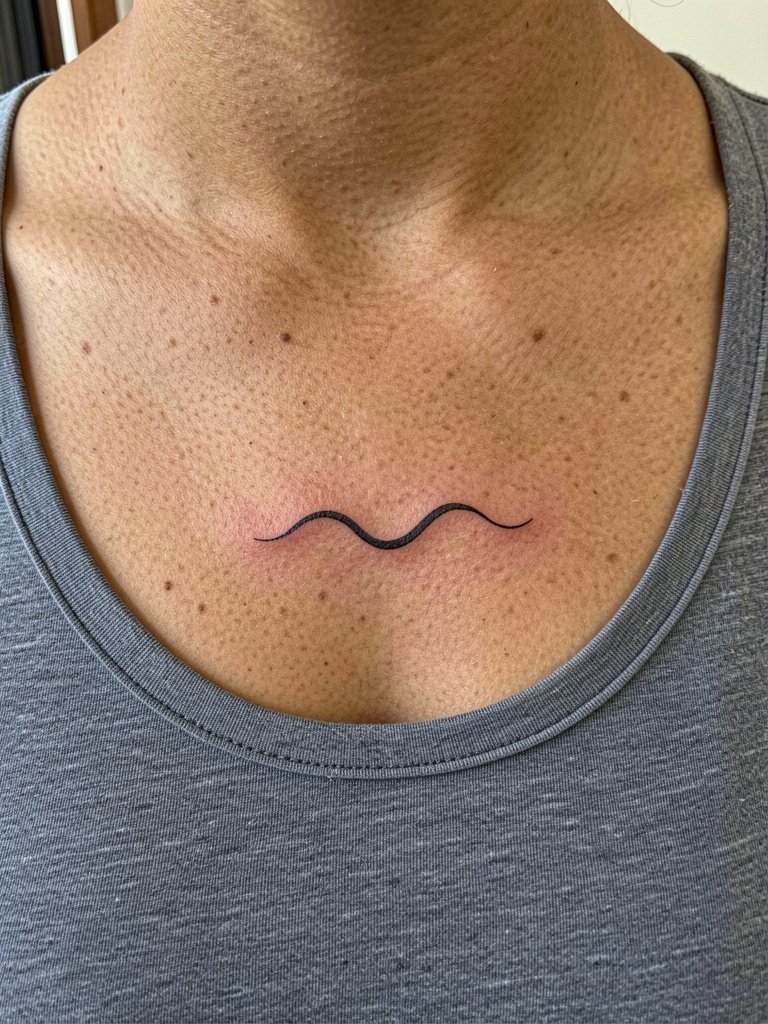
A single-line wave is a quiet option that plays nicely with necklaces. The trick is to ask for a continuous stroke that still has micro-variation in weight so it reads like motion after a year. This design usually takes under 30 minutes and is low on pain. For casual days choose a camisole so the tattoo sits in the neckline without friction from straps.
18. Small geometric sunburst with negative space
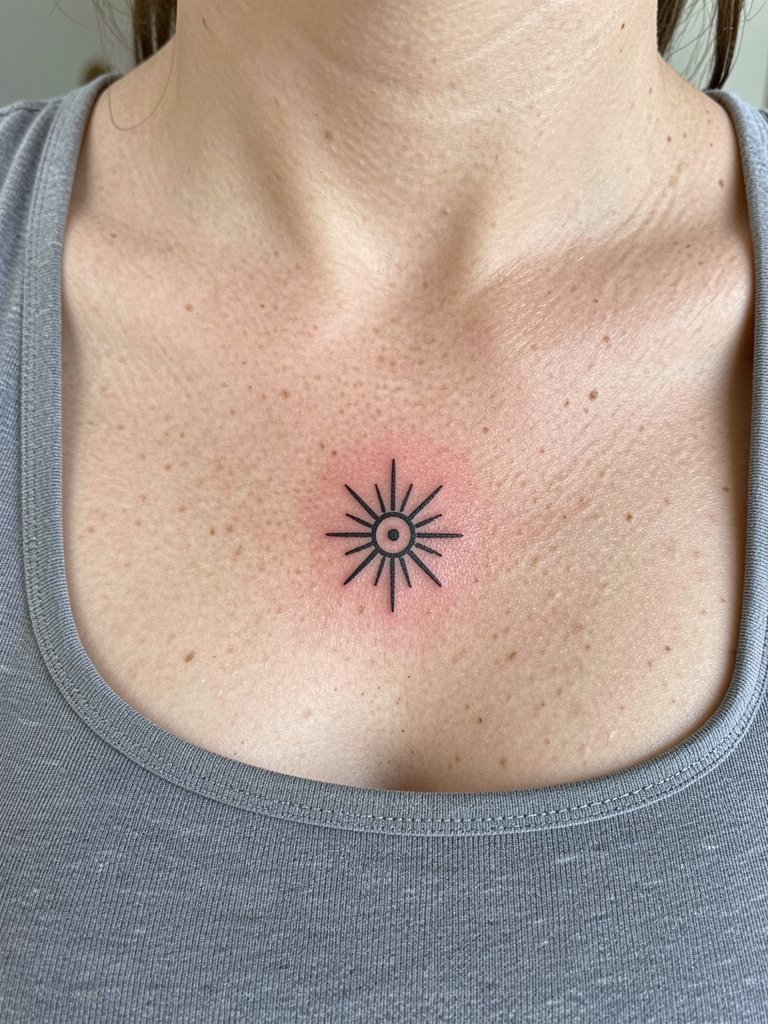
Geometric motifs depend on crisp edges to avoid muddiness. Ask for slightly wider spacing between rays and clear negative areas so the pattern remains readable after settling. Sessions vary but are usually under an hour and pain is moderate. For a modern look wear a square neck tank to frame the geometry without distractions.
19. Tiny lotus centered near the collarbone
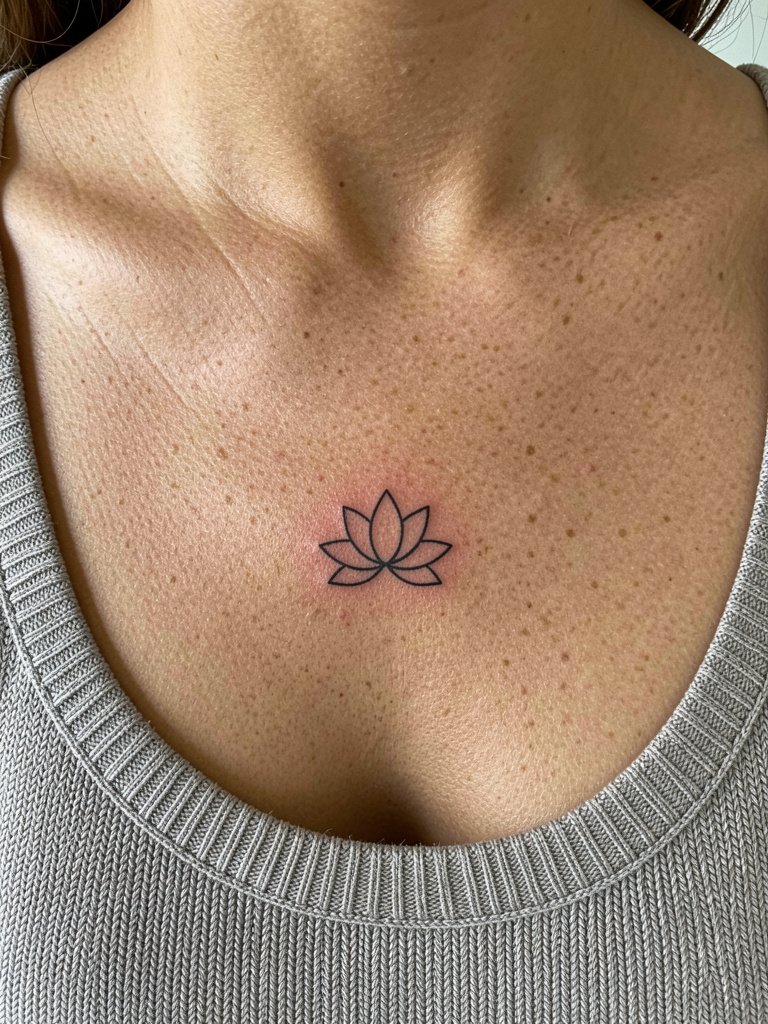
Lotus shapes need clear petal separation to avoid looking like a single blot of shadow later. Request bolder petal outlines and restrained internal detail. The session is usually 30 to 50 minutes and pain is similar to other collarbone placements. For understated showing, layer a minimal chain necklace above the design.
20. Tiny key or lock tucked at the clavicle corner
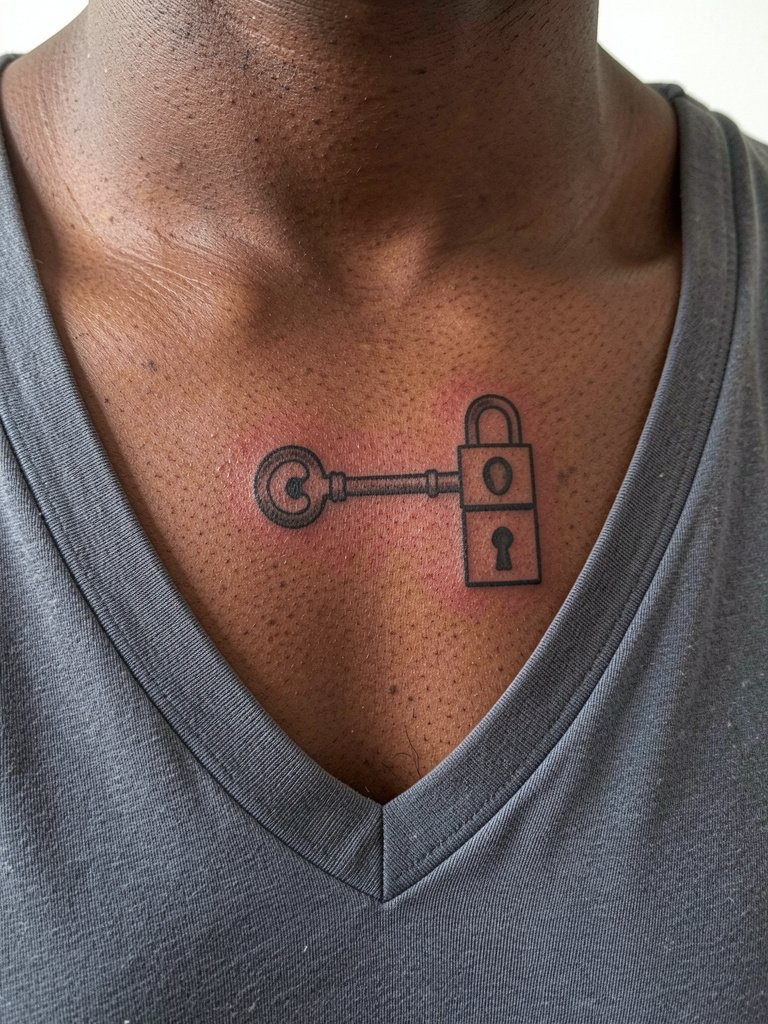
Small object motifs need simplified silhouettes to preserve identity after healing. Ask the artist to test a bold silhouette version before committing to intricate internal filigree. Appointment time is short and pain moderate. For wardrobe pair it with a scoop-neck tee that leaves the clavicle visible while keeping the key low-key.
21. Minimal crescent and single star cluster
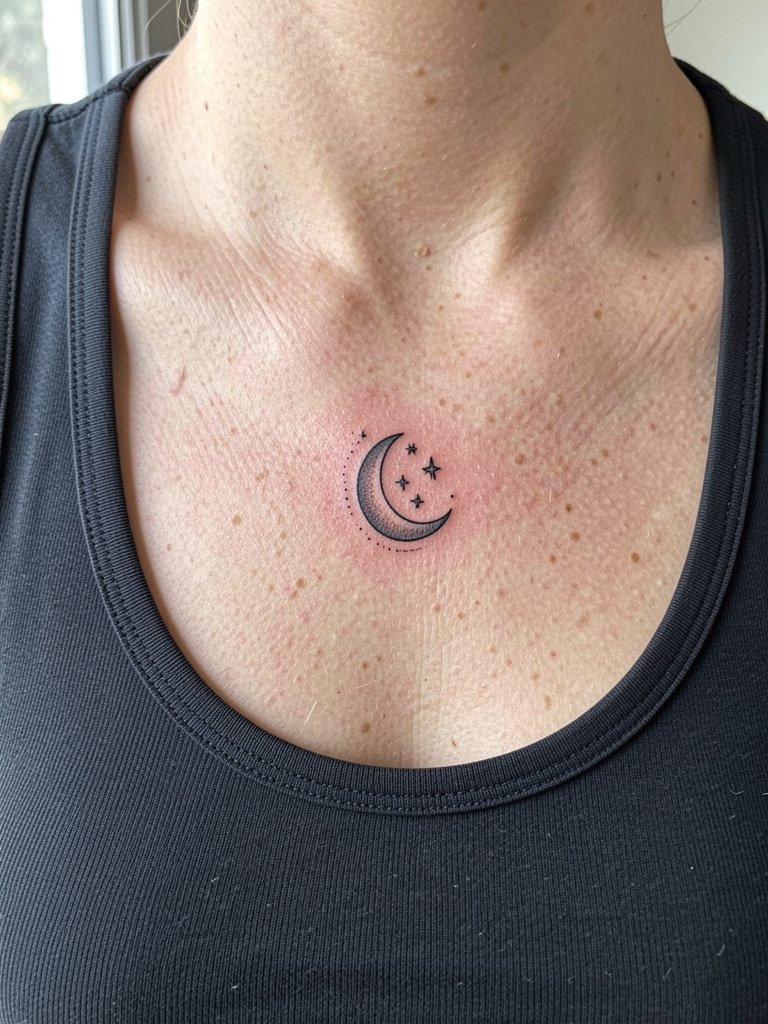
Pairing a crescent with a single star keeps the look minimal while offering a compositional anchor. Ask for dotwork that is spaced for six- to twelve-month stability. These pieces are quick and require little healing time. If you want the piece visible at festivals, a camisole or open button-down shows it off cleanly.
22. Tiny grooved laurel wreath across the clavicle
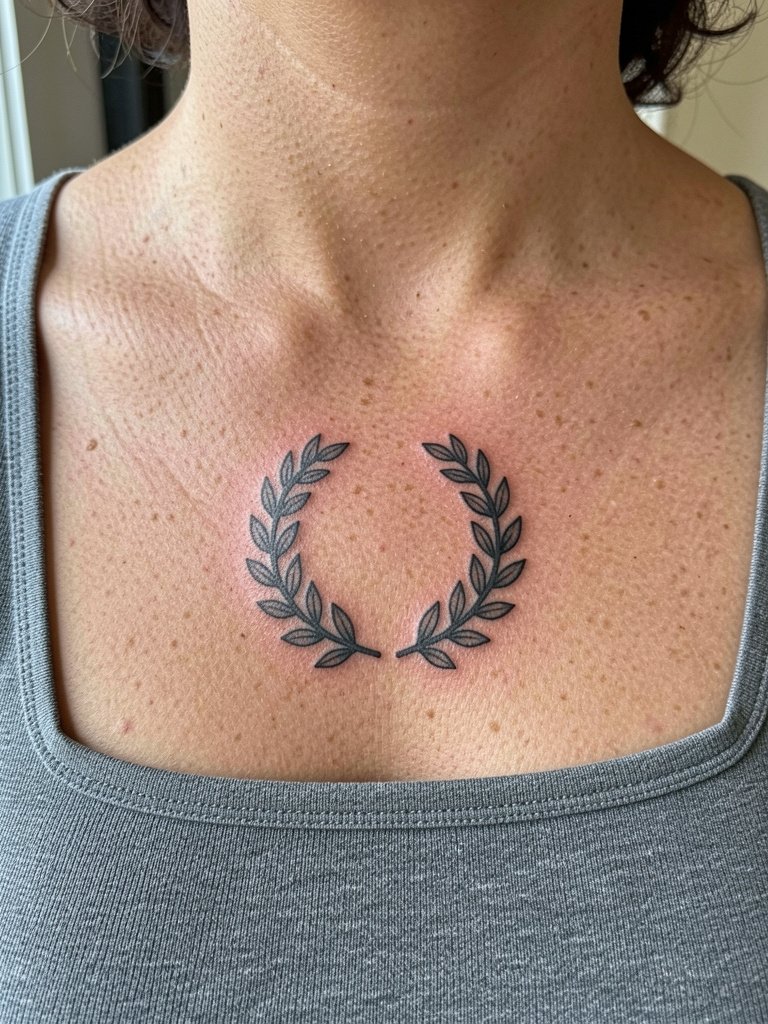
Laurel motifs read classically when leaf spacing is generous. A common error is crowded leaves that turn into one mass. For this placement choose slightly larger leaves and ask the artist for healed examples at similar scale. Sessions are usually under an hour. For a clean look wear a square neck tank that frames both halves of the wreath.
23. Tiny compass point near the clavicle
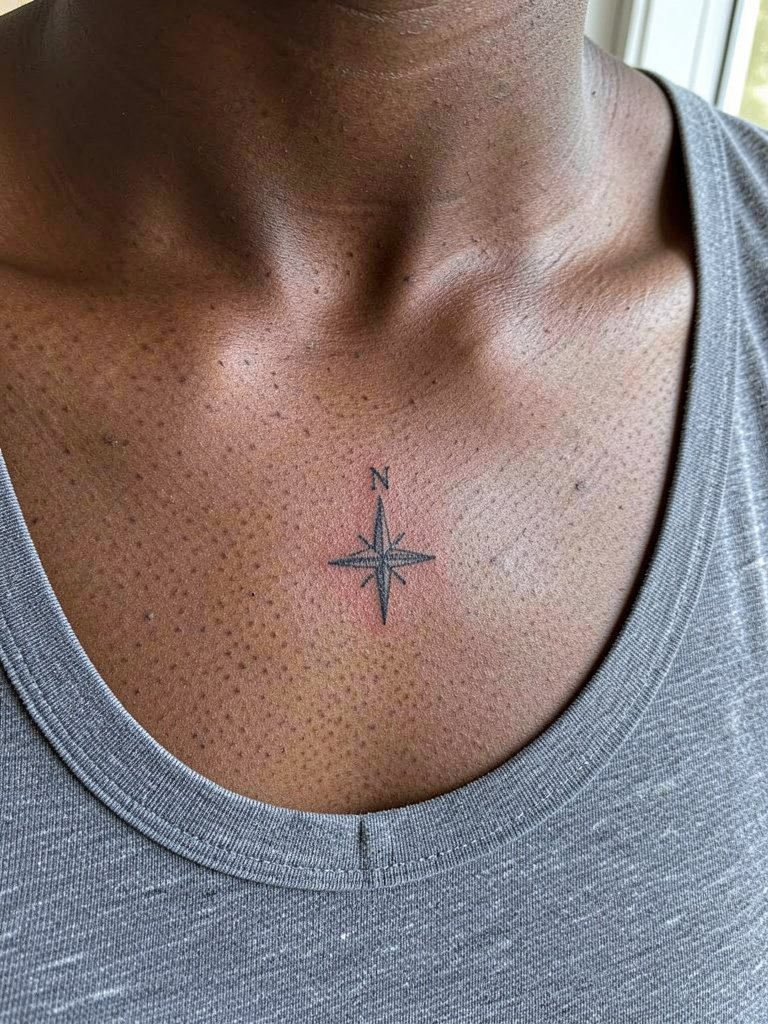
Compass-style symbols hold up if the points are bold enough to maintain contrast. Ask the artist to thicken outer points slightly so the design retains sharpness at year two. Short sessions and low to moderate pain are typical. For outfit pairing choose a minimal chain necklace worn above the symbol.
24. Tiny geometric crescent with dotwork halo
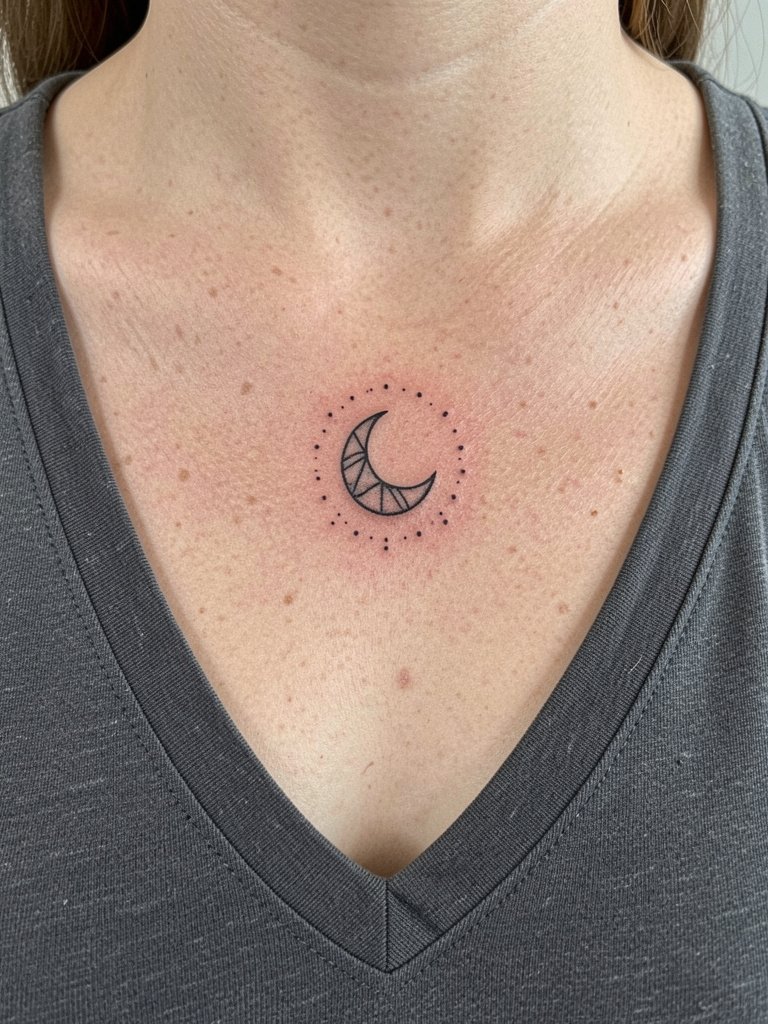
Dot halos need even spacing so the pattern does not collapse into gray over time. Request a slightly wider radius for dots than the reference so negative space survives. Expect a 20 to 45 minute session and moderate pain. For casual display choose a camisole that keeps the neckline open.
25. Tiny mountain range silhouette under the clavicle
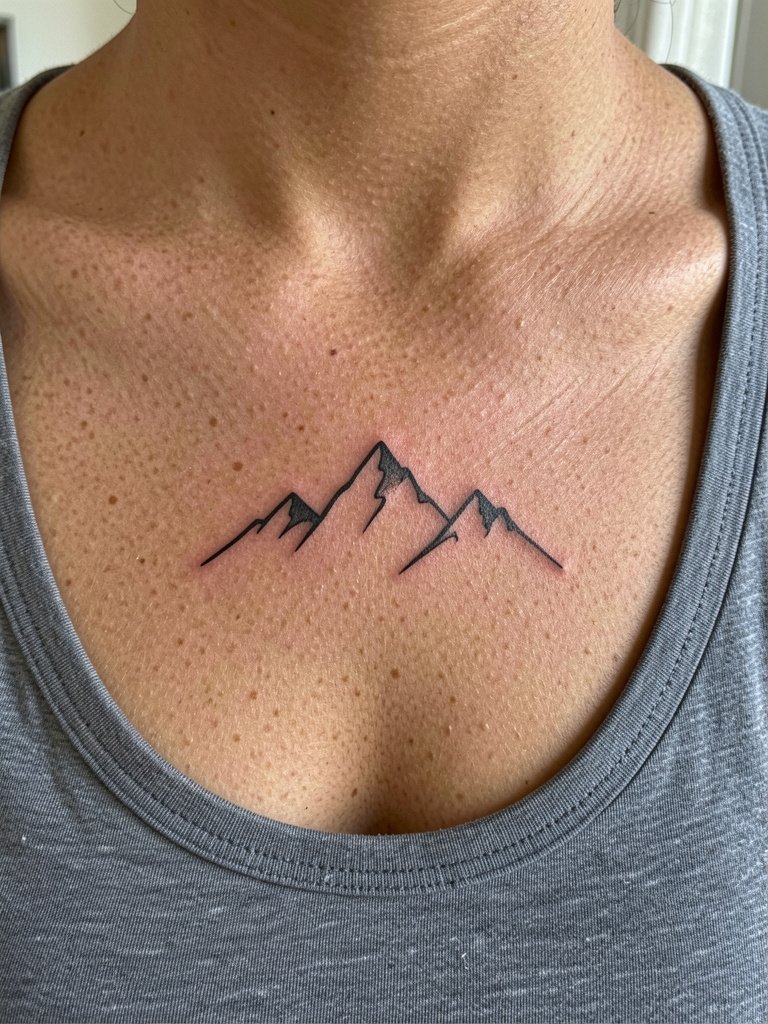
Silhouettes translate well to this placement because they rely on contrast not tiny detail. The main ask for the artist is to keep the negative valleys between peaks crisp. Sessions are short and pain moderate. If you hike often, remember sun protection after healing because the upper chest gets a lot of exposure.
26. Tiny single-line face or minimal continuous-line profile
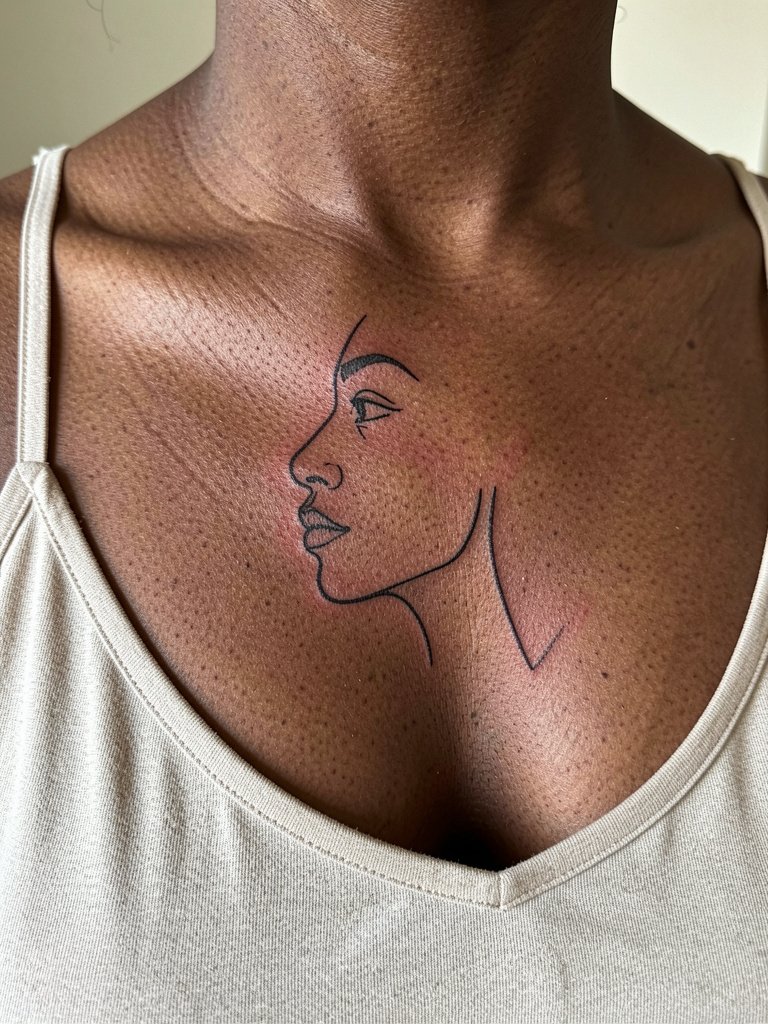
Continuous-line portraits are elegant if the line thickness is chosen with aging in mind. The mistake is using a hairline stroke that disappears into soft skin texture. Request a consistent medium line weight and a quick mockup on skin to confirm scale. Sessions are typically 30 to 60 minutes and pain sits around moderate. For styling, a wide-strap camisole keeps the neckline simple so the profile reads.
27. Small constellation mapped to the clavicle arc
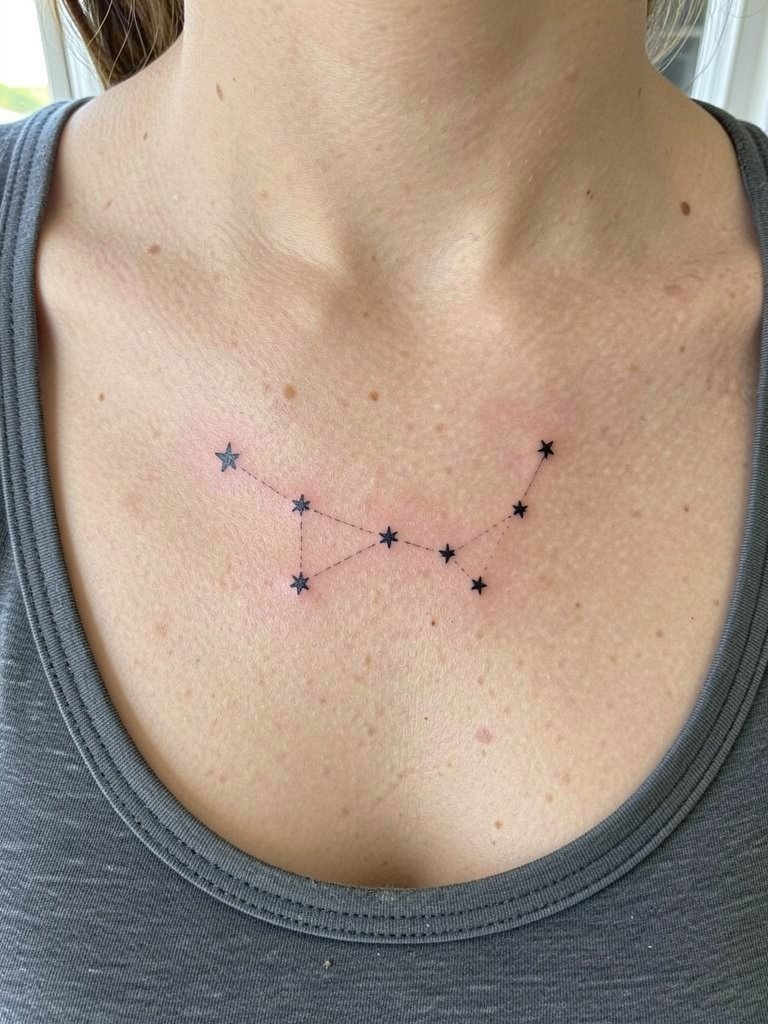
Constellation pieces read like jewelry and can be expanded later into a small chest patch. For durability ask for slightly stronger dot sizes for key stars and thinner connector lines that do not compete. Sessions are short and pain is moderate. If you plan to expand later, leave space between clusters so future work does not crowd the original.
Frequently Asked Questions
Q: How much does a small collarbone tattoo usually cost?
A: Small collarbone pieces typically fall into a shop minimum to small-piece range. Expect a range around one hundred to five hundred in most U.S. studios depending on linework complexity and the artist's minimum. Larger micro-realistic or multi-spot pieces sit at the higher end of that range.
Q: How painful is a collarbone tattoo and how should I prepare?
A: Pain varies because the clavicle area has thin tissue over bone. Many people describe it as an intense buzzing rather than sharp pain. Eat a meal, hydrate well, and wear a strapless top, loose tank, or a button-down that opens fully so the artist can work without fabric rubbing the fresh ink.
Q: Which designs age best on the upper chest skin just below the clavicle?
A: Simpler silhouettes and slightly bolder single-pass outlines tend to age more predictably than ultra-fine scripts or over-detailed micro florals. Botanical sprigs with space between leaves, small silhouettes, and minimal symbols hold their shape longer. Ask to see healed photos of similar-sized work on comparable skin tones.
Q: Where can I find local portfolios and healed examples without naming artists directly?
A: Search social hashtags like #collarbonetattoo, #collarbonetattooideas, #finelinetattoo, and #microtattoo and use the location filter on platforms to find nearby studios. Reddit threads about healed work often include time-lapse photos. Directories that group portfolios by style can help you compare healed images before booking.
Q: Should I use second-skin adhesive bandages or stick to a wash-and-moisturize routine?
A: People split into two camps on this. Some prefer second-skin because it shields fresh ink from friction and keeps the first 24 to 48 hours cleaner. Others prefer dry healing or a light moisturize approach because adhesive can trap moisture and irritate sensitive chest skin. Try to follow the artist's guidance and watch your skin for signs of irritation.
Q: What should I wear to the appointment so the artist can reach the area cleanly?
A: Choose clothing that gives full access to the upper chest without needing to be pulled or adjusted during the session. Good options are strapless tops, loose tanks, and button-down shirts you can open fully. Avoid garments that must be tugged to uncover the collarbone because that creates unnecessary friction on the fresh tattoo.
Q: How do I check healed examples if I have darker skin and want a realistic expectation?
A: Look specifically for healed photos labeled with skin tone or tagged in communities that celebrate a range of tones. Ask the artist during consultation for healed shots from clients with similar skin. Healed photos at six months to a year show how linework and dotwork held up, and they are the best visual proof for scale and spacing decisions.
