
Tiny matching icons flood feeds, but the pieces that still read clearly after three years are usually the ones that got a little spacing, bolder linework, or were placed away from friction. Trends push micro-detail, and the reality of healed skin pushes back. Read through these friendship symbol designs and you will find practical options that photograph well at first appointment and still look intentional after routine life and frequent hand washing.
1. Half-Heart Line on the Wrist
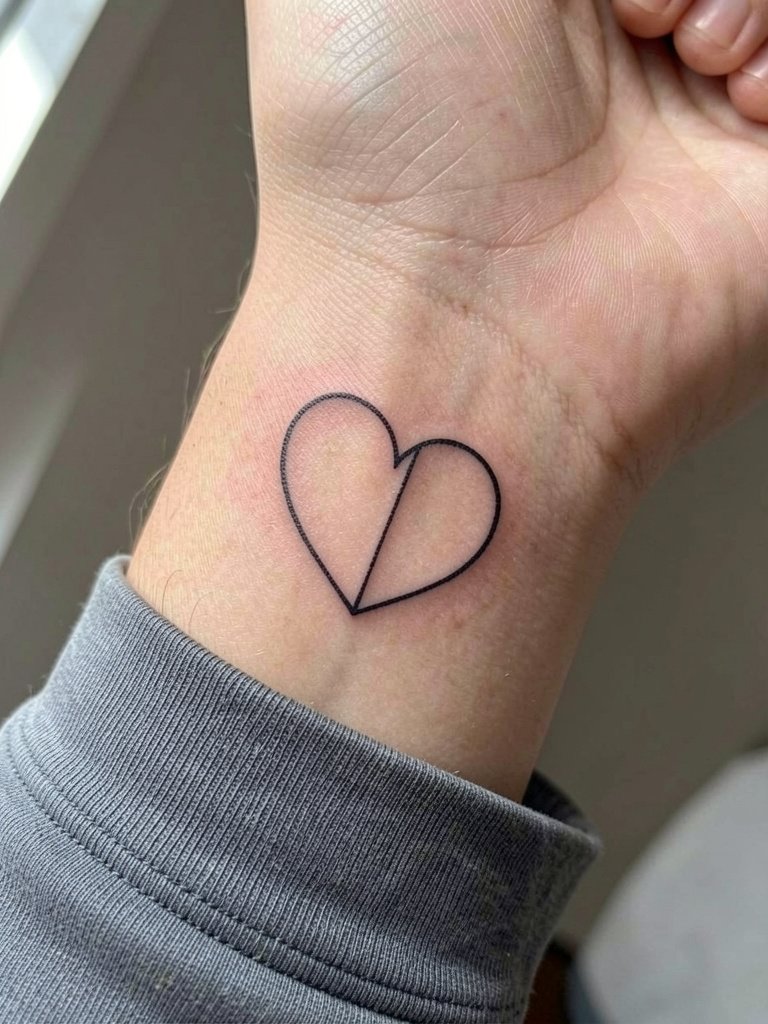
The half-heart is the most literal shared symbol and it reads best when scaled with breathing room. I recommend a hair heavier lineweight than a one-needle single stroke and 1/4 inch of negative space inside the curve so the halves do not merge as they heal. Wrist placement has more wash and friction from bracelets and sleeves, so expect touch-up after one to two years if you choose very thin work. For the appointment wear a loose short sleeve so the artist can access the palm-up wrist without fabric sticking. If you want to show the piece, pair it with a slim thin stack bracelet that sits opposite the tattoo.
2. Tiny Lightning Bolt, Inner Forearm
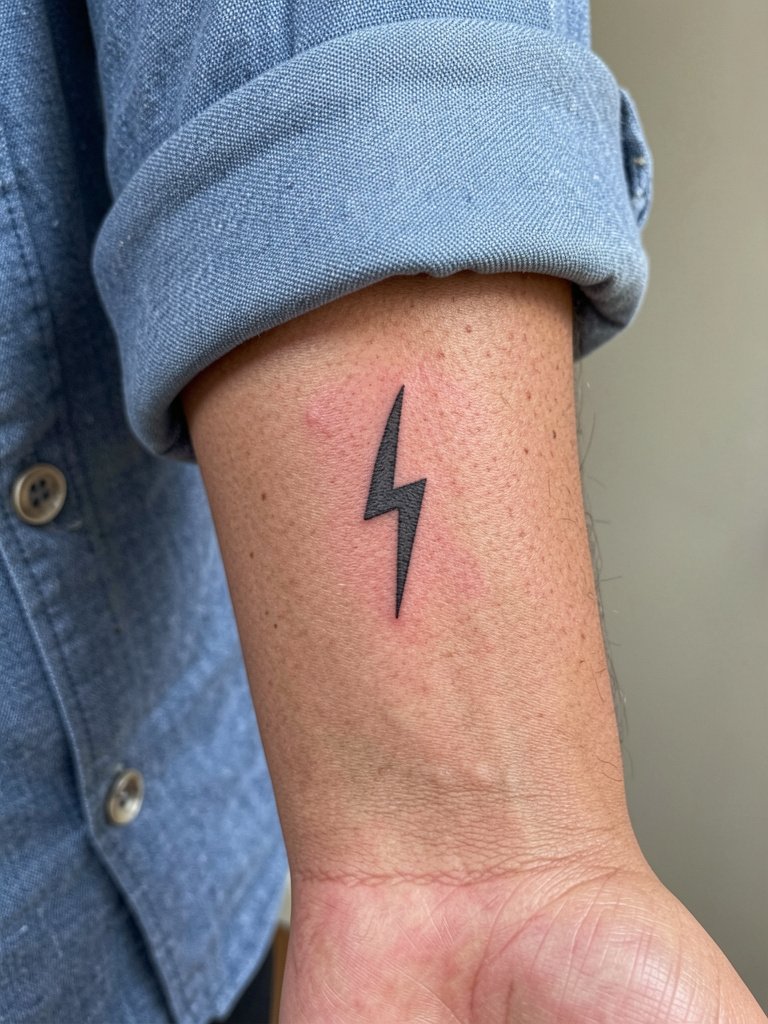
The lightning bolt is a small graphic that still reads at micro scale because of its sharp angles. For longevity use a slightly bolder outline and avoid interior hatch shading that will blur. Inner forearm is low friction, so contrast and saturation hold well. The session usually takes under 20 minutes and rates low to moderate on most pain charts. Bring two reference sizes so the artist can show how it reads at one inch and at two inches. For outfits, this placement shows nicely when you roll a cuffed shirt sleeve, and you can prep with a linen button down that slides back easily during the session.
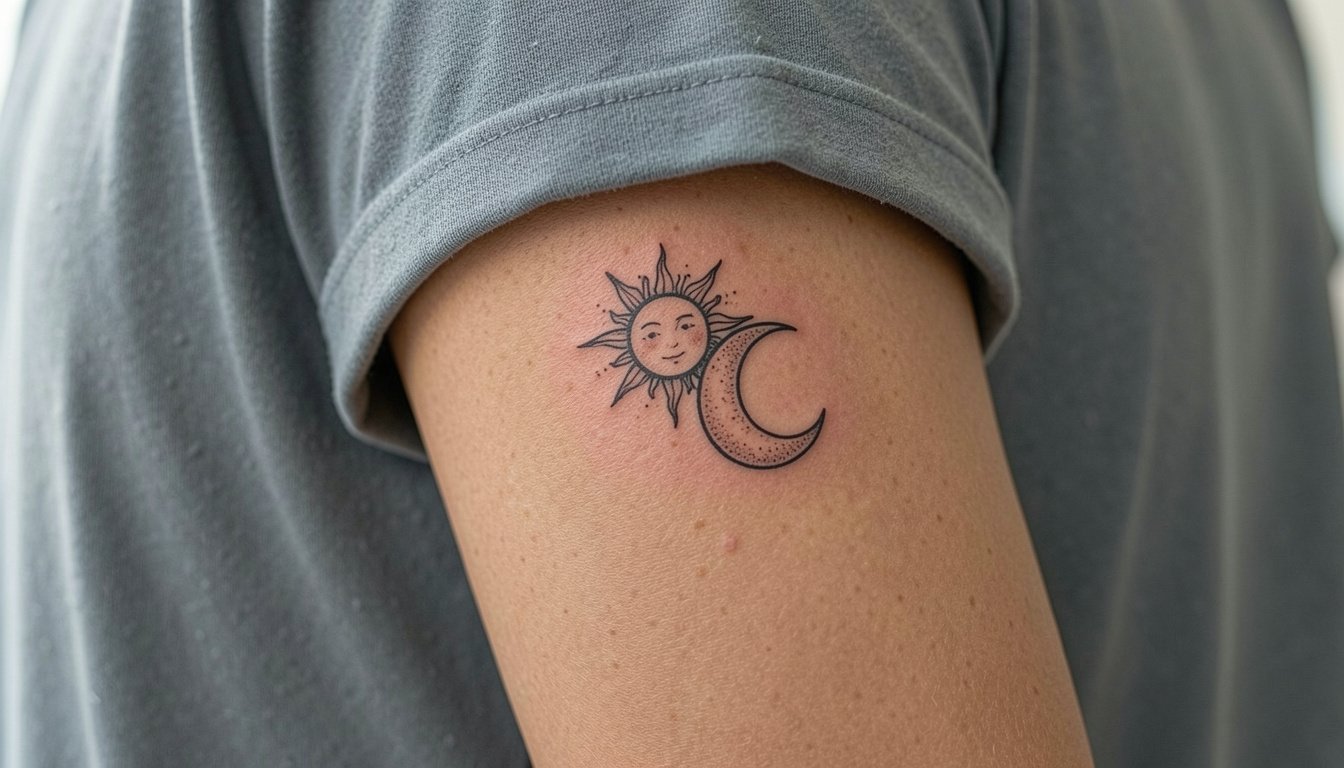
3. Sun and Moon Complementary Pair, Ankle and Forearm
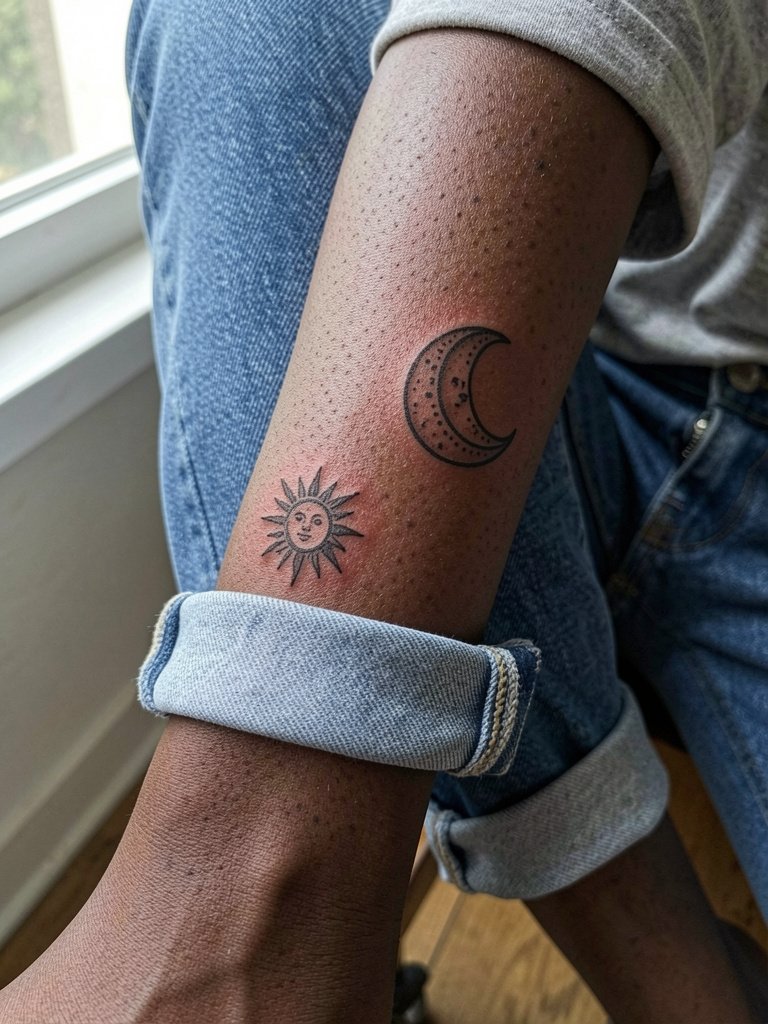
Complementary sun and moon pieces let each person wear a distinct symbol that connects visually. One artist camp argues identical tattoos reduce comparison and feel cleaner. Another camp argues complementary halves feel more personal because each friend carries a different role visually. Both views are common and valid. For the ankle placement expect more touch-up because socks and shoes rub the area. The forearm companion will likely need less maintenance. For show-off styling, cropped straight-leg jeans and ankle strap sandals highlight the ankle piece, and a simple short sleeve tee frames the forearm piece nicely with a cropped straight jeans look.
4. Matching Butterflies on the Collarbone-Adjacent Chest
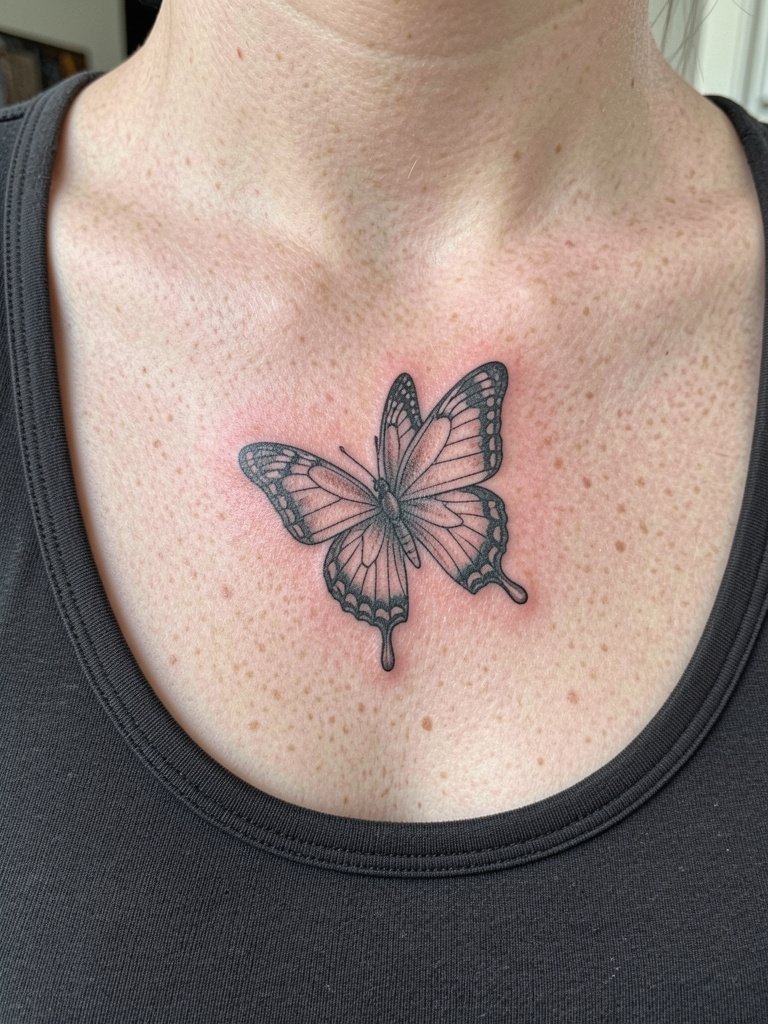
Butterflies are flexible in scale and style. On the upper chest they can be slightly larger, which helps linework settle cleanly over time. The sternum and chest area moves with breathing, so use moderate lineweight and avoid ultra-fine filigree there. For session day wear a tank top or strapless undergarment to give clear access. This placement pairs well with delicate layered chains, and an off shoulder top shows the piece without crowding the collarbone.
5. Daisy Stem on the Inner Forearm
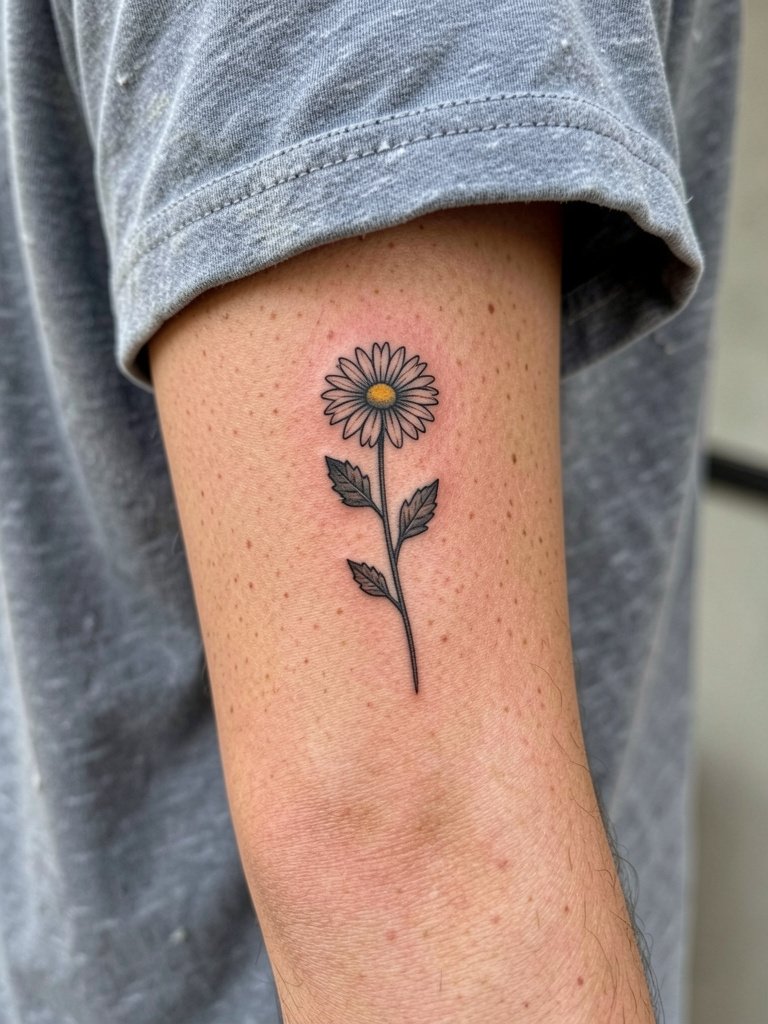
A single-stem daisy reads clearly and can be personalized by leaf count or petal detail. Inner forearm is forgiving for fine work, but tiny petals need spacing so stipple shading does not turn to blotch. Plan for a one-hour session for a small stem and bring reference photos showing the exact line weight you want. For outfits roll a lightweight linen overshirt for a casual reveal, and wear a loose sleeve that slides back easily during the appointment. Try a linen overshirt so the fabric does not stick to fresh ink.
6. Koi Split Pair on Upper Arm and Calf
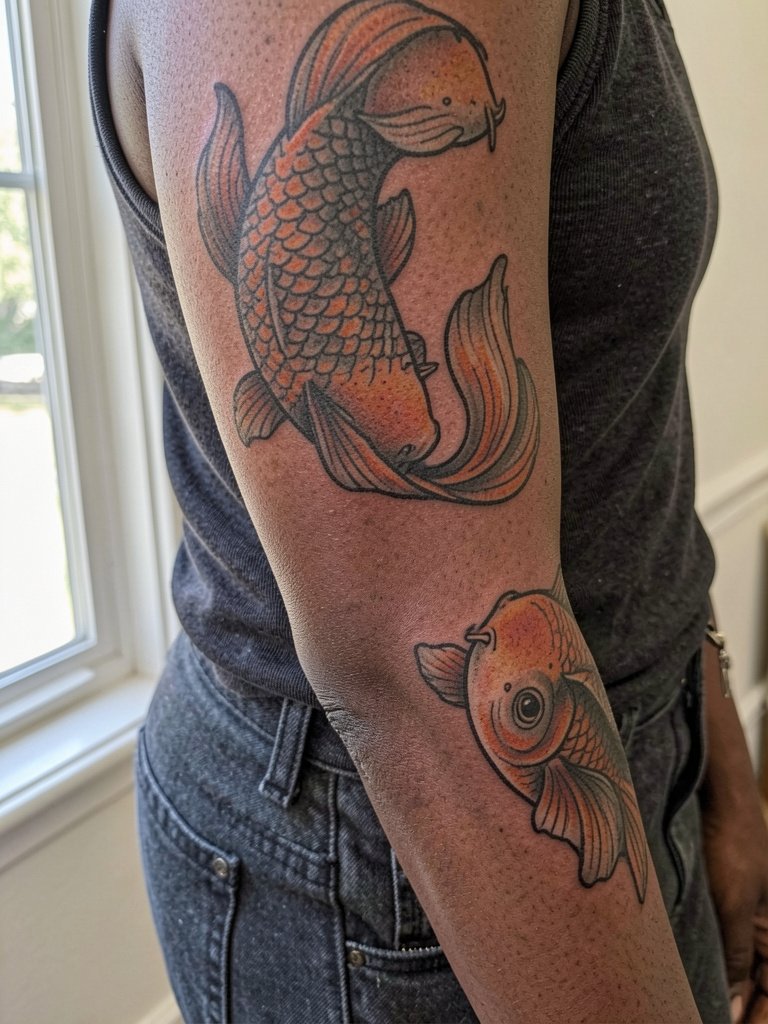
Koi fish make a statement about resilience and survival when rendered as matching or complementary pieces. For the bolder neo-traditional look choose slightly larger scale so the fins have room for saturated color and contrast. Calf and upper arm are both lower-friction placements that keep color richer over years. Expect a one to two session timeline for medium-sized koi. If one friend wants a subtle placement and the other wants a bolder one, match the lineweight and scale to keep the pair coherent. The sporty reveal pairs well with a racerback tank and racerback tank styling for days you want to show the arm piece.
Session Day Picks
The skinny wrist icons above and the forearm stems all benefit from a few practical items for the session and the first week of healing.
-
Stencil transfer paper kit. Lets you preview the design on skin at size, which is useful for matching tiny symbols and for the half-heart layout described earlier.
-
Topical numbing cream. Applied before the chair time takes the edge off sensitive spots like the wrist or ankle without changing linework when used responsibly.
-
Thin protective film roll. Useful for covering finger or wrist pieces during the first day of heavy contact, it reduces direct rubbing while showering.
-
Fragrance-free body wash. A gentle wash keeps fresh linework clean without stripping natural oils that help healing for fine line work.
-
Aquaphor Healing Ointment. A thin layer for the initial 48 hours protects tight linework on wrists and fingers without clogging tiny needle channels.
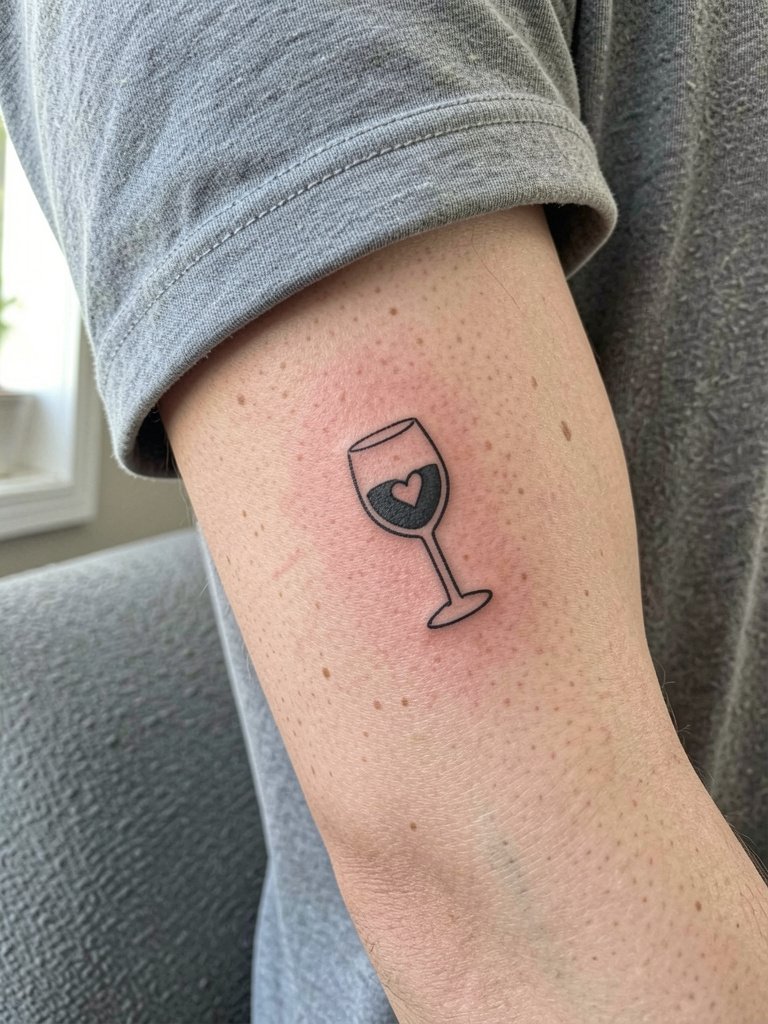
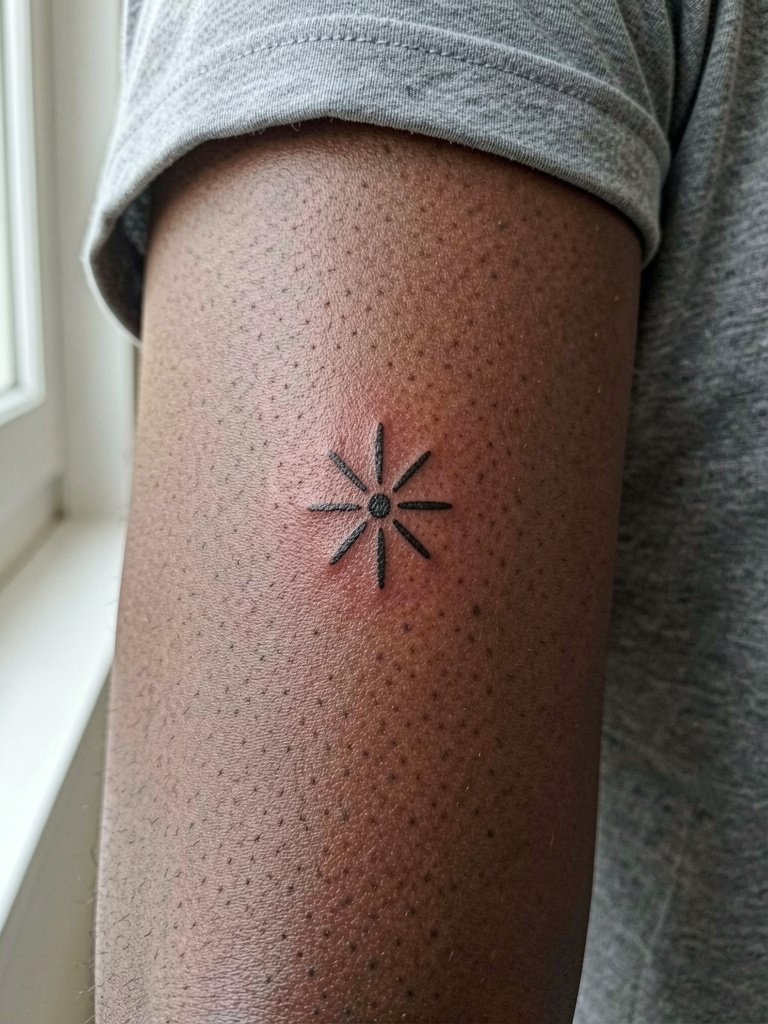
7. Wine Glass Heart on the Wrist
The wine glass heart is a playful shared ritual symbol and it works best at wrist scale if the stem and bowl are drawn with a steady outline. The common mistake is cramming interior detail into a tiny silhouette. Instead keep negative space inside the bowl so the heart reads clean. For session wear a loose cuffed tee and for reveal nights a slim watch or thin bangle opposite the tattoo creates balance. Try a slim watch band to complement the placement and avoid overcrowding the wrist.
8. Anchor Minimal on the Ankle
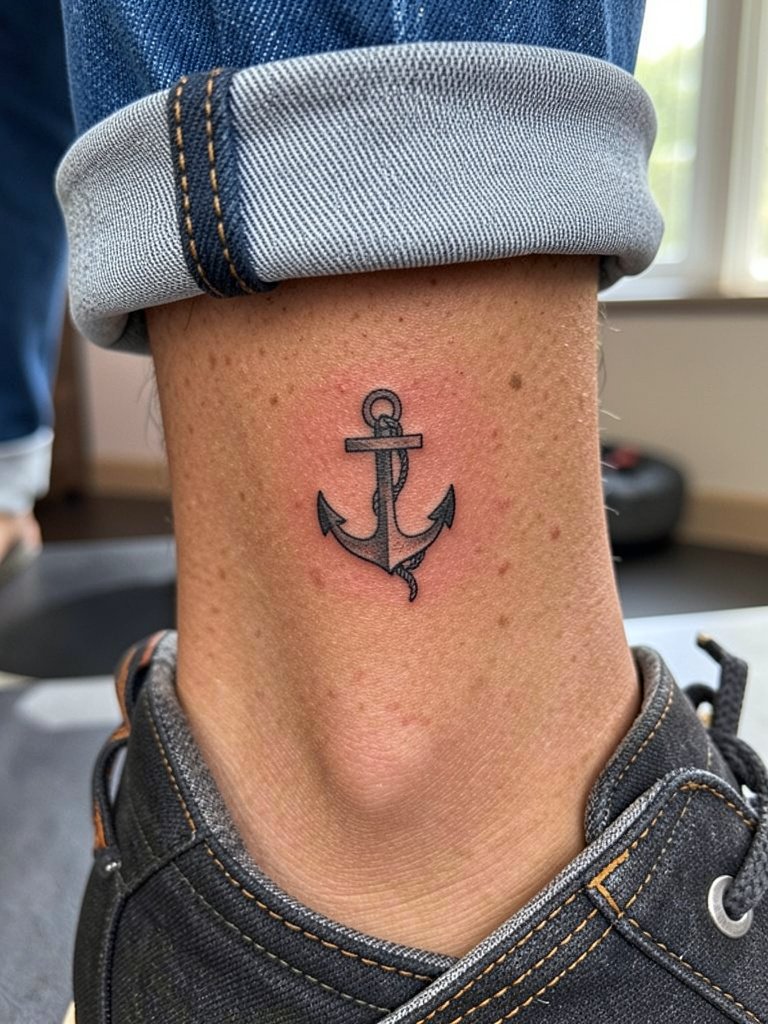
Anchor symbols carry the literal idea of steadiness. For ankle placement keep lines a touch bolder to resist blurring from shoe friction. A frequent error is placing the anchor too low near the shoe line, which accelerates wear. Session feel is quick and medium discomfort depending on shoe pressure while seated. Styling for showing the piece includes cropped jeans or sandals, and a neutral ankle strap sandals look works well with tiny motifs.
9. Identical Minimal Symbols Behind the Ear
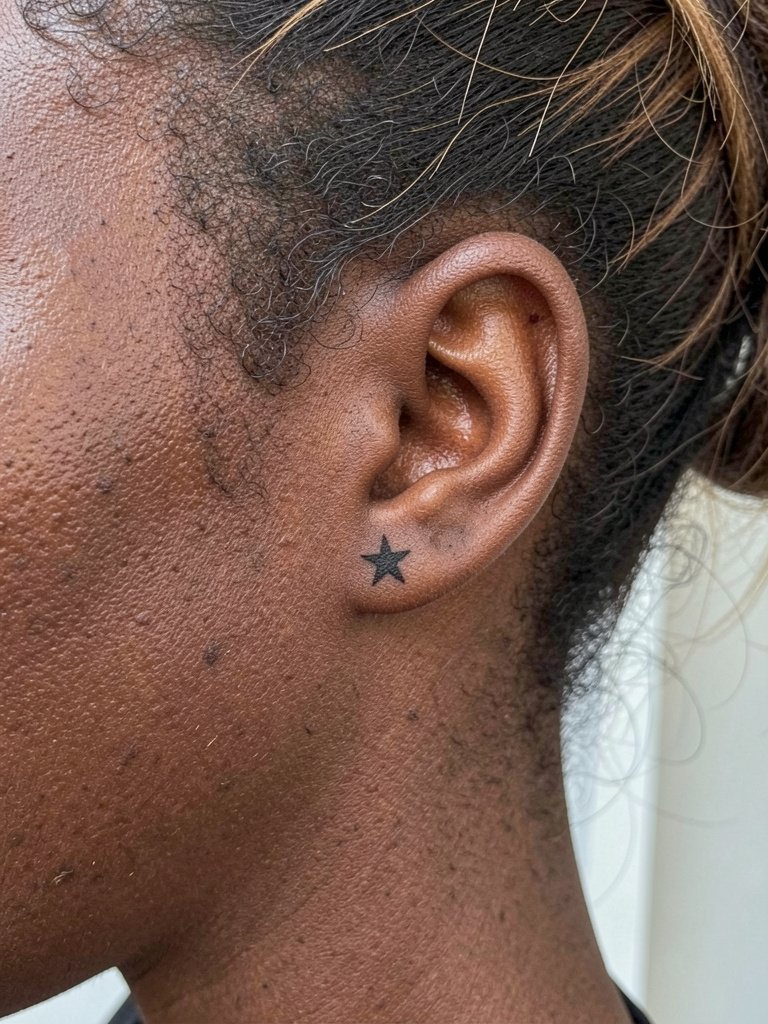
Tiny symbols behind the ear are very discreet. The mastoid skin accepts micro-detail but the trade-off is that the area is harder to care for and touch-ups require a steady hand. A common mistake is asking for single-needle fineness without accounting for ear-adjacent skin texture. For session wear pull hair back with a clip and bring a set of hair clips, and for showing off try a small hoop earring that frames the area, like a small hoop earrings. Expect low to moderate pain for the site.
10. Split-Butterfly Half on the Wrist

The half-butterfly gives that shared necklace nostalgia while keeping each person distinct. Avoid tiny filigree in the wing veins because wrists see frequent motion and washing. For alignment plan bring a clear photo showing wrist orientation so both halves mirror correctly when arms are placed side by side. A thin bracelet opposite the piece frames it well, and session wear of a loose tee makes access easy.
11. Tiny Clock Face, Outer Forearm
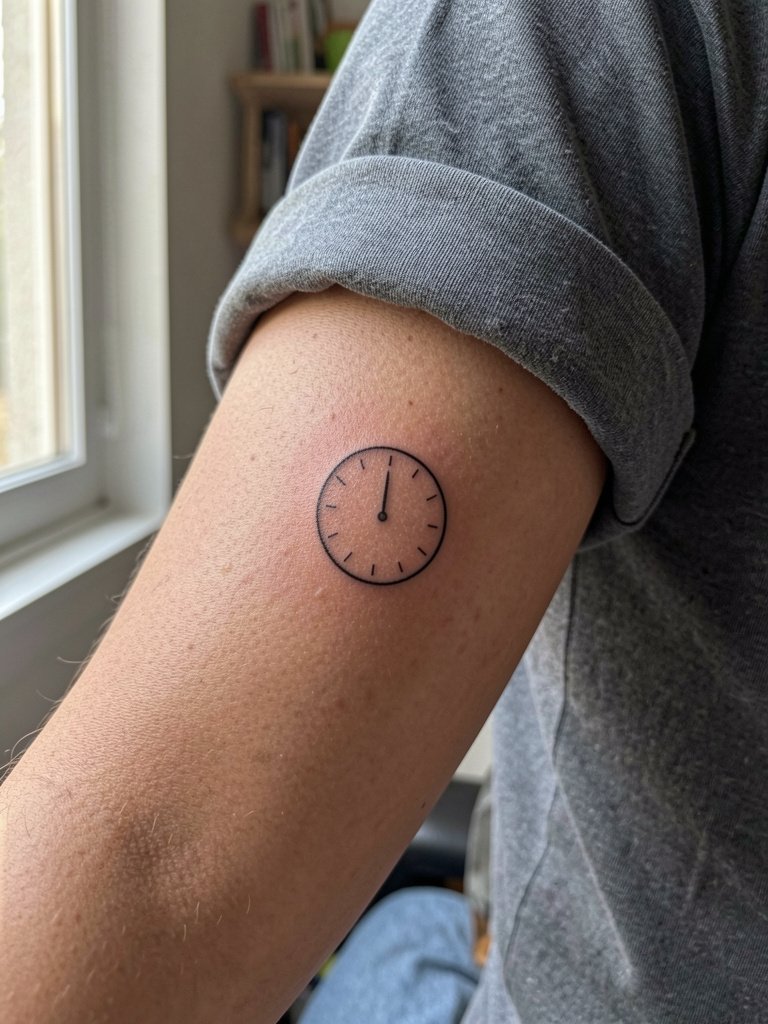
Clock or timepiece tattoos carry shared milestones. The most durable versions use simple hands and open markers, not tiny numerals which blur with time. Outer forearm keeps detail legible, and a small clock about one inch across will hold up better than a micro-dot numeral ring. For reveal wear a structured tee and minimal jewelry so the clock remains the focal point, for example a structured shirt. During consultation specify the exact time you want inked so the artist can scale the hands to balance the circle.
12. Interlocking Hands, Side of Finger

Hands and finger pieces are evocative but demand honest maintenance planning. The lateral finger skin sloughs quickly and small details fade faster than on forearm or chest. If you want finger placement, scale up slightly and expect touch-ups every one to three years. A common mistake is requesting dense shading on fingers. Keep the motif line-based and plan for rings that do not sit over the ink, or choose a minimal ring set like minimal rings set so the piece remains visible.
13. Shared Script Word on Ribcage
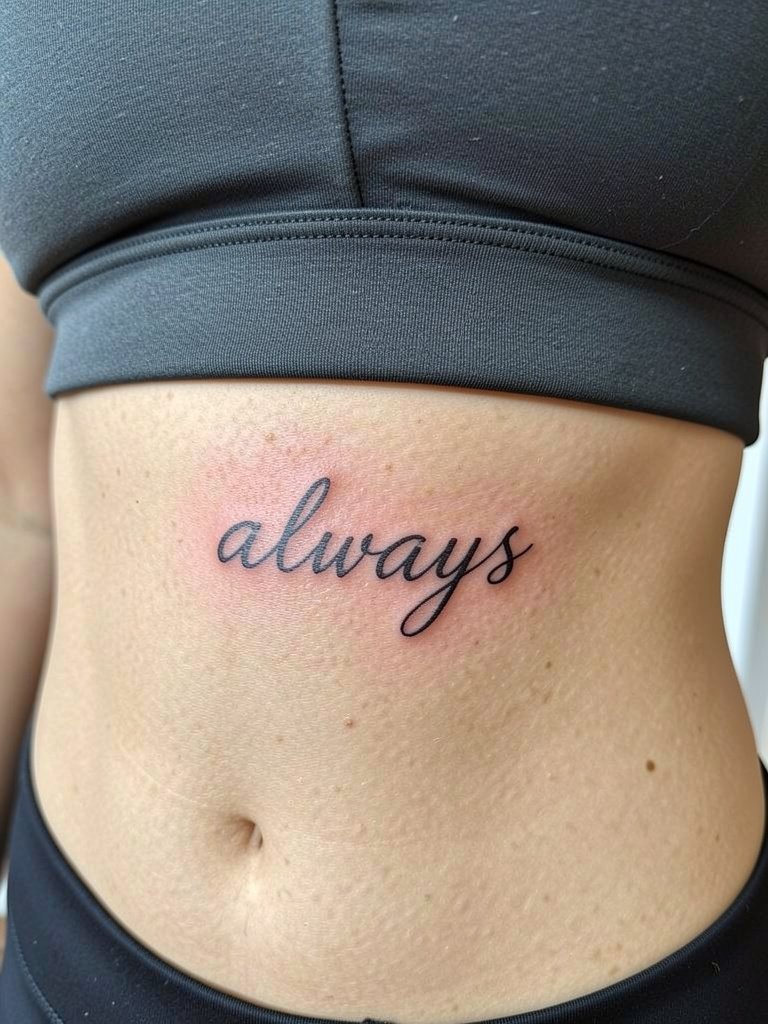
Script on the ribs looks intimate and reads well in photographs when line spacing is respected. One controversy here is fine line on the ribs where one group says the skin stretch blurs lines within two years. Another group says that with slightly wider spacing and proper needle depth the script settles fine. Both perspectives exist. Rib sessions are higher on the pain chart and usually need an hour or more depending on length. Wear a sports bra or bralette that can be moved to give access without exposing more than necessary. For after-session clothing pick a soft bralette for comfort.
14. Small Constellation Dots on the Outer Forearm

Constellations are ideal for tiny collaborative pieces because dots and lines maintain a graphic look at small sizes. The mistake is making the dots too close together which merges into a blob as the tattoo heals. Space dots at least two to three millimeters apart on the forearm. For session wear a soft cotton tee and for showing the piece use rolled cuffs and a minimal jewelry set such as minimal jewelry set that keeps attention on the pattern.
15. Geometric Semi-Colon Pair, Inner Wrist

Semi-colon tattoos are personal and geometric framing helps them read at small scale. Inner wrist is an easy spot to show but beware of thin internal detail that disappears. Book a consultation with clear scale references and confirm the triangle opening is wide enough to avoid closure over time. For reveal styling pick a slim cuff bracelet on the opposite wrist or a soft cotton tee like soft cotton tee that frames the inner forearm.
16. Mismatched Related Icons, Forearm and Shoulder

Mismatched but related designs let each friend keep individuality while reading as a set when the pieces share scale and linework. A common error is mismatching scale so one looks like a patch beside the other. For upper arm and forearm pairings match the thickness of the strokes and the visual weight. The shoulder reveal pairs well with racerback tops and sleeveless styles such as sleeveless tee so the shoulder piece shows cleanly.
17. Tiny Knot or Infinity Line on the Side of the Hand

Hand placements are expressive but high-wear. The side of the hand and webspace are especially vulnerable to daily friction and soap. If you want this area, increase lineweight slightly and plan on touch-up in a year or two. The session tends to sting more than forearm work, so plan recovery days where you limit heavy hand use. Minimal ring choices work best for showing the area, for example a thin band ring so the knot stays visible.
18. Floral Half Pair, Ankle and Behind Ear

Splitting a floral motif across two different placements gives each person a unique visual without losing the pair idea. Match the lineweight and floral style so the two pieces still read related. Behind the ear needs extra consideration for hair coverage and touch-up access. For session prep wear clothing that exposes the ankle naturally and use hair clips for the mastoid area. For showing off, sandals and tucked hair make the pair obvious, try ankle strap sandals to highlight the ankle blossom.
19. Minimal La Palma Line, Collarbone Groove
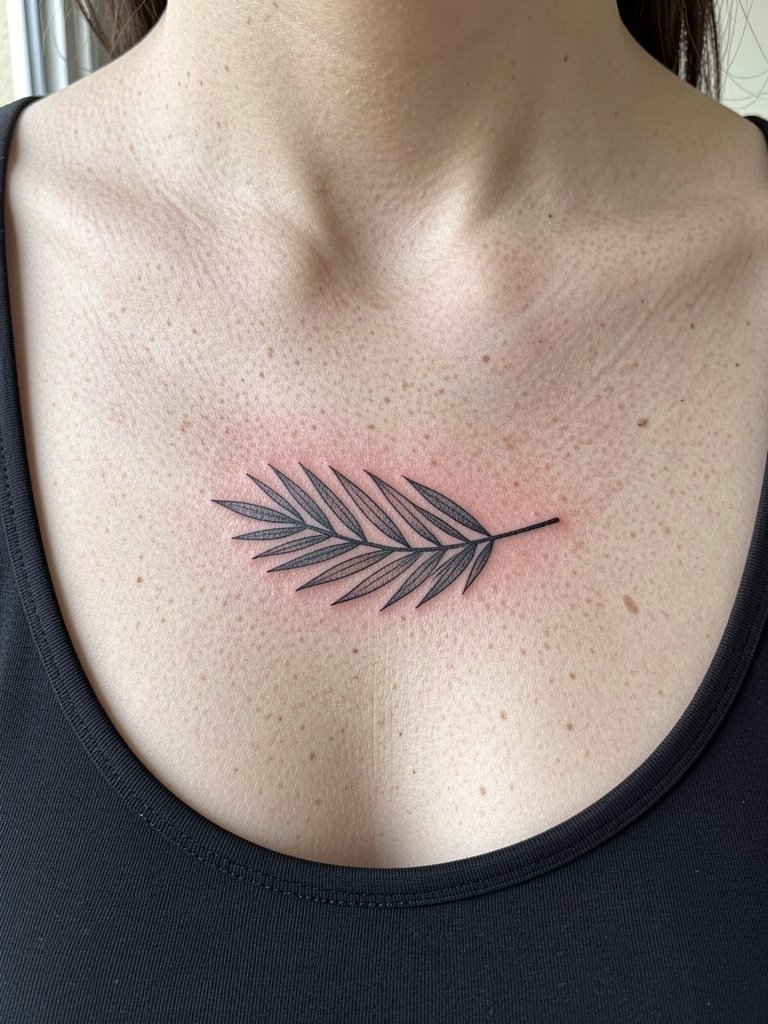
A single horizontal botanical line sits well under the collarbone where it can be both discreet and visible. The mistake is making the leaf too pointillistic when the chest skin moves and stretches. Instead choose a continuous clean line and keep the width moderate. For clothing, scoop necks and off-shoulder tops frame the piece, try a scoop neck tank for a refined reveal.
20. Small Compass Dotwork, Outer Forearm
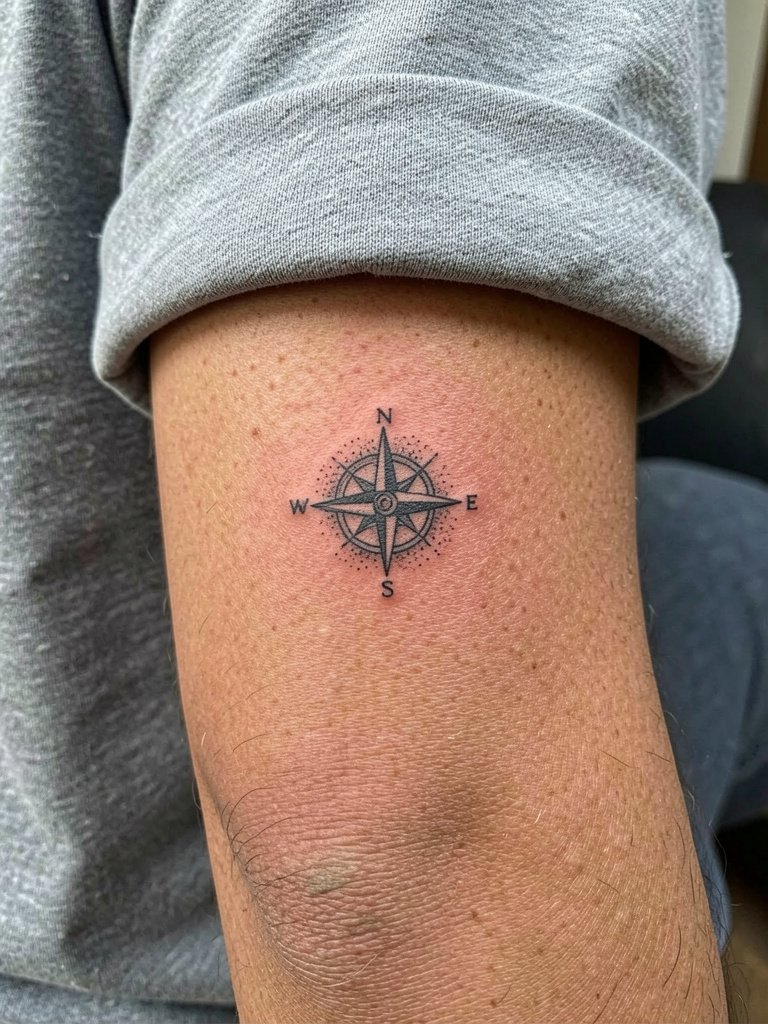
Compass motifs symbolize guidance and pair nicely for friends who travel together. Dotwork centers look crisp on the forearm if dots are spaced properly. A common mistake is over-densifying the dotwork in a small compass, which softens the contrast. Bring a healed dotwork photo to the consult so the artist can match spacing. For showing, a rolled sleeve with a oversized tee creates a casual frame.
21. Half-Mandala Wrist Band

Mandala bands look ornate but need scale to avoid muddiness. A half band on the wrist gives the mandala aesthetic without wrapping fully and it heals more predictably. The mistake is packing in too many petals. For comfort wear a short sleeve tee and consider a thin cuff on the opposite wrist to balance the visual weight, such as a slim cuff bracelet.
22. Crescent Moon Match on the Ankle
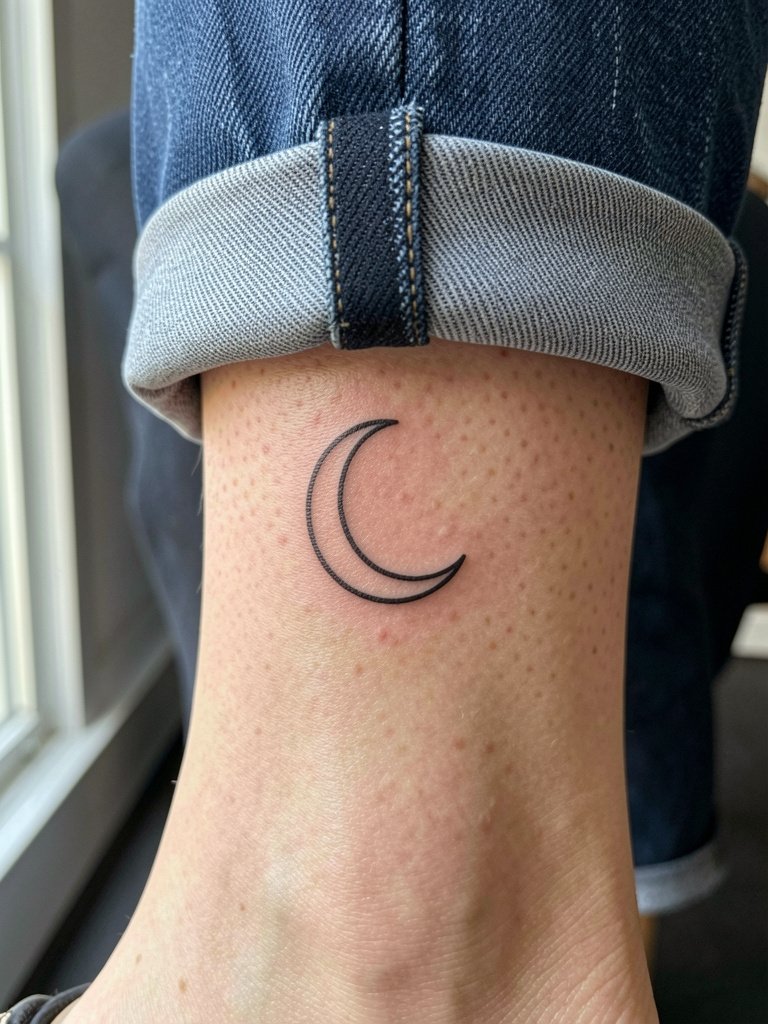
Crescent moons are a durable, recognizable option at ankle scale. Keep the curve bold enough to resist softening from shoe and sock friction. Ankle sessions are short and the area tolerates moderate discomfort. For reveal pair the piece with sandals or cropped jeans and a cropped straight jeans styling choice that makes the motif visible.
23. Tiny Wave Line, Upper Arm
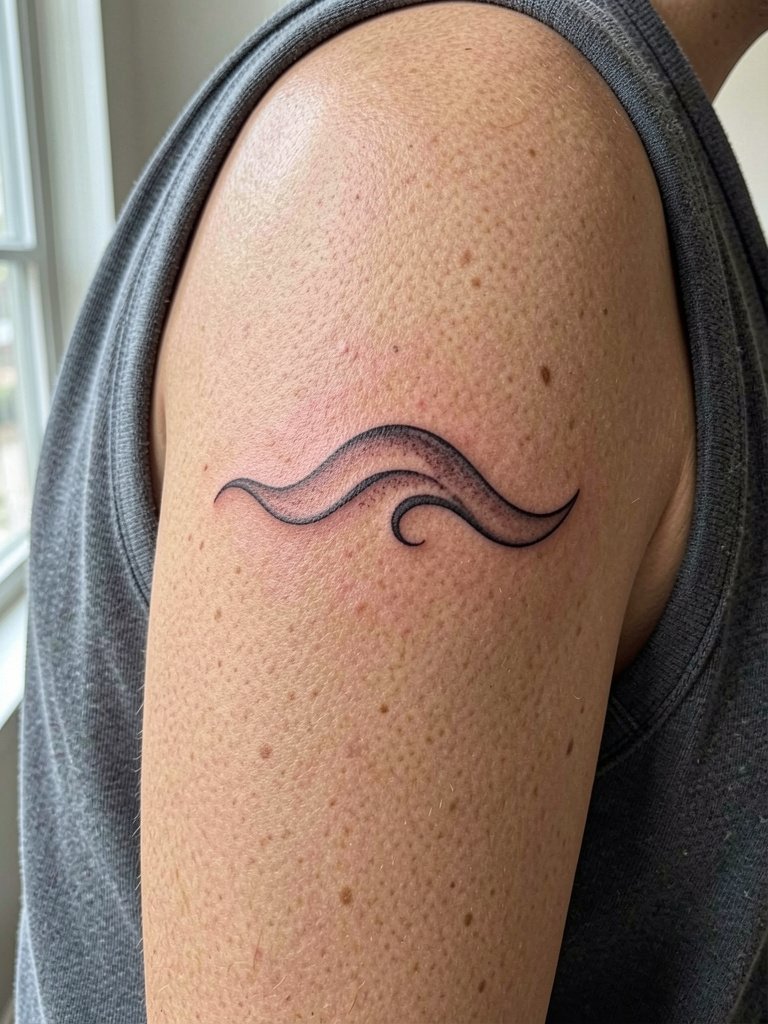
A single wave line is a small, resilient symbol for friends who share beach origins or travel. Upper arm placement keeps the motif readable and less prone to abrasion. The common mistake is trying to cram multiple waves into a micro area. Keep the line continuous and bold enough to stay crisp. For showing, racerback tanks or sleeveless shirts highlight the deltoid and a racerback tank suits the reveal.
24. Tiny Paw Print, Ankle or Foot

Paw prints are playful and simple. Foot tattoos heal differently due to footwear contact, so pick an ankle or top-of-foot placement with lower rubbing and expect touch-ups in one to three years. A common error is choosing the sole or too-low placement that gets constant pressure. For show-off choices wear sandals or midi skirts, and consider midi skirt casual looks for warm weather.
25. Matching Starburst, Outer Forearm
Starbursts are a crisp minimalist option that stands out at small sizes because of the radial contrast. Make each ray slightly thicker than a single-needle hairline and avoid interior micro-dot fills. The outer forearm holds detail well, and the session time is typically short. For styling try structured shirts or rolled sleeves and a oversized tee to set off the piece.
26. Coordinate Pairing, Inner Forearm and Ankle
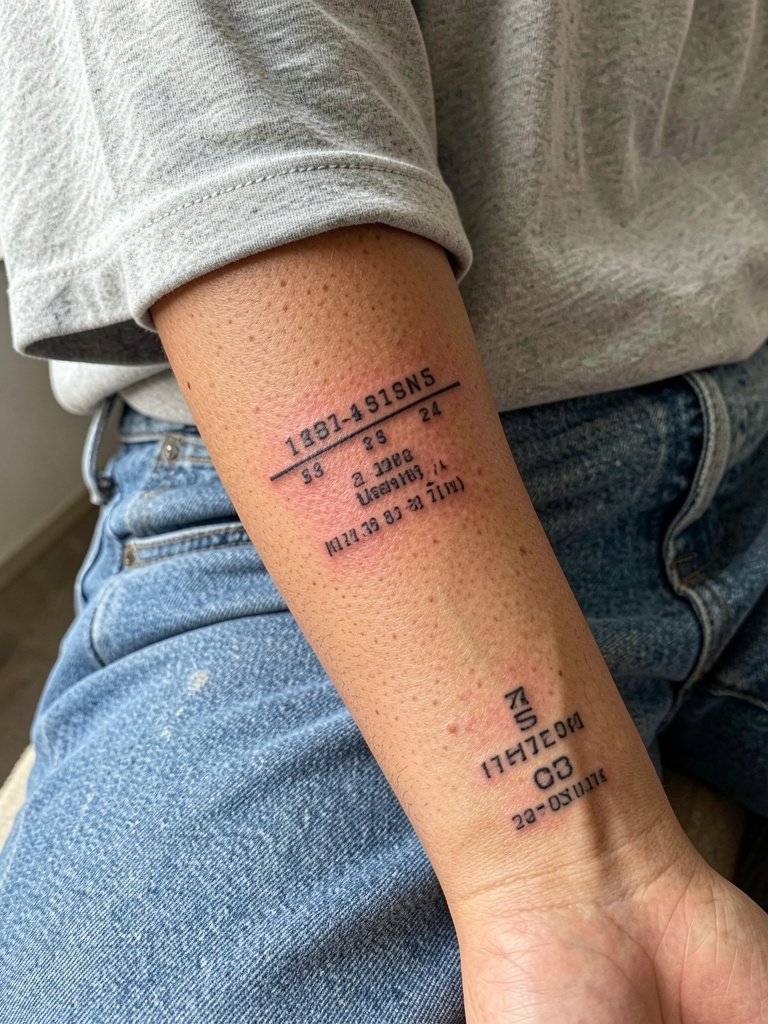
Coordinates are precise and durable as long as the lettering is bold enough to survive skin movement. On the inner forearm use a slightly larger point size than on the ankle so both read at typical viewing distances. Bring the exact numbers to your appointment typed in a reference image so there is no transcription error. For show-off pairing wear cropped jeans and a soft tee for forearm visibility. A pair of cropped straight jeans helps reveal ankle coordinates.
27. Tiny Lock and Key Complementary Pair

Lock and key pairs read as a clear complementary set and let each person keep an element. The key detail needs negative space so teeth do not blur into a solid. Wrist and inner forearm pairings balance visibility and longevity. For session comfort wear a loose tee and bring two reference images to confirm scale. When showing the piece, a slim watch or bracelet on the opposite wrist complements the lock, try a thin stack bracelet on the other arm.
Frequently Asked Questions
Q: How do I choose identical versus complementary friendship tattoos without regret?
A: Artists split on this, and both camps have reasons. One group says identical tattoos avoid comparisons and feel unified. The other group says complementary designs let each person keep individuality while still forming a visual pair. Think about whether you value exact match for clarity or a paired concept that feels more bespoke, and pick scale and placement that make both options read cohesive.
Q: Where can I find real healed examples and local artists who do tiny friendship symbol work?
A: Search social platforms with hashtags like #friendshiptattoo and #minimaltattoo and add your city name to find local portfolios. Tattoodo and similar directories let you filter by style and placement to see healed work. Reddit tattoo threads are useful for peer-shared healed photos when you want to compare how certain lineweights age on different skin tones.
Q: Will a tiny friendship tattoo on my wrist blur fast and what are realistic touch-up timelines?
A: Tiny wrist pieces live in a high-friction zone, and single-needle hairlines are the most at-risk for blur. If you choose slightly wider line spacing and a bolder outline the piece can hold well for two to five years before a touch-up becomes helpful. Expect higher-wear areas like fingers and ankles to need maintenance more often.
Q: What should I wear to my appointment for a collarbone or sternum placement?
A: For collarbone or upper chest pieces wear a tank top or wide scoop-neck shirt so the artist can access the area without you changing completely. For sternum work a fitted sports bra or bandeau that stays in place gives coverage while giving the artist access during the session. Comfortable, soft fabrics reduce irritation after the appointment.
Q: Do black ink or soft color options age better for friendship symbols?
A: Black ink generally holds contrast longer on small motifs, so fine black linework with strategic negative space tends to read cleaner over time. Soft color accents can add personality, but they require more saturation at the time of tattooing and sometimes earlier touch-ups depending on placement and sun exposure.
Q: How painful are the common placements featured here and can numbing cream help?
A: Pain depends on placement. Fingers and ribs rank higher on most pain charts while outer forearm and shoulder land lower. Topical numbing cream applied according to instructions can reduce discomfort for short sessions, and pacing the appointment with brief breaks helps for areas that sting more.
Q: Can friendship tattoos still feel appropriate if the relationship changes later on?
A: Choosing symbol-based designs instead of names or dates helps the tattoo remain personally resonant without tying it to one specific relationship label. Select motifs that feel sustainable visually, and consider placements you can cover easily if you want privacy in the future.
