
A lot of back tiger tattoos trending on reels look amazing on day one and then soften into a muddy portrait after a year. Bold contrast and smart composition are the fixes most artists recommend when you want detail that still reads from across a room. Below the skin-level hype you will find ordered options that honor body flow, age well, and include wardrobe tips so the finished piece fits how you live.
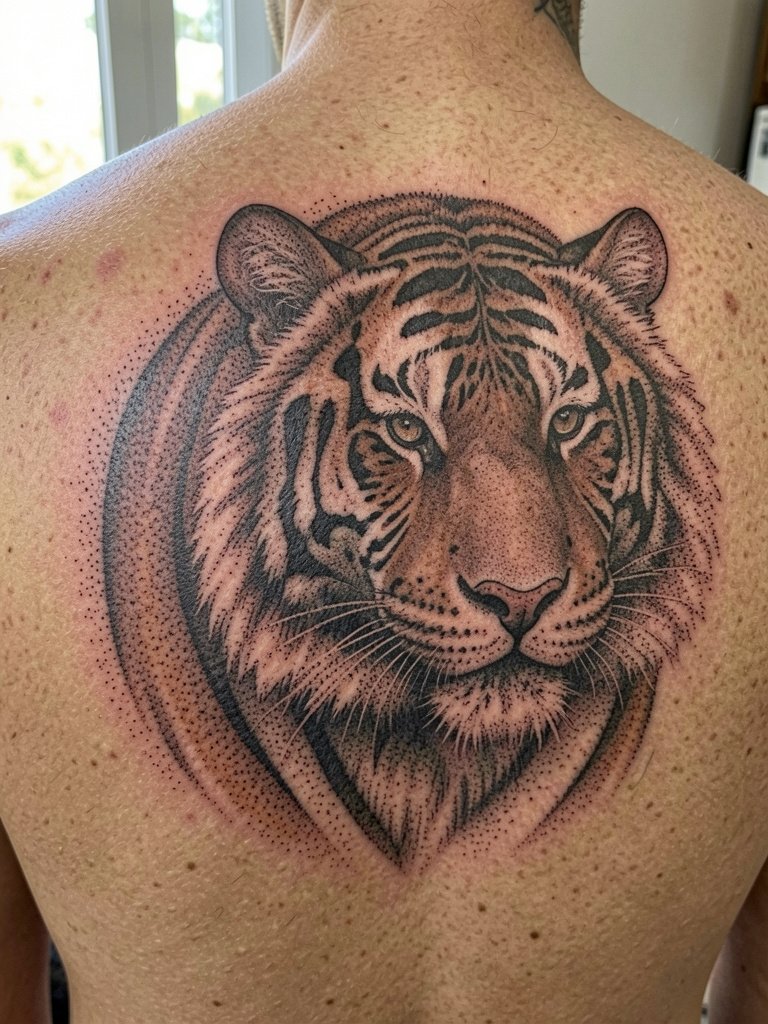
1. Full Back Realistic Tiger Portrait
A full back realism portrait gives the artist room for facial detail and fur texture. One camp argues color adds life but requires more touch-ups over the years. The other camp prefers black and gray for longevity and readability as the piece settles. If you want the realism route, bring healed animal portraits that match the lighting you like and ask how the artist maps the eyes to the spine line so symmetry stays true. Expect multi-session work across the upper, mid, and lower back and plan touch-ups at the two to four year mark for optimal saturation.
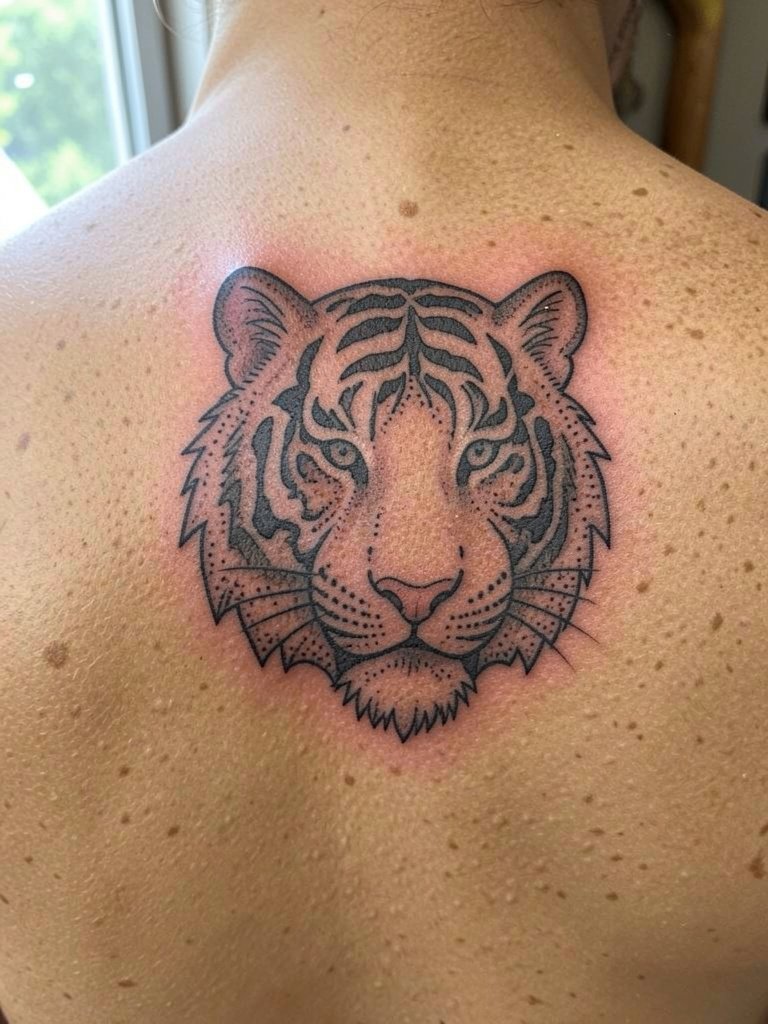
2. Tiger Head Between the Shoulder Blades
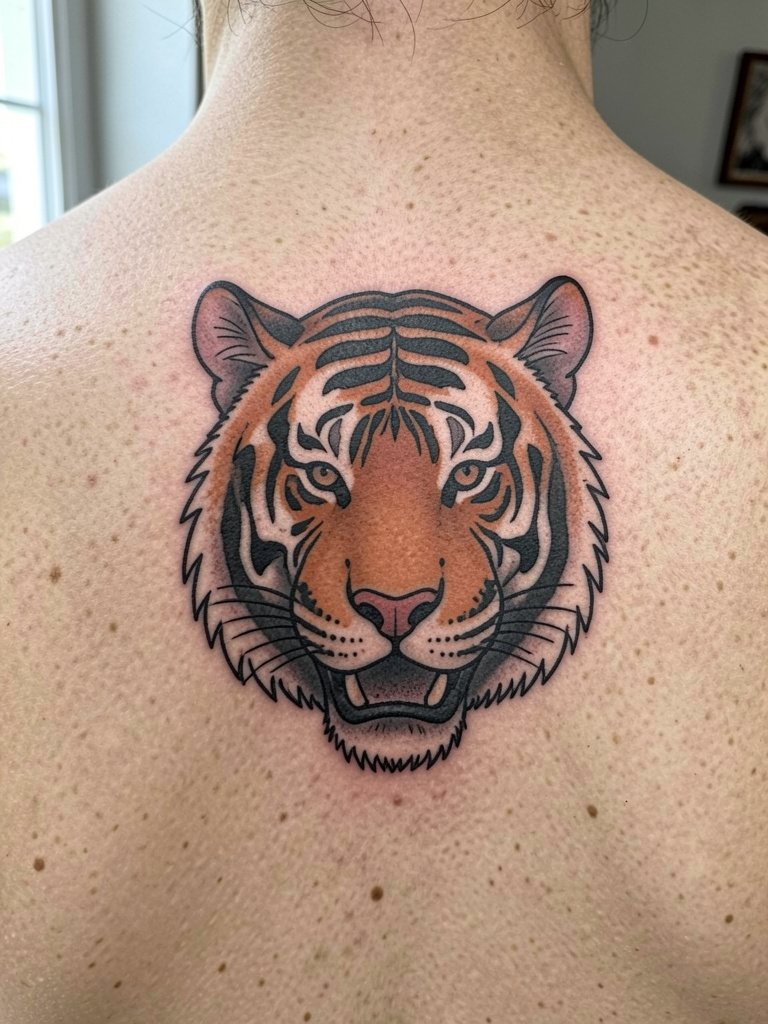
A centered head between the shoulder blades reads balanced without covering the whole back. Ask about linework weight so the stripes stay crisp after healing. A common mistake is picking a tiny reference and expecting portrait detail at a small scale. For session wear, pull on a loose button-down shirt that the artist can slide down briefly without rubbing the fresh ink. Expect low to moderate pain and one to three sessions for a medium-sized piece.
3. Roaring Tiger With Open Mouth
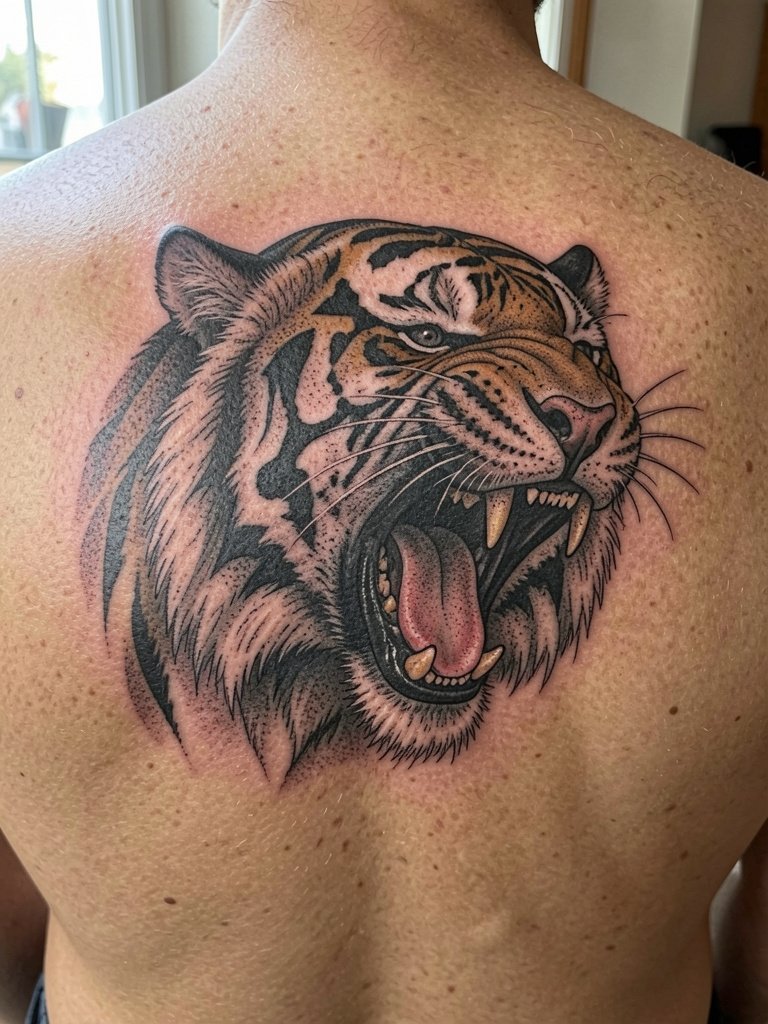
A roaring head gives instant energy and dramatic negative space around the jaw. Tell your artist you want the mouth to read at a distance by increasing contrast in the gums and teeth areas, not by adding tiny line detail that will blur. The usual aging mistake is softening the teeth into a dark block. During the session you will feel more sting near the shoulder blades than the fleshy upper back. Show-off pairing: crew neck tees highlight the top of the design, and a men's crew neck tee keeps the silhouette visible.
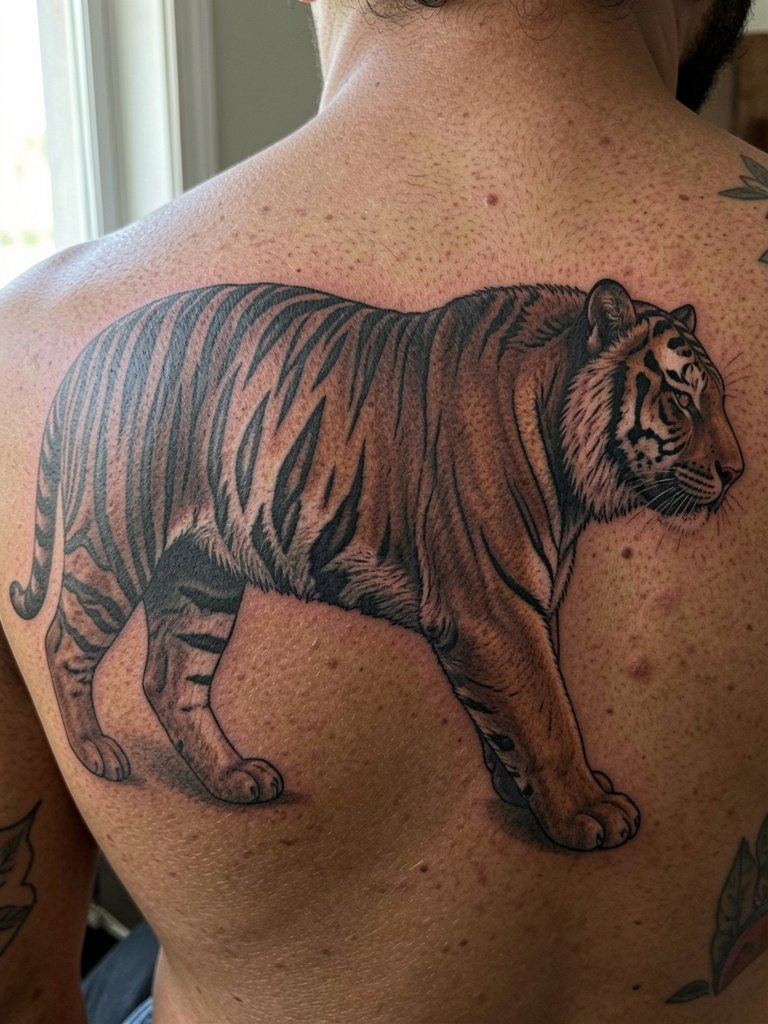
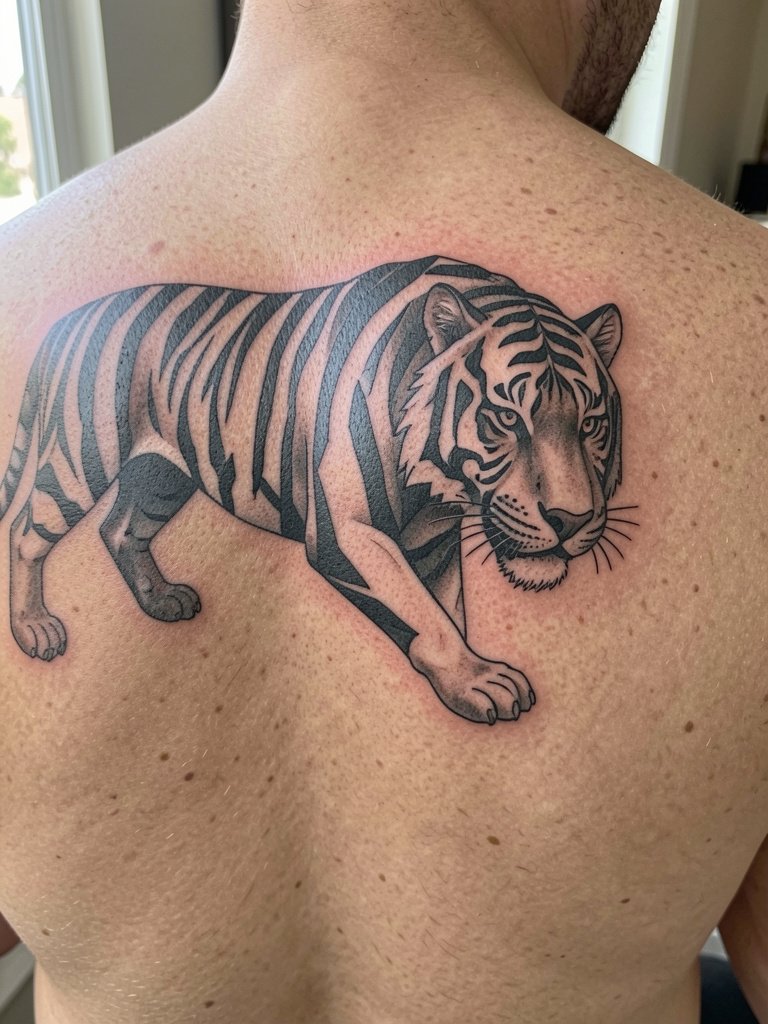
4. Tiger Prowling Across the Shoulder Blades
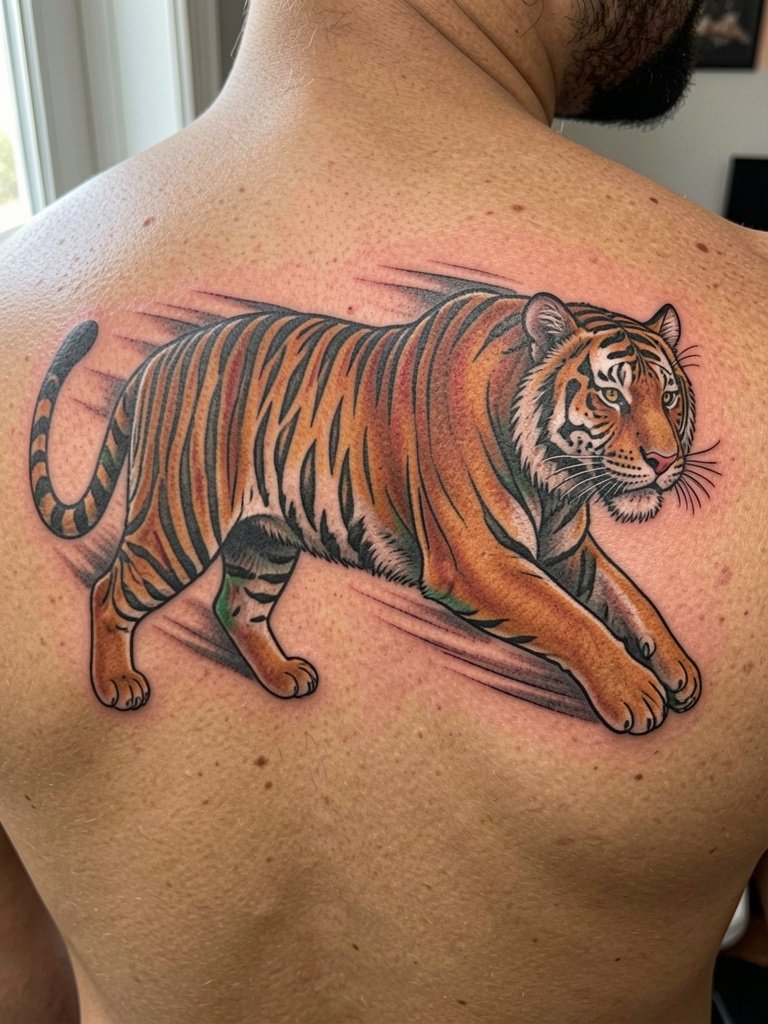
A horizontal prowling pose uses back anatomy for natural motion and avoids fighting the spine. Ask the artist how the tiger's shoulder and hip will align to your scapula so the stride reads correct when you move. One avoidable error is forcing a centered frontal head onto a horizontal flow, which flattens the composition. For the appointment, wear a zip front hoodie or a button-up so the artist can get unobstructed access without tugging at fabric.
5. Tiger With Jungle Foliage Framing
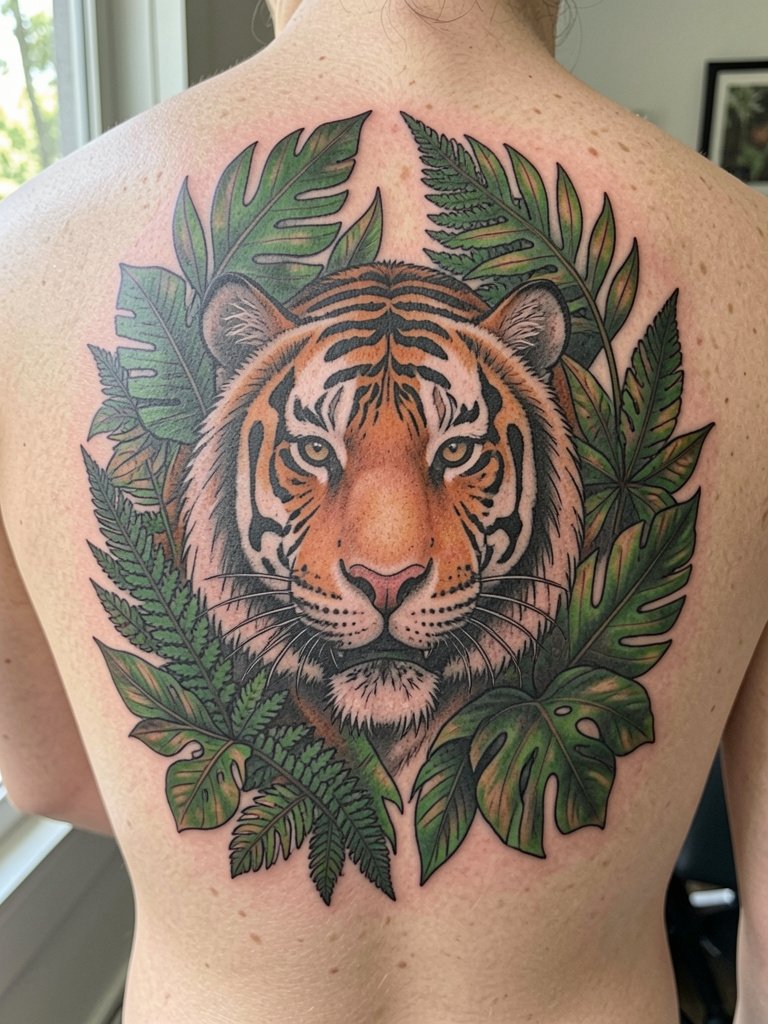
Adding foliage gives context and helps fill negative space without random dots. During consultation bring both head and foliage references and ask the artist to map where leaves will overlap shoulder blades and ribs. A typical mistake is overcrowding the leaves so they compete with the tiger. Plan for three to six sessions depending on color saturation. For showing off the finished piece, open camp shirts and tank tops frame the top of a jungle-framed back tattoo well.
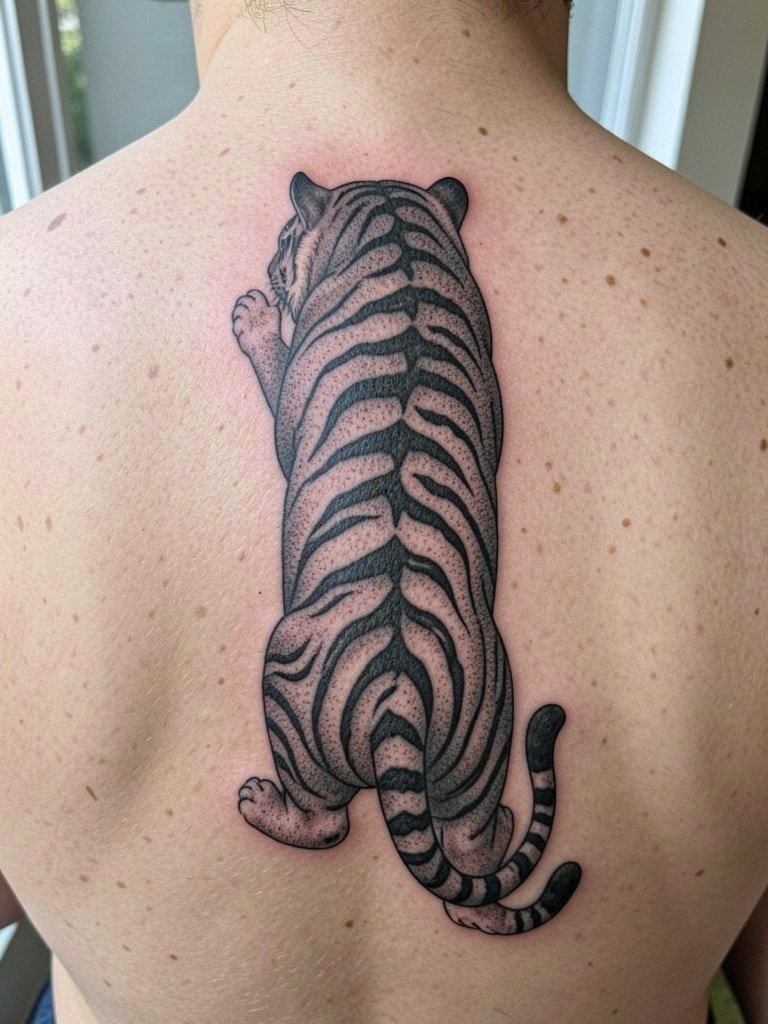
6. Blackwork Tiger Silhouette
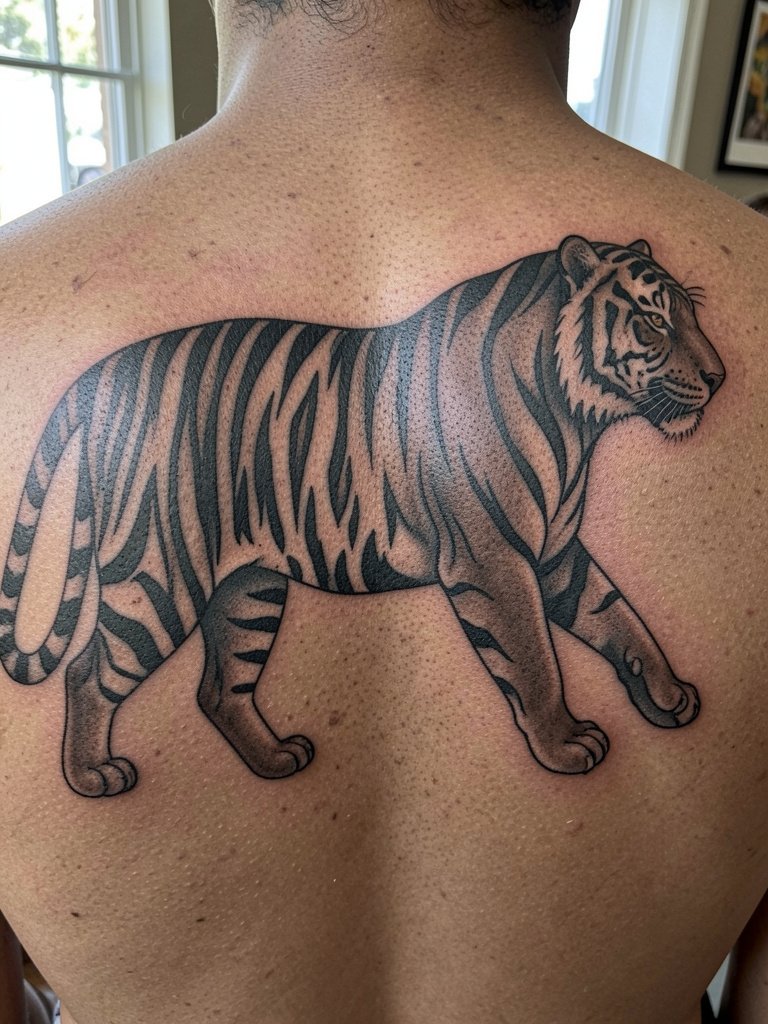
Blackwork silhouettes age predictably and stay legible from a distance. One side argues that realism on a full back is the best use of the canvas and demands fine shading and fur texture. The other side maintains that solid blackwork or simplified silhouettes avoid early blurring and long-term muddiness. If you prefer the silhouette, tell the artist you want edge definition and negative space stripes rather than tiny interior detail. Recovery is straightforward and touch-ups are usually limited to edge crisping after the first year.
Pre-Session Essentials
The first six ideas vary in scale and session length, so a few practical items smooth out the chair day and the first 48 hours.
-
Sensitive transfer paper kit. Helps the artist preview placement on the shoulder blade curve before heavy shading, which is useful for the centered and prowling compositions above.
-
Long-lasting topical numbing gel. Applied per instructions it eases upper-back sessions without compromising linework on more sensitive spine-adjacent zones.
-
Flexible protective tattoo film roll. Keeps large back pieces clean during the first showers and prevents straps from sticking to healing ink.
-
Fragrance-free saline wound wash spray. A gentle rinse option for big surface areas where traditional soaping can be tedious.
-
Aquaphor healing ointment. A widely used mainstream option for the initial thin layer in the first days, especially on heavier shading zones.
7. Tiger Eyes Only Centerpiece
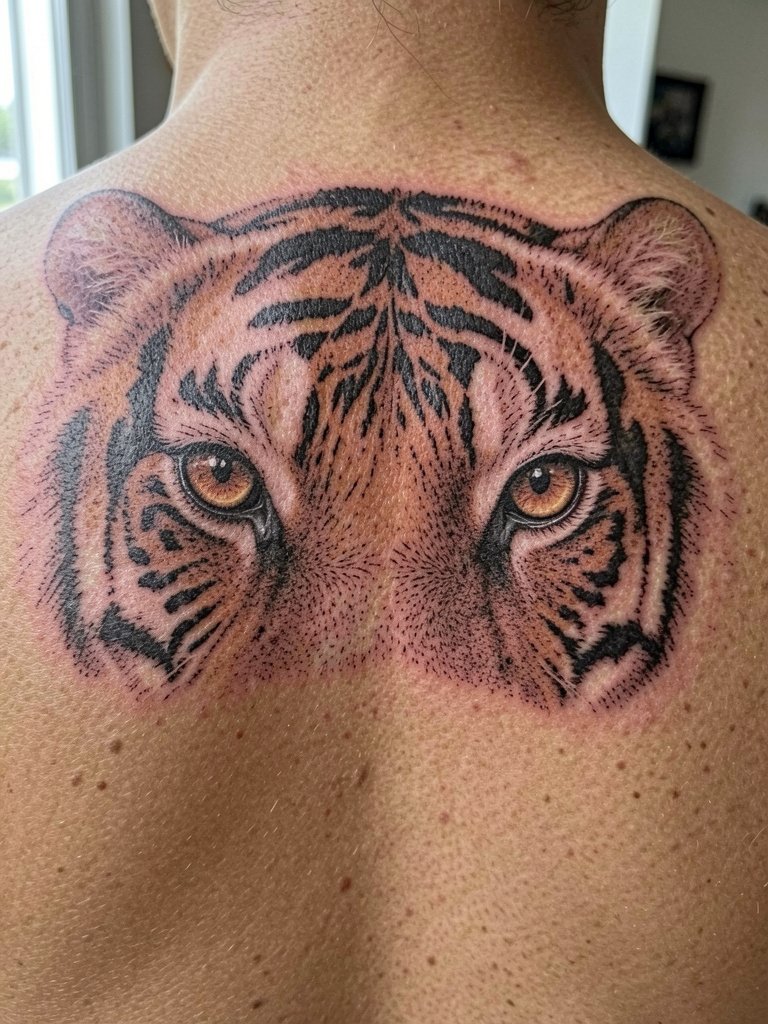
Focusing on the eyes creates a dramatic, less literal approach to a back centerpiece. Ask the artist for healed close-ups of eye work so you can judge pupil and iris contrast. A common error is shrinking the eyes too small, which loses impact after healing. This placement favours heavier contrast and clear linework to prevent blur. For wardrobe, a men's sleeveless tank shows the eyes and upper trapezius cleanly.
8. Tiger With Smoke, Clouds, or Mist

Atmospheric fillers bridge portrait elements and keep the negative space cohesive. Specify to the artist how much softness you want in the mist so stipple shading or whip shading is used intentionally. Missteps include too much soft shading next to tiny facial detail, which causes the face to lose definition. Expect two to six sessions depending on scale and whether you want color. For session day, wear a loose oversized tee that you can pull down without abrasion during breaks.
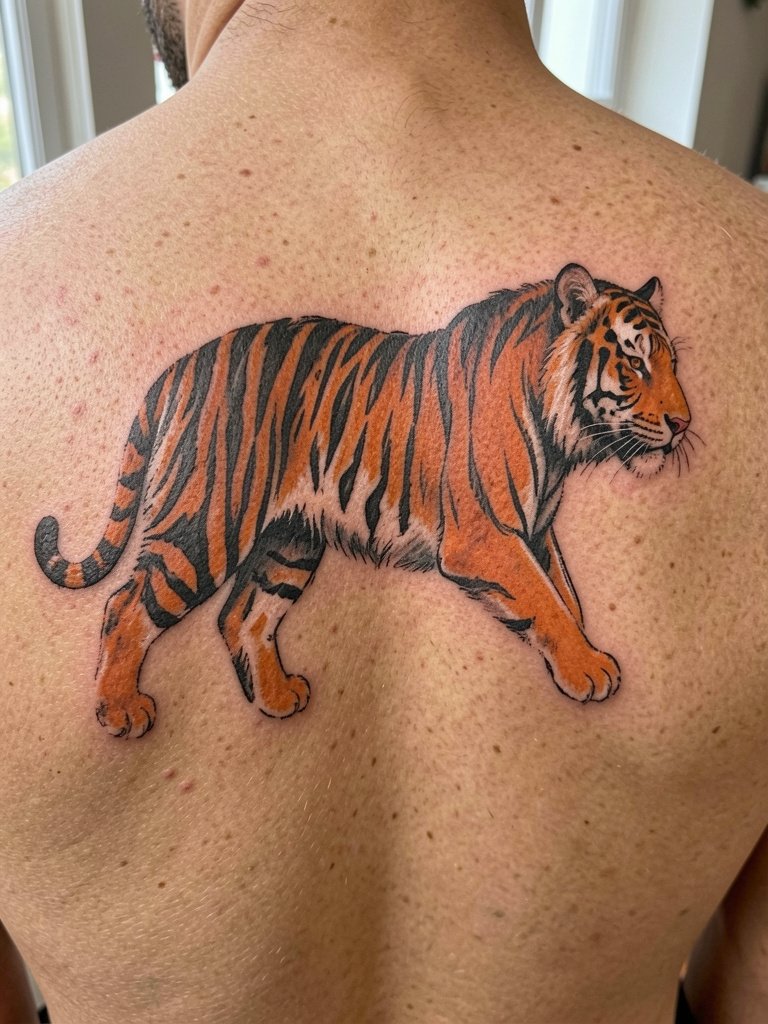
9. Traditional Tiger With Bold Striping
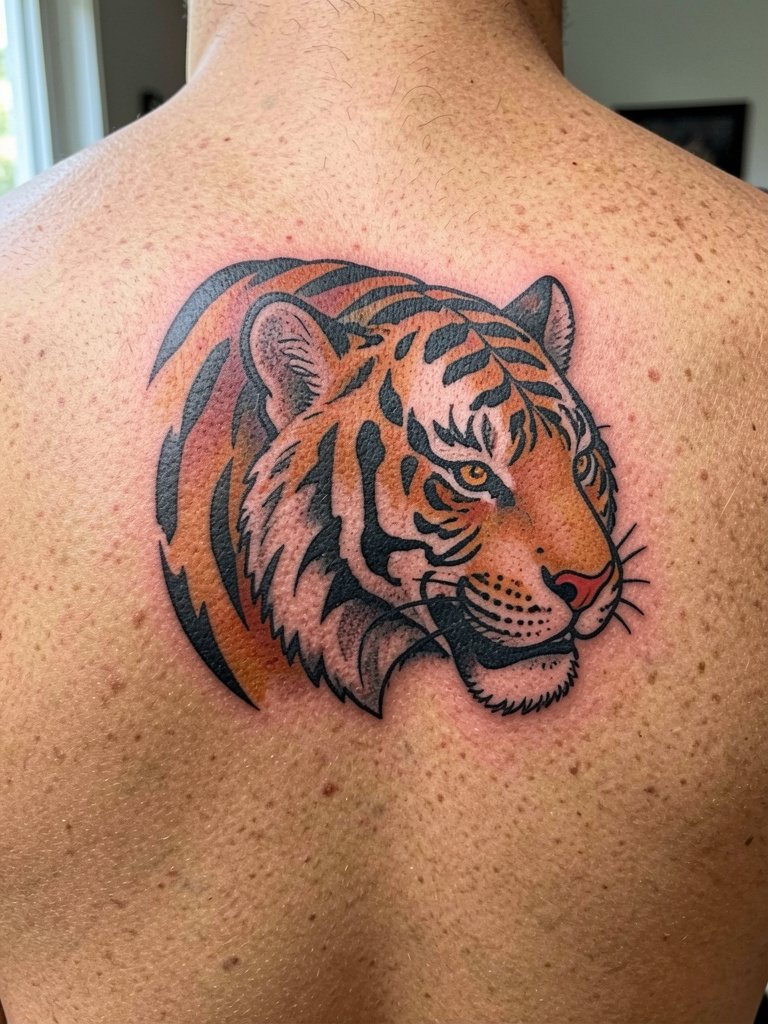
Traditional styling depends on strong linework and saturated color blocks that age into legible shapes. When booking, request portfolio shots of healed traditional pieces rather than fresh work only. A common pitfall is choosing washed-out reference colors which need stronger saturation to age well. For wearing the finished piece, fitted crew neck shirts keep the outline visible and let the stripes read from a distance.
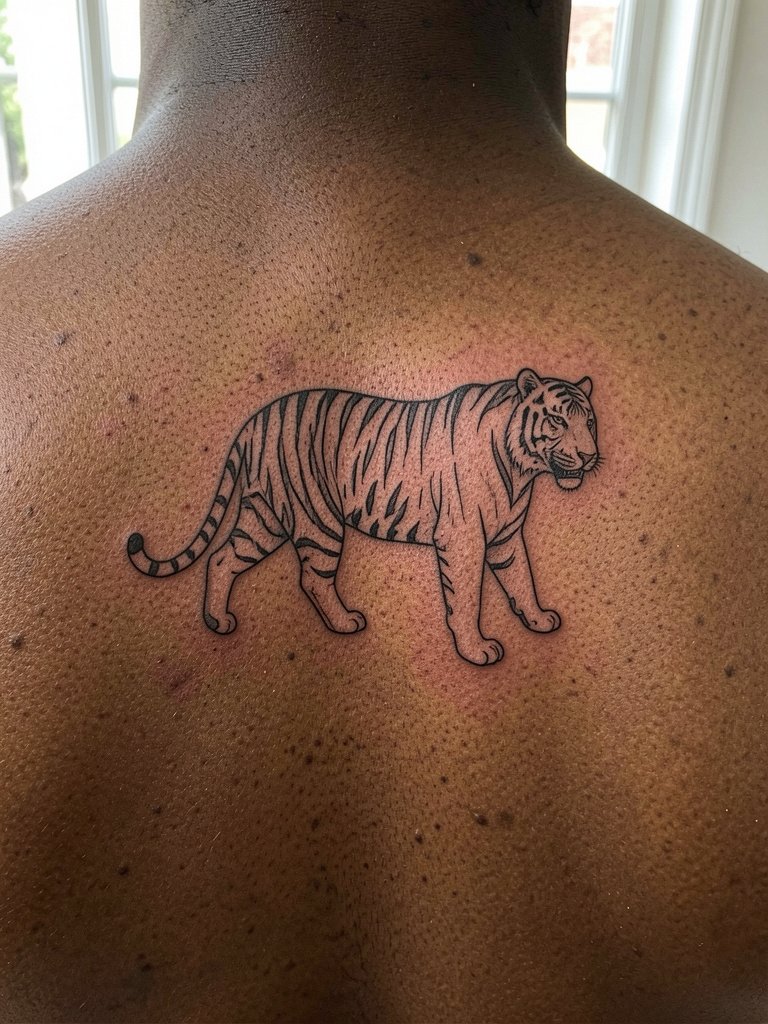
10. Side-Profile Tiger Across One Side
A lateral profile uses the natural length of the back for a streamlined silhouette. Clarify with your artist which anatomical landmarks will be used for the nose-to-tail line so the pose looks natural when you twist. Mistakes arise when artists place the muzzle too close to the spine, which distorts with movement. Session sensations are milder on the lateral back but more intense near the rib margin. For after sessions, loose front-button shirts help avoid rubbing.
11. Tiger Framed by Geometric Elements
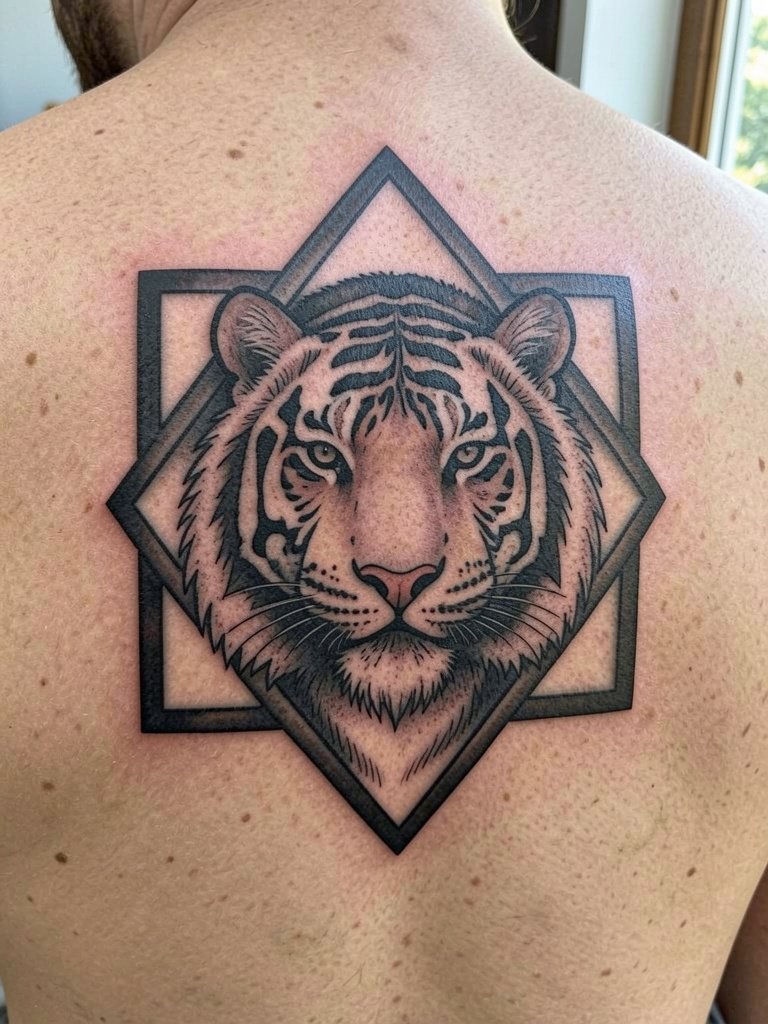
Geometry can organize a large composition and modernize a traditional subject. Ask for mockups showing how the shapes will fall across the shoulder blades so symmetry is maintained. A common error is using too-tight geometry that conflicts with muscle curvature. For showing off the edged framing, a fitted crew neck or a shallow V-neck keeps the frame visible without distraction.
12. Tiger and Moon or Celestial Motif
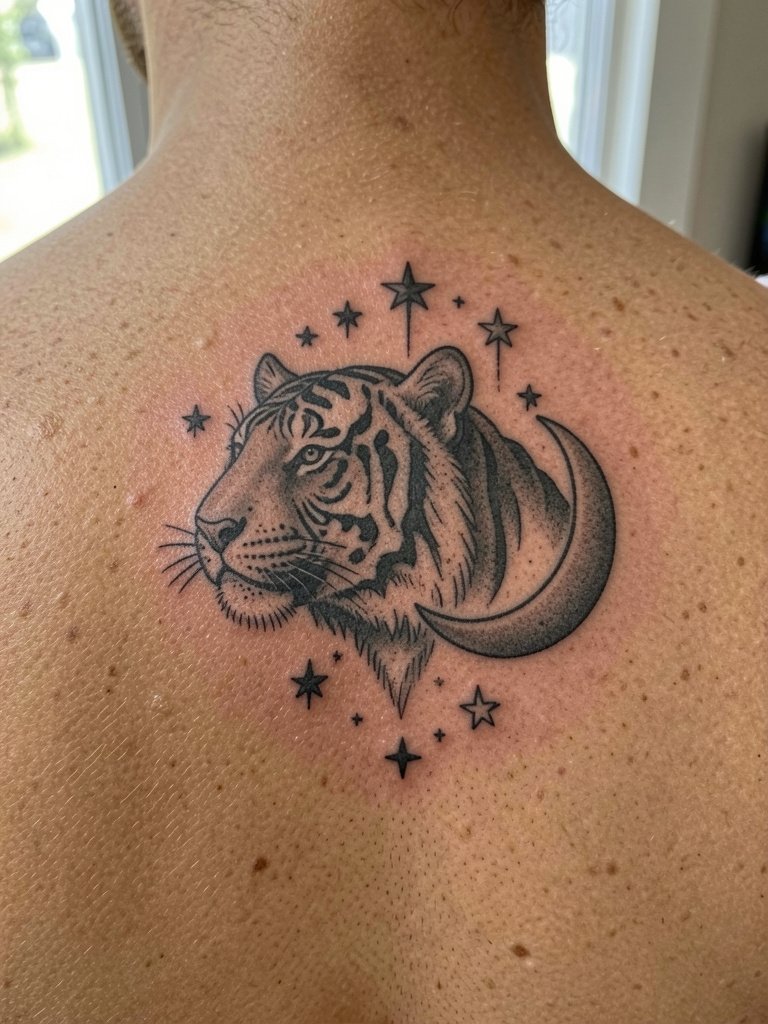
Pairing a moon or celestial elements adds narrative contrast to predator imagery. Make clear whether you want the moon sized to dominate or to sit as a subtle accent so the artist balances scale. A mistake is shrinking the moon so small it reads as a smudge after healing. For the session, layer a loose button-up or a lightweight button down shirt that can be shifted without friction on healing skin.
13. Chest-to-Back Wraparound Concept

Wraparound projects use body contours for a custom feel and are less likely to look like pasted-on art. Discuss how the chest-to-back transition will age, especially across the pectoral stretch zones. Avoid copying a flat flash meant for a flat canvas. For the appointment, wear a shirt that offers full front access like a button-up so the artist can plan the wrap without tugging.
14. Minimal Tiger Linework on Upper Back
Minimal linework fits men who want a tiger motif with less commitment, but single-needle work can fade on textured skin if done too small. Tell the artist you want slightly heavier line weight than a typical wrist script so the contour holds. A typical error is asking for micro detail that the skin will not support long term. For session comfort, a loose tank top that can be pulled down without rubbing the fresh ink works best.
15. Stipple-Shaded Tiger Portrait
Stipple shading gives texture without heavy gray wash and can keep edges readable. Ask the artist for healed dot work photos so you can judge density and contrast. The mistake is asking for dot density that merges into a blob at five years. During sessions expect longer needle time but lower surface trauma than heavy packing. For show-off styling, open camp shirts highlight the stippled gradients without competing colors.
16. Painterly Color Tiger Back Piece

Painterly color offers a softer, artistic vibe but requires maintenance for vibrancy. One camp values color for life-like fur, while the other favors black and gray for durability and long-term clarity. If you choose color, request a staged plan for saturation passes and annual check-ins. Sessions will be longer and often spaced to allow skin recovery between color layers. For evening wear, a dark open shirt can make colors pop under low light.
17. Ornamental Tiger With Decorative Fillers
Ornamental elements make a tiger feel bespoke and rare. Bring reference images that show both the ornament and animal so the artist can merge styles proportionally. A common mistake is over-ornamenting the face area which obscures expression. For session day, a loose tank top that slides down without pressure keeps the area clean during work.
18. Geometric Tiger With Negative Space
Negative space and geometry can give a modern pause to traditional subject matter. Be explicit about how much bare skin you want inside the shapes so the artist sizes elements to your shoulder width. A misstep is using tiny geometry that reads as noise after healing. This style often looks sharp under fitted shirts that trace the shoulder line.
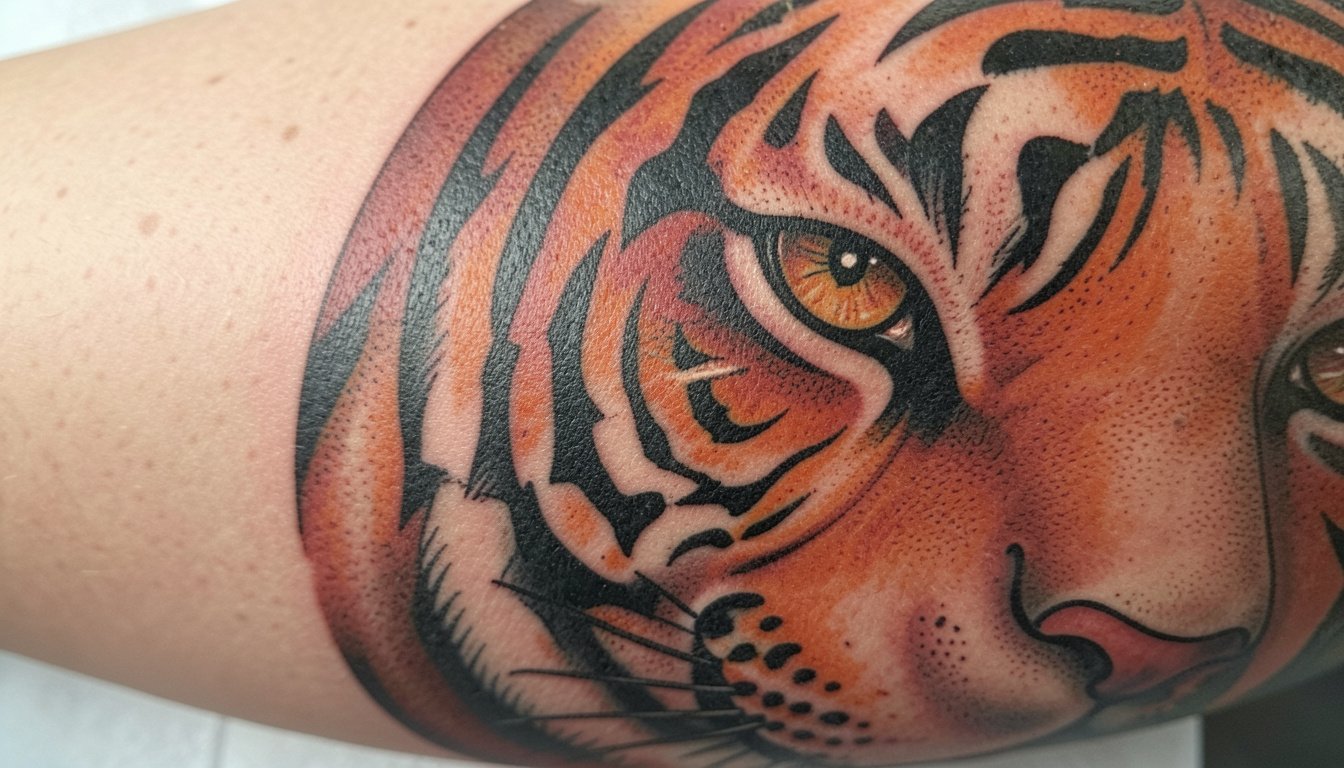
19. Black and Gray Realism With High Contrast
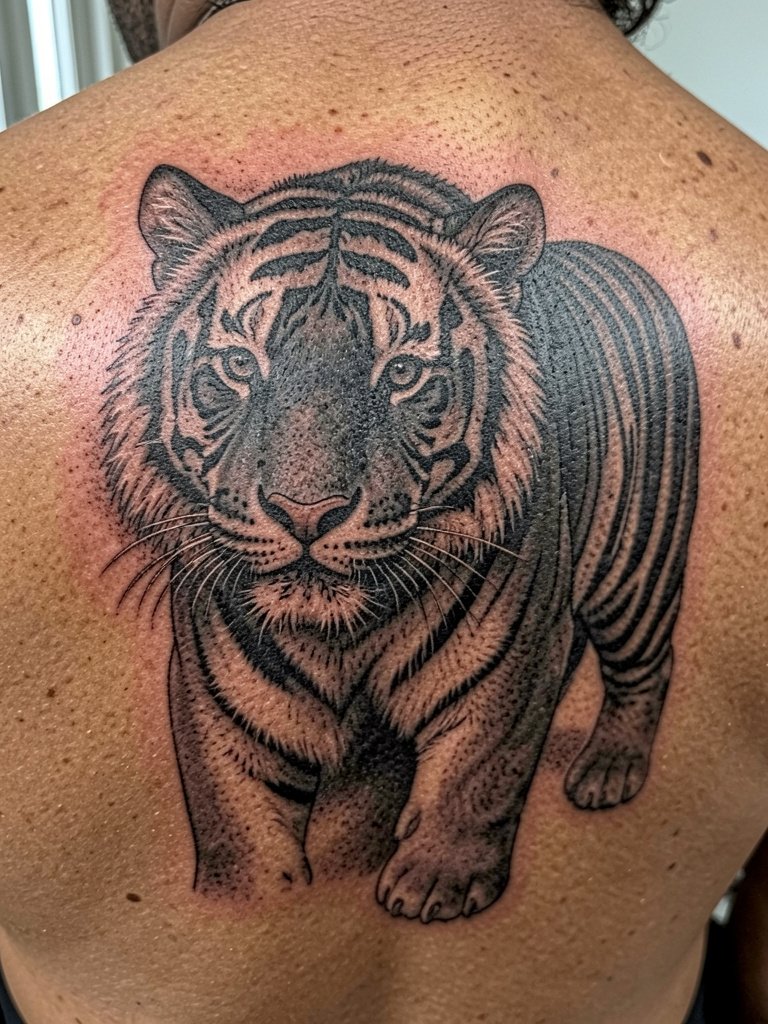
High contrast black and gray provides longevity and strong readability. Tell the artist you want the darkest blacks packed in the mane and the brightest skin breaks preserved around the eyes. A frequent error is undersaturating the darkest areas which age into mid-gray. For session clothing, a soft oversized tee that can be removed without scraping the back is the practical choice.
20. Neo-Traditional Tiger With Floral Accents
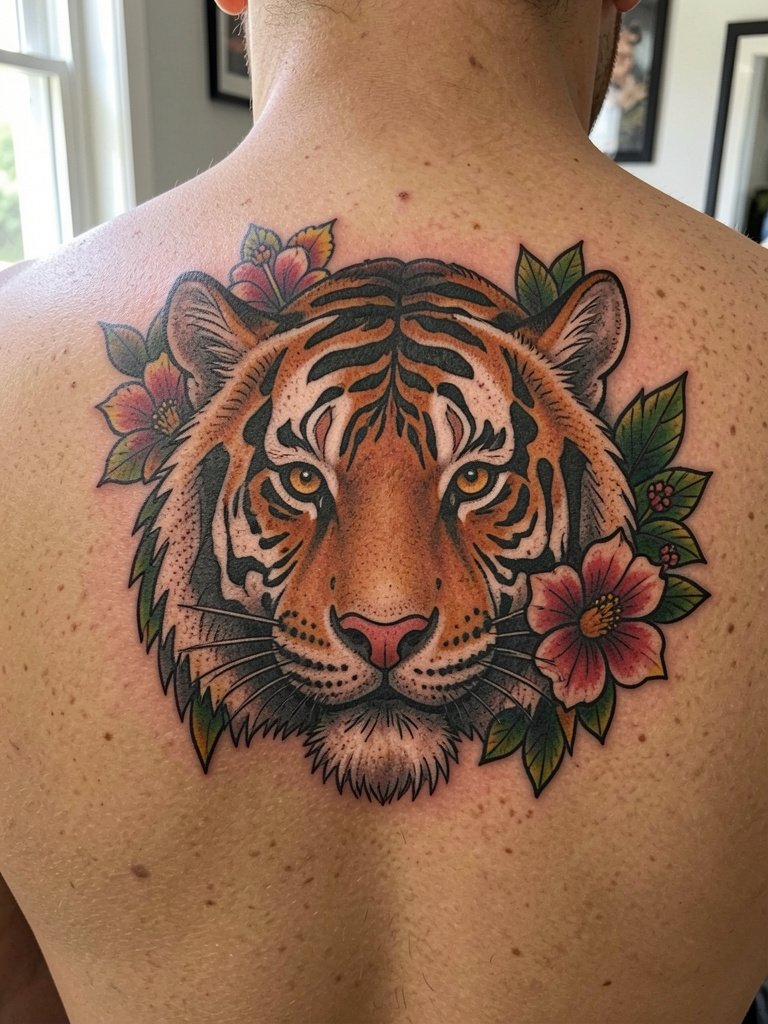
Pairing florals with a neo-traditional tiger tempers aggression and adds compositional rhythm. Ask how the flowers will be shaded so they do not compete with facial focal points. The usual mistake is picking too many floral types that create visual clutter. Fitted jackets that sit off the shoulder let floral accents peek without hiding linework.
21. Side-Flank Tiger Stretching Toward the Hip

Stretching designs need mapping for how the tiger will move with the hip and torso. Bring side photos of your body so the artist can plan where the shoulder, rib, and hip meet. Mistakes occur when the tail lands on a high-movement zone without compensation, causing early distortion. Session wear should be loose and low-rise if possible so the artist can access the lateral area easily. For showing off, low-rise waistlines and cropped shirts reveal lateral flow.
22. Painterly Black and Orange Contrast
Using restrained orange with bold black brushwork hits the balance between realism and graphic punch. Ask for a staged plan so color saturation is layered intentionally instead of packed in a single session. A common error is over-blending color into shadow areas that should remain crisp. For apparel, dark open shirts let the orange pop without distracting from black linework.
23. Mandala-Framed Tiger Head
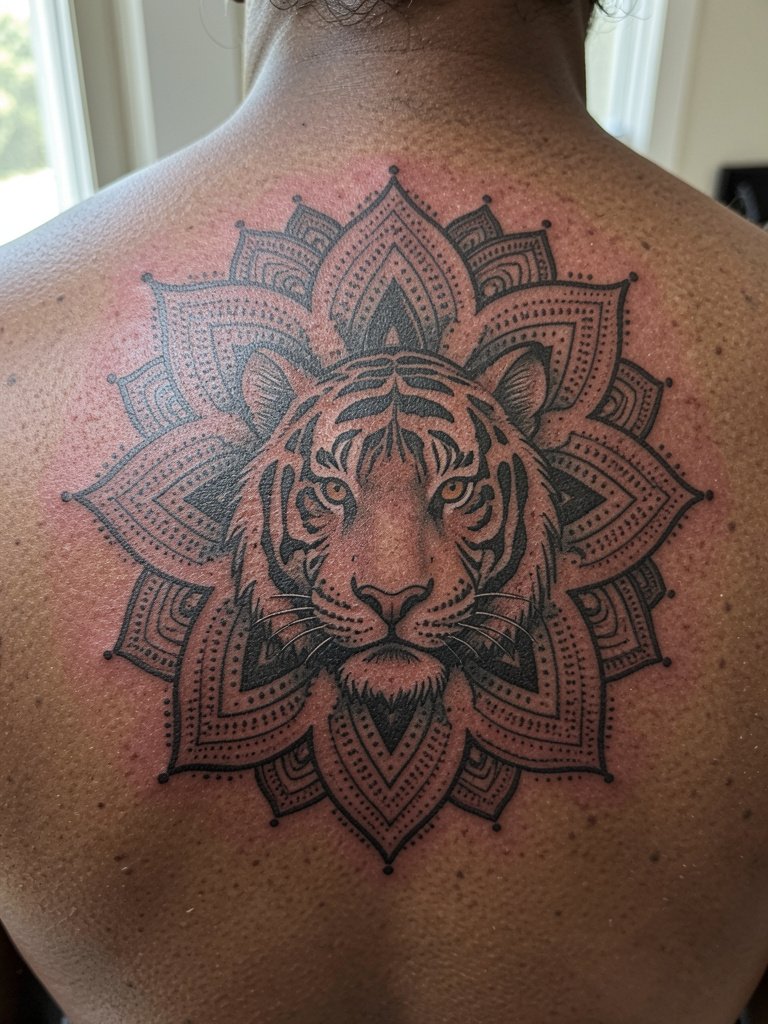
Combining mandala structure with animal imagery requires sensitivity to origin and meaning. If you choose ornamental motifs, say you want culturally respectful motifs and ask which patterns the artist studied. The risk is mixing sacred symbols without context which can feel off. For showing off, a fitted crew neck or open shirt keeps the radial design centered and visible.
24. Eyes-and-Forehead Framing Over the Spine

Spine-centered pieces must respect vertebral symmetry and curvature to avoid visual wobble. Ask the artist to show how the axis will align with your spine in standing and seated postures. A mistake is letting the focal point drift off-center which becomes obvious in movement. Session sensation can be more intense near the spine, so plan breaks and hydration.
25. Half-Back Tiger With Decorative Wave Fill

Half-back pieces are a compromise between scale and budget and can still read like a full project when designed well. Discuss how the waves or fillers wrap toward the flank so the edge does not look tacked on. The usual mistake is ending the filler abruptly which makes the composition feel incomplete. For showing off, sleeveless muscle tees or cutoffs highlight the asymmetric placement.
26. Masked Tiger With Ornamental Eyes

A masked or stylized tiger lets you play with symbolism while keeping the piece graphic. If you want ornamental eyes, request healed close-ups to confirm pupil and iris contrast. A common misstep is over-ornamentation in the mask that hides facial direction. For session ergonomics, breathable front-button shirts keep sweat and rubbing to a minimum.
27. Full-Back Cinematic Scene With Tiger and Environment

A cinematic full-back builds a story across the canvas and needs careful mapping of depth and focal points. Bring a few scene reference photos and ask how the artist will use foreground and background contrast to keep the tiger as the clear focal point. The biggest error is cramming too many narrative items without a hierarchy, which blurs into a collage after healing. Session planning here is crucial and normally requires multiple long sittings. For reveal wear, camp shirts and tanks make the full scene visible without constraining shoulders.
Frequently Asked Questions
Q: How do I choose between a medium shoulder-blade piece and a full back tiger?
A: Think about long-term commitments and how you live. A medium piece is faster and cheaper and still reads well if the artist increases line weight and contrast. A full back project lets the artist add cinematic depth and fillers but requires multiple sessions over months. If you want guidance in person, bring photos of your back and the references so the artist can sketch placement directly on your skin.
Q: Should I pick color or black and gray for a tiger back tattoo?
A: The debate splits into two camps. One camp favors black and gray because it tends to hold contrast and legibility better as the skin ages. The other camp prefers color for lifelike fur and jungle accents and accepts the trade-off of periodic touch-ups. If you lean color, ask for staged saturation passes and healed photos of the artist's color work on backs in a comparable skin tone.
Q: Does the back hurt more than other areas and where are the sensitive zones?
A: Pain varies by zone. The fleshy upper back and shoulder blades are usually more tolerable than the spine-adjacent midline or the lower back near the lumbar. Ribs and areas near the waistline feel sharper. Plan breaks and numbing strategies for longer sessions and expect localized soreness for a few days.
Q: What should I wear to a full back tattoo session and what clothing shows the tattoo best afterward?
A: For the session, wear front-button shirts or zip-front hoodies so the artist can access the back without you stepping out of clothing. After healing, tank tops, open camp shirts, and fitted crew neck tees frame back tattoos well. A practical option to bring on chair day is a loose tank top you can change into after the stencil and during breaks.
Q: Where can I find healed tiger back portfolios and avoid copy-paste flash?
A: Use hashtags like #tigerbacktattoo and #backtattoo on Instagram and TikTok but focus on healed photos rather than fresh shots. Reddit tattoo communities and studio portfolios that show before-and-after healed images are also useful. Search local studio portfolios using your city name plus "black and gray back tattoo" to find artists who regularly do large back projects.
Q: How often will a full back tiger need touch-ups?
A: Realistically, medium to large back tattoos often benefit from a touch-up between two and five years to refresh blacks and any saturated color. High-contrast black and gray pieces may need less frequent work. Plan for at least one touch-up in the first two to three years to lock in edges if you want long-term clarity.
