

Tiny ladybug tattoos read sweet, but they also force a real design trade-off. If you pick whisper-thin single-needle linework at micro scale, the piece may look ethereal at first and blur into soft grey sooner than you expect. If you pick slightly heavier lineweight and clearer spot shapes, the tattoo keeps its identity longer and still looks cute. That choice is the single decision that determines whether the bug ages into charm or smudge.
1. Tiny ladybug on the wrist, fine line minimalist
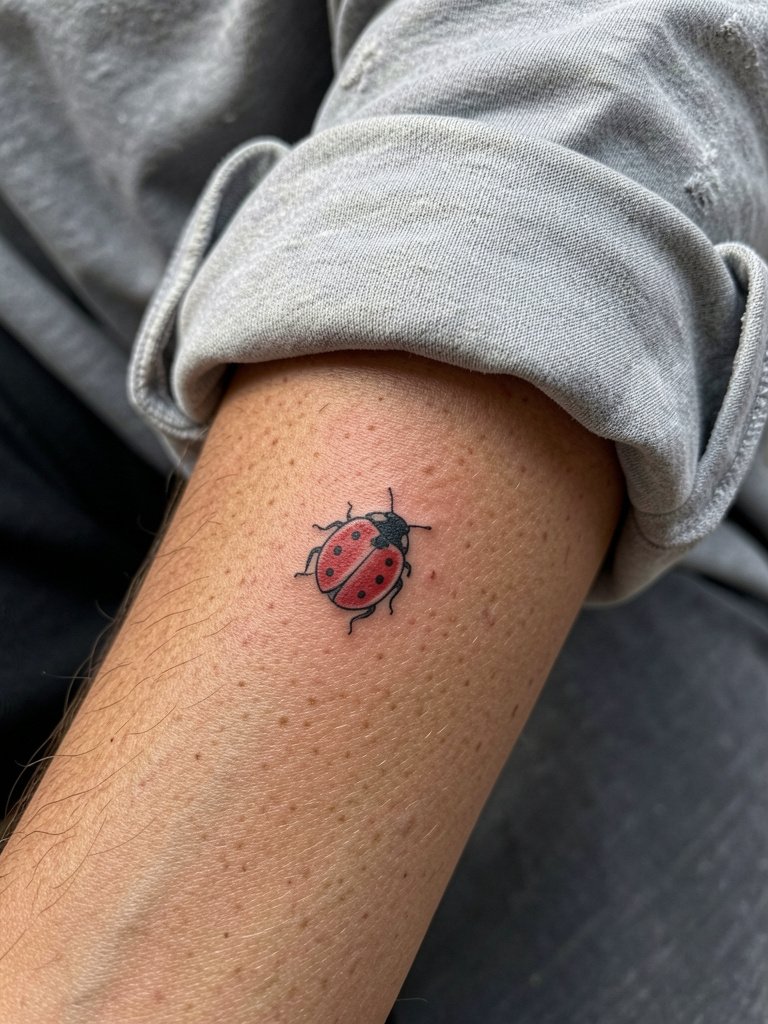
This is the classic first-timer move because it is low-commitment and photographs well. For this spot pick a slightly heavier single-needle contour so the spots keep shape over three to five years. Expect wrist movement to thin linework faster than forearm work, and plan a touch-up in the two-to-five year window if you want the red saturated. Wear a rolled sleeve tee the day of your session so the artist can roll fabric up with minimal friction. Pain here is mild to moderate, and session time for a true micro piece is usually under thirty minutes.
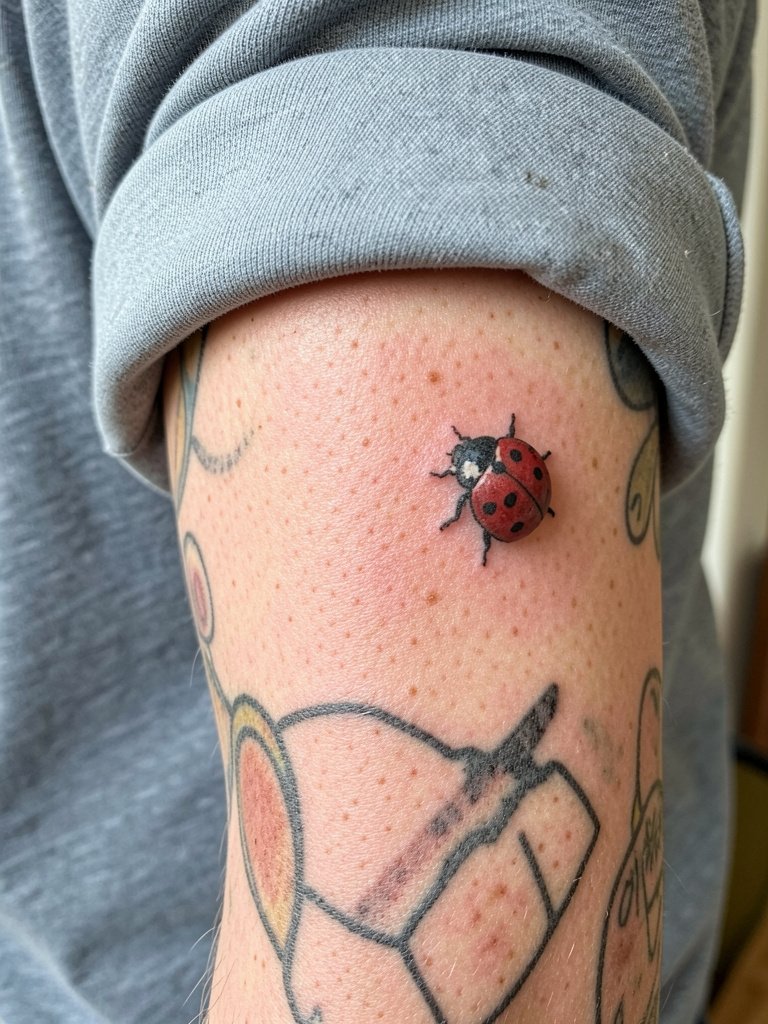
2. 3D realistic ladybug on the outer forearm
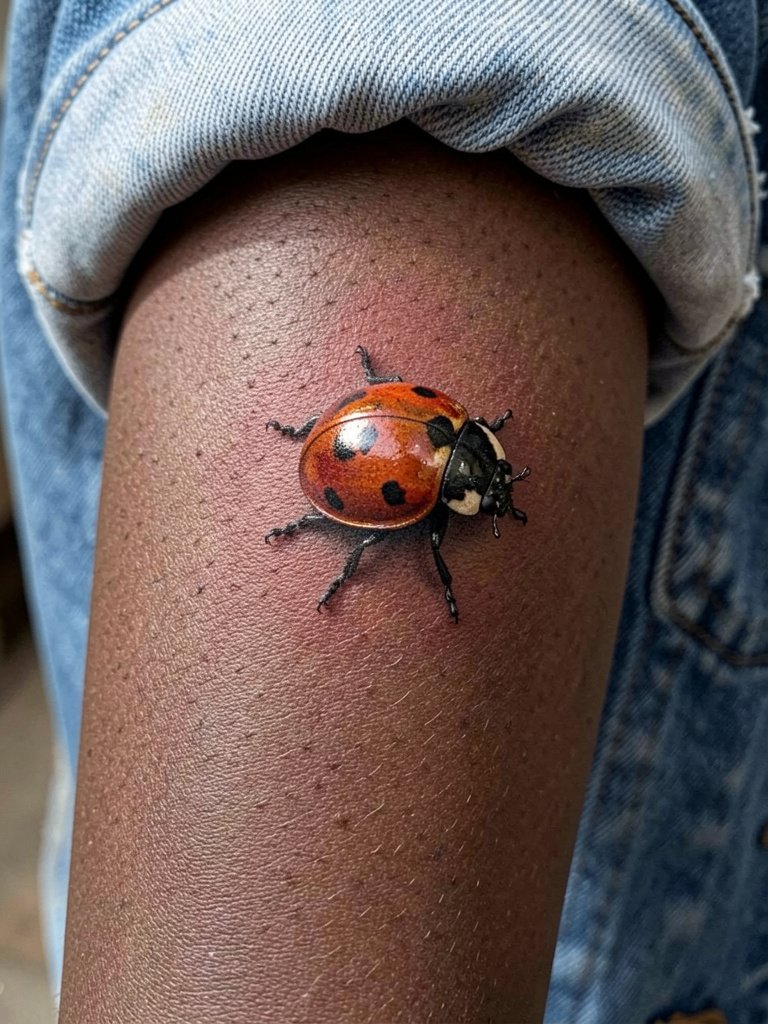
Micro-realism makes a small insect read alive in photos and in person. If you want that pop, plan for a longer appointment because shading for a 3D effect is time-consuming. A common mistake is asking for hyper-detail at a scale too small; that turns into mush on healed skin. Discuss exact spot placement with reference photos that show the bug at the size you expect. For showing the piece off consider a cropped denim jacket or rolled sleeves so the bug sits in the visible frame.
3. Ladybug with tiny flowers, inner forearm botanical mix
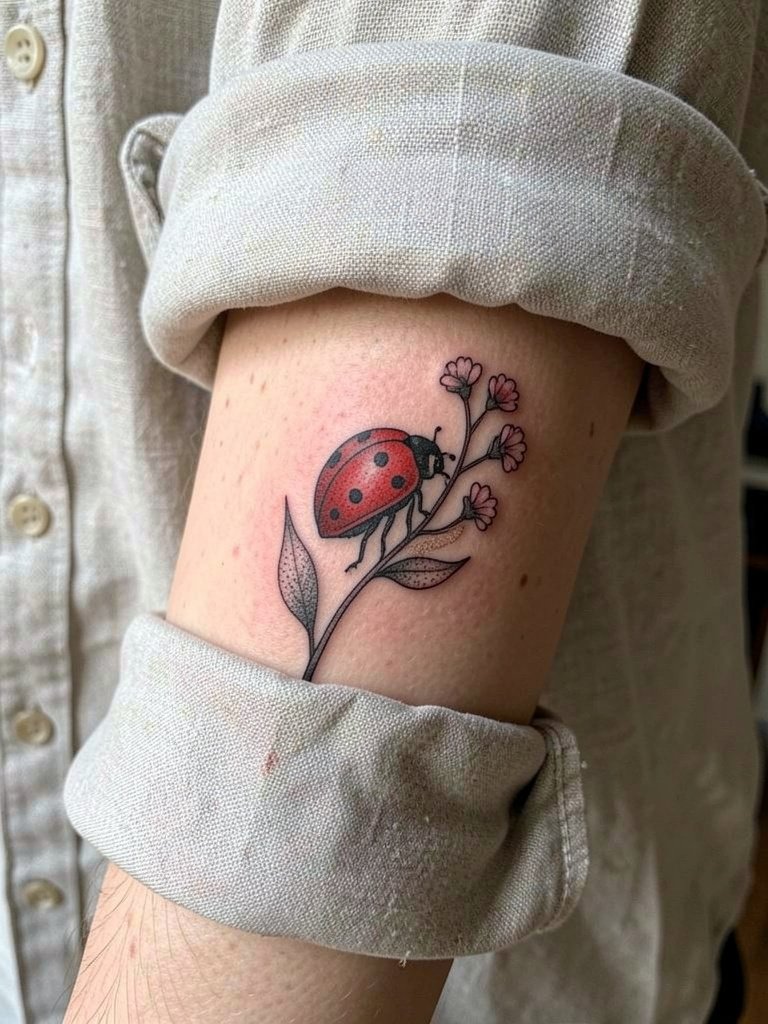
Botanical pairings soften the insect and make the design feel intentional instead of clip-art cute. The trick is scale and spacing. Keep the flowers small enough not to compete with the ladybug but large enough to age separately. A typical blunder is adding tiny lettering that crowds the composition. For the session wear a linen button down with sleeves you can roll; the artist needs clear wrist-to-elbow access. Expect low to moderate pain and a session that can run forty-five minutes to an hour.
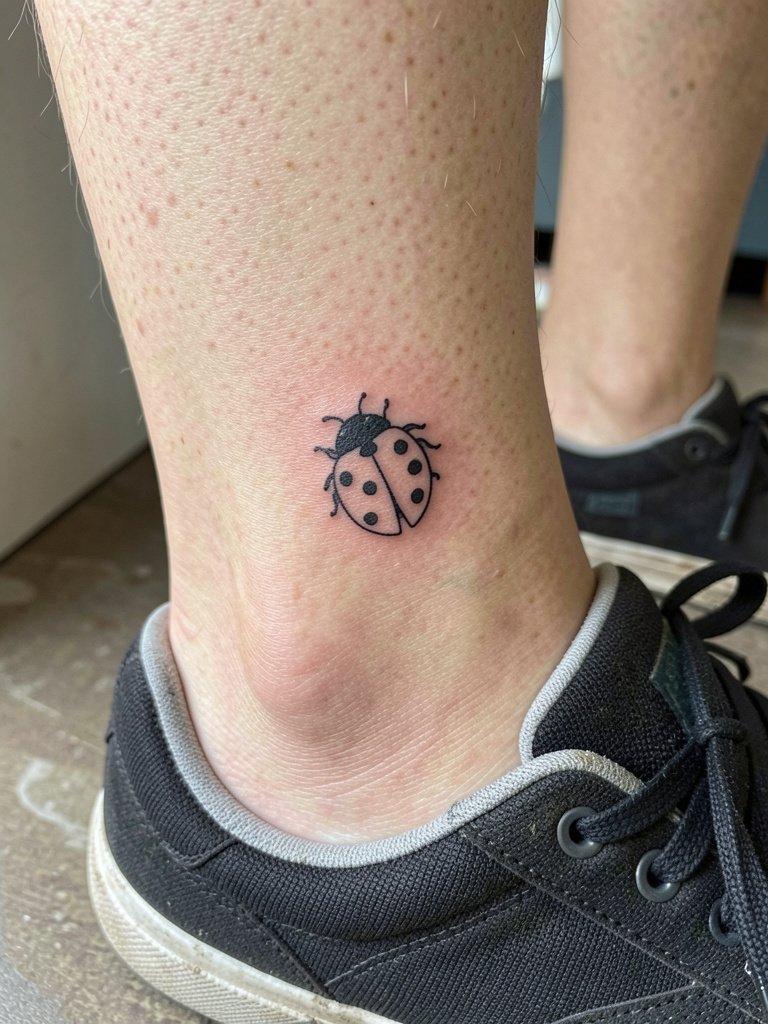
4. Minimalist outline ladybug on the ankle
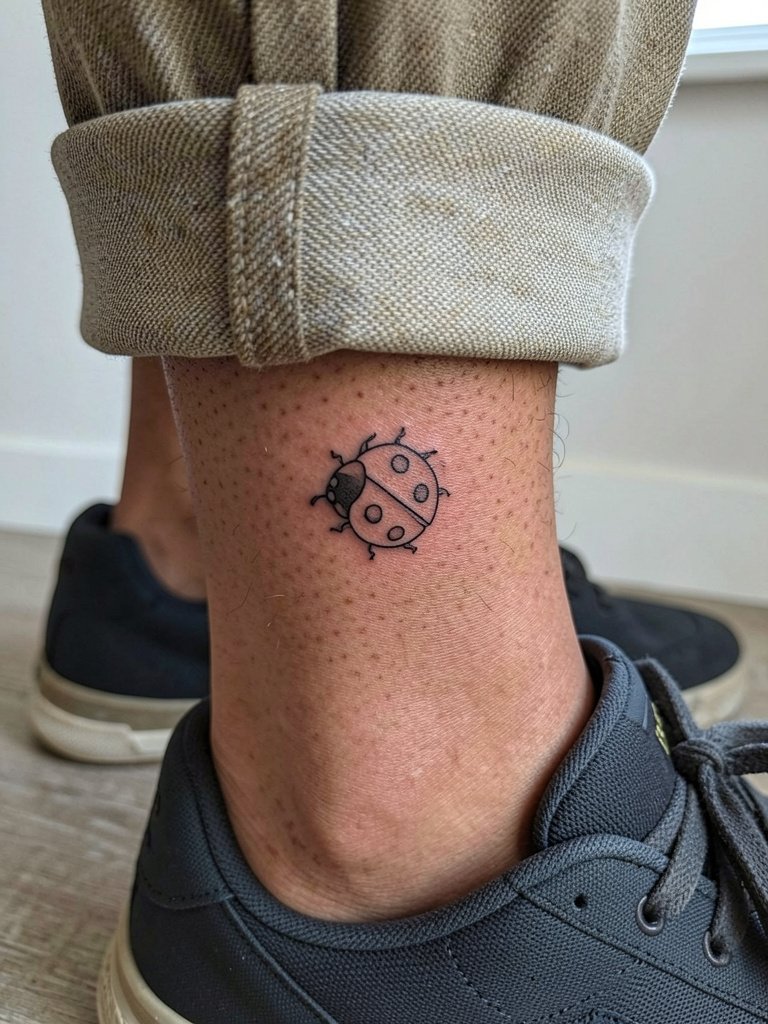
Ankle placements are seasonal and playful, so keep composition small and bold enough to survive shoe friction. A common aging issue is taking a single-needle outline too small. That looks fine week one and then softens with shoe rubbing. For session-day comfort wear cropped linen pants or sandals so the area is accessible. Expect a touch more sensitivity than the forearm, and plan on sunscreen once healed if you plan to show it off in summer.
5. Tiny ladybug behind the ear, mastoid charm
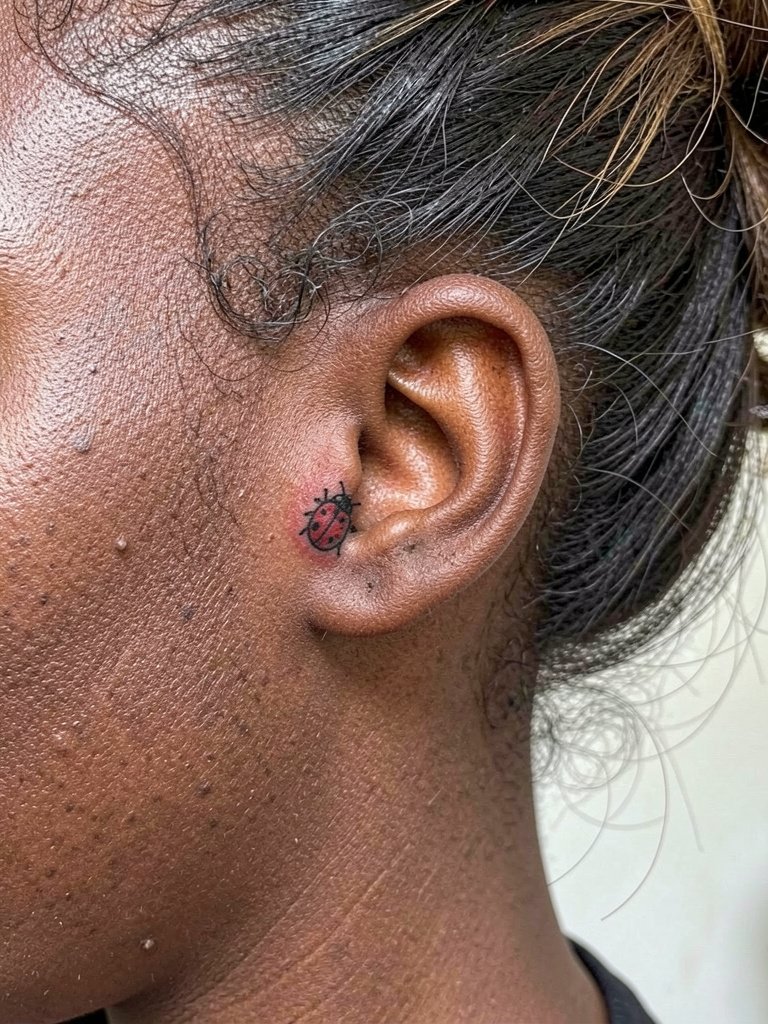
This spot reads like a tiny charm and is discreet until you pin your hair up. The mastoid area is thin-skinned so the session can feel sharper than a forearm tick. A frequent mistake is asking for too much color there; small color areas can blur without strong outlines. For show-off styling think hair up with a claw clip or small hoops. Wear a hair clip to your appointment so the artist can access the spot without fuss.
6. Ladybug sleeve filler for patchwork arms
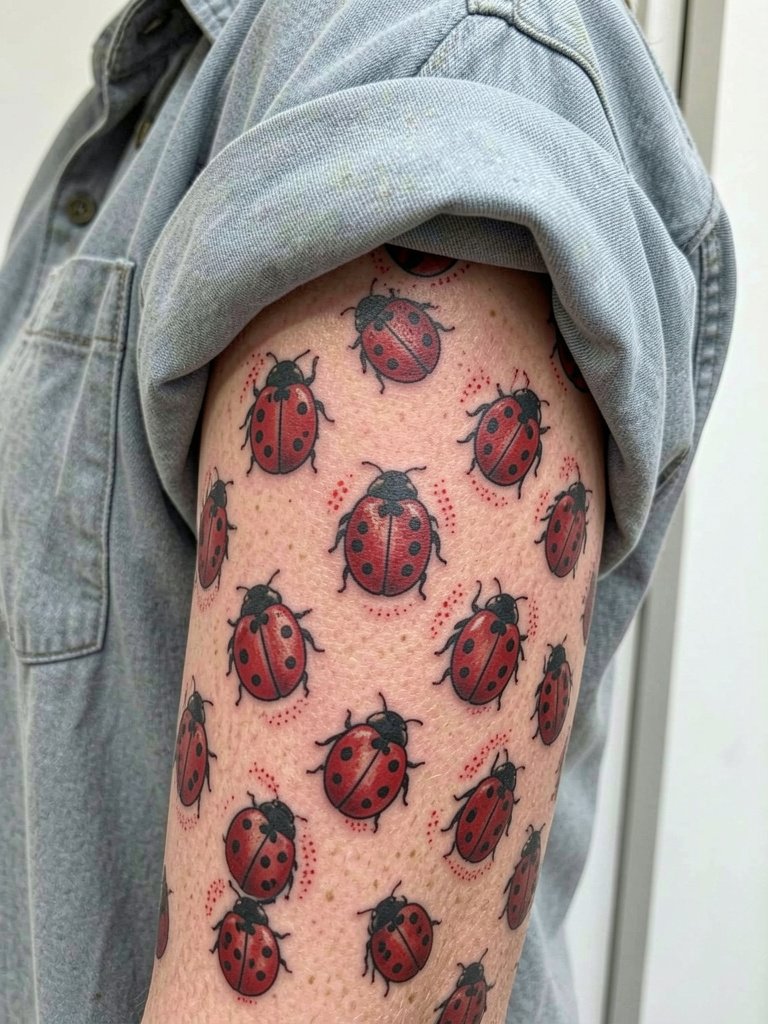
Using the ladybug as filler keeps a sleeve cohesive without one dominant scene. The design works best with slightly bolder outlines so the motif reads at a distance and across different sessions. A common error is crowding too many tiny bugs into one area without negative space. For wardrobe pairing try a relaxed button-down or cropped denim to frame the arm. Sleeve filler is an additive strategy, so expect multiple appointments over months.
Session Day Picks
The wrist, ankle, and behind-the-ear ideas each face different first-week hazards, so a few targeted items make the first days much easier.
- Indie tattoo healing balm. A lighter boutique balm can reduce breakouts for people who react to heavier ointments, useful for small wrist or finger pieces covered by fabric friction.
- Panthenol cream for sensitive skin. Panthenol-based creams are often preferred by people who find standard petroleum ointments too occlusive during the first week.
- Saline-based wash spray. A plain saline rinse helps shallow scabs lift without aggressive scrubbing, which is handy on delicate placements like the nape or behind the ear.
- Australian-style aftercare balm. Lighter international formulations sometimes suit those who break out from heavier U.S. products, and they can help keep color from drying into flaky scabs.
- Second-skin protective bandage. A thin protective film is handy for the first day on the wrist and ankle to avoid fabric rubbing and trapped moisture from socks or sleeves.
7. Fine line ladybug with delicate stem on the collarbone

Collarbone skin moves and stretches with posture, so a slightly thicker single-needle contour keeps the little bloom readable. A common mistake is placing too much fine detail close to bone where the skin is thin. For showing it off use open-back midi dresses or scoop-neck tees. Session pain is low to moderate depending on how close the design sits to the bone, and a tidy touch-up can be scheduled if color loses saturation.
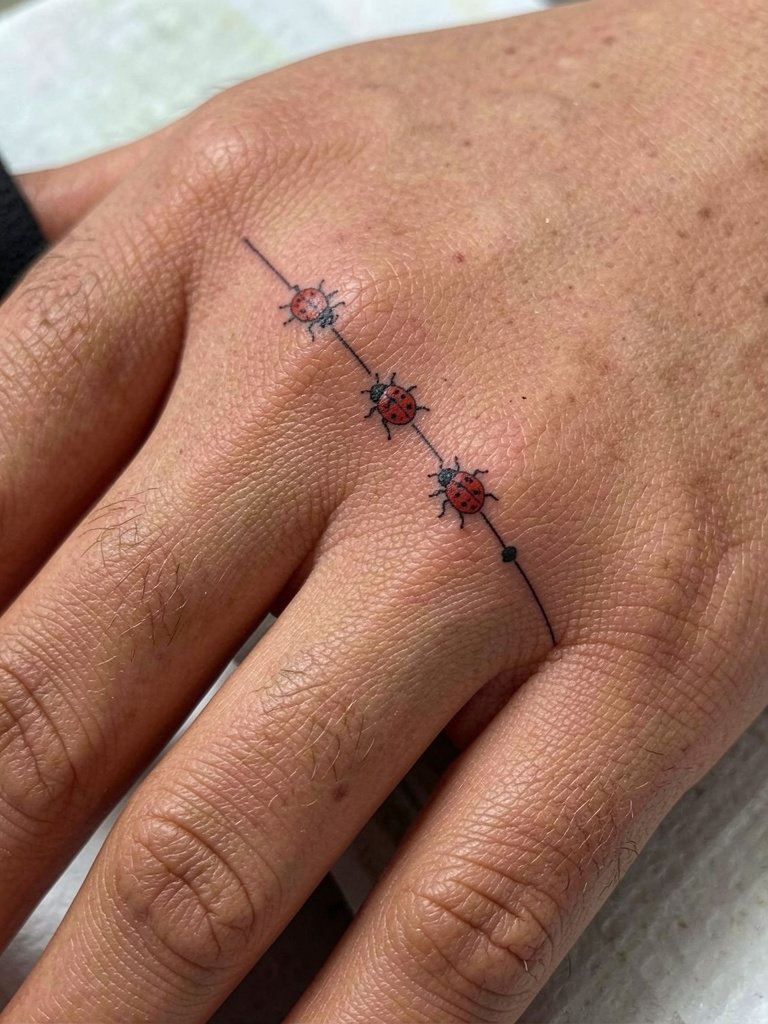
8. Tiny ladybug on a finger, micro visible every day
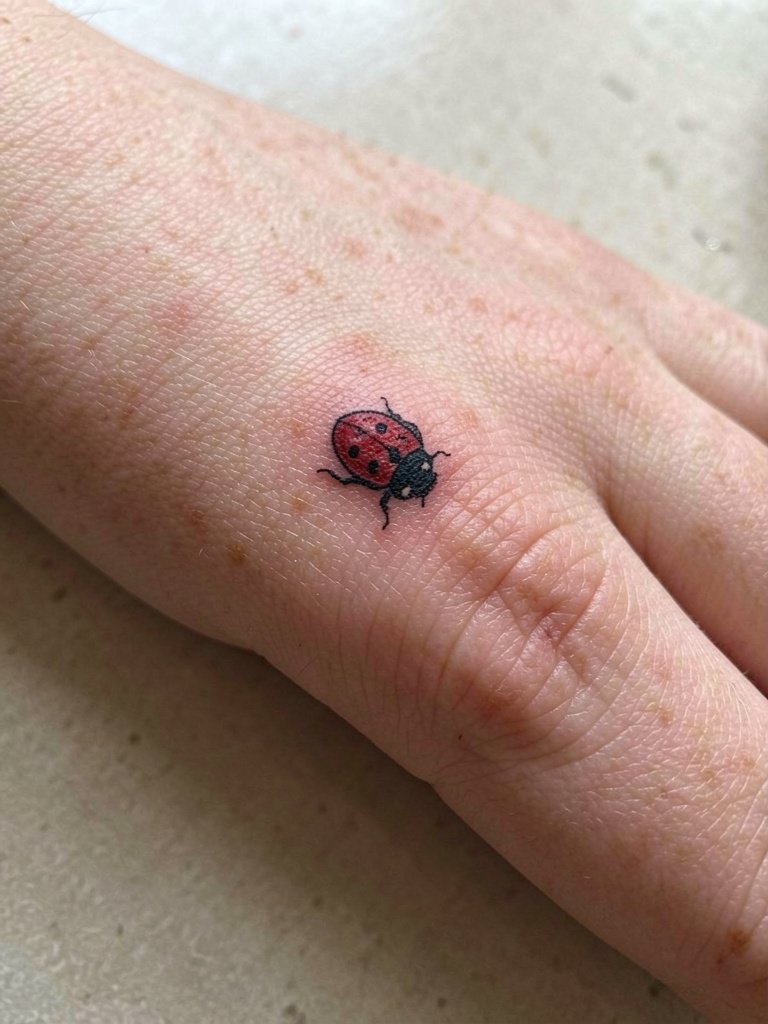
Finger tattoos are very visible but demand honest maintenance. The skin here wears fast and touch-ups are more common than other tiny placements. Avoid asking for legs or tiny antennae because they can blur into a dark spot. For session comfort wear short sleeves and avoid rings that might rub a fresh hand tattoo. To show it off keep jewelry minimal and consider minimalist rings that do not press on the fresh ink.
9. Ladybug on ankle with a tiny trail of dotwork

Dotwork trails add movement and make the ankle piece feel deliberate rather than pasted on. The area sees sock and shoe pressure, so keep a small margin between design edges and where footwear will sit. For warm-weather show-off pair with ankle strap sandals or cropped trousers. Sessions are short and sensitivity ranges from mild to moderate. Expect that trails with very tiny dots will need bolder spacing if you plan to keep the tattoo long-term.
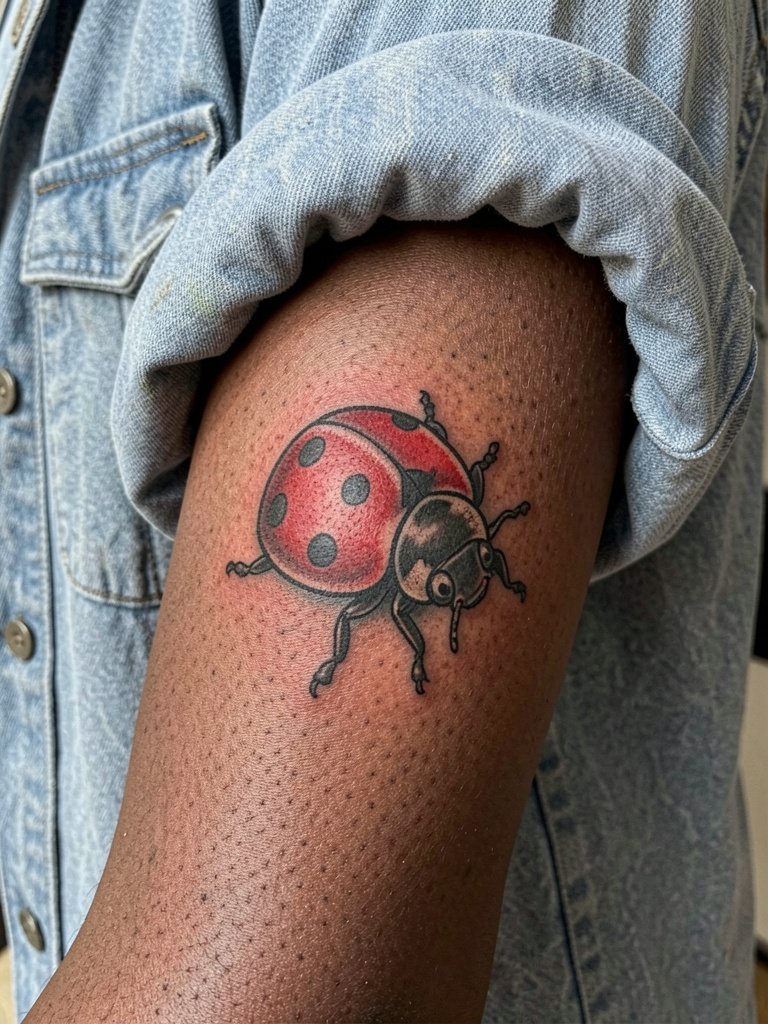
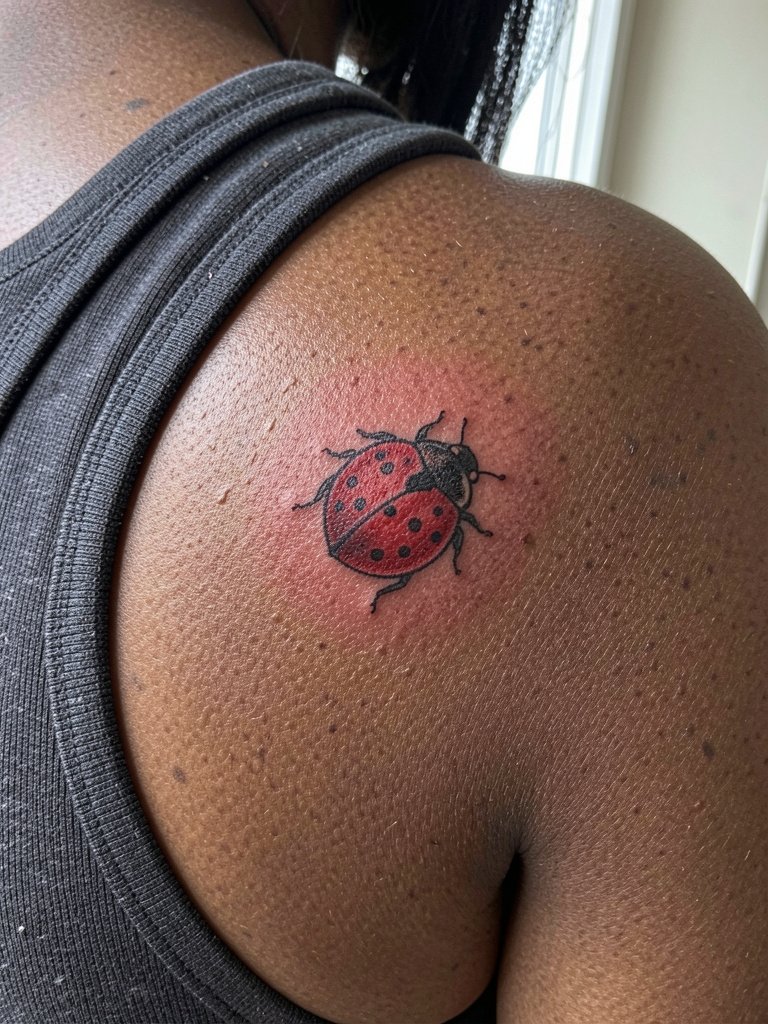
10. Small traditional-style ladybug on the shoulder
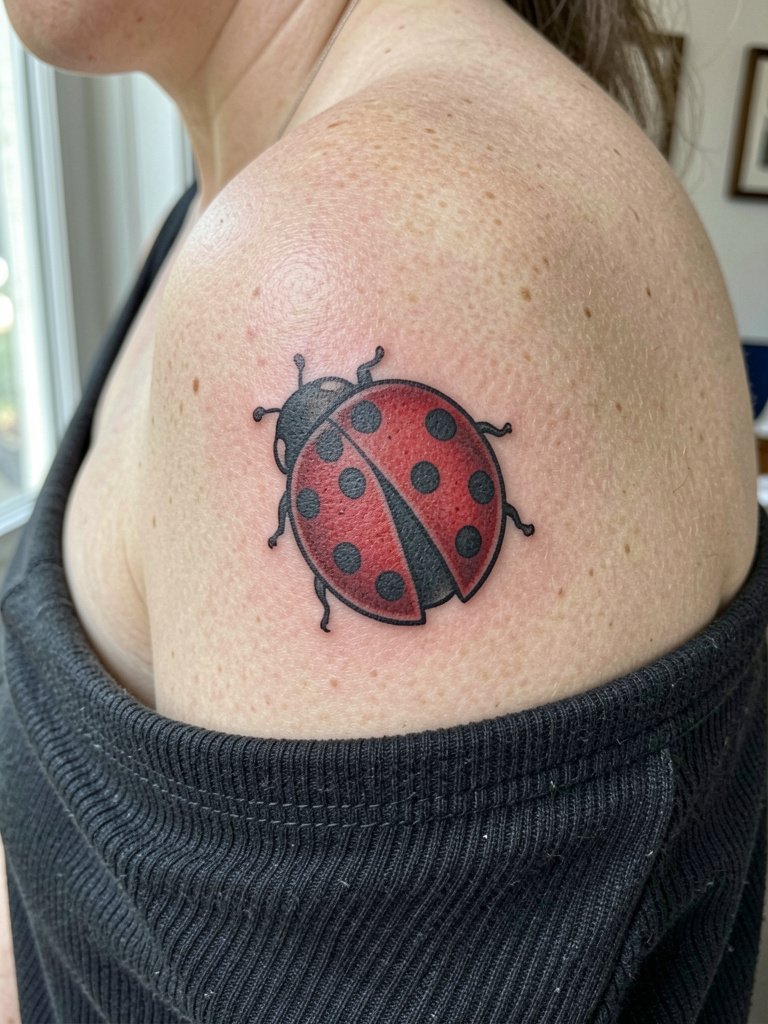
A shoulder gives room for traditional proportions so the bug can have rounded legs and clear spots. One strong advantage is longevity because bolder outlines hold up better with time. Some people worry traditional looks too cartoonish. The balance is to keep saturated color with intentional spacing. For display season choose off-shoulder tops or sundresses. Session time is short and pain is usually low.
11. Ladybug with "luck" script accent on the inner forearm
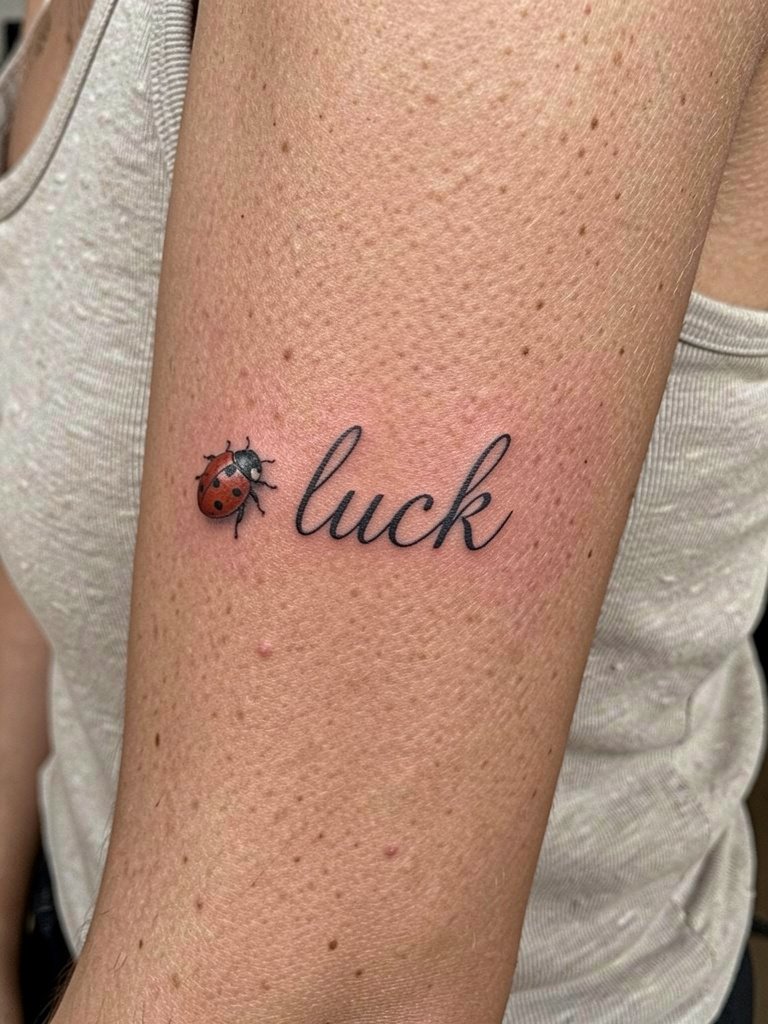
Pairing a tiny script with the bug makes the symbolism explicit without crowding. Scripts heal differently than small illustrative forms so keep lettering open and sized to remain legible on the inner forearm. The biggest mistake is cramped cursive that blurs into an unreadable line. For showing it off try linen shirts with rolled cuffs so the script peeks out when you move your arm. Session time for this combo is usually under an hour.
12. Traditional-style thicker-outline ladybug on the outer forearm
This is where the fine line versus bold outline debate becomes real. One camp prefers ultra-fine linework for a delicate look. The other camp favors thicker outlines for long-term readability. The first camp says fine line reads softer and more modern. The second camp says bold outlines keep the bug recognizable for many years. If you lean toward durability, pick a slightly stronger outline and ask for larger spots so the design does not compress as it heals. For a casual look wear a cropped denim jacket or short sleeves.
13. Tiny nape ladybug, hidden charm under the hairline

The nape is playful because it is hidden until you show it. Thin skin and a few nearby hair follicles mean you should avoid ultra-tiny stipple shading there. A common problem is asking for a crowded design in an area too small to hold it. For display style use claws or updos and consider wearing a claw clip set to lift hair without touching the tattoo. Sessions are quick and pain is moderate.
14. Ladybug with soft watercolor wash on the outer upper arm
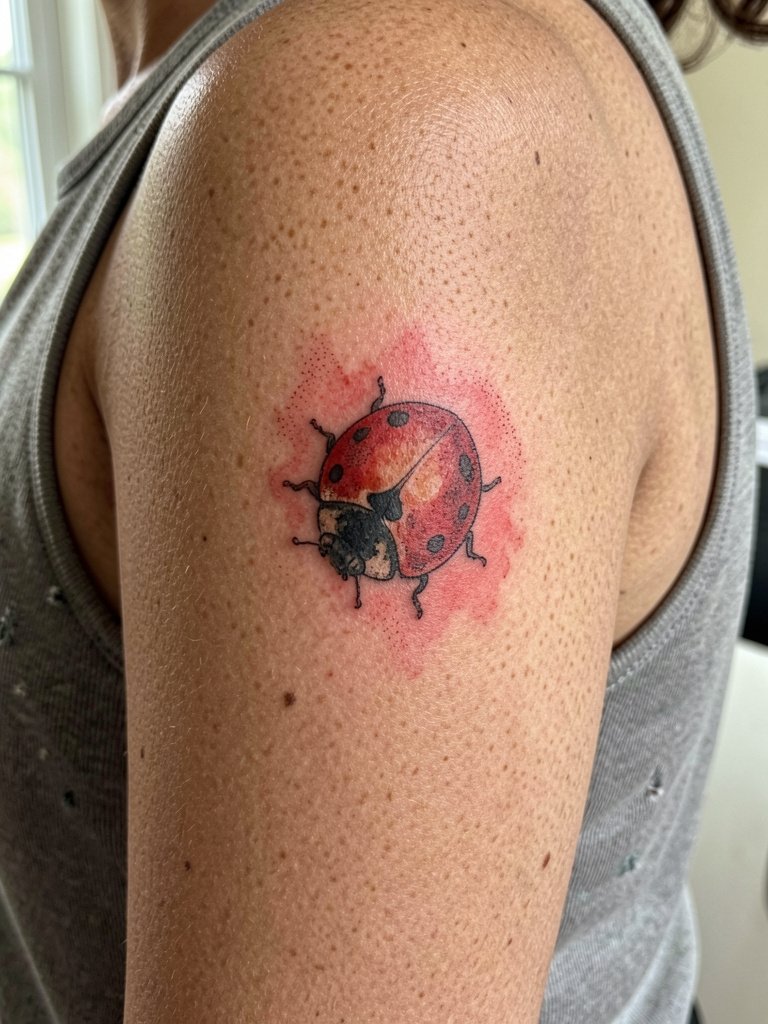
Watercolor accents give a dreamy feel but age differently than solid fills. One camp appreciates the painterly blur. Another warns that color bleed and fading can make watercolor pieces look washed out over time. If you want a wash, ask for slightly more saturation in initial work and light protective sun practices after healing. For outfits try racerback tanks to show the soft color bleed in warm months. Sessions can be longer because color layering takes time.
15. Cluster of ladybugs on the calf, movement in multiples
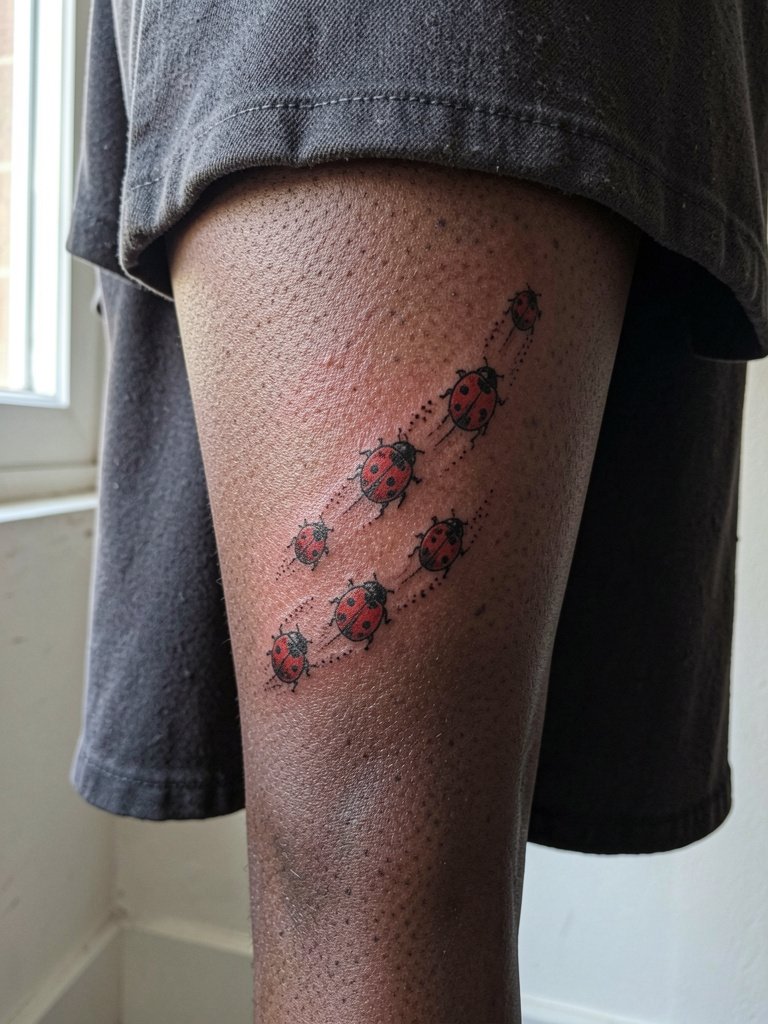
Clusters create movement and let you build a patchwork without one focal point dominating. Calf skin tolerates slightly larger pieces so this is a smart place to avoid micro detail that might blur. For summer styling pair with midi skirts or cuffed jeans. Sessions are usually under an hour for multiple small bugs, and touch-up timelines depend on how many tiny color fields you include.
16. Fine line ladybug on the hand with accessory framing

Hands are highly exposed and susceptible to fading and blurring. Choosing black-only or simplified color keeps maintenance lower. A typical error is trying to pack tiny features on the hand where friction eats detail. For presentation choose clean rings and neutral nail polish. A good session plan is short bursts with breaks because hands are sensitive.
17. Watercolor cluster on the outer upper arm, painterly bugs

When you increase scale a little you let watercolor and micro shading read without getting muddy. The design will take longer to tattoo and may need a touch-up to refresh the soft washes after a year or two. For summer outfits try sleeveless tops and racerbacks. Pain is usually mild and the result photographs nicely in natural light.
18. Patch-style ladybug near the hip, low-rise framing
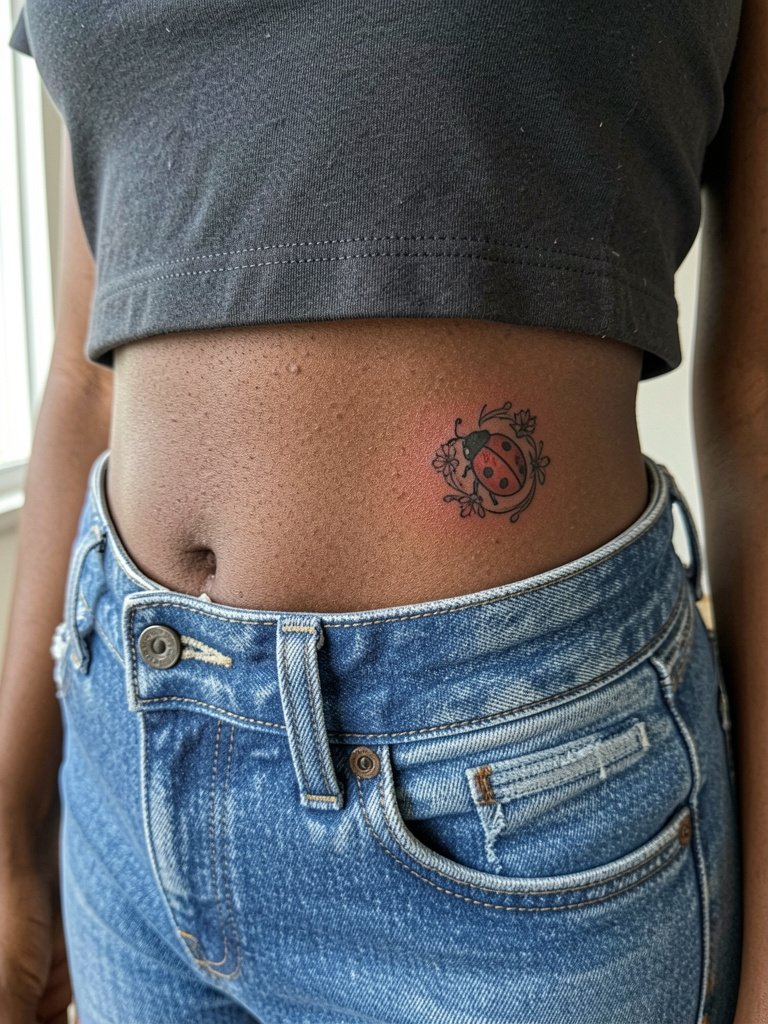
Hip pieces sit near clothing lines so plan positioning carefully to avoid constant waistband friction. A common mistake is placing designs too low where jeans will rub. For session wear low-rise jeans that are fully zipped and buttoned so the artist can map the tattoo to where the waistband will sit. Pick clothing that frames rather than compresses the area.
19. Minimalist geometric ladybug motif on the sternum
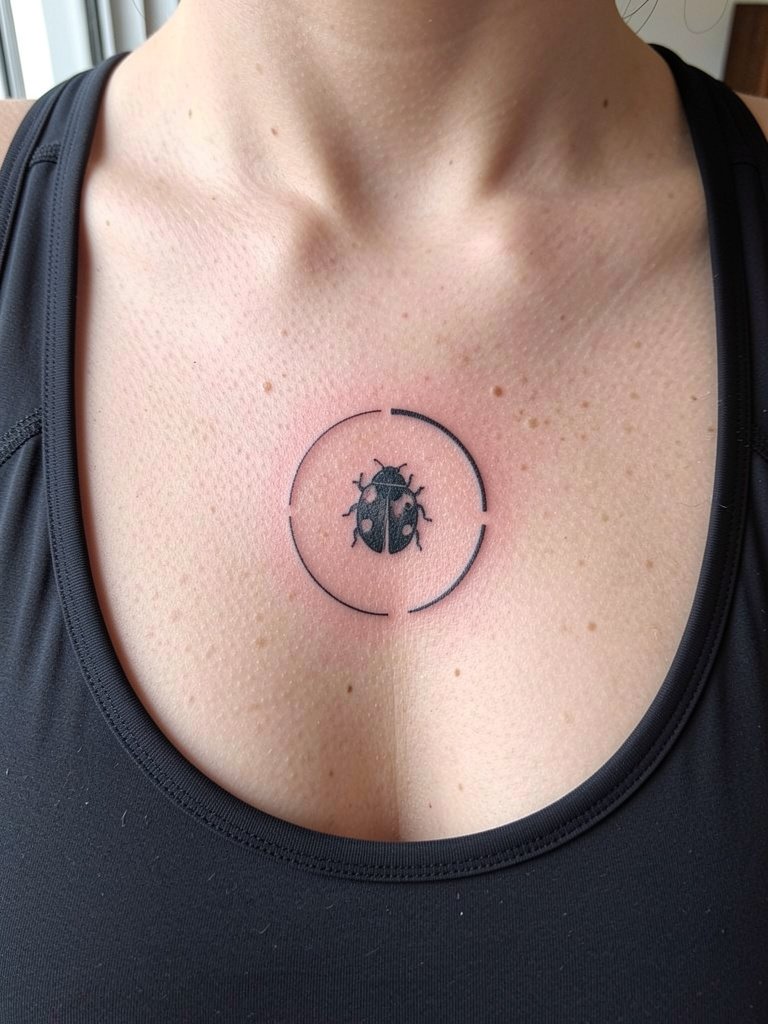
Sternum placements feel intimate and they react to breathing and movement. The area can blur if tiny geometry is pushed too small. Keep the motif bold enough to hold through motion. For session wear a fitted sports bra so the artist can access the sternum without fabric being moved. Pain ranges moderate to higher and plan for a longer session window.
20. Tiny ladybug on the lower back, discreet sparkle

Lower back placements are private and slip under clothing, which can be good for people cautious about visibility. Avoid overly fine antennae in that zone because friction against waistbands can affect crispness. For showing it choose low-rise jeans or crop tops in the right season. Sessions are short and manageable.
21. Tiny ladybug on the upper thigh, inner-facing charm
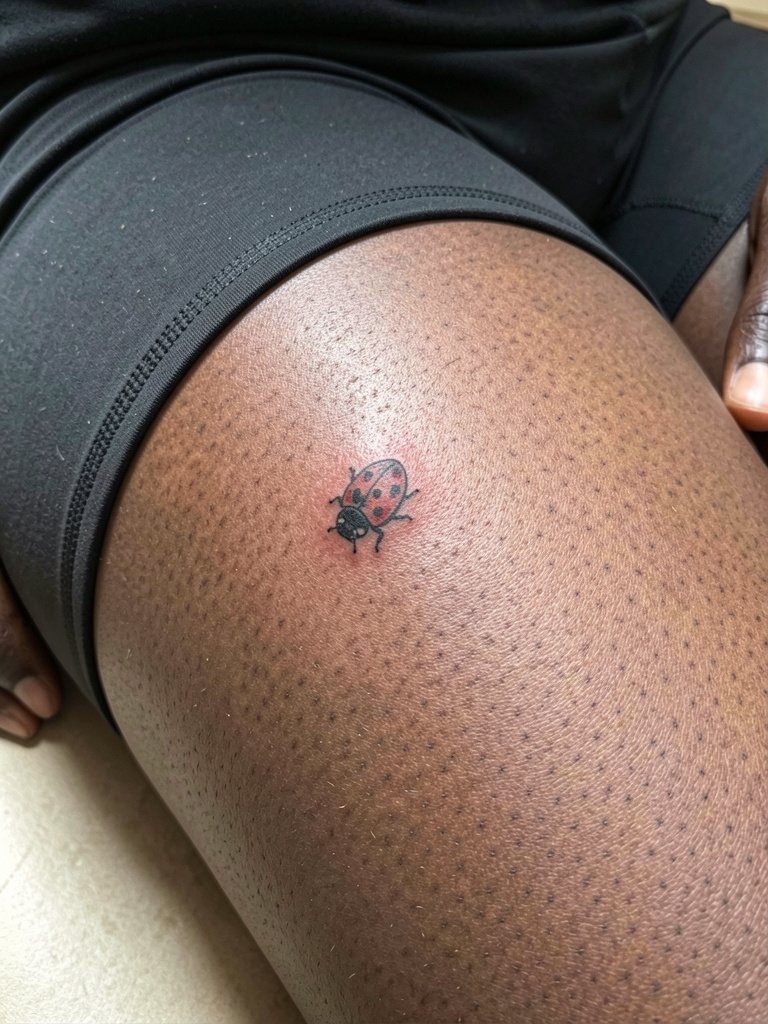
Inner-thigh pieces are intimate and see little sun, which helps color longevity. The area can be sensitive and is higher on the pain scale for many people. Design with clean negative space to prevent pigment creep across soft tissue. For your session wear modest athletic shorts that do not shift. Touch-ups are less frequent here because sun exposure is minimal.
22. Single small ladybug on the chest near the heart

When people place small motifs near the heart they often want symbolism. The chest has more stretch and movement, so choose size carefully to preserve shape. For showing it off use scoop-neck tops that reveal the piece without rubbing. Sessions can be brief but may feel more sensitive than forearm work.
23. Tiny ladybug behind a small floral, collarbone variant

Hiding a ladybug within a tiny floral cluster keeps the insect from feeling literal and lets the composition read like a motif. Avoid packing too many tiny petals or dots near bone. For display choose wide V-necks or off-shoulder tops and consider small hoop earrings to mirror the discreet placement. Session time is generally under an hour.
24. Minimal black-only ladybug on the ankle for longevity
Black-only versions age more predictably because black pigment tends to retain contrast longer than reds. One camp prefers the classic red and black for instant recognition. The other camp prefers black-only for predictability and minimal maintenance. If you prioritize longevity, black-only with clear negative space is the safer route. For outfits pair with no show socks and sandals when showing the piece. Sessions are quick and touch-ups are less frequent.
25. Tiny ladybug cluster on a finger-side band
Finger-band clusters look delicate but demand simplified shapes for longevity. Avoid trying to fit tiny legs or complex shading in that band because daily washing and movement quickly soften detail. For session wear short sleeves and keep hands ring-free for the first week. Expect more frequent touch-ups than forearm or shoulder work.
26. Ladybug on the shoulder blade, subtle back placement
The shoulder blade is a great canvas that stays mostly out of daily friction. This placement is forgiving for a slightly more ornate ladybug because the skin holds detail well. For display choose racerback tops or strap-baring dresses and consider racerback tanks for summer. Session time is moderate and pain is usually low.
27. Tiny ladybug as a sleeve anchor near the elbow crease
Elbow-adjacent pieces must account for movement and bend. Tiny motifs near the crease lose crispness faster if the ink sits directly on the flex zone. Use this spot as an anchor that links to nearby filler, not as the only small detail in a heavily folded area. For session wear a loose long-sleeve you can roll up easily. Expect a slightly longer appointment if the artist needs to stencil across a bend.
Frequently Asked Questions
Q: How much does a small ladybug tattoo cost in the United States?
A: Pricing varies by studio and region, but for tiny micro pieces expect a shop minimum or small-piece tier. A realistic range for tiny one-inch work runs from about eighty dollars up to a few hundred depending on color and detail, while slightly larger illustrative or 3D pieces push the price higher. Remember that color and realism typically add session time and therefore cost.
Q: Will red ink in ladybug tattoos fade oddly over time?
A: Red tends to soften faster than black because of how pigment sits in the dermis and how skin repairs itself. In practice that means reds can look less saturated over several years unless you protect the area from sun and consider periodic touch-ups. If you want the red look but worry about maintenance, ask for slightly higher initial saturation and plan for annual or biennial color refresh.
Q: I have darker skin. How should I adapt a ladybug so it reads clearly?
A: Choose stronger contrast and bolder outlines so the shape reads against deeper tones. A version with a clearer black outline and larger spots will stay readable longer. Ask to see healed photos on similar skin tones and request slightly higher saturation for colored areas so the red keeps presence.
Q: Where can I find local artists who specialize in small ladybug or micro-realism work without naming them directly?
A: Search Instagram and TikTok hashtags like #ladybugtattoo, #microtattoo, and #finelinetattoo and apply your city or region as a filter. Pinterest is useful for collecting reference boards and YouTube helps you compare style approaches in motion. Reddit and local Facebook threads often include healed shots and firsthand impressions, which are helpful when you want to confirm how a style ages.
Q: How do I choose between a fine line and a bolder outline for a tiny ladybug?
A: Think about how long you want the design to read clearly. Fine line looks modern and delicate but can blur sooner on high-motion sites. Bolder outlines trade a touch of delicacy for longer-term clarity. If you want delicate but worry about aging, increase scale slightly and maintain cleaner spot shapes rather than pushing single-needle detail too small.
Q: What should I wear to my appointment for an inner forearm or wrist ladybug?
A: Pick layers that give easy access. For inner forearm or wrist go with a loose short sleeve or a rolled long-sleeve top so the artist can expose the area without fabric pressure. A neutral tank top or a loose tee works well for comfort and convenience.
Q: Are there design choices that make a tiny ladybug look less childish while keeping the cute factor?
A: Yes. Use botanical pairings, selective color rather than full solid fills, or slightly desaturated watercolor accents. Keep spot shapes clean and avoid exaggerated cartoon legs. A small script or geometric framing can also lend maturity without losing charm.
