
Bold, saturated Venus flytrap tattoos often read better on the skin over time than the tiny, single-needle pieces people pin on short-form feeds. The plant’s open mouth and tooth detail need space to stay legible, and choices about line weight and placement determine whether the trap looks sharp or turns into a smudge. Read on for style-first options and the placements that keep the mouth readable long term.
1. Neo-Traditional Venus Trap on Outer Upper Arm
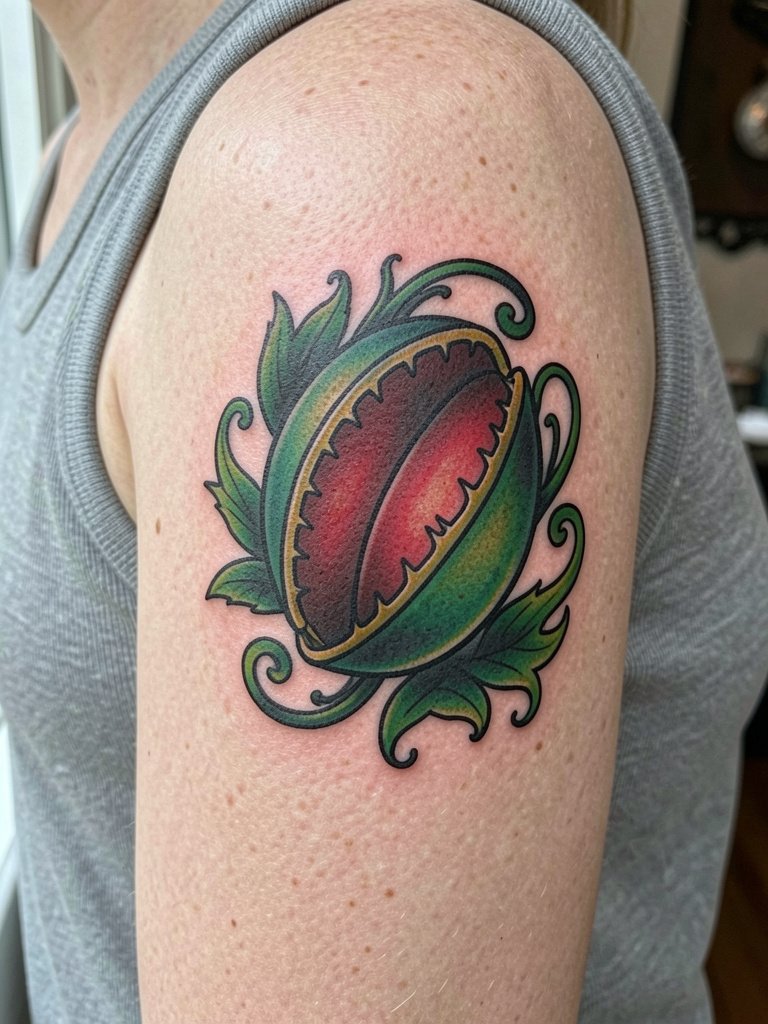
This is the go-to if you want a playful, badge-like flytrap that still reads from a short distance. The bold outline and color block preserve the mouth shape as the piece ages, and I usually recommend a medium size, about three to five inches, rather than a tiny sticker. Bring two reference images that show line weight and color balance so the artist can map out how the red lobe sits against green leaves. Expect one longer session for color saturation and a light touch-up at year two if you are outdoors a lot. For showing it off, a fitted sleeveless tank in a neutral tone frames the bicep and keeps attention on the saturated greens, try sleeveless tank top for similar fits.
2. Small Minimalist Venus Outline on the Wrist
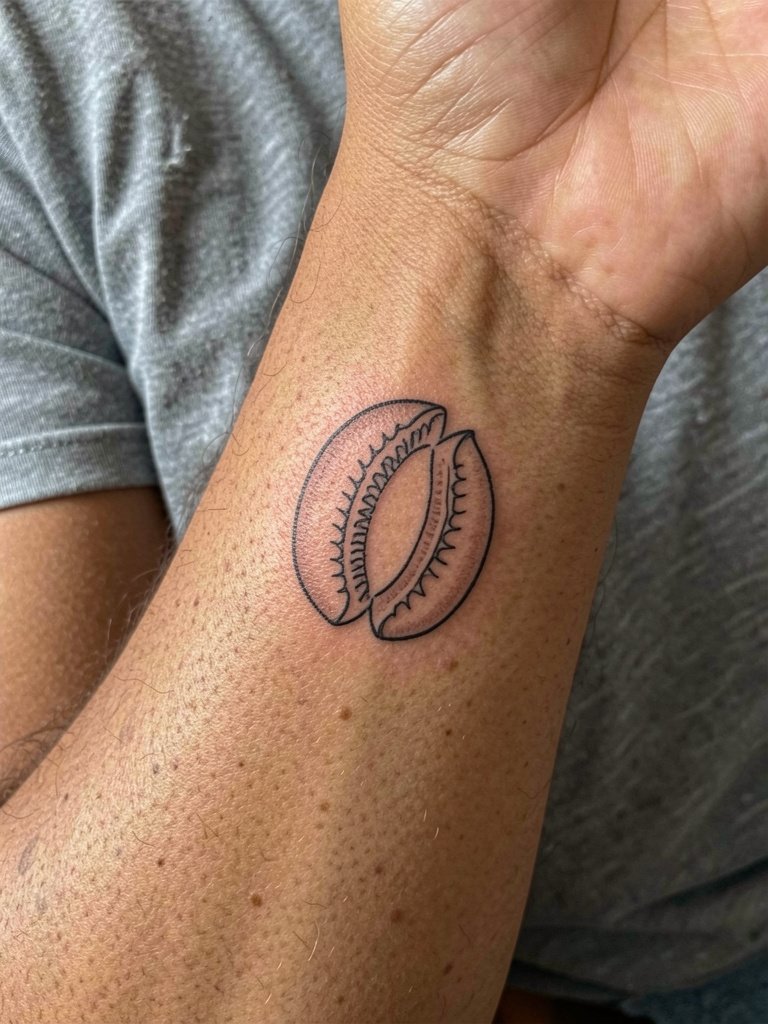
Tiny wrist pieces read delicate in photos but they blur fastest if the teeth are drawn too close together. If you want minimalism, widen the spacing between teeth and accept a slightly larger footprint so detail survives a few years. A common mistake is requesting an exact micro reference without adjusting for wrist mobility and frequent washing. Session time is short and pain is low to moderate. For outfits, pair this with thin bracelet stacks on the opposite wrist and avoid a watch on the tattooed side. A neat option for wearing during the appointment is a short sleeve tee that slips on easily, see short sleeve tee.
3. Chibi Cute Flytrap at the Ankle
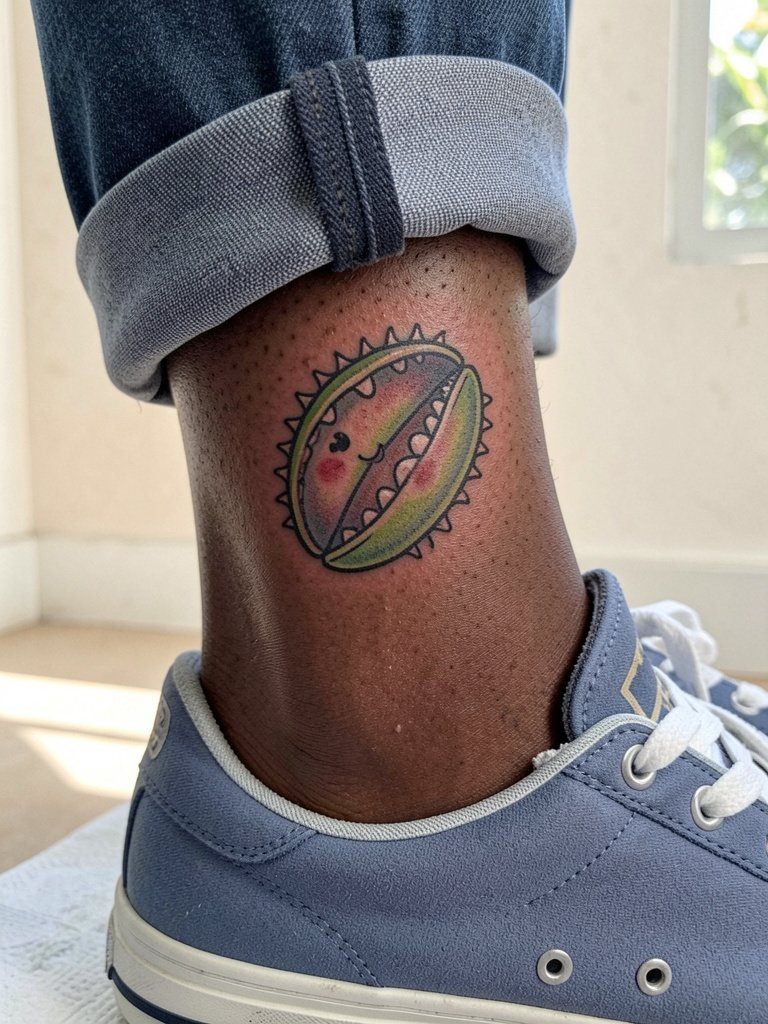
Cute chibi versions soften the plant’s predatory edge and make a small ankle design feel approachable. The ankle sees rubbing from socks and shoes, so choose a silhouette with a clear outer contour rather than lots of tiny interior teeth. Plan for a single session and a possible touch-up after six to twelve months if the lower green fades. Wear cropped pants and low-top sneakers to show it off once healed. For the appointment, slip into cropped straight-leg pants so the artist can access the area without tight fabric, for example cropped straight leg pants.
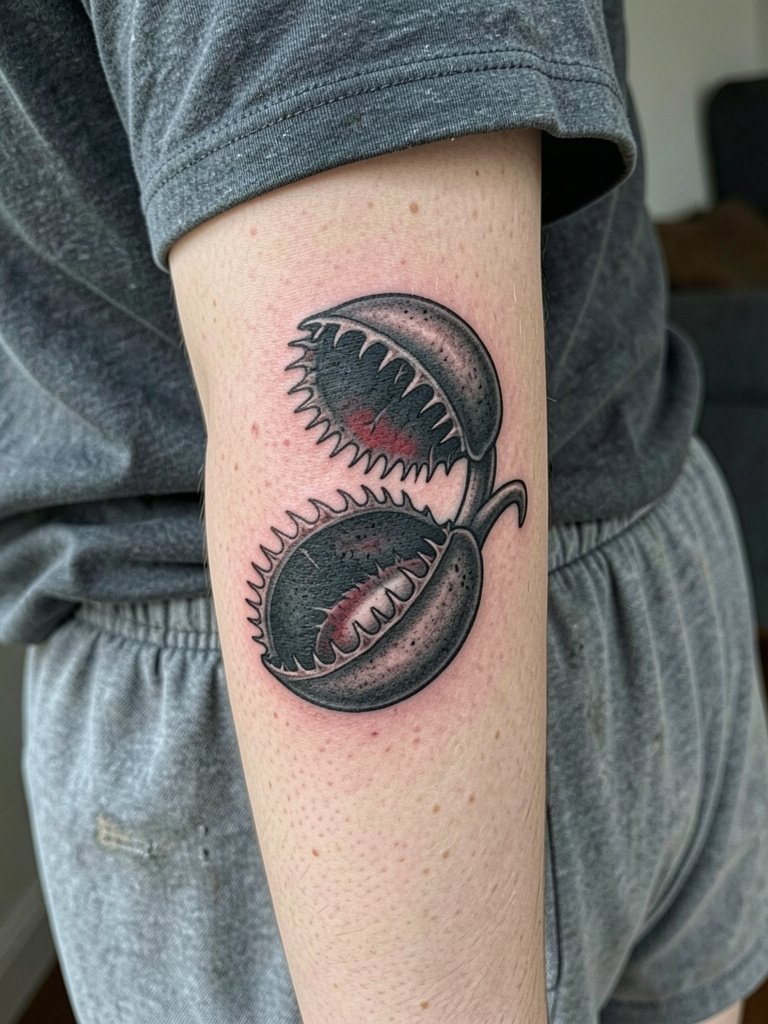
4. Spooky Monster-Face Flytrap on the Calf
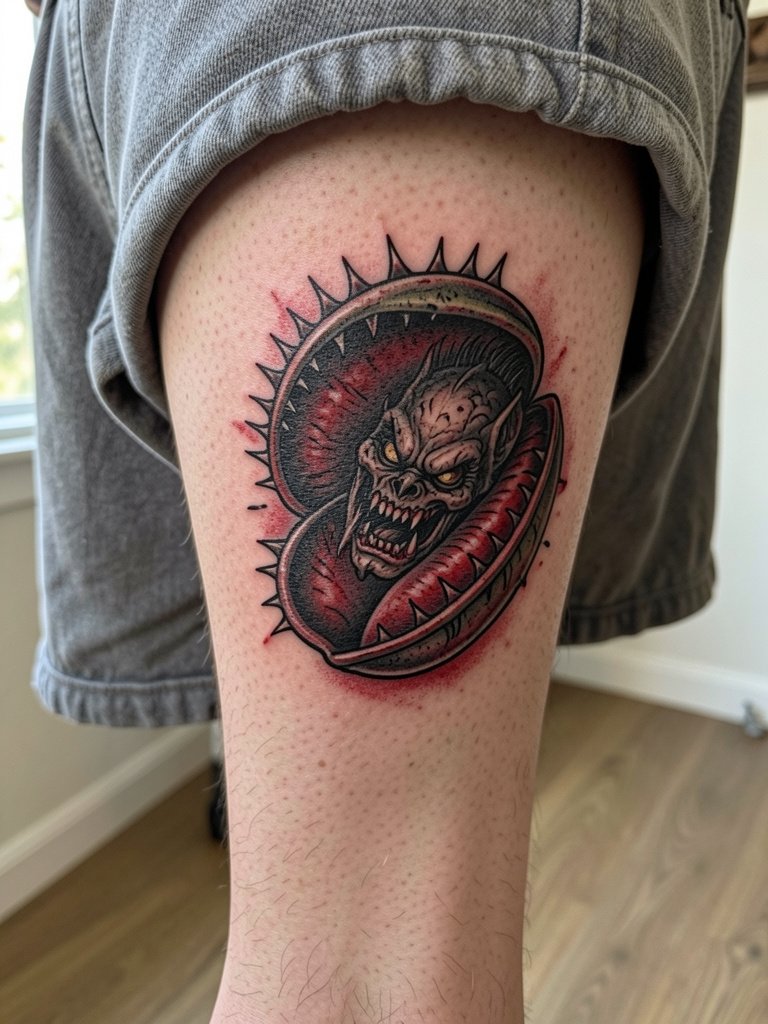
This direction leans alt and reads strong from a distance because the calf gives room for an open mouth and dramatic negative space. One common error is shrinking the concept and squeezing expression into a too-small patch. The session feels moderate; the back-of-leg has lower nerve density but the artist will need steady passes for solid black fill. Expect good longevity from blackwork and consider a targeted red wash for the inner lobes if you want a hint of color. Style it with midi skirts that have a slit or cuffed shorts to flash the back calf, try midi skirt slit.
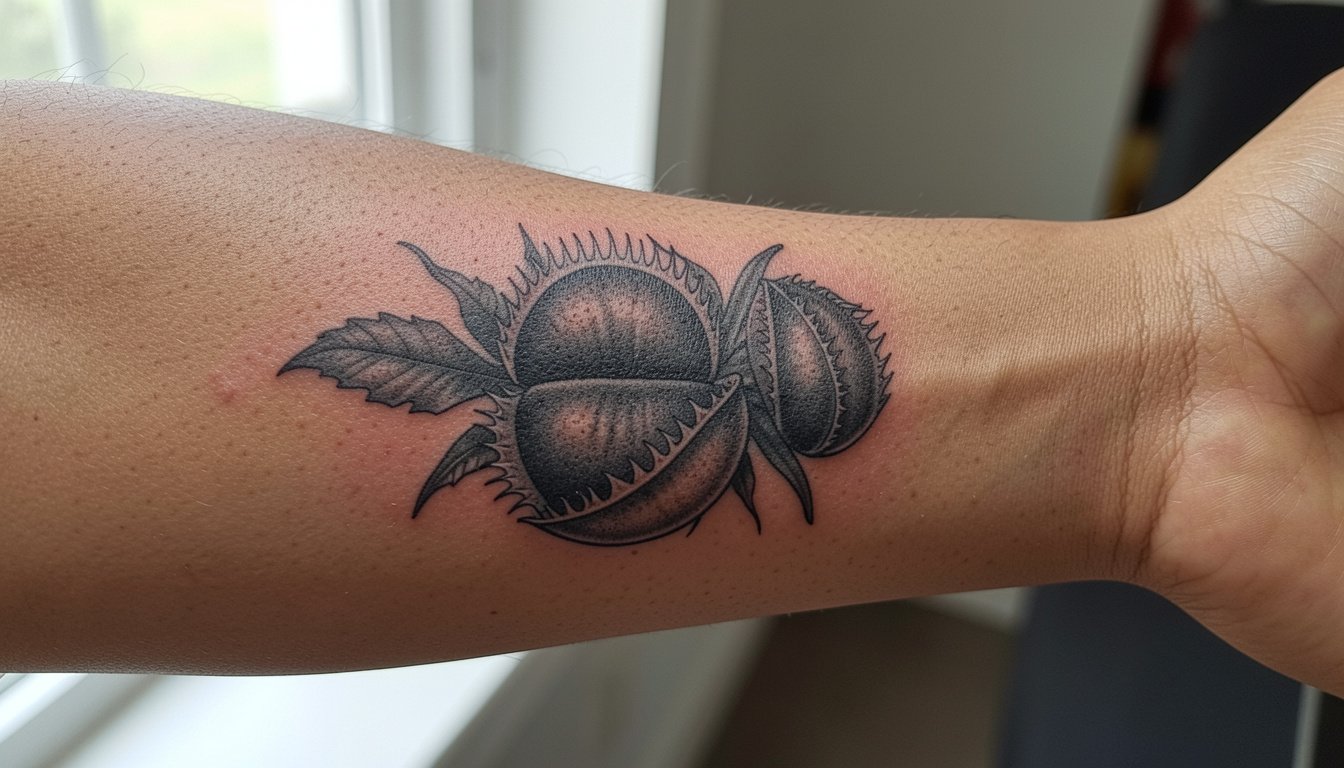
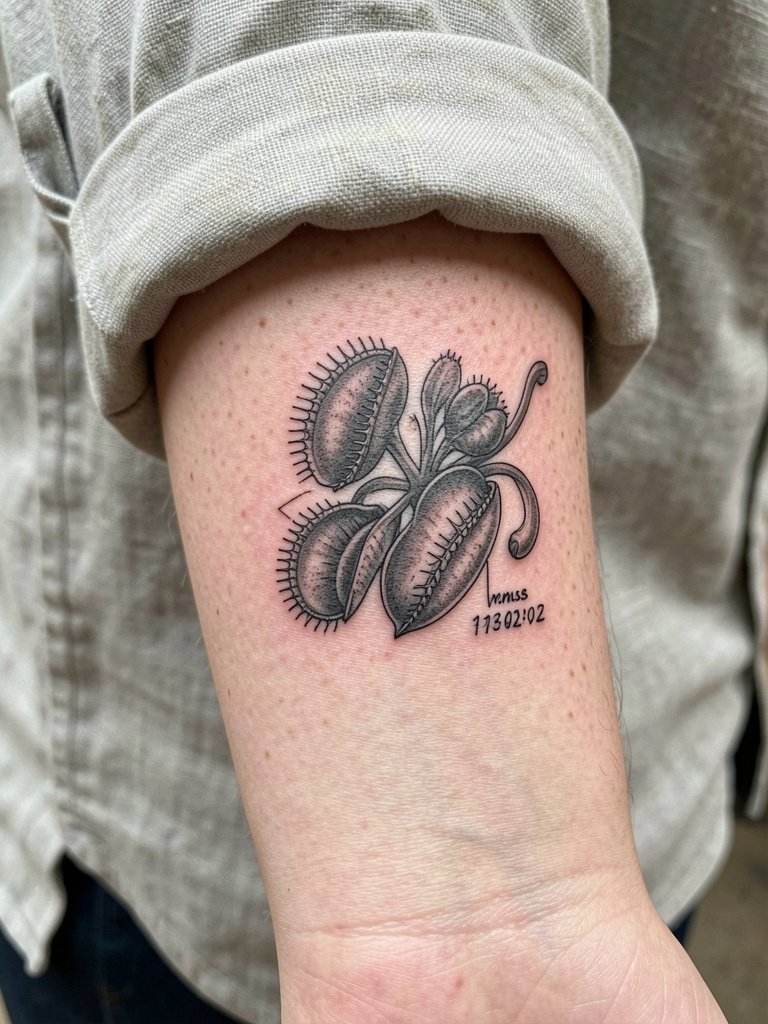
5. Black-and-Gray Botanical on Inner Forearm
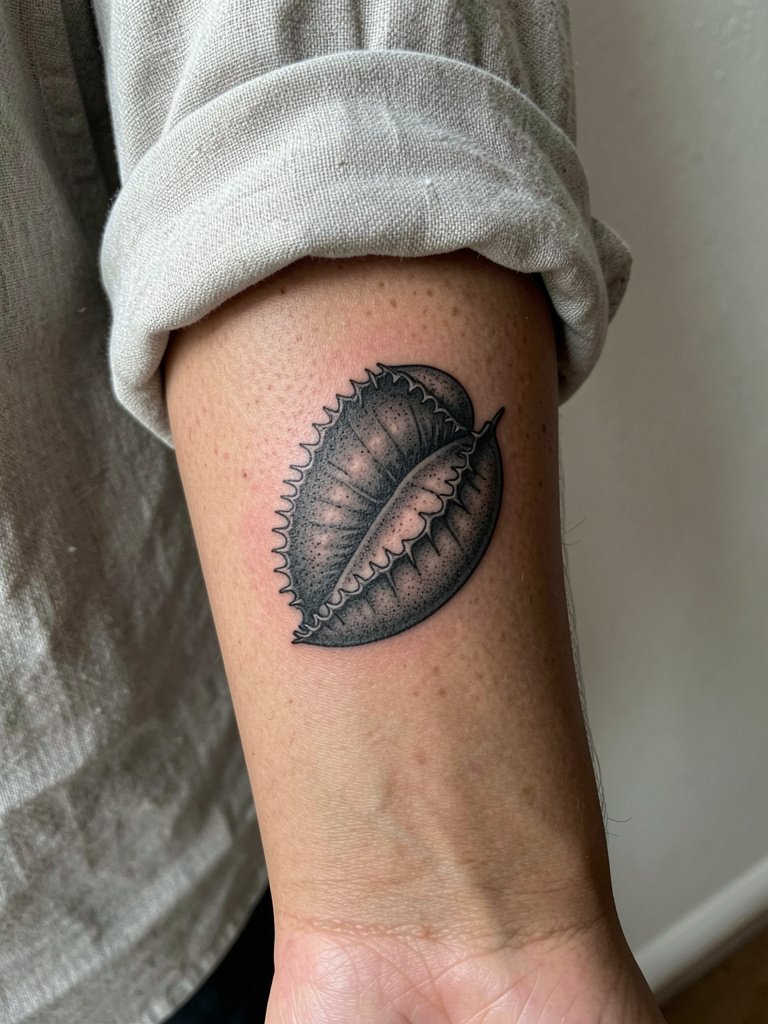
Black-and-gray keeps things elegant and avoids color fade issues, especially for collectors who prefer a cohesive arm look. For inner forearm placement, choose slightly wider leaf veins and leave room between teeth so the trap remains readable as the skin settles. The usual mistake is over-detailing tiny textures that vanish after healing. This placement is visible while you gesticulate, so pair the piece with rolled linen shirts or open-cuff button-downs to frame the art, for example linen button down shirt. Expect one to two sessions and a touch-up window at around year two.
6. Micro Venus Flytrap Behind the Ear
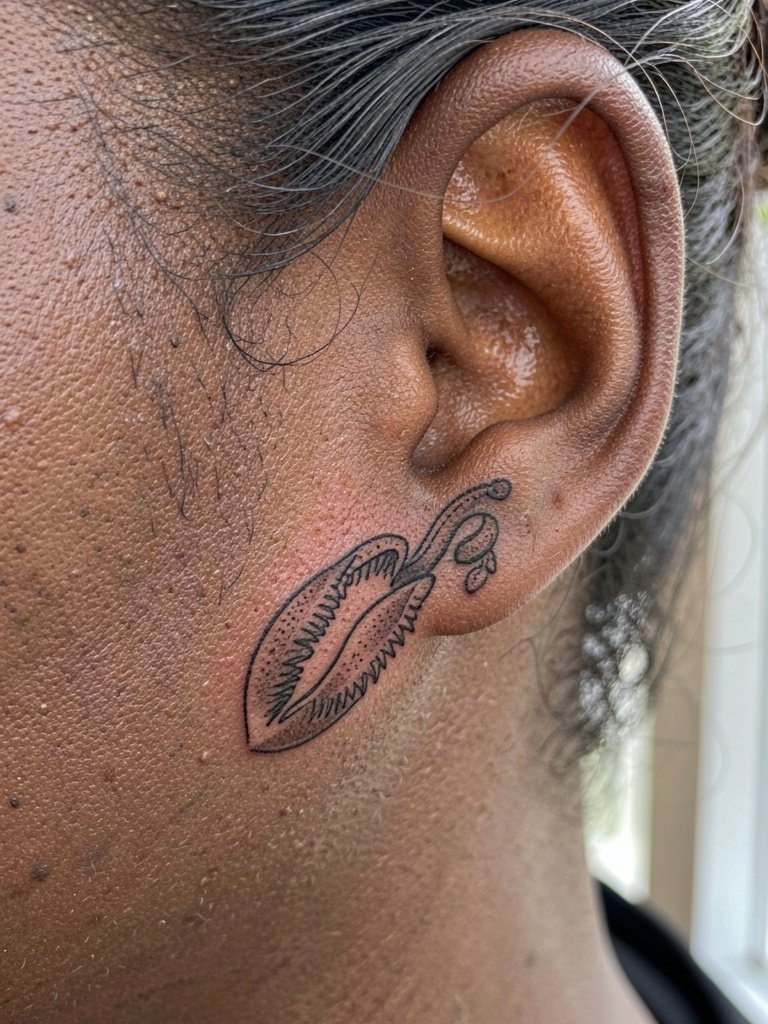
Micro placements are charming but polarizing. One camp prefers tiny single-needle versions because they are subtle and cute. Another camp worries that the teeth and inner mouth blur within a year on such a small canvas. Both positions have merit. If you choose micro behind the ear, increase negative space between teeth and plan for a potential touch-up within the first year. The session is quick and the area is low friction, but precision is critical so bring a magnified reference of the spacing you want.
Session Day Picks
These items smooth the first week and help small placements keep their edge, especially the wrist, ankle, and behind-ear pieces above.
-
Stencil transfer paper kit. Lets you preview how linework will sit on the skin so the artist can adjust spacing for teeth before the needle touches you.
-
Topical numbing cream. Helpful for sensitive spots like the ankle and behind the ear when applied per the product instructions and discussed beforehand.
-
Thin protective film roll. A breathable barrier that shields small, high-friction spots during the first days of healing.
-
Fragrance-free body wash. Gentle cleansing without irritation matters for fine line and micro pieces that are prone to early fading from harsh soaps.
-
Aquaphor healing ointment. A widely used option for the first 48 to 72 hours that keeps small linework moist without clogging.
7. Neo-Traditional with Decorative Leaves on Outer Forearm
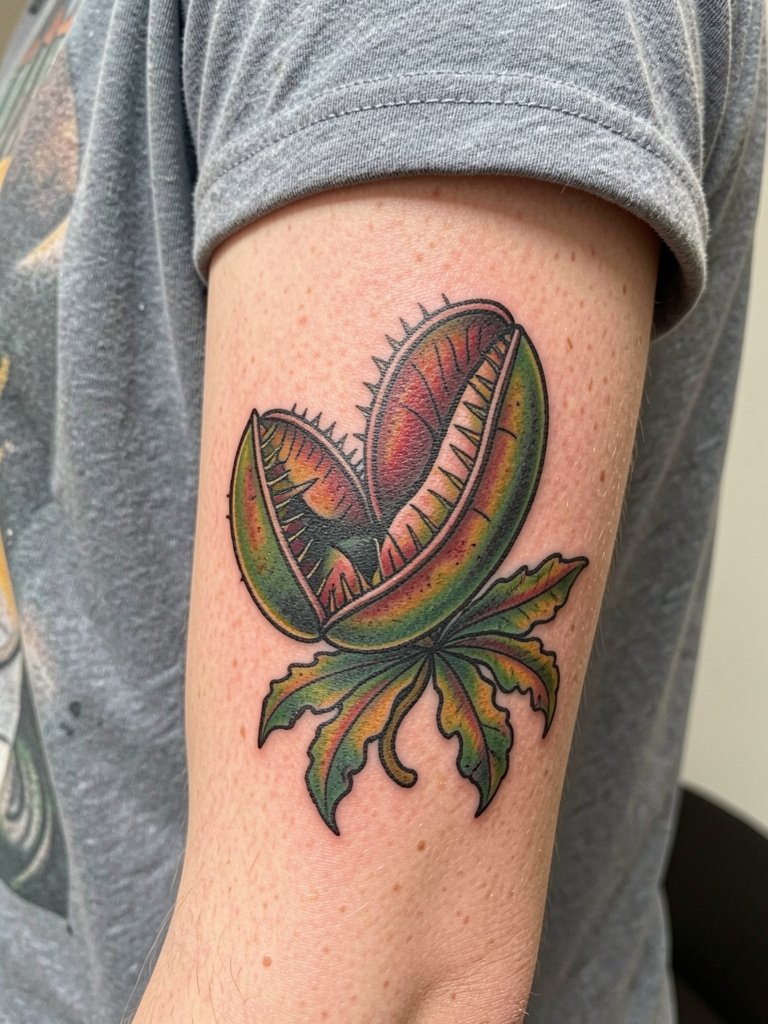
If you want the plant to age without losing tooth detail, heavy contour lines and decorative leaves help separate elements visually. This style is a safer choice than ultra-fine line for the forearm where movement and sun exposure accelerate fade. Tell the artist the exact contour thickness you like and show a colored photo to match saturation. Session time is moderate for color work and a small color refresh at year two is common. Pair with short sleeves and neutral over-shirts so the arm reads cleanly, try open cardigan women for layering that does not hide the piece.
8. Venus Flytrap Paired with Other Botanicals on Ribcage
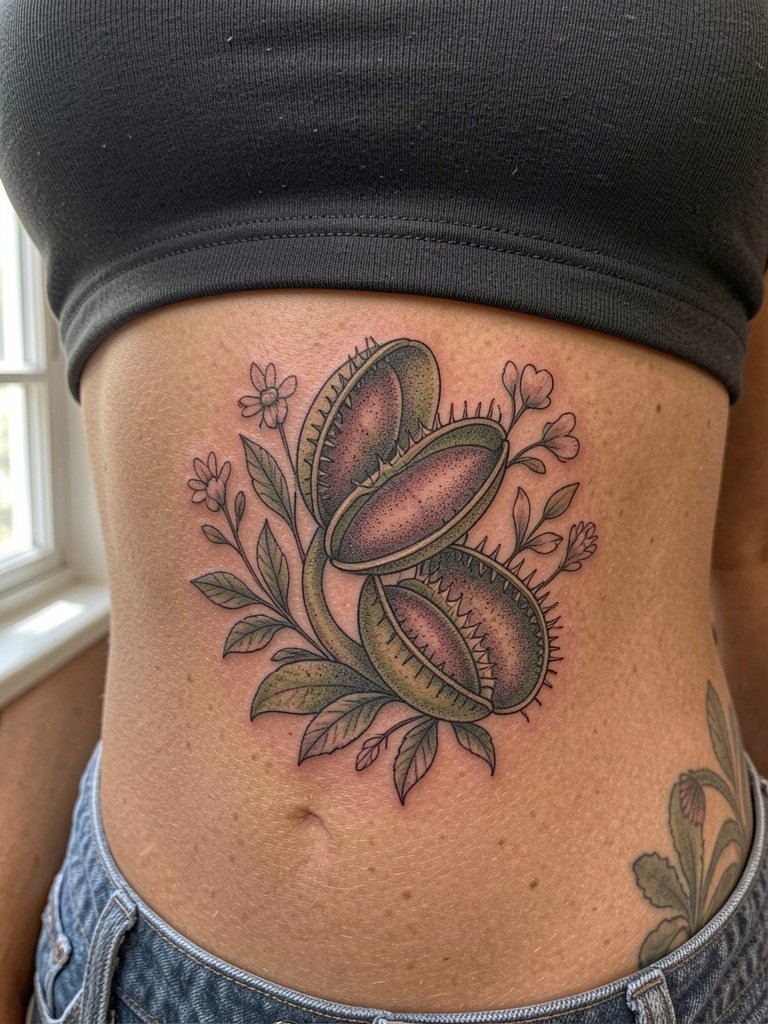
Combining the flytrap with other plants balances the sharp mouth and gives the composition breathing room. The ribcage is a curved canvas so plan the layout with full stencils to see how leaves flow with the torso. Pain is higher on the ribs and sessions may be split. A common mistake is compressing a complex botanical into a single short session. Expect two to three sessions for a larger black-and-gray or muted color build. For the appointment, a loose sports bra or button-down makes access easy without tugging, consider sports bra women for session comfort.
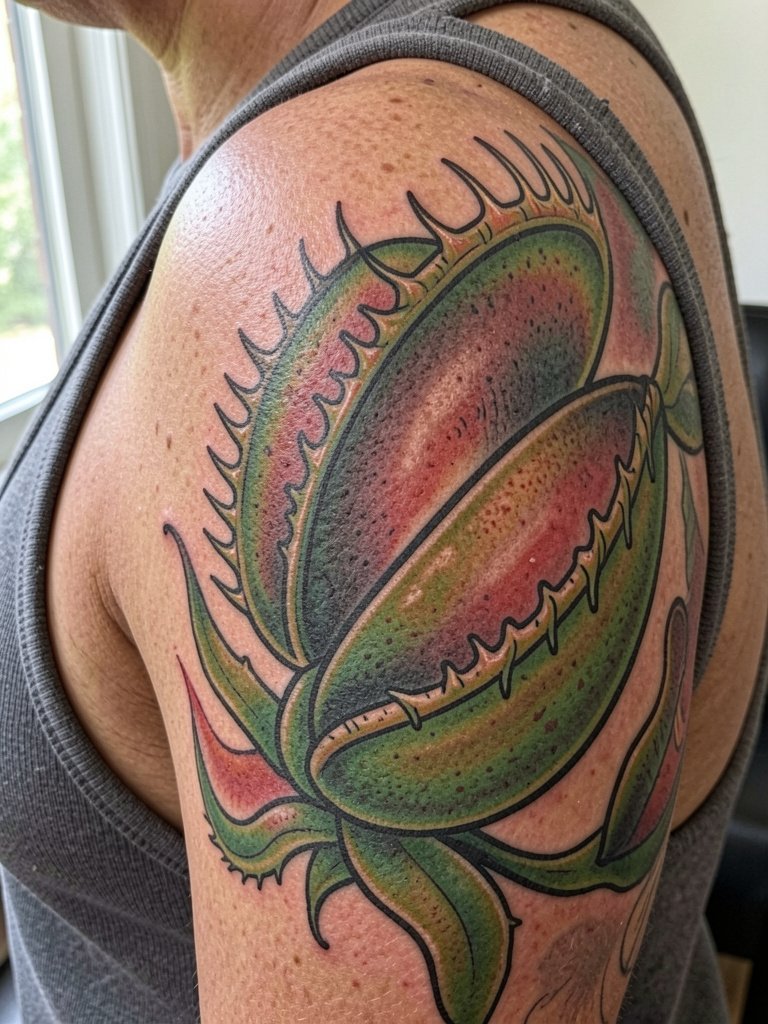
9. Whimsical Retro Green and Red on Upper Thigh
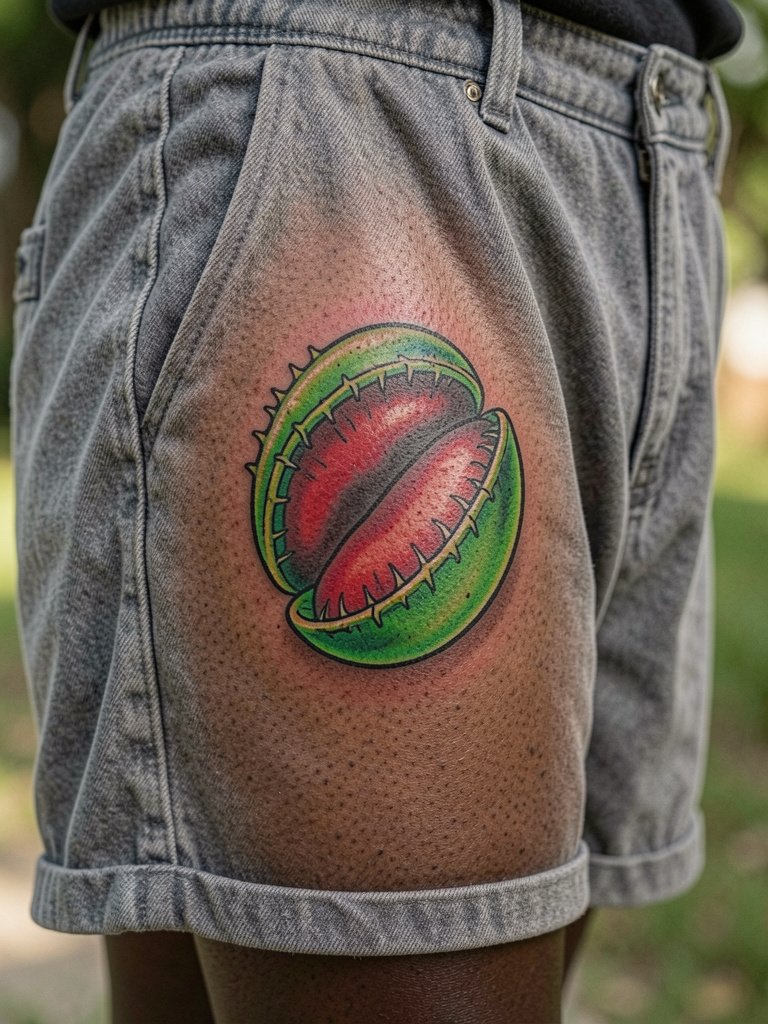
The thigh gives space for playful color without the constant sun exposure that fades leg work. Bright green and red read iconic, but you might need bolder outlines to prevent the red from sinking into surrounding greens over time. If you want retro charm, ask for flat color fills and a small white highlight to suggest shine rather than gradient blends that can soften. The area tolerates longer sessions and heals with low friction if you avoid tight seams during the first two weeks. Showing it off works well with bike shorts or skirts that can reveal part of the piece, try bike shorts.
10. Statement Open-Mouth Composition on the Shoulder
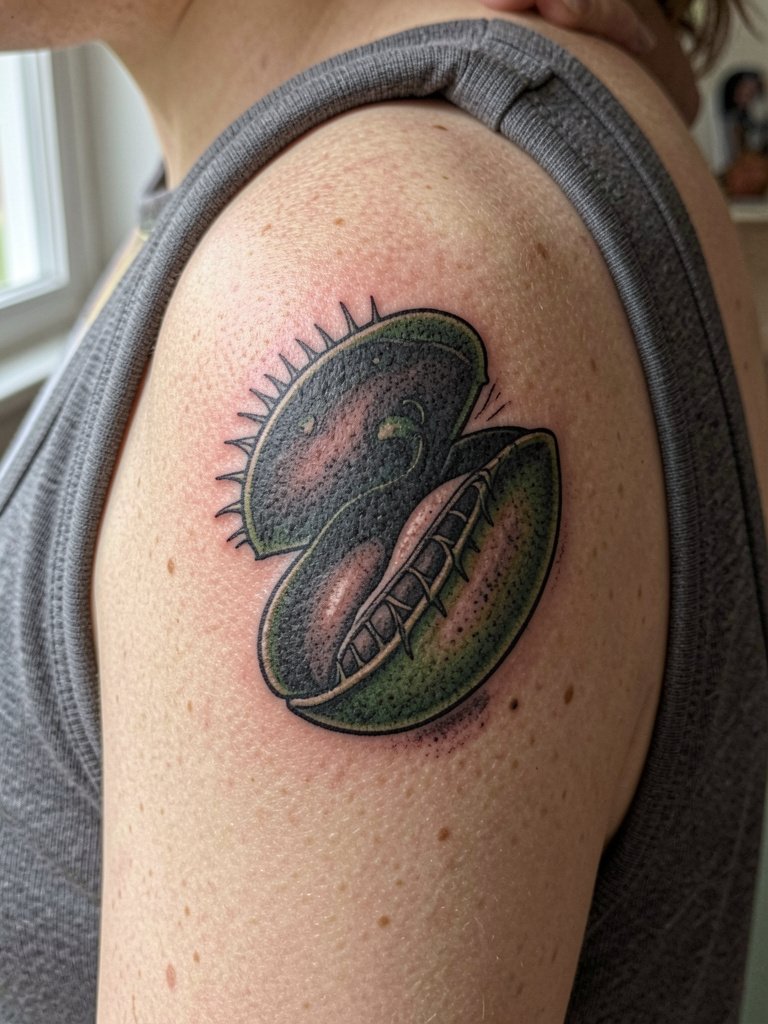
Shoulder pieces read well when the trap is arranged around the deltoid curve, because the silhouette becomes the focal point. Avoid intricate teeth cramming; a strong negative-space mouth and suggested tooth peaks hold up. Sessions are moderate and can be done standing or seated. For wardrobe, off-shoulder or racerback tops put the art front and center. Wear a loose tank or racerback to the appointment so you can remove the top without rubbing the fresh ink.
11. Botanical Dream Tattoo with Polished Neo-Traditional Finish on Outer Upper Arm
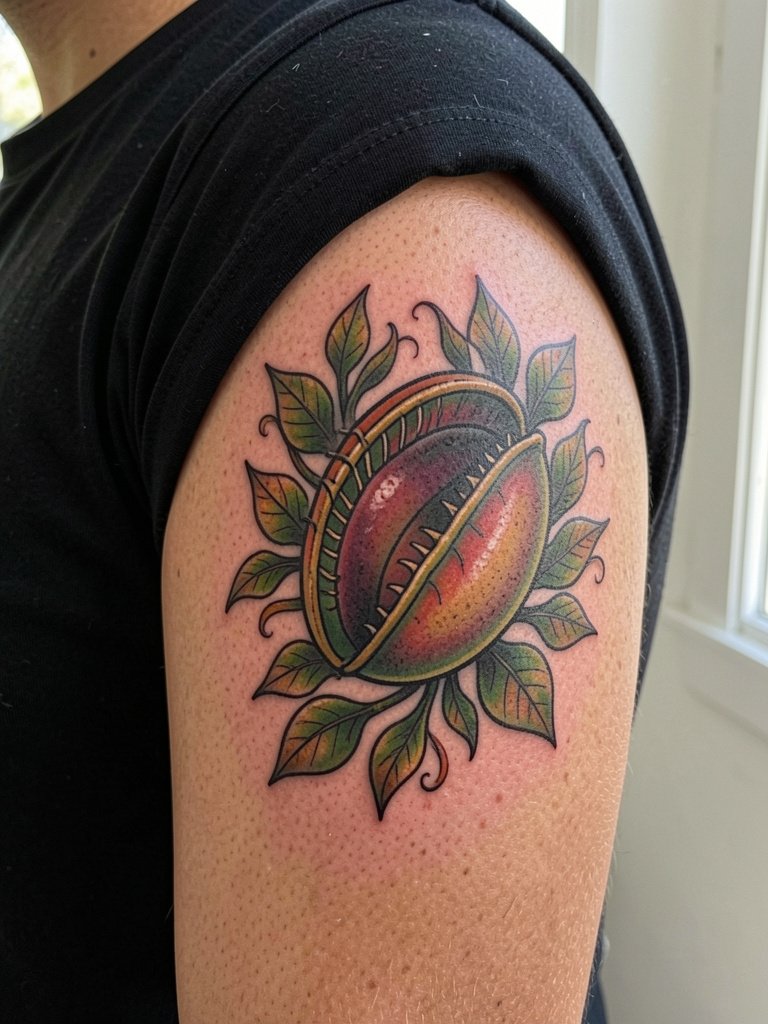
A fully realized neo-traditional finish reads intentional and durable, especially on the outer upper arm where you can keep the form large enough. The mistake I see most is asking for near-photoreal detail at too-small a scale. Instead, aim for polished shapes, layered leaves, and controlled highlights that support the trap read. One session can build the base and a second session can refine saturation. For everyday styling, short-sleeve fitted tees and rolled cuffs highlight the piece without covering it. Try fitted black tee for a low-contrast backdrop.
12. Spooky Blackwork for the Alt Collector on the Calf or Outer Forearm
Blackwork emphasizes shape and silhouette rather than delicate teeth. That is an advantage if you want a bold, less sugary look. Placement choice affects how the piece interacts with other tattoos, so plan spacing if you already have blackwork. This style ages well because solid black remains readable and touch-ups are straightforward. Pain varies by placement but sessions are typically single visits for medium pieces. For a goth or alt wardrobe, cuffed jeans and layered socks can frame the calf or arm art without hiding it.
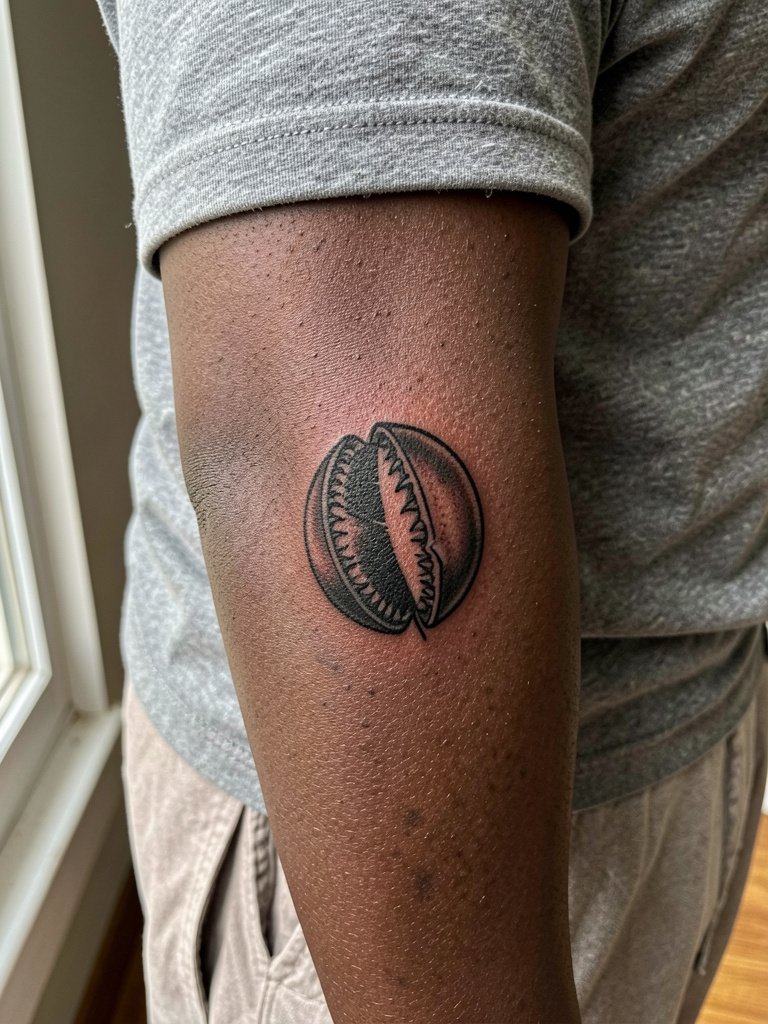
13. Collector Badge: Plant-Collector-Inspired Inner Forearm
If you cultivate carnivorous plants, this functions like a collector badge with room for a tiny note or number. For longevity, avoid ultra-thin script inside the trap. Instead, reserve the small label area for single-word text in a legible weight and keep the trap slightly larger than you think you need. Inner forearm touch-ups are common at years two to three. Pair this with rolled cuffs and thin bracelets on the opposite hand to balance the look, try thin chain bracelet.
14. Spooky-Soul Alternative Style on Outer Forearm or Calf
This niche fits goth and weird-botany fans who want the plant to read serious rather than cute. Keep tooth shapes bold enough to avoid softening and ask for heavy contrast in the trap rim so the mouth remains a focal point. The skin here tolerates black-and-gray well and touch-ups are usually minimal. For outfits, layered dark socks with cuffed pants or midi skirts with slits let you show the art selectively.
15. Statement Shoulder-to-Upper-Arm Composition for Collectors
For a collector-level piece, scale is your friend. The shoulder and upper arm allow the trap to open fully, which preserves the silhouette at long distance and close up. A common error is trying to compress multiple stylistic directions into a single small panel. Instead, pick a dominant aesthetic and let supporting elements follow it. Sessions will be longer and may be scheduled over multiple visits. For session wear, choose a racerback or loose tank so the artist can access shoulder and upper-arm skin cleanly.
Frequently Asked Questions
Q: Color or black-and-gray for a Venus flytrap, which ages better?
A: One camp favors color because the green and red make the trap instantly recognizable and lively. Another camp prefers black-and-gray because it avoids early color fade and keeps a less cartoonish tone. Both choices work if you plan sizing and line weight accordingly. If longevity is the priority, opt for bold outlines with solid fills whether you choose color or grayscale.
Q: How big should a Venus flytrap be so the teeth stay legible?
A: Aim for at least two to three inches across for obvious tooth detail on areas that move a lot like wrists or ankles. If you want micro work, increase the negative space and accept a simpler tooth suggestion rather than literal serration. Consider a touch-up window at year one to retain crispness for very small pieces.
Q: Where can I find artists who specialize in weird-botany or neo-traditional plant work?
A: Search Instagram and TikTok by combining the subject with style tags, for example #venusflytraptattoo plus #neotraditionaltattoo or #botanicaltattoo, and filter by location. Pinterest is good for mood boards and Reddit threads often show healed photos and user feedback. Short-form reels help you see how healed color and linework age in real life.
Q: What should I wear to my session for different placements?
A: For outer upper arm or shoulder work wear a racerback tank or sleeveless top so the artist has clear access. For ribcage pieces pick a fitted sports bra or cropped top that stays in place. For ankle or calf work bring loose shorts or cropped pants so fabric does not rub the fresh ink.
Q: How often will I need touch-ups for small versus medium Venus flytrap tattoos?
A: Small, single-needle pieces commonly need a touch-up inside the first year to refine teeth and fine line. Medium pieces with bold outlines often need less frequent attention and may only require a touch-up every two to five years depending on sun exposure and skin type. Good placement and contouring reduce early touch-up needs.
