
A heavy band of ink can read like jewelry or a badge, depending on spacing, line weight, and placement. Pick wire that follows the curve of your arm, not the photo on your phone, and expect that tiny single-needle spikes will soften faster than mid-weight lines. The sections below show versions that work now and versions that still look good years from now.
1. Classic barbed wire wrist band

This compact wrist bracelet reads jewelry-like when spaced to avoid the wrist bone. For durability pick a slightly heavier line weight than the smallest single-needle example you saw online. Common mistakes are wrapping the wire too tight against the wrist bone and using spikes that sit inside wrist creases. Session time for a simple band is usually under an hour and pain is moderate on the top of the wrist. For the appointment wear a cropped sleeve tee so the artist can position the stencil without tugging at clothing. Healed look at two years shows softer spike tips but still clear spacing.
2. Minimal barbed wire line tattoo

Minimal versions are the easiest to style as bracelet substitutes, but they raise longevity questions. One camp says fine line looks cleaner and modern. The other camp says fine line blurs faster on high-motion skin like the inner forearm. If you want the minimal look and longer life request slightly wider linework and more negative space between spikes. A common mistake is copying a phone photo that was shot macro and expecting identical scale on your arm. Expect touch-up in the first two to five years with tiny micro bands.
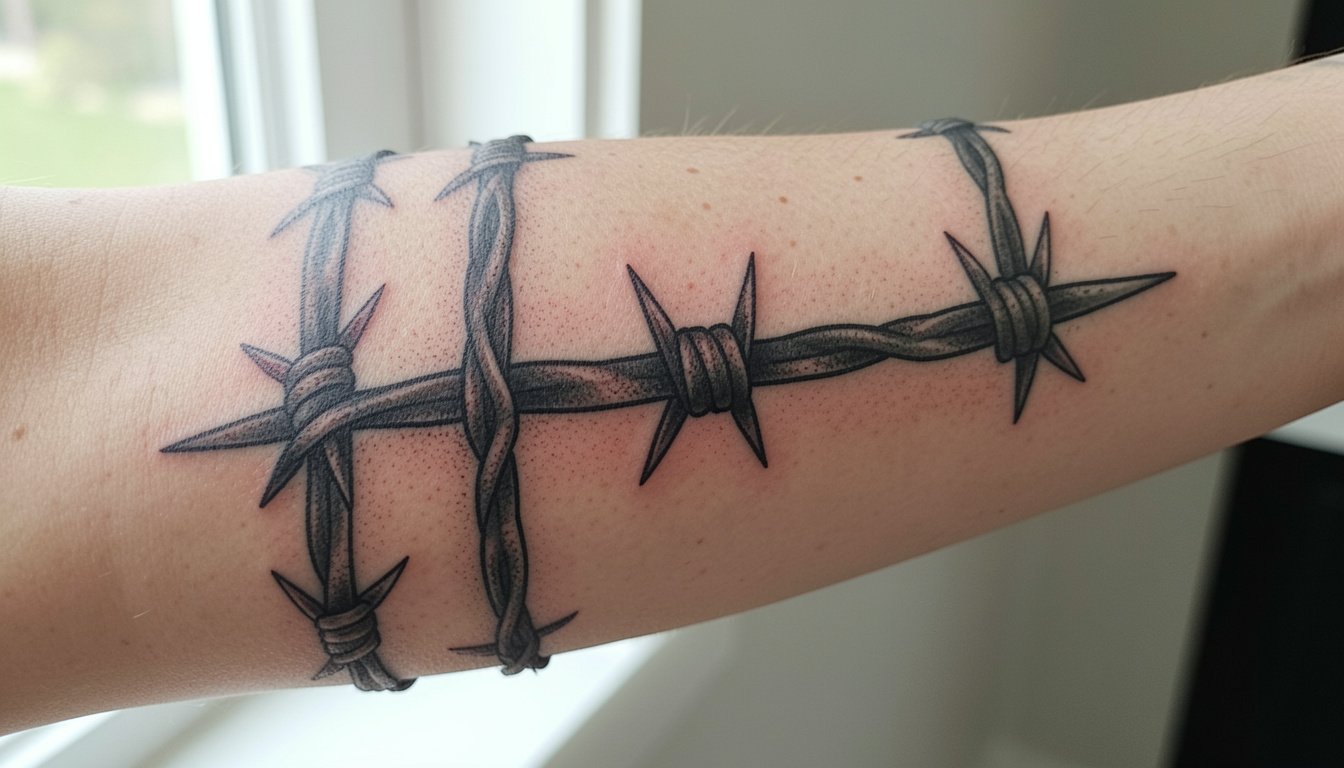
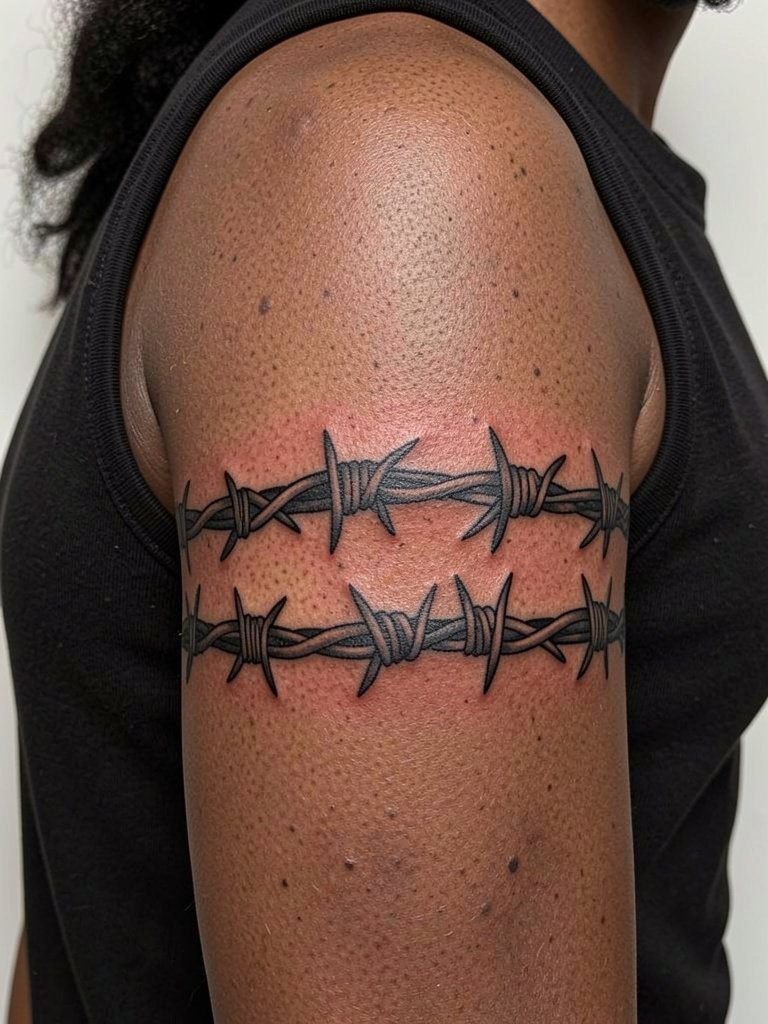
3. Barbed wire armband for forearm

A full-wrap forearm band reads bold from a distance and makes a clean frame for future sleeve work. The design works best when the wire follows the arm circumference and avoids sitting on bony landmarks. During consultation bring images at the exact circumference of your arm so the artist can mock a wraparound stencil. Wear a rolled sleeve shirt to show how the band will look under typical clothing. Expect one session for a simple band and a second if the cuff needs symmetry corrections.
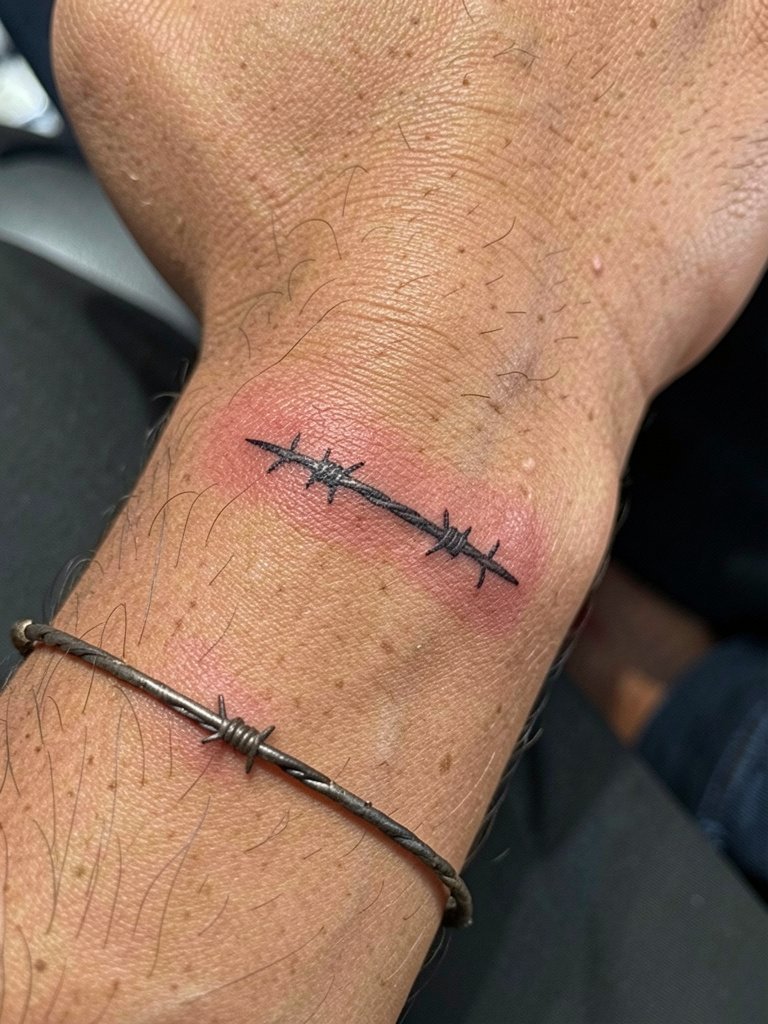
4. Barbed wire bracelet tattoo above the wrist

Placed like an accessory, this variant pairs well with jewelry on the opposite wrist. The mistake is crowding the tattoo under existing bracelets which accelerates friction during healing. For showing off, stack a thin bangle on the other wrist and avoid metal on the tattooed wrist for the first week. Line weight should be medium not ultra-fine so spikes keep their shape after a year. Pain at the top of the wrist is mild to moderate and session time is short.
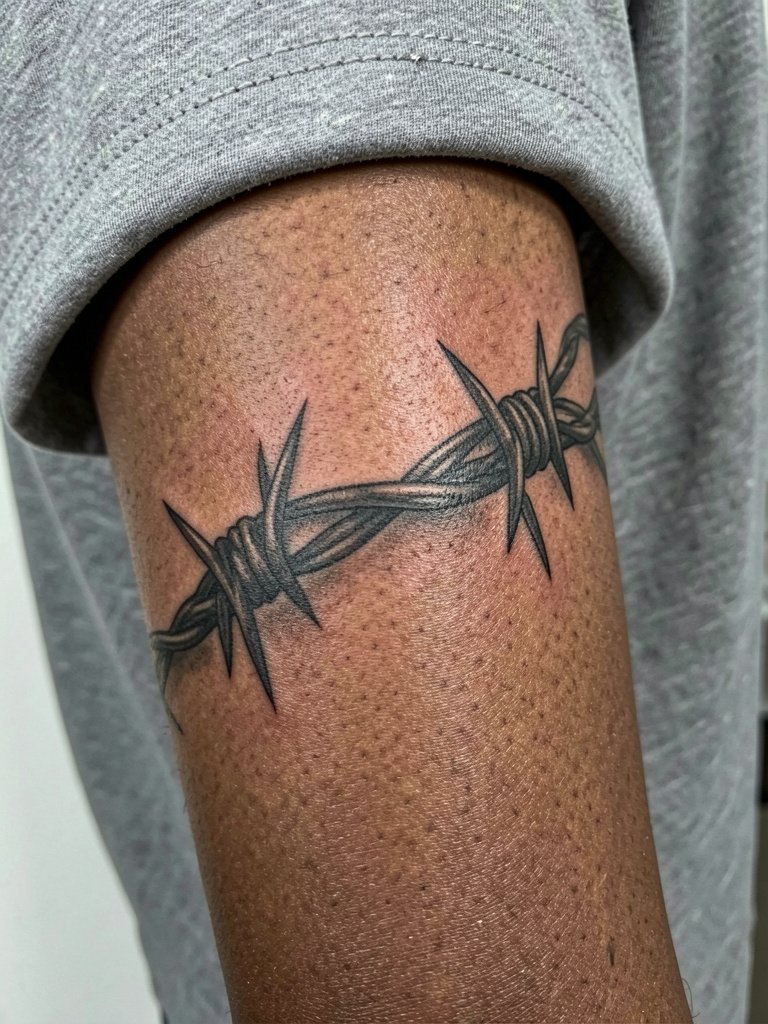
5. Barbed wire forearm band with thicker silhouette
Thicker silhouettes age more predictably on forearms because they resist early blur. One camp argues fine-line bands look modern but degrade faster on moving skin. The other camp argues bold bands are the safer long-term choice and point to healed photos showing clearer edges at five years. If longevity is the goal pick wider linework and slightly larger spikes. The session feels like a steady, continuous run and blowout risk is lower when the artist spaces the loops with room.
6. Barbed wire with rose accents

Soft florals help the motif avoid prison-era associations while keeping the wire as a visual anchor. A typical consultation item here is where the wire should pass behind or in front of the bloom. Bring scaled references and precise placement notes so the artist can show overlaps on a stencil. For outfits, this placement looks great with a muscle tank top that frames the bicep. Expect a one to two hour session if color is included and plan for a touch-up after initial healing if small color gaps appear.
Session Day Picks
The first six designs include wrist and upper-arm placements that rub on sleeves and jewelry, so a few low-profile items save the session and the first 48 hours.
-
fragrance free tattoo wash. Gentle cleansers reduce irritation on wrist and forearm pieces where friction is highest during showers.
-
non petroleum tattoo balm. Petroleum alternatives avoid trapping bacteria while keeping fine-line areas moisturized.
-
silicone free tattoo lotion. Silicone-free formulas help for those who react to heavy ointments and need a lighter finish.
-
second skin roll tattoo. A roll of protective film is handy when a wrist band might rub on bedding on the first night.
-
Aquaphor healing ointment. A well known ointment for the immediate post-session window when thin, breathable hydration is required.
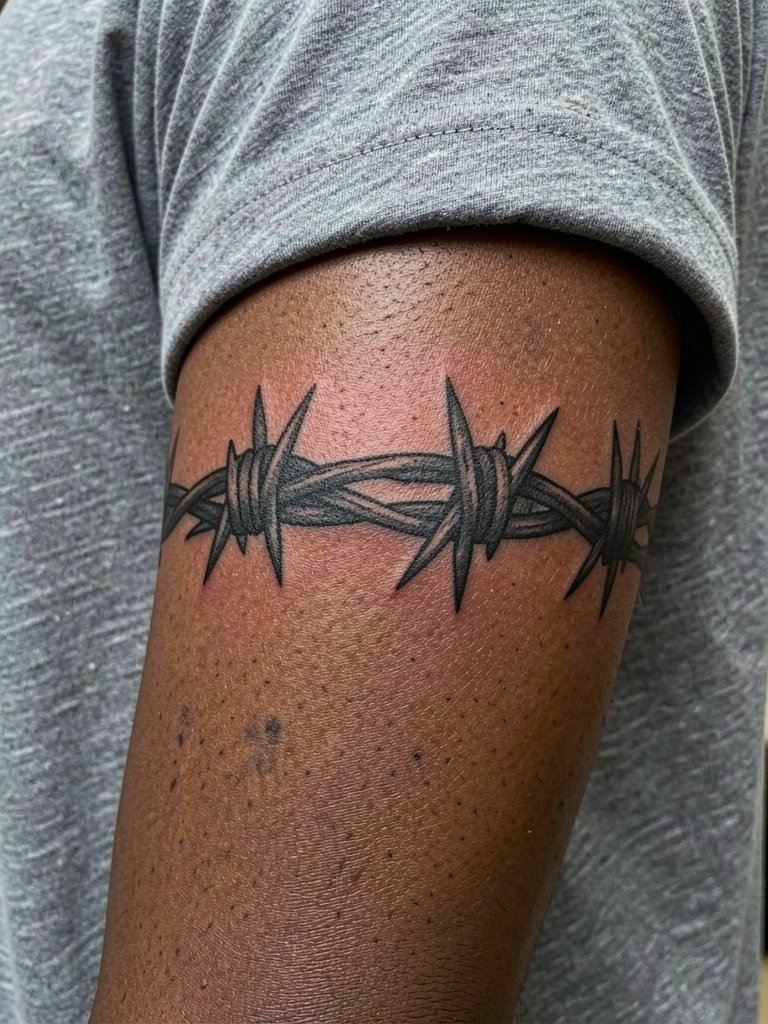
7. Barbed wire bicep armband

Upper-arm placements avoid wrist movement and therefore preserve fine detail longer. This is a good choice if you want a cuff effect without daily friction. The main mistake is choosing a band that is too narrow for the arm circumference which makes the spikes look cramped. Session time is short and pain is low to moderate. For showing the piece off pair it with an open overshirt or sleeveless layers. Plan touch-up at one year if you add nearby sleeve work.
8. Barbed wire with realism shading
Realism shading gives the wire sculptural weight which helps when the design needs to read from multiple distances. A common mistake is overloading small cuffs with heavy graywash which fills in negative space after healing. Ask for reference photos that show healed black-and-gray work at the same scale. The session usually takes longer than a flat black band so plan for a break mid-way. For outfit pairings choose clean monochrome tops so the shaded volume stands out.
9. Broken spacing wrap with gaps

Strategic gaps make a band feel custom and reduce the trapped cuff effect. This approach helps when you want the motif to integrate with scars or old ink. A typical consultation item is where to place negative spaces so they sit on flatter planes of the arm. For the session wear a relaxed fit tee to let the artist test the gap positions visually. Broken wraps also anchor future connecting pieces more naturally.
10. Delicate bracelet for a feminine read

Delicate bracelets read jewelry-like but they demand careful planning because the smallest lines can blur. If you choose a very fine variant accept that touch-up may be needed sooner. A common mistake is requesting microscopic spikes and then expecting no fade. On appointment day avoid bracelets on the target wrist and wear a minimal watch on the other wrist for balanced styling in the healed photos.
11. Wide armband with repeated barb clusters

Clustered patterns make the band feel bespoke rather than copy-paste. If you want a decorative cuff insist on a custom stencil because off-the-shelf wraps rarely account for arm taper. Expect session time to be longer because symmetry checks and small corrections add minutes. The visual impact holds well if the artist keeps the clusters slightly separated so the negative channels remain visible at two years.
12. Sleeve-start connector band

Use a band as a starter for a sleeve by asking for bolder outlines where the sleeve will connect. The consultation should cover how the band transitions into future motifs so you avoid rework. A common mistake is letting an initial band sit too shallowly so later shading disrupts its edges. For the session wear a button down shirt you can roll without creasing the area. This design is best when the artist draws the first sleeve lines thicker for future readability.
13. Micro barbed wire band for discreet wear
Micro bands are great for low-visibility placements but they blur faster. If you want discreet then ask the artist to slightly thicken the main spine and space spikes out a little more. The mistake is copying a phone macro that hides how tiny the work is. Pain and session time are minimal. Healed photos at one year show the micro band softer but still readable if the initial line weight was reinforced.
14. Custom-fit asymmetrical armband
Custom-fit armbands avoid the one-size-fits-all look by adjusting loops to arm shape. The artist should trace your arm and mock stencil positions at the exact circumference. Ask for a hand-held stencil preview on both sides of the arm so you can confirm symmetry. This design is best for collectors who plan more work on the same limb and who want a band that reads correctly in motion.
15. Floral band that softens the motif

Pairing florals with barbed wire reduces the aggressive read and increases options for color or grayscale shading. During consultation specify how much overlap you want between petals and spikes so neither element fights the other. For outfits, lightweight linen shirts in neutral tones amplify the floral contrast. Expect a longer session if you add multiple flowers and color, and plan a follow-up touch-up for color saturation after initial healing.
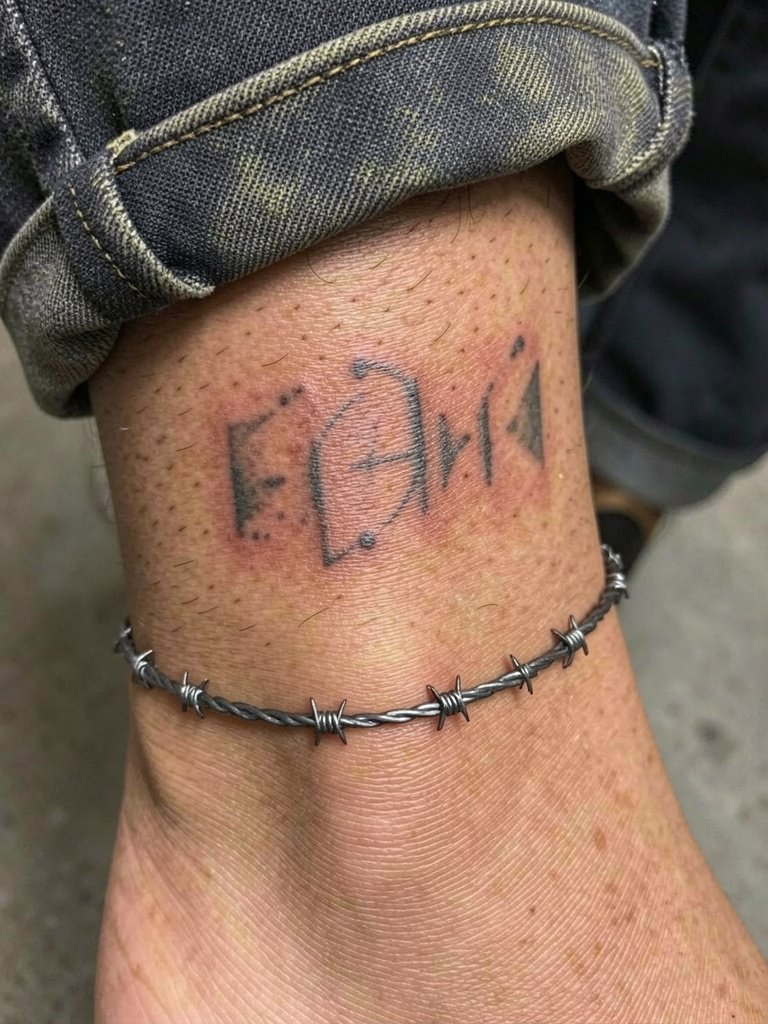
16. Ankle barbed wire cuff

Ankle placements face friction from shoes and socks so pick lines that can survive daily rubbing. A common mistake is going too fine on the ankle where blur risk rises. Wear low-top shoes and rolled cuffs during the session and in the first week to reduce contact. For styling pair the healed cuff with low top sneakers and cropped jeans to show it off. Expect mild pain and a short session.
17. Interlaced multi-strand wrap

Layered strands add depth without heavy fill. The crucial decision in the consult is how many strands your arm needs before the pattern reads as clutter. Artists will often throttle spacing to prevent future merging. Session time grows with each strand and touch-up may be needed if lines sit closely. For wardrobe try monochrome tees that let the interlaced lines stand out.
18. Single spike accent band

Using a single larger spike as an accent creates a compositional anchor that ages more attractively than uniform tiny spikes. A mistake is making the accent too large so it dominates the wrist. During your consult clarify scale with an inch-long stencil so you can see how it reads on your arm. Pain is mild and the session is short.
19. Blackwork silhouette cuff

Solid black silhouettes read strongly and simplify long-term maintenance because saturation survives fading better than thin lines. Common errors are losing negative cutouts by making them too thin. If you prefer a bold, graphic look ask the artist to block-fill and leave generous negative channels. This approach pairs with minimal, monochrome outfits to let the cuff read as a design element.
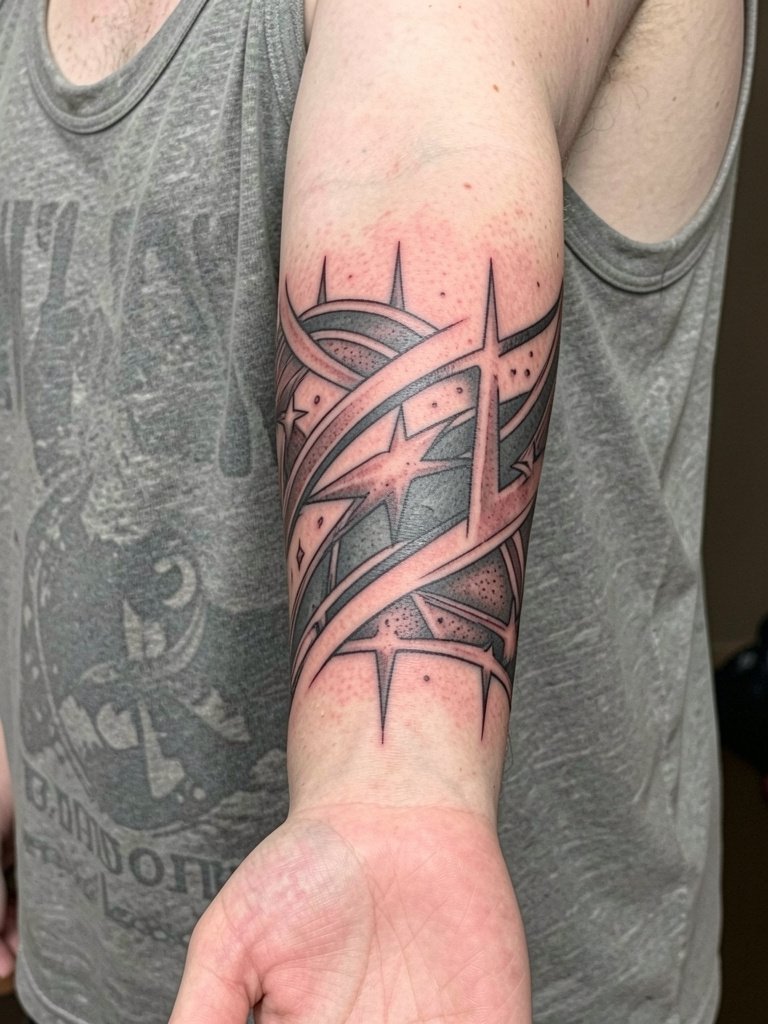
20. Barbed wire with geometric breakpoints

Geometric accents modernize the motif and help it avoid dated flash aesthetics. A planning detail is where the geometry intersects the wire so the pattern does not look pasted on. Ask the artist to draw intersection points on a live stencil to check how the shapes move with your muscles. Sessions take longer when precision geometry is required.
21. Memorial barbed wire band with small text
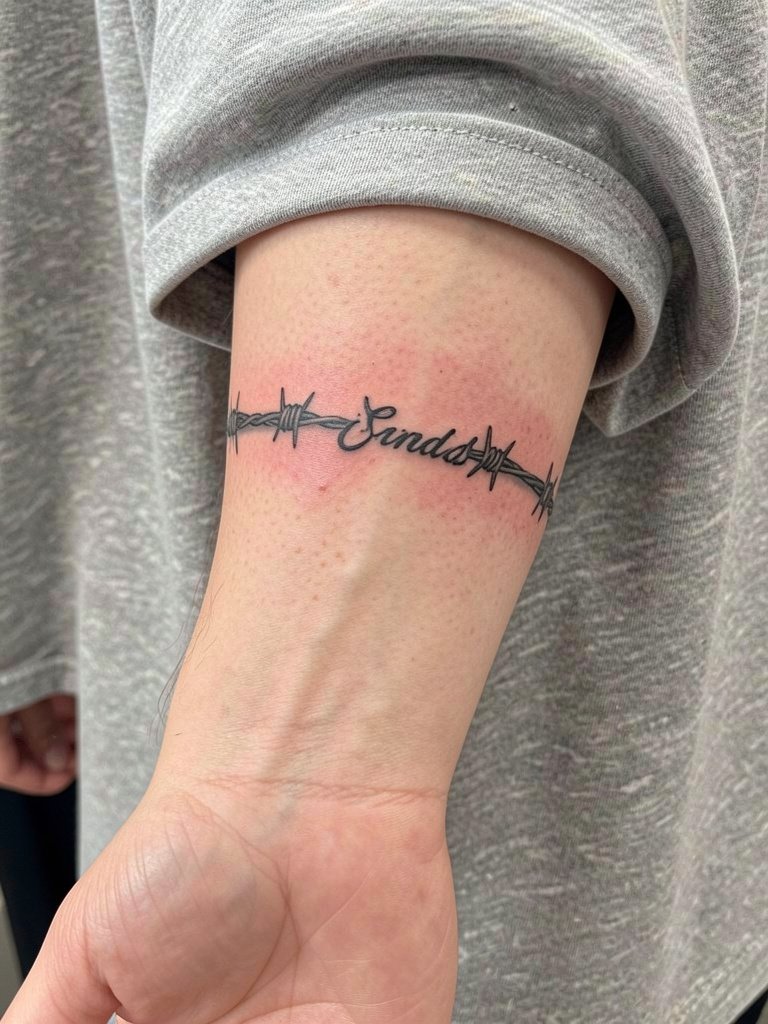
Integrating text into a barbed wire band requires exact size decisions because letters shrink visually when scaled around a curve. The right approach is to test the text at full scale on the arm using a stencil strip so you can read it in the actual spacing. Small text integrated into the band often needs a slightly bolder stroke than standalone script to remain legible at two years. For session wear choose a loose tank top so the artist can access the inner forearm.
22. Color-accented spike tips
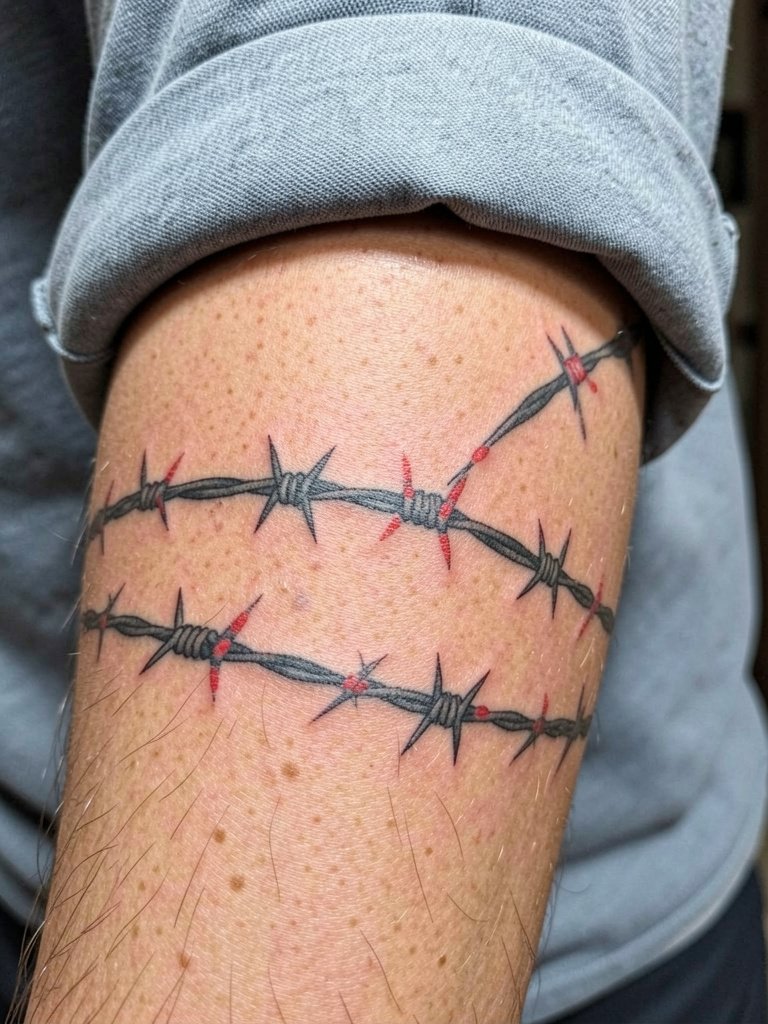
Tiny color accents give a modern twist and can soften the motif. Be wary of adding color where lines are thin because color sits differently than black. A common artist note is that saturated pigments need room to age, so tiny color dots should be reinforced. For showing off pair this design with neutral tops that let the red or blue pop. Expect a slightly longer session than plain black and a potential color touch-up.
23. Barbed wire fused with chain link
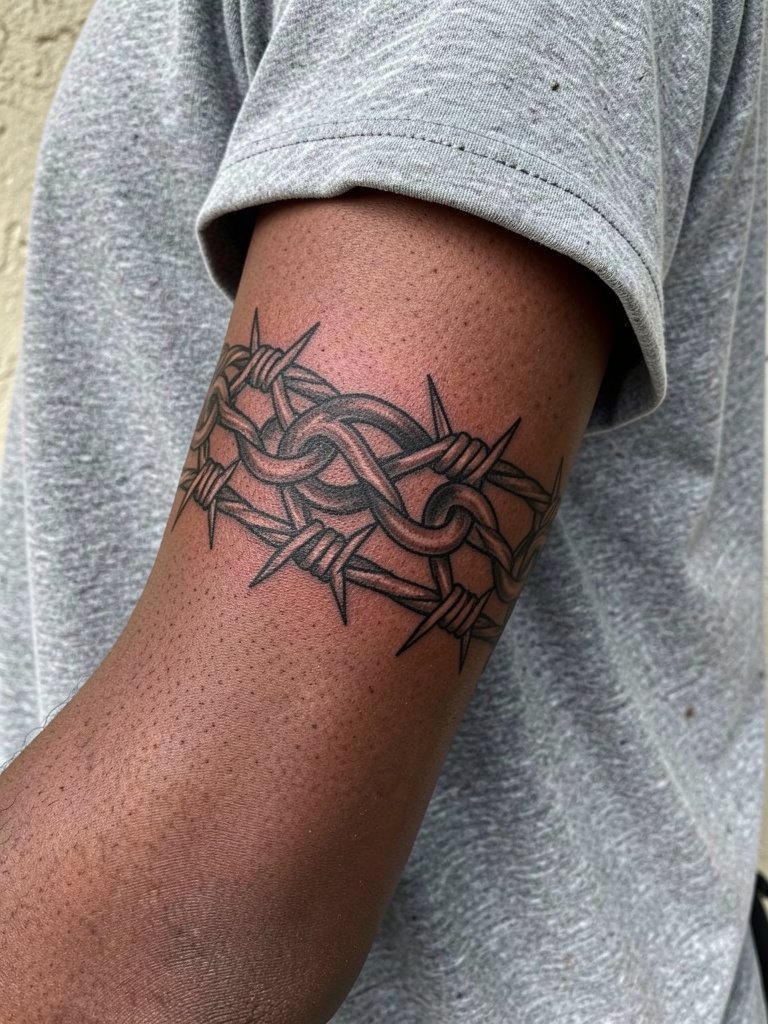
Combining motifs creates a personalized look and reduces the flash feel. The consult should cover which motif takes visual precedence so the cuff does not read as cluttered. The session takes longer and the blowout risk is lower if the artist keeps each motif slightly separate. Pair with understated outfits so the hybrid reads as accessory.
24. Distressed heraldic cuff

Heraldic elements give older symbolism without copying any copyrighted crest. The crucial planning step is scaling the quartered motifs so they read as panels, not blobs, after healing. This version is good for chest or bicep integration later because it already mimics patchwork. A longer session and a follow-up touch-up are common.
25. Ankle micro cuff for subtlety
Ankle micro cuffs are discreet but face constant footwear friction. For better longevity request slightly wider main linework and spaced spikes. Wear open shoes and rolled cuffs in the first week to reduce irritation. For showing off pair with cropped trousers or sandals. Expect a short session and mild pain.
26. Tattoo that doubles as sleeve seam

If you plan a sleeve, treat the band as an architectural seam that future elements can tuck under. Tell the artist the sizes and styles you expect for future pieces so the band does not need reworking. A common regret is not leaving enough margin for surrounding shading. Session time depends on how much anchor work you request.
27. Mixed-width adaptive armband
Adaptive bands solve the problem of a single-width design that looks wrong on tapered arms. The artist should mark the arm and show you exactly where the width changes will sit before starting. Mistakes include symmetric designs that ignore arm geometry. This version is versatile for collectors who want an armband that still reads whether their arm is flexed or relaxed. For session wear choose a sleeveless tee that gives easy access.
Frequently Asked Questions
Q: How long does a barbed wire armband typically take and how much might it cost?
A: Small wrist or ankle bands often take under an hour while wider forearm or bicep cuffs can take one to three hours. Pricing varies by studio and region but expect shop minimums and small armbands to fall roughly in the 50-300 range depending on size, color, and the artist's hourly rate.
Q: Will a fine-line barbed wire disappear faster than a bold band?
A: Fine-line supporters argue the look is cleaner and more modern. Bold-line supporters argue thicker work holds longer on moving skin. If longevity is a priority choose slightly heavier linework and more negative space between spikes so the pattern still reads after a few years.
Q: What should I wear to my appointment for a wrist or forearm band?
A: Wear clothes that give the artist easy access and do not rub the new tattoo post-session. For forearm and upper-arm work a loose button-down or rolled sleeve shirt is convenient. Avoid bracelets or watches on the tattooed wrist for at least a week.
Q: Where can I find real healed examples and artists who do barbed wire armbands?
A: Search platform hashtags like #barbedwiretattoo, #barbedwirearmband, and #blackworktattoo and filter by location to find artists who post healed shots. Pinterest can show layout ideas but look to short-form videos for process clips and Instagram location filters for local portfolios. Reddit tattoo communities are useful for healed comparisons and placement feedback.
Q: Is there a best placement if I want the design to age well?
A: Upper arm and outer forearm are safer for long-term clarity because they move less and typically avoid constant friction. Wrists and ankles need slightly wider linework to survive daily wear. Plan for touch-ups if you want a crisp look after several years.
Q: Does choice of healing method matter for armband placements that rub on sleeves?
A: Some people prefer second-skin film for the first few days because it shields the piece from fabric friction. Others prefer a thin ointment and dry healing because adhesives can trap moisture for sensitive skin. Both camps have valid points and your skin type should guide the decision.
Q: Will a barbed wire armband carry a negative meaning socially?
A: Some viewers associate barbed wire with toughness or rebellion while others see it as a classic cuff motif without specific baggage. Context changes how it reads, so if meaning matters include softer elements like florals or small color accents to steer perception.
