
A cleaner take on 90s tribal keeps the raw energy but strips the flashy curves and fills, so the ink reads like intentional blackwork years from now. Expect sharp negative space, asymmetric flow, and pieces that breathe with muscle movement. Below you will find modern neo tribal builds for every part of the body, with session notes, aging reality, what to wear, and exactly how to make each idea hold up.
1. Forearm Band with Tapering Spikes

A forearm band reads clearly in photos and everyday life because the cylinder of the arm keeps the pattern continuous. Recommend medium thickness linework with generous negative gaps so the spikes do not blur into one another after a few years. Tell the artist you want spacing set for a healed width of three to four millimeters between black masses so the pattern keeps its rhythm. Session time is often 60 to 120 minutes depending on circumference. For session wear, roll up a fitted henley so the artist has full forearm access and you leave comfortably.
2. Shoulder Cap Sunburst Wrap
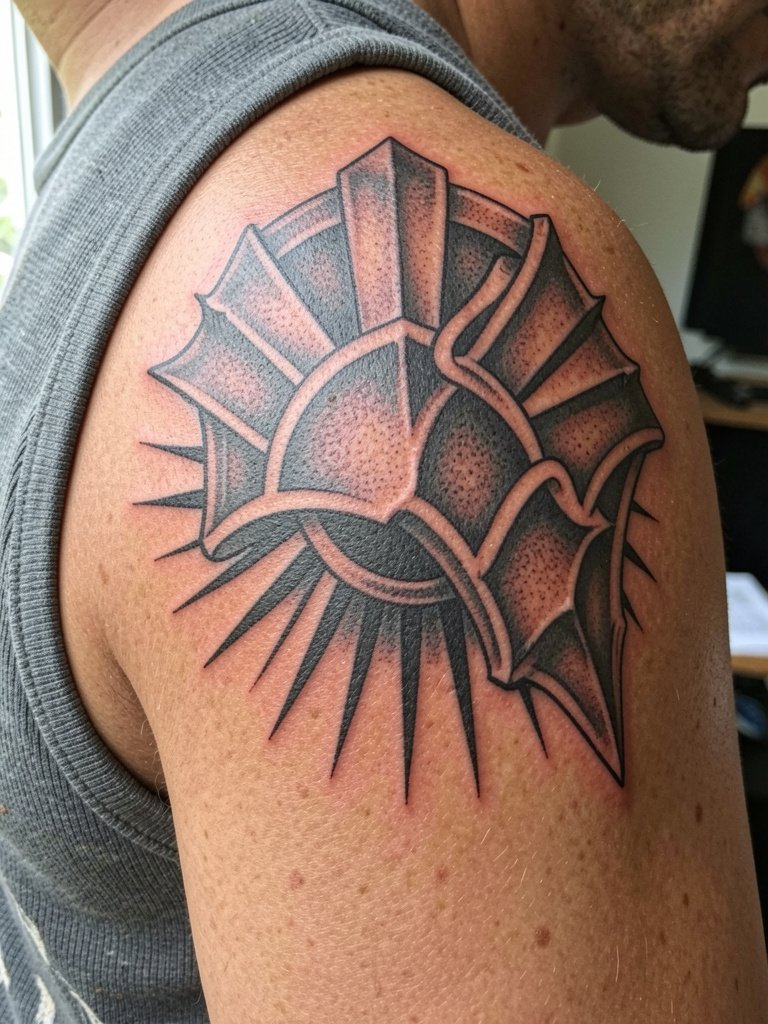
The shoulder cap is perfect for fanning shapes outward where the muscle rounds. Ask the artist to stencil the burst while you flex a few times so the flow matches your movement. Common mistake is shrinking the design to fit inside a small circle which makes the pieces look boxed in after healing. Expect one or two sessions and moderate pain. To show it off after healing pair the piece with athletic cut tees that reveal the shoulder line.
3. Chest-Spanning Mirrored Sweep
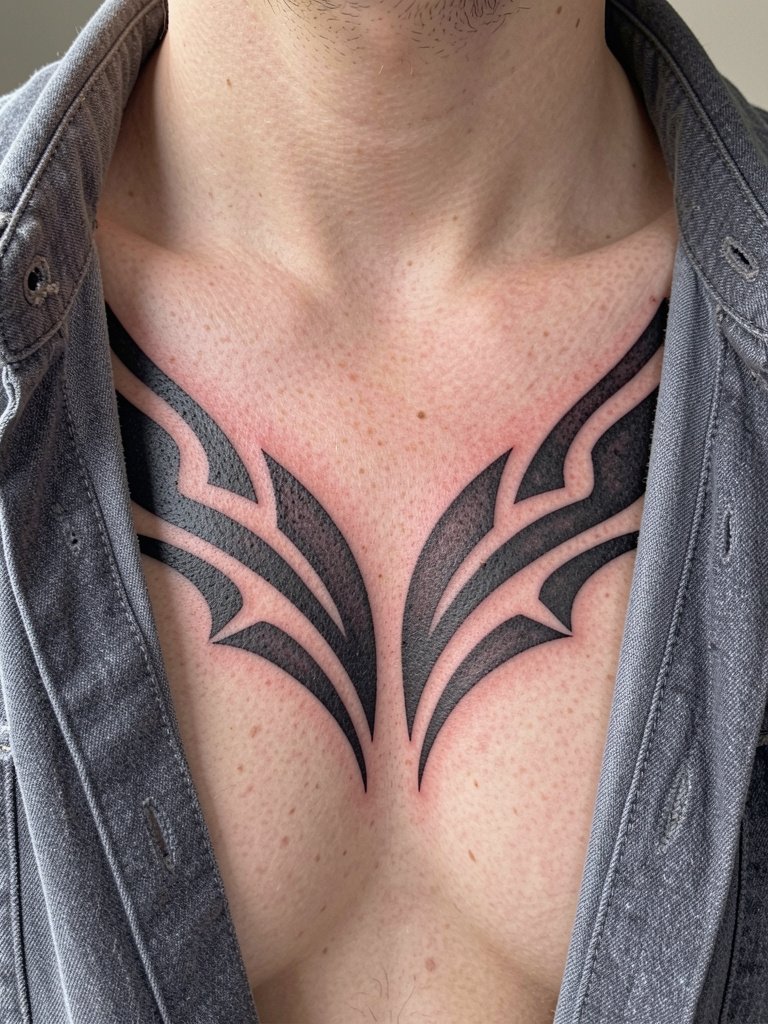
A chest symmetry piece works best when the two halves have slight asymmetries so the chest breathes naturally while still looking deliberate. During consultation bring photos that show how the shape reads when the arms are relaxed and when the pecs are flexed. Healed appearance at six months shows strong contrast; at two to five years the edge crispness depends on how bold the interior fills were. Wear an open-collar linen shirt to frame the piece once it settles.
4. Ribcage Flame or Claw Flow
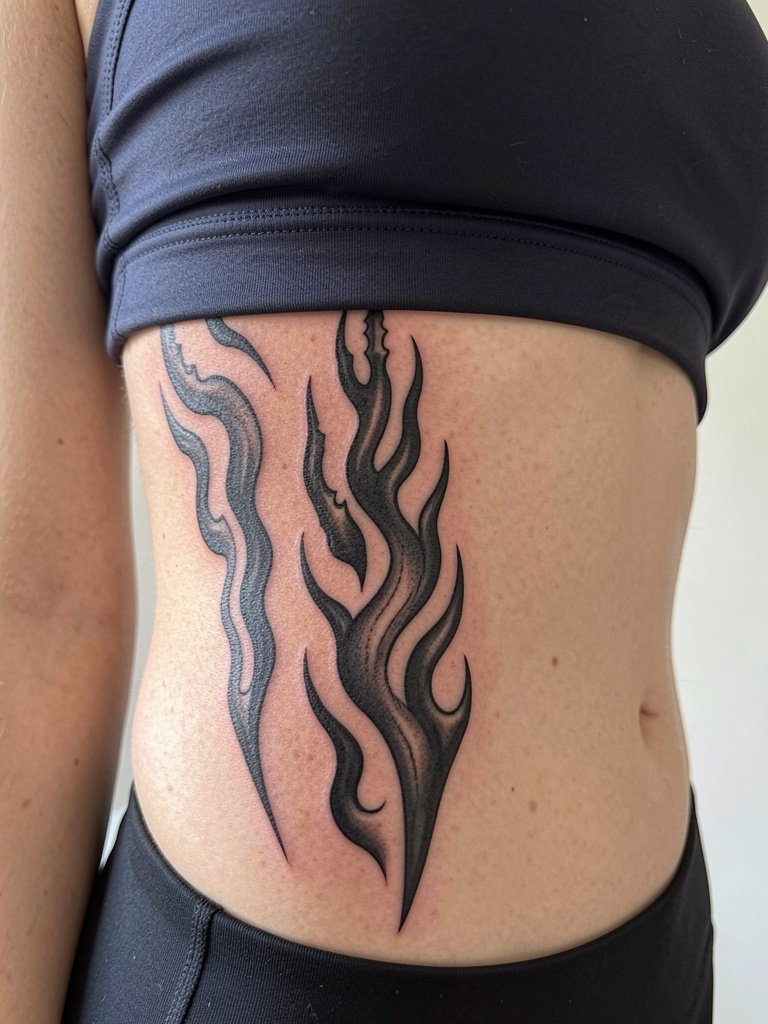
Rib placements are notorious for feeling intense while being tattooed and for uneven healing if the design has too many tiny interior cuts. One camp argues fine-line ribs blur fast because of constant breathing motion and thin skin. The other camp says slightly wider spacing and controlled needle depth lets clean lines settle even on ribs. If you favor longevity, pick a design that keeps large black panels separated by clear negative space and plan for one or two touch-ups. For the session wear loose shorts and a relaxed fit tank so the artist can access the side torso comfortably.
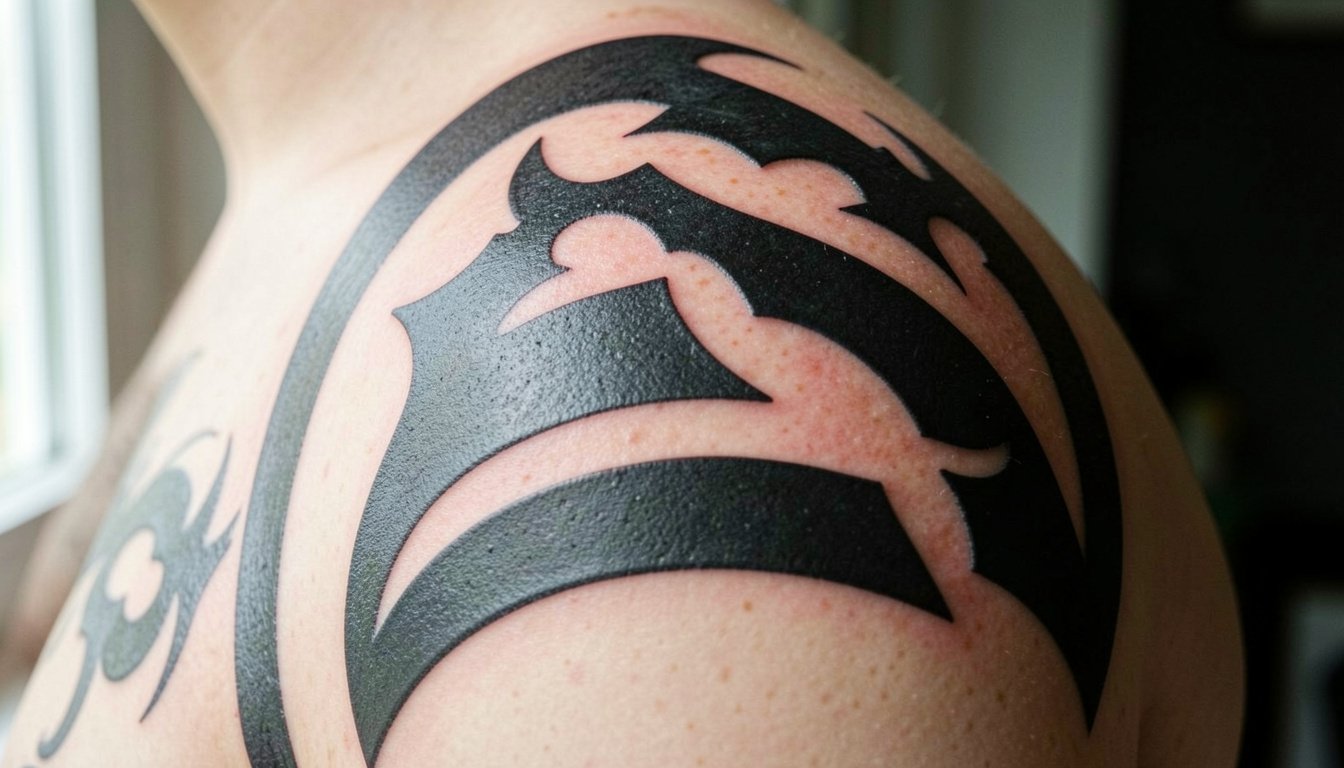
5. Lateral Neck-to-Shoulder Extension
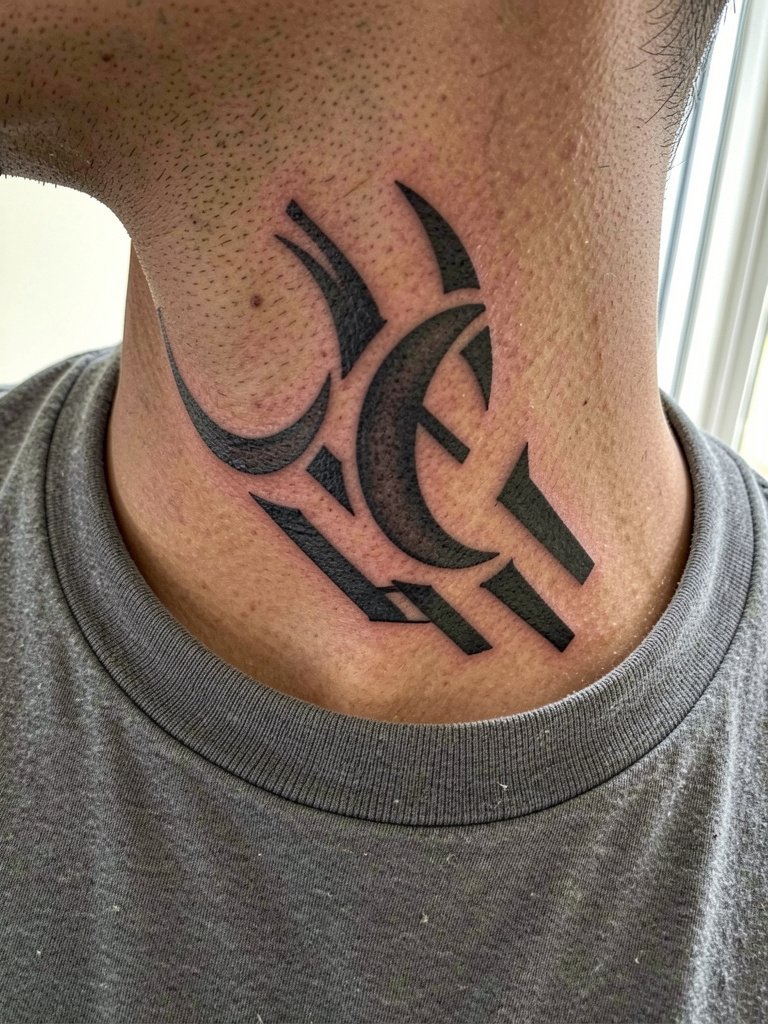
Neck-to-shoulder extensions read like armor and should be planned to anchor with the trapezius motion. Keep the shapes bolder near the neck where blowout risk is higher. A common mistake is insisting on very thin detail next to the throat. For sitting-day comfort choose a short-collar shirt that comes off easily, and consider a wide-neck tee for showing it off after healing.
6. Inner Forearm Blade or Chevron
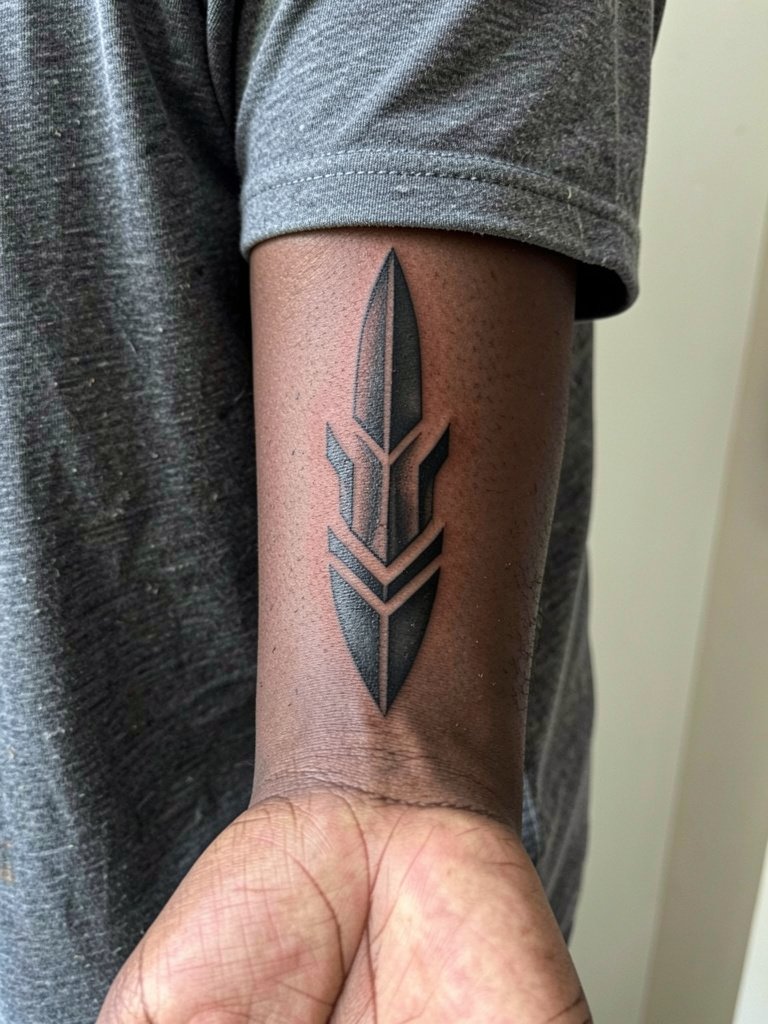
Inner forearm pieces photograph well and are low on the pain scale compared with ribs or neck. The inner forearm surface tends to hold linear shapes for longer if the line weight is set a touch heavier than ultra-fine single-needle work. Bring reference shots showing the exact line weight you like at three inches wide. For the session wear a rolled sleeve button-down to make access easy while staying comfortable.
Studio Day Picks
The first six ideas cover wrists, shoulders, chest, ribs, neck, and inner forearm, so these items help you through the session and early healing window.
-
Thin protective film roll. Helps keep fresh forearm and hand work clean during the first week of showers and daily movement.
-
Topical numbing cream kit. Useful for rib and neck sessions when you expect higher discomfort and want a short window of pain relief.
-
Hypoallergenic adhesive bandages small pack. Keeps small chest accents and hand tattoos protected from friction and accidental knocks.
-
Fragrance-free gentle body wash. A mild cleanser for the first showers that avoids irritating newly tattooed skin.
-
Aquaphor healing ointment. A mainstream option for short-term moisture control in the initial 3 to 5 days without dense ointment buildup.
7. Upper Arm Asymmetrical Claws Wrap

The outer upper arm is forgiving for experimenting with wrap shapes. A common mistake is compressing too many small cuts into a narrow band which creates a muddied look after healing. Recommend medium-to-large shapes with a sweeping negative channel that wraps toward the elbow. One session usually covers this area. For showing it off try a fitted tee with short sleeves that reveal the bicep silhouette.
8. Calf Tribal Wrap
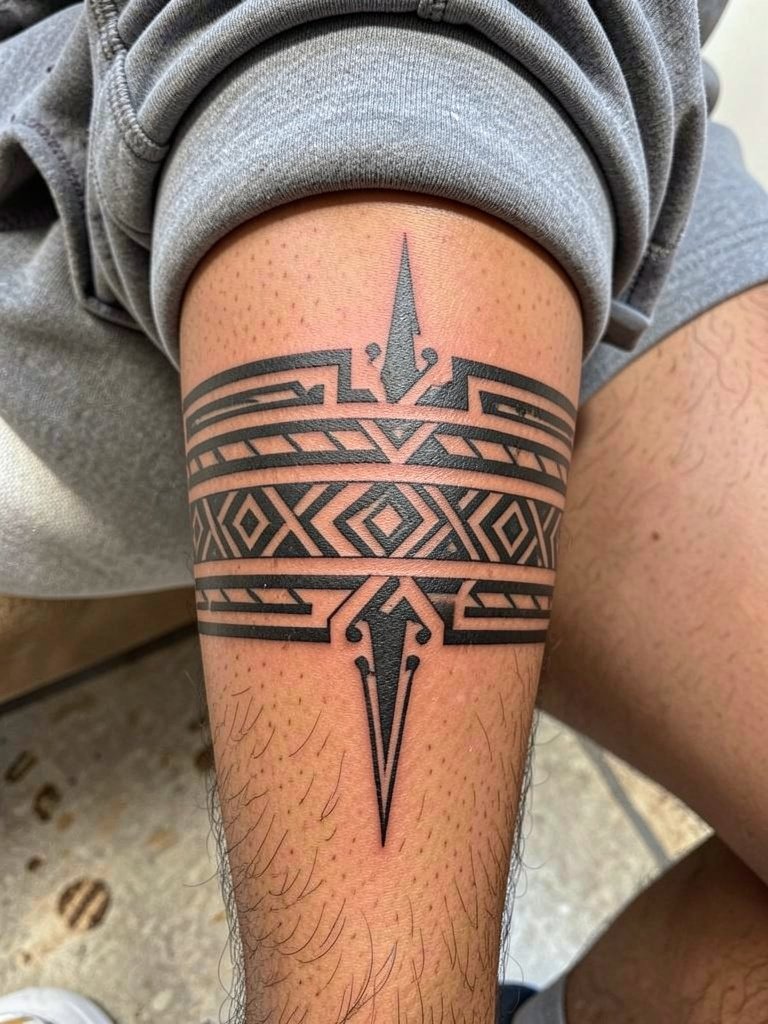
Calf wraps benefit from the calf's cylindrical canvas and age with less abrasion than ankle or foot work. Watch for too-tight repetition of tiny elements that will blur over time. Sessions run one to three hours depending on coverage. Show-off pairing includes cuffed joggers or shorts above the knee for clear visibility.
9. Narrow Repeated Geometric Armband

Armbands are one of the easiest entry points for neo tribal because they read like jewelry and can be expanded later. Avoid micro-detail inside each repeat which can fill in. One session often does it. If you work in a strict office, this is a discreet option that is simple to hide with a long sleeve. For session wear choose a rolled sleeve shirt so you can expose the forearm without tugging.
10. Shoulder Blade Sweep

Upper back pieces allow the design to breathe and provide a clear expansion path into half-sleeves. The visual risk is compressing the sweep into a tiny area which removes flow. Expect two sessions for larger sweeps. This placement shows best with gym wear and sleeveless tops.
11. Hand and Knuckle-Adjacent Motifs

Hands fade and require touch-ups more than arm or torso pieces due to washing and friction. Plan for a higher chance of touch-up within one to three years. Keep motifs simple and heavy in saturation to prolong clarity. Avoid asking for ultra-fine interior detail on knuckles. For session comfort wear short sleeves and avoid rings on the tattooed hand for the first week.
12. Full Sleeve Neo-Tribal Progression
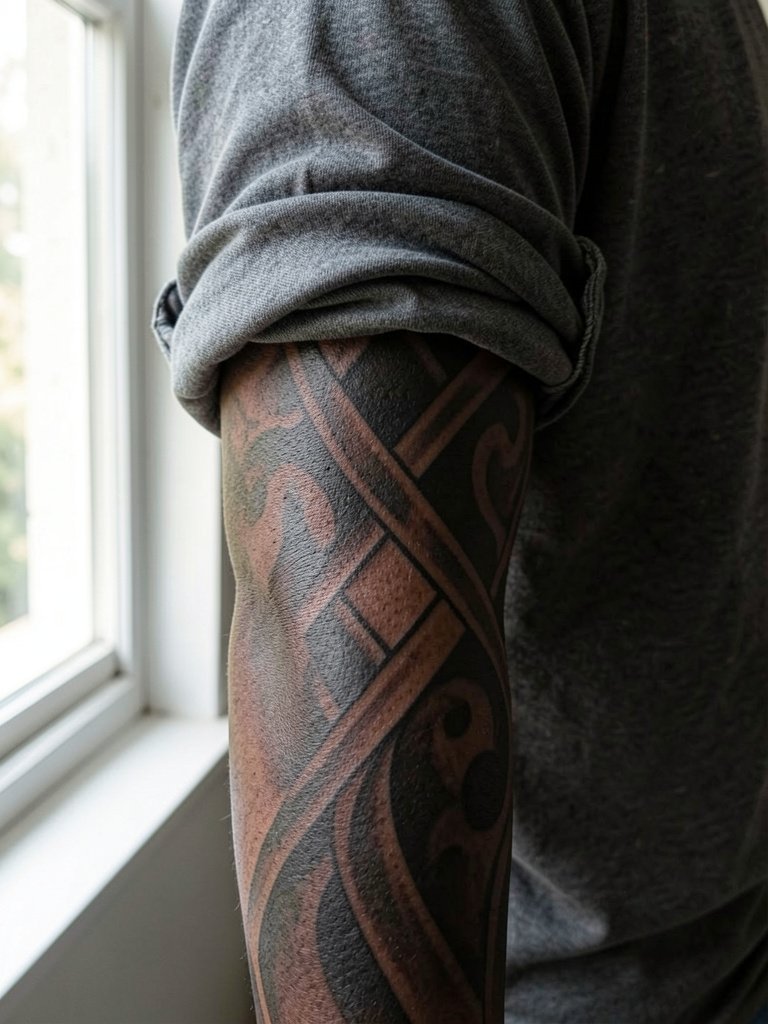
Sleeves demand planning because each component must tuck into the next. One camp says start with a single band and build out to avoid overcommitment. The other camp argues a sleeve needs coherent planning from day one to avoid a pieced together final look. Both positions are valid. If you want to test the style first, begin with a forearm anchor and expand. If you plan a sleeve, bring a mockup of how shoulder, bicep, and forearm elements interlock so the artist can match flow and spacing across sessions. For studio days wear a muscle tank so the arm is fully accessible.
13. Side-Neck Slash or Crescent Accent
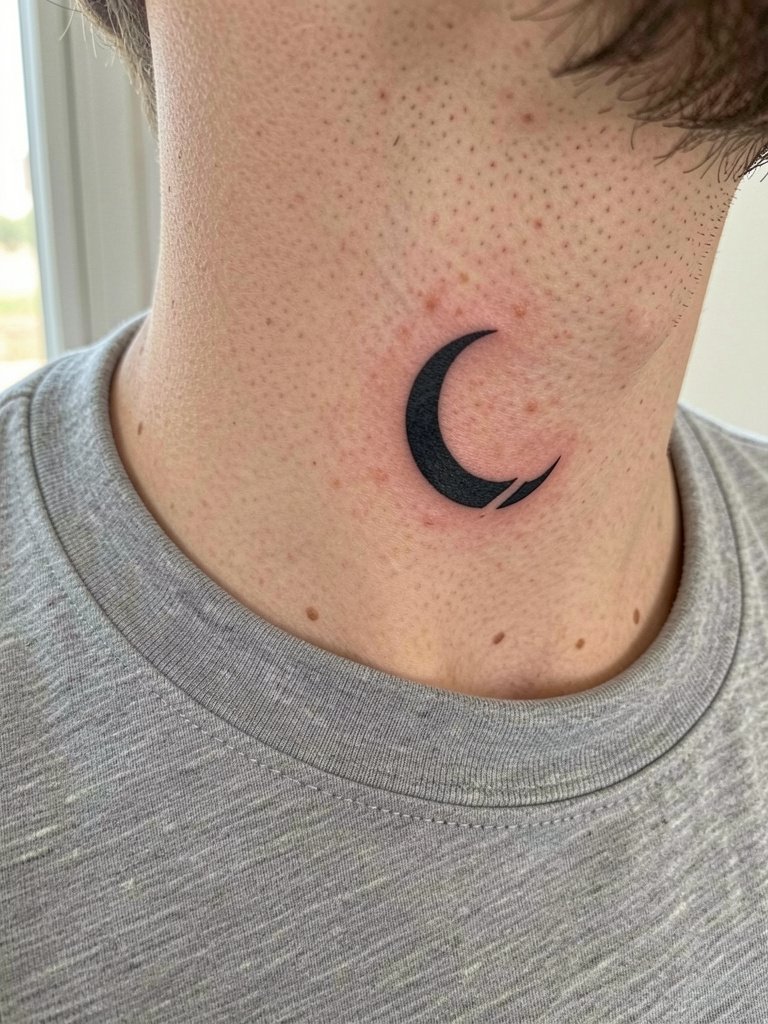
Side-neck pieces are high-impact and hard to hide, so choose placement carefully. Keep the design bold rather than tiny to reduce the risk of fading into a gray smudge. A single session usually suffices for small accents. For styling pair with clean crewnecks or bomber jackets that frame the neck.
14. Stomach-to-Rib Abstract Sweep

Torso work uses width to create stacked movement that reads from across a room. The main mistake is overloading the sweep with micro details that get lost when the area compresses. Ask for larger plane separation and plan two to four sessions depending on the vertical span. For reveal looks try pairing the healed piece with open-collar shirts or cropped tees that let the flow show.
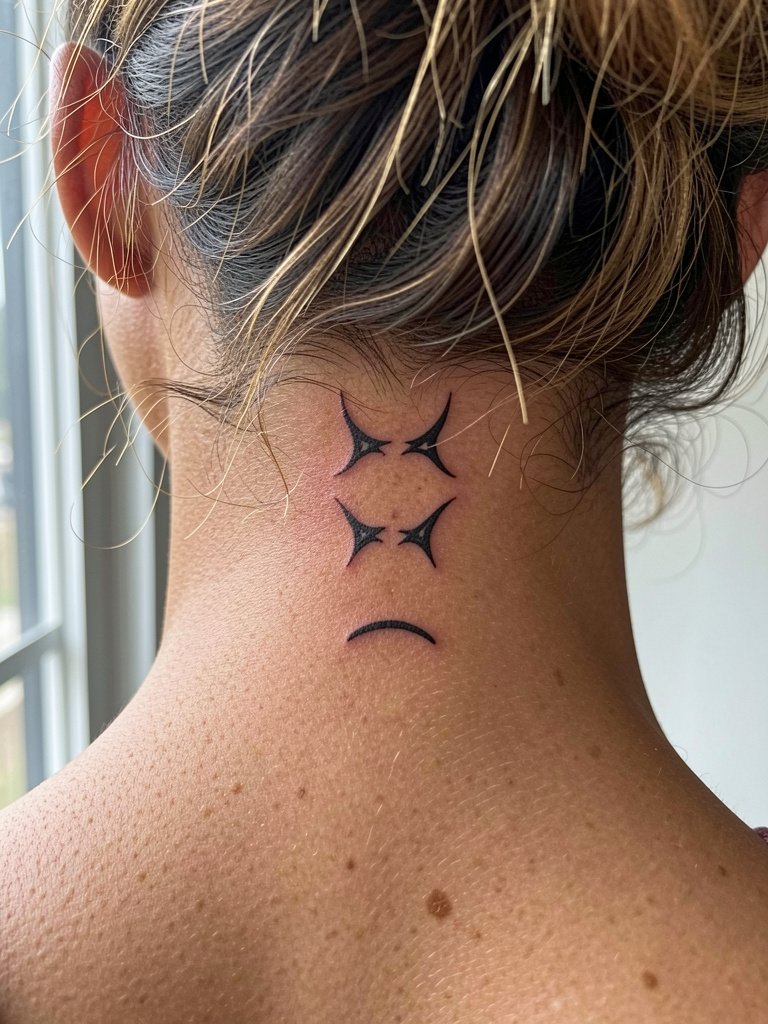
15. Minimal Nape or Behind-the-Ear Accent

Tiny accents at the nape or behind the ear are great starter pieces. Keep them bold in silhouette and avoid micro shading that will not age well in tight spots. One session is typical and pain tends to be low. For session wear hair up and bring a small elastic; for show-off styling consider minimal rings and a clean haircut that reveals the area when desired.
16. Calibrated Stencil Rib Stripe
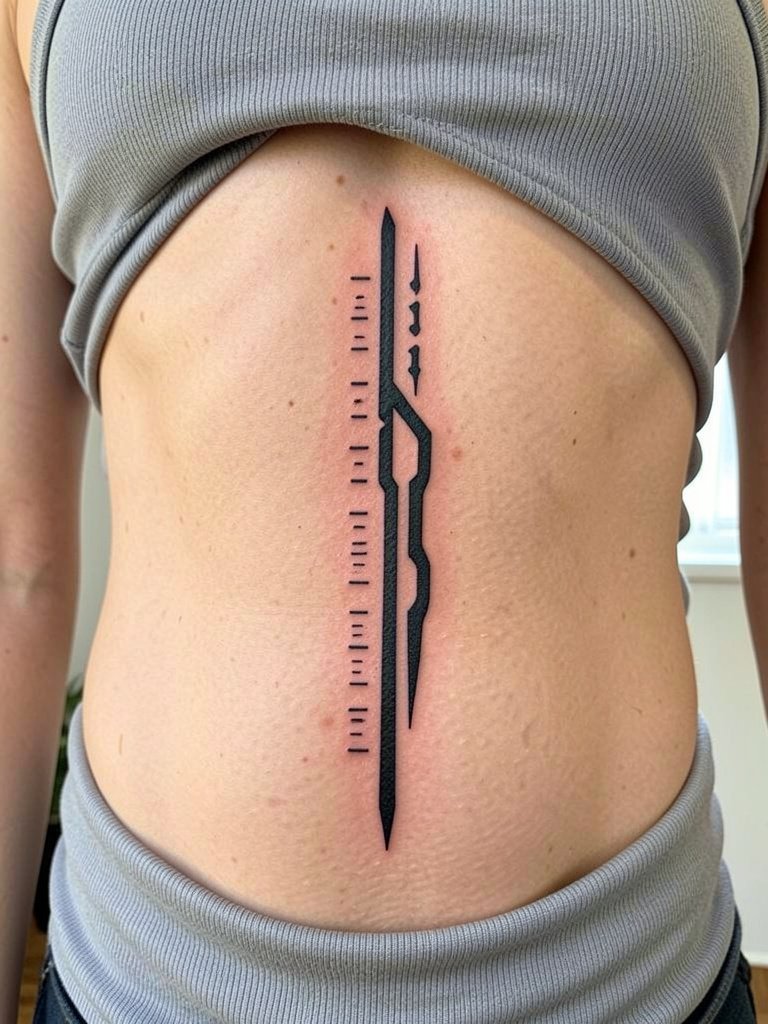
When a central rib stripe is done right it reads as a structural spine across the torso. The danger is making it too narrow which invites blurring. Specify to the artist that the negative channels should be at least a few millimeters wide and that test stencils are placed while breathing to verify flow. Expect moderate pain and plan for at least one touch-up. Session wear should be loose shorts and a tank top for easy access.
17. Minimal Inner Wrist Chevron

Inner wrist placements are visible and have steady wash from hand movement. Keep the chevron bold and avoid fine interior texture. One short session covers it. The common mistake is underestimating the need for saturation on lighter skin tones which can make the chevron look faded in photos. For the appointment wear a short-sleeve shirt for easy access.
18. Stacked Geometric Bands on Calf

Stacked calf bands let you mix repeated motifs with varying widths and spacing. The calf tolerates heavier fills without frequent touch-ups compared with hands. Avoid ultra-thin separators between bands which will blur. One to three sessions depending on coverage. Style with cropped joggers or above-knee shorts for visibility.
19. Small Collarbone Wave
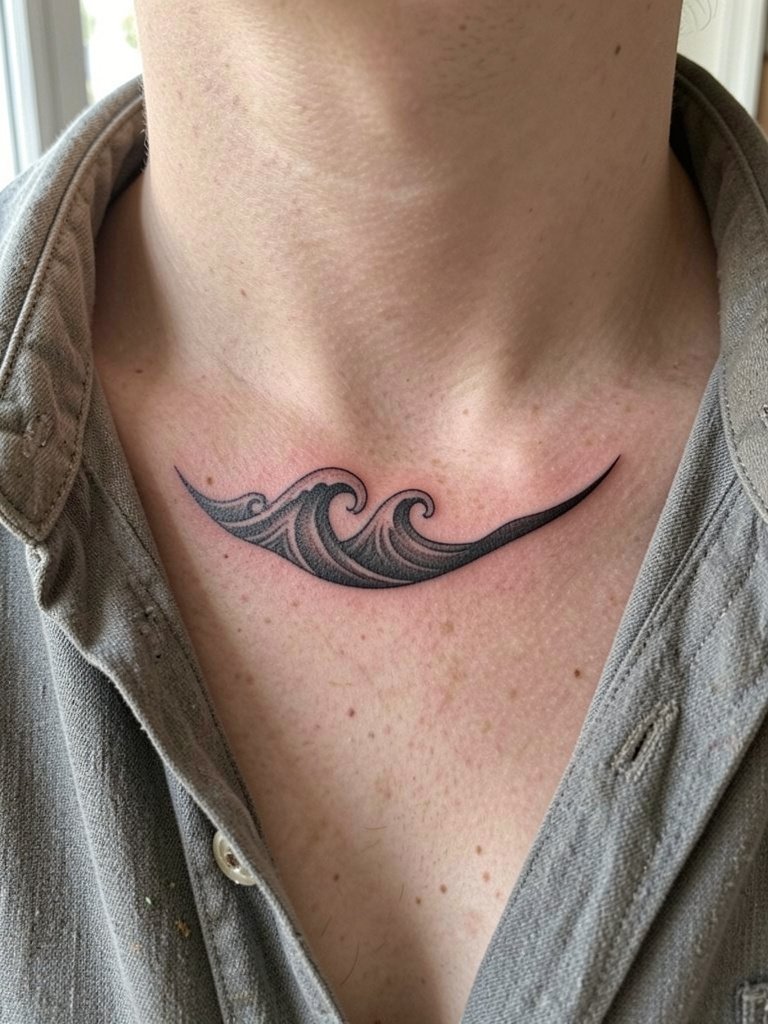
Collarbone accents look editorial when placed parallel to the bone and when they use negative space to contrast the clavicle. Keep scale moderate so the curve does not get lost against daily clothing friction. One session works for small pieces. Pair it with open-collar shirts or layered chains that frame the area without covering the ink.
20. Asymmetric Bicep Shield

An asymmetric shield on the bicep reads strong without needing a full sleeve. The advantage is it fits under a short sleeve and can be a future anchor for expansion. Watch for symmetry mistakes where mirrored elements are forced; asymmetry usually reads more modern. Session time is often 90 minutes. For the session wear an athletic cut tee that can be removed with ease.
21. Outer Thigh Tribal Panel

Thigh panels can be large while still easy to hide for office settings. The skin is forgiving and ages well if spacing is generous. Avoid tiny filigree near the top of the thigh where friction from clothing is greater. Sessions can be longer but tend to be less painful than ribs. Wear shorts so the artist can work without tugging at fabric.
22. Back Shoulder Blade Armor Flow

A back shoulder armor piece can be a dramatic anchor for later expansion into a half-back or full-back project. The key is to plan edges that blend into potential sleeve work. Avoid hard stops that will be obvious if you add another piece later. For the session wear a button-down or tank that the artist can easily slide aside without catching stitches or fabric.
23. Micro-Black Accent Near the Nape
Small nape accents are low-risk starter pieces that can be covered by hair or revealed as desired. Keep silhouette crisp and avoid shaded interiors. A single short session will usually do the job. For the appointment pull your hair back in a simple elastic and wear a shirt that slides over the head comfortably.
Frequently Asked Questions
Q: How do I find artists and healed examples for neo tribal work near me?
A: Use hashtags like #neotribaltattoo, #tribaltattoo, and #blackworktattoo on Instagram and TikTok then filter by location to surface nearby portfolios. Pinterest boards help compare flow and negative space, while Reddit threads often include real healed shots from regular people. When messaging a studio request healed photos at three months and one year so you can judge how linework settles.
Q: What line weight and spacing make neo tribal age better on ribs and neck?
A: Heavier line weight with wider negative channels tends to hold up longer on ribs and neck because the skin there moves and stretches. Ask for spacing that reads well at three inches across rather than a tiny two-inch stencil so the shapes have room to breathe when the skin settles. Plan on one touch-up within the first two years for placements that see a lot of motion.
Q: I have darker skin. Will bold blackwork still read clearly in photos?
A: Bold, saturated blackwork with generous negative space reads well across most complexions. Avoid tiny interior detailing that relies on subtle shading because those small tones can disappear. Look for healed photos from artists on similar skin tones and ask how they approach saturation depth during the booking conversation.
Q: What should I wear to a shoulder or chest neo tribal appointment?
A: For shoulder work wear a tank top or loose tee that you can remove easily without pulling fabric over your head if your tattoo is on the chest. For chest spread pieces an open-collar button-down worn open works well for the studio and for later reveals. A specific item that helps is a wide-neck tee which makes access easy while keeping you comfortable.
Q: How much pain and healing time should I expect for hands, ribs, and forearm pieces?
A: Hands and ribs are commonly rated higher on pain scales than forearms because of thinner skin and proximity to bone. Forearms are lower in comparison and usually heal cleanly in four to six weeks with standard aftercare. Hands often need touch-ups sooner due to friction and washing. Follow your studio's protocol and allow at least a week of reduced friction on hand work.
