

The smallest Chrome Hearts cross pieces are the ones that surprise people at booking time. Fine engraving and tight filigree take more care than a simple dot or band, and that extra work is why tiny wrist crosses can cost close to mid-sized forearm pieces. If you want the gothic-jewelry vibe with longevity, pick spacing and line weight before you pick placement and plan for a touch-up window.
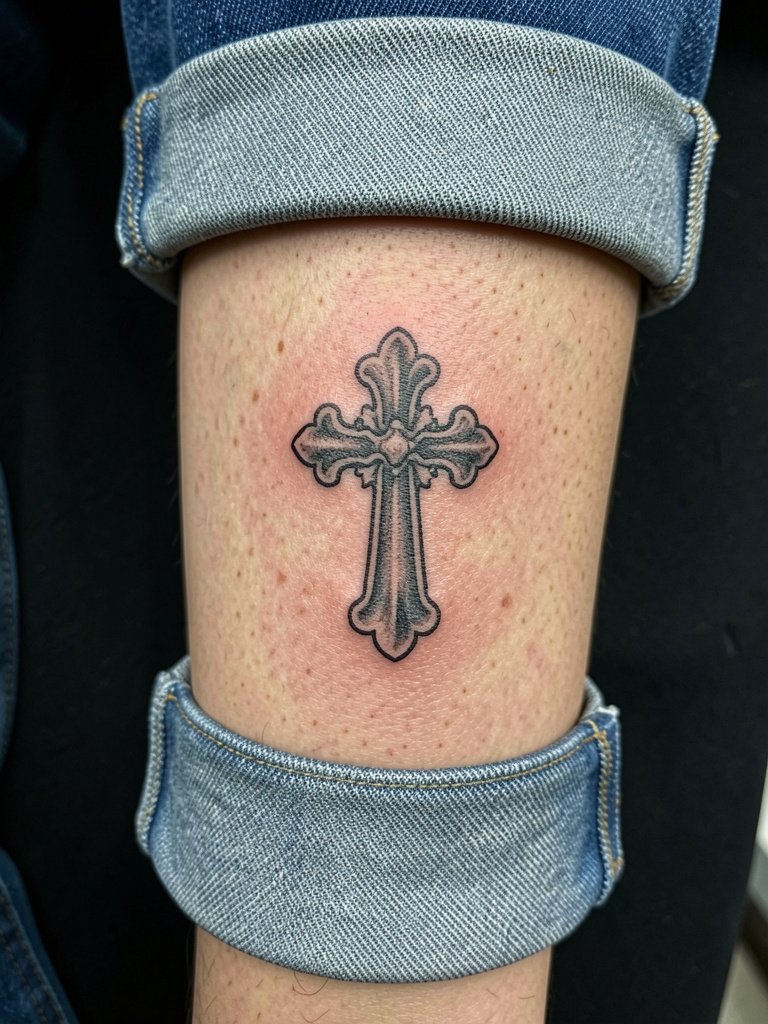
1. Ornate Forearm Cross With Filigree

An ornate cross on the outer forearm reads like jewelry and scales well if you plan future patchwork. Pick a slightly heavier outline than a jewelry photo shows so the filigree keeps definition after a few years. Say exactly which filigree elements you want exaggerated and where negative space should sit, rather than leaving proportion decisions open. The session is usually one hour for a medium version, with low blowout risk on this flatter skin. For showing the piece, pair it with a rolled sleeve white t shirt and silver rings to echo the black-and-silver palette.
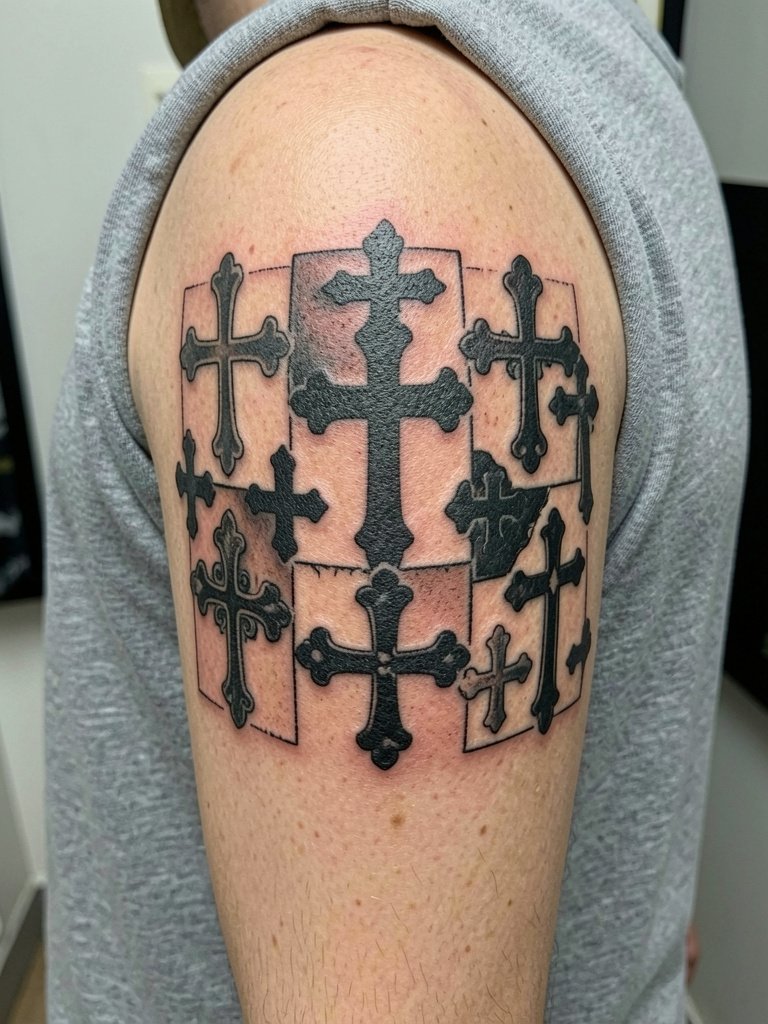
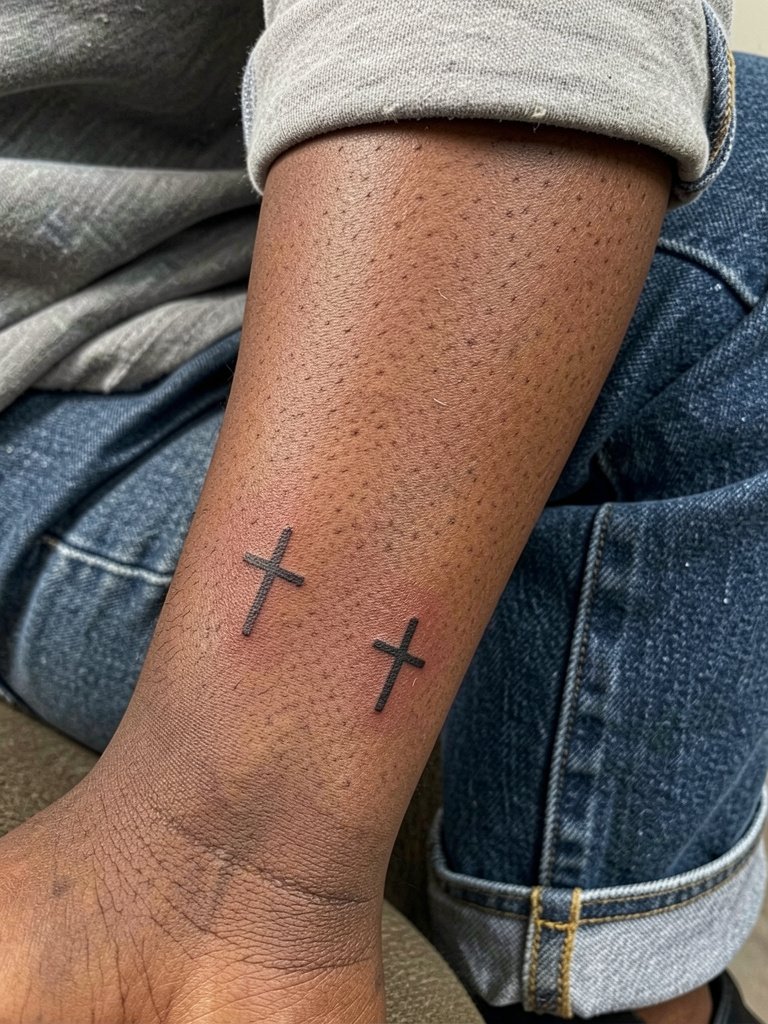
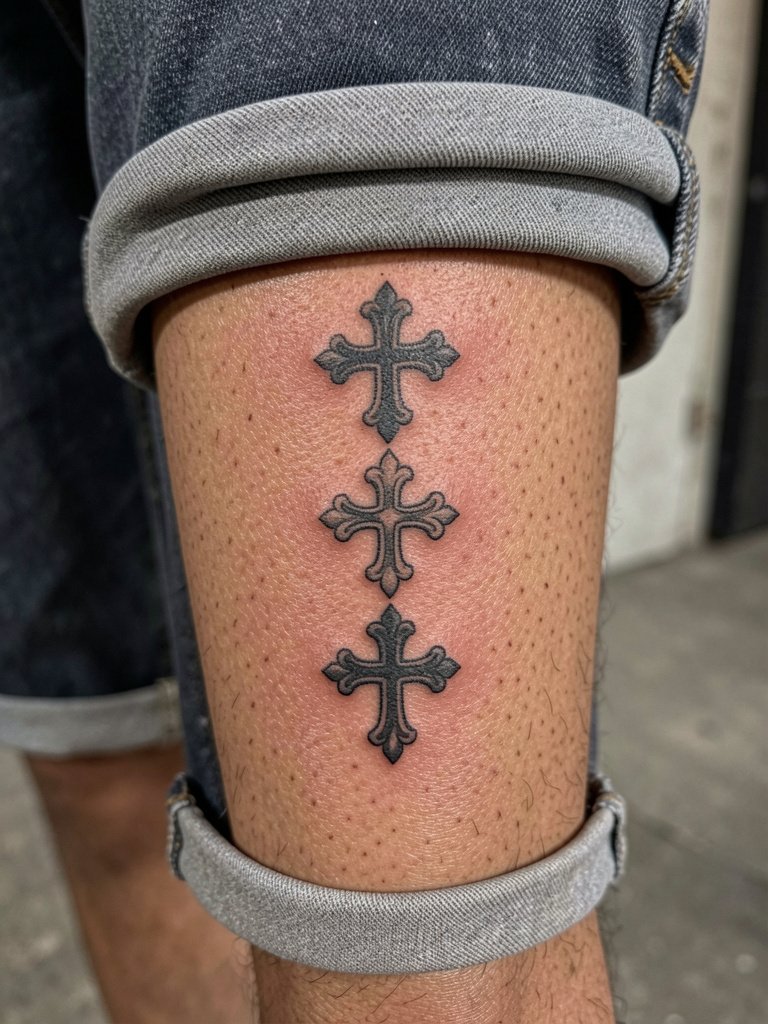
2. Triple Cross Composition for Stronger Read

Single versus triple cross divides opinions. One camp prefers a single cross because it stays cleaner and fits smaller placements with less visual clutter. The other camp prefers the triple cross because it reads as a stronger fashion motif and anchors a sleeve or patchwork set. If you want the triple, confirm spacing between each cross so the vertical stack does not compress over time. This piece often takes one to two sessions depending on spacing. Wear a loose short sleeve tee on session day so the artist can work without fabric friction.
3. Inner Forearm Cross With Floral Engraving

An inner forearm cross with engraved florals softens the gothic silhouette and makes the design feel custom rather than copied. Ask to widen gaps between engraving strokes and the main outline so stipple shading does not merge into the border at year two. The typical small-to-medium engraved cross is a one-session piece that can still need a touch-up at 12 to 24 months if the stipple gets fuzzier. For wearing it, crisp cuffs and a thin chain bracelet keep the palm-up display readable and fashion-forward during shows.
4. Wrist Micro Cross, Minimalist Blackwork

Wrist crosses are visible fashion pieces that must be planned for jewelry stacking. Thin-line wrist tattoos can look great at first and then soften quickly if the line weight is too fine. Request slightly thicker linework than the micro reference, and plan for a six- to twelve-month check for a light touch-up. For showing the piece without overpowering it, use a minimalist watch on the opposite wrist and keep bracelets thin. Avoid putting heavy bracelets on the tattoo wrist during the first two weeks of healing.
5. Patchwork Forearm Set With Repeated Cross Motifs
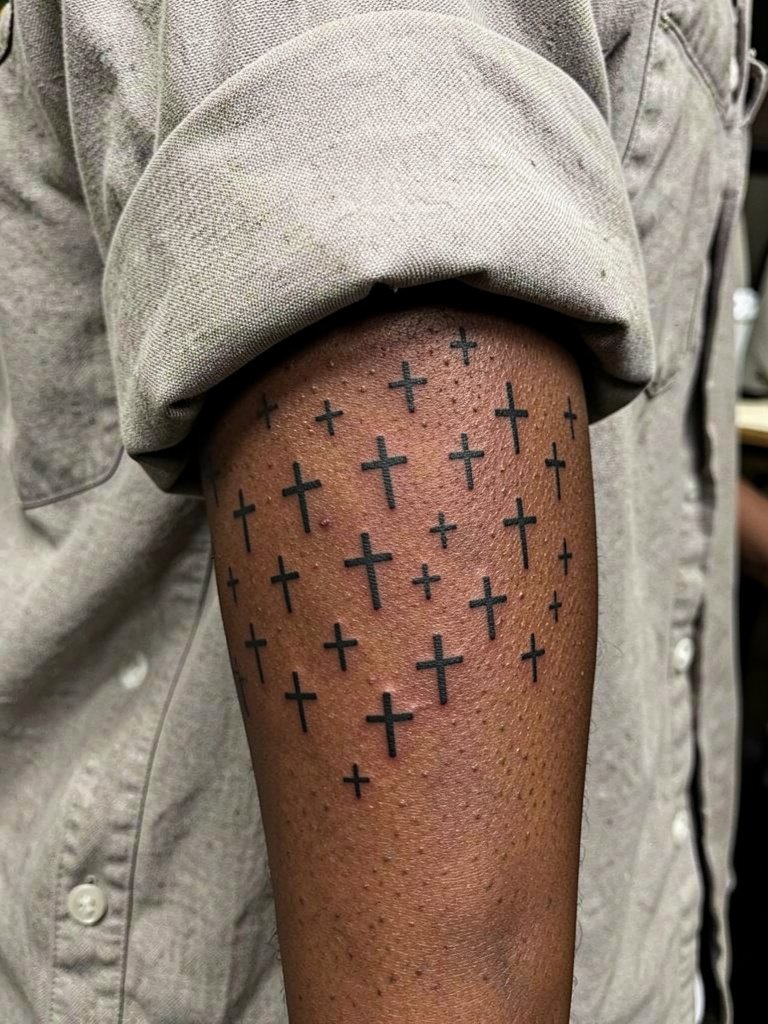
Patchwork sets build over time and are made to look assembled rather than identical copies. Plan a placement map so new crosses have breathing room and do not sit on previous healed edges. A common mistake is repeating the exact same scale each session, which causes a crowded look in two years. Expect multiple appointments spaced months apart and track which motifs you want saturated more heavily for longevity. During sessions wear short sleeves or a loose button-down so the artist can access different forearm panels easily.
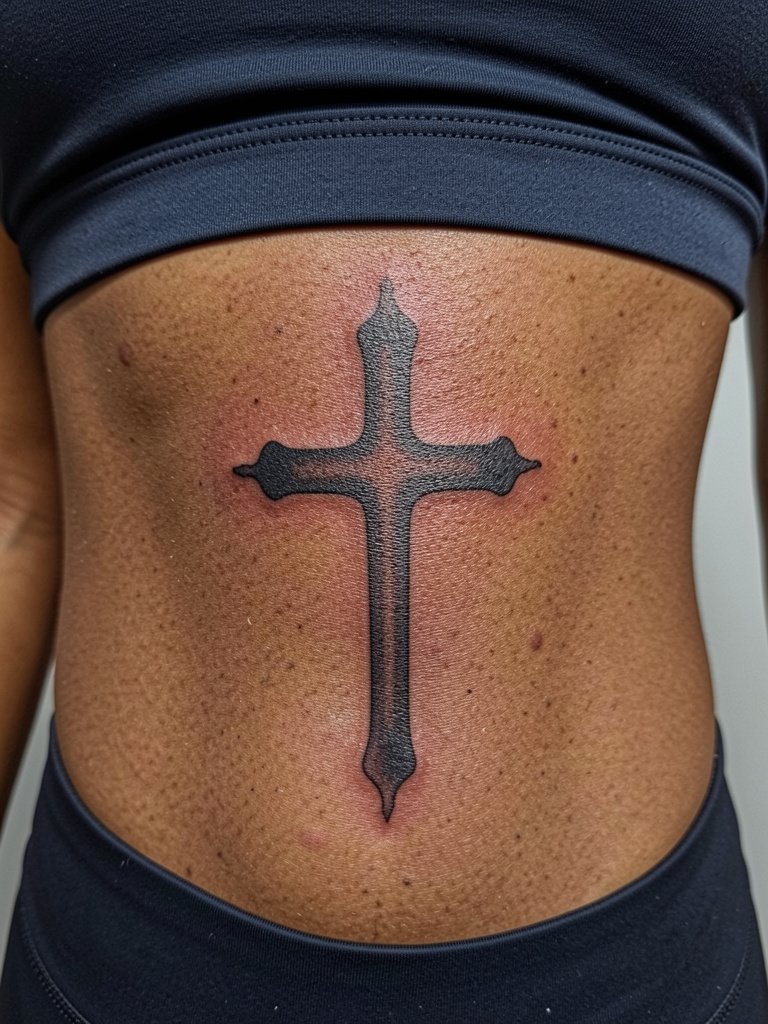
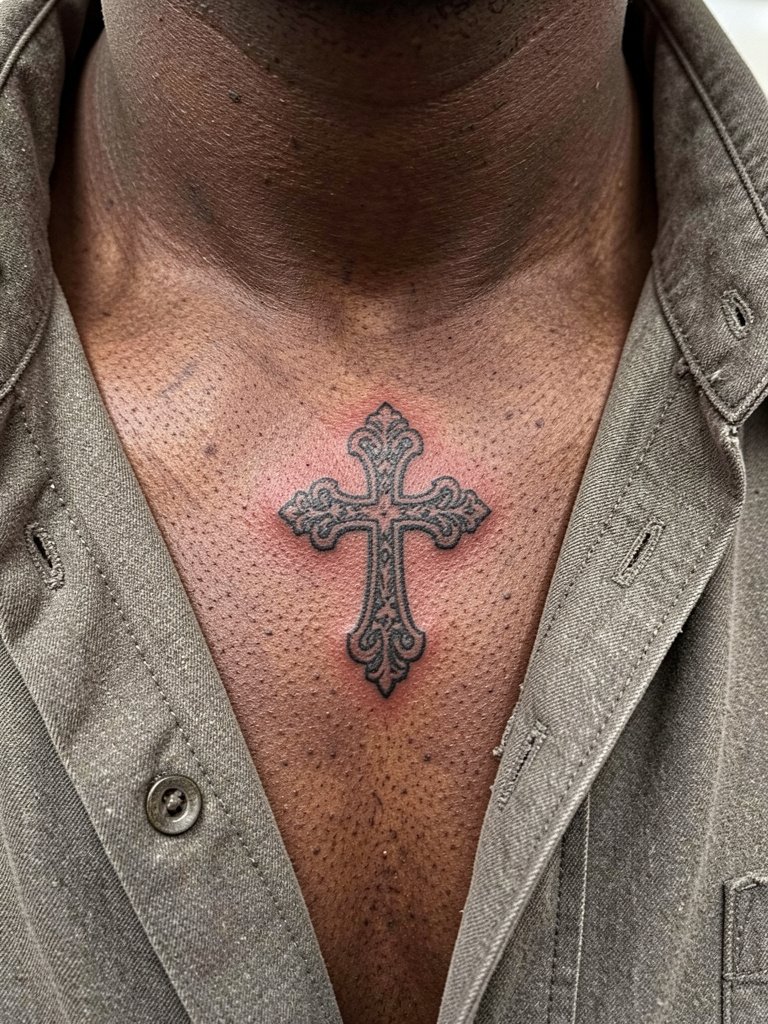
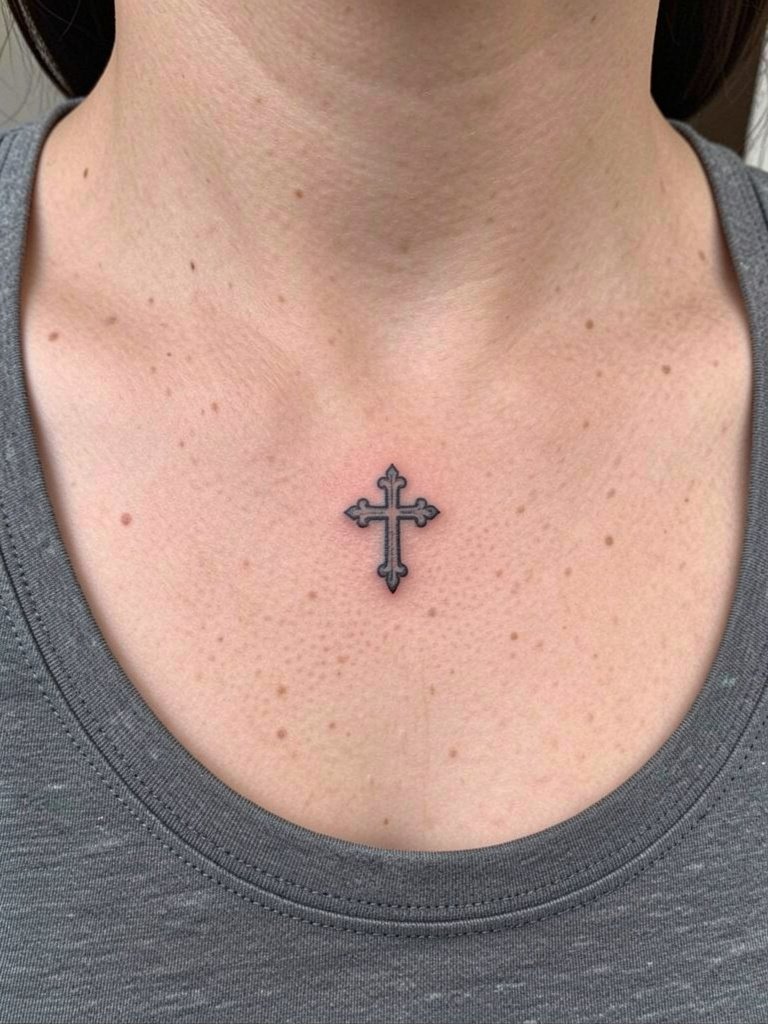
6. Upper Chest Cross for Jewelry Vibe

A chest cross sits where necklaces usually land and reads like a pendant translated to skin. For this placement, choose slightly larger proportions than a jewelry photo so the engraved detail remains legible after healing. The sternum area can be sensitive for some people, and pain varies with body type. For show-off outfits, layered chain necklaces work well together with a chest cross, and a layered chain necklace keeps the composition intentional. Wear an open-collar shirt on session day for easy access and minimal fabric rubbing afterward.
Pre-Session Essentials
A few small care and session items smooth out the forearm, wrist, and chest pieces above, especially when filigree or thin stippling is involved.
-
Fragrance-free tattoo soap. A gentle cleanser prevents irritation during the peeling phase and helps blackwork keep crisp edges without excess rubbing.
-
Lightweight tattoo balm. A less occlusive balm helps the skin breathe during later healing days when heavy ointments feel too greasy under collars or cuffs.
-
Petroleum jelly alternative balm. For people prone to clogged pores, a thinner, non-comedogenic option keeps ink moist without trapping sweat.
-
Hypoallergenic adhesive remover wipes. Useful if second-skin dressings or bandage adhesives irritate sensitive chest or wrist skin.
-
Second skin bandage strips. Helpful for forearm and chest placements where clothing friction can cause scabbing in the first 24 hours.
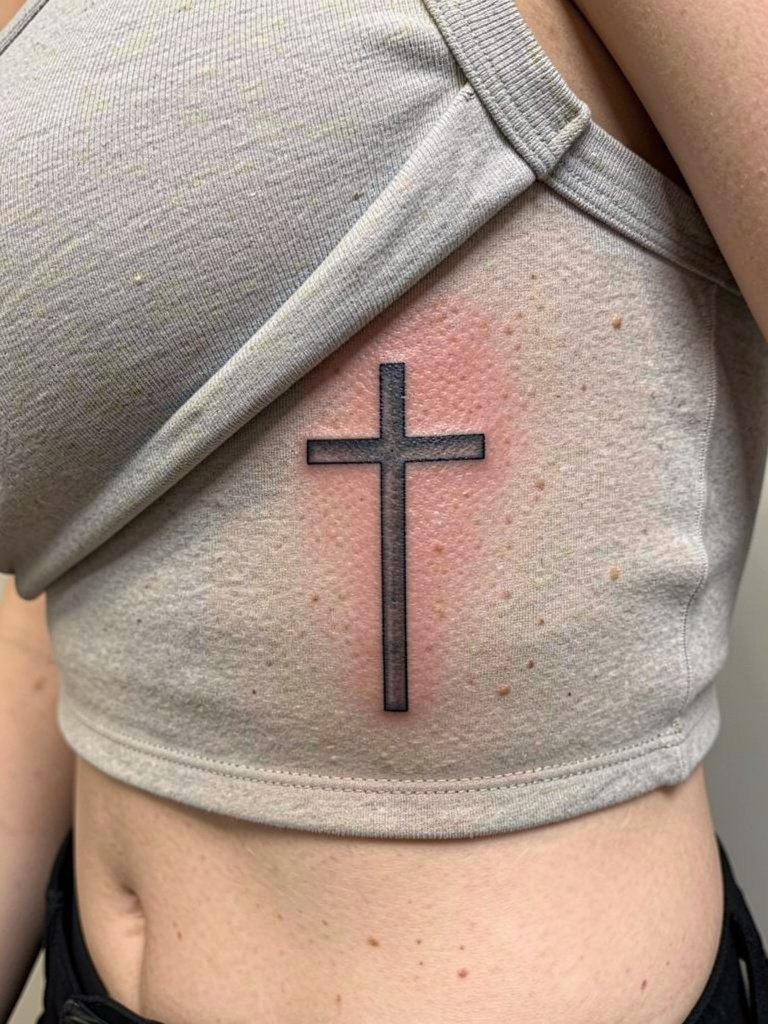
7. Ribcage Vertical Cross, Body-Contour Fit
The ribcage is discreet and contours beautifully to a vertical cross, but it is higher on the pain chart. Expect a longer session feel and occasional breaks. Fine-line engraving can blur here because the skin stretches with breathing. If you want engraving, request slightly wider spacing and ask for healed photos of similar rib placements so you can see long-term results. Note that ribs often need a touch-up around the one-year mark if the ink was kept very fine. Wear a fitted top that can be lifted briefly without rubbing on the fresh work.
8. Sleeve Filler Panel With Repeated Chrome Crosses
Cross motifs scale well into sleeve filler work when balance is planned from the first session. Discuss saturation zones explicitly so some crosses get heavy black fills and others stay linework for contrast. A common mistake is over-detailing every motif, which makes touch-ups tedious and time consuming. Expect multiple sessions across months and plan how each new panel will pair with denim and jackets. For an outfit that shows sleeves naturally, a muscle tank top or rolled sleeve jacket puts the arm composition on display.
9. Fine Black Line Cross That Ages Lightly
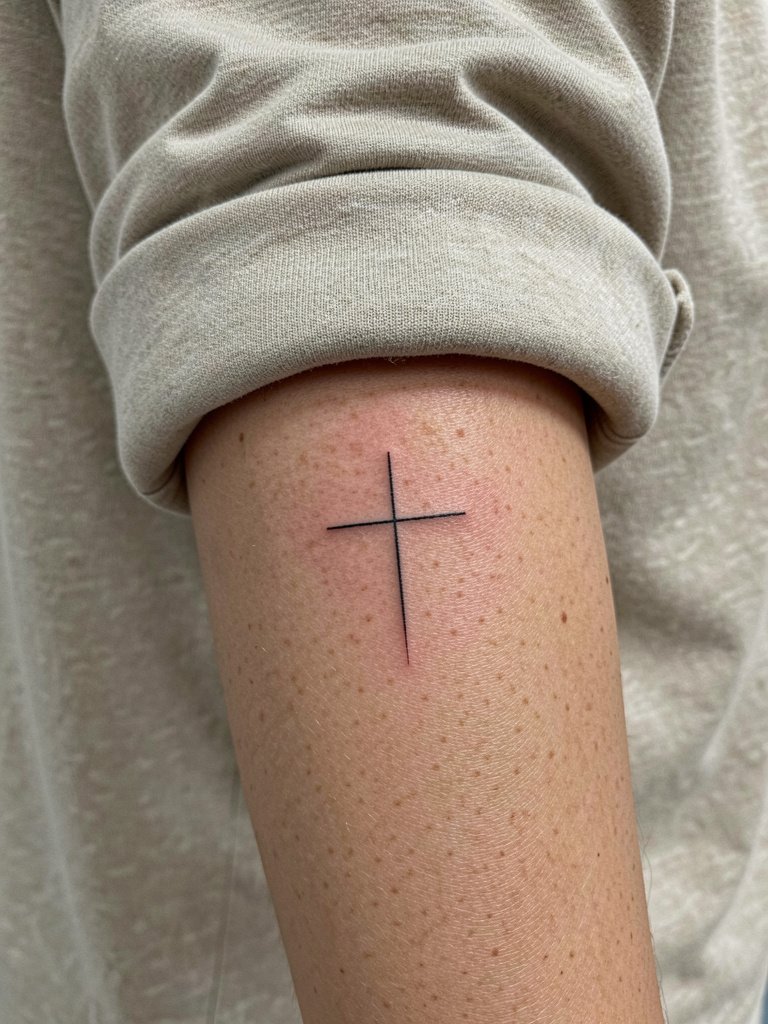
Thin lines look fashion-forward until they do not. One camp says thin single-needle linework best captures the jewelry look and suits small visible placements like the wrist or behind the ear. The other camp argues that bold linework holds up longer on moving skin and keeps the cross readable past year three. If you want fine line, ask for slightly bolder primary contours while keeping the interior filigree delicate. Plan for a likely touch-up at 12 months and check healed examples on similar skin tones before booking.
10. Bold Gothic Cross With Thicker Borders

Thicker borders are a practical choice for anyone wanting long-term legibility and low touch-up needs. Bold cross outlines age predictably because saturation and linework resist the subtle blur that affects single-needle work. Specify where you want the heaviest black fills versus open negative space so the piece does not read flat. This placement is low blowout risk and usually completes in a single session for medium-sized pieces. Show it off with an oversized sleeveless vest or a muscle tank top to keep shoulder lines visible.
11. Small Matching Cross Pair for Partners or Friends
Matching cross pairs are simple in execution but need coordinated scale and spacing. Decide on size together and confirm the precise millimeter height so both locations match visually across different body contours. Tiny matching pieces often carry a minimum fee per tattoo, so budget for two separate appointments or a combined session. For session day, wear a sleeveless top for the wrist and cuffed jeans for the ankle so the artist can work without fabric interference. These pieces usually heal cleanly with minimal touch-up needs.
12. Script-Enhanced Cross for a Fashion-Led Look
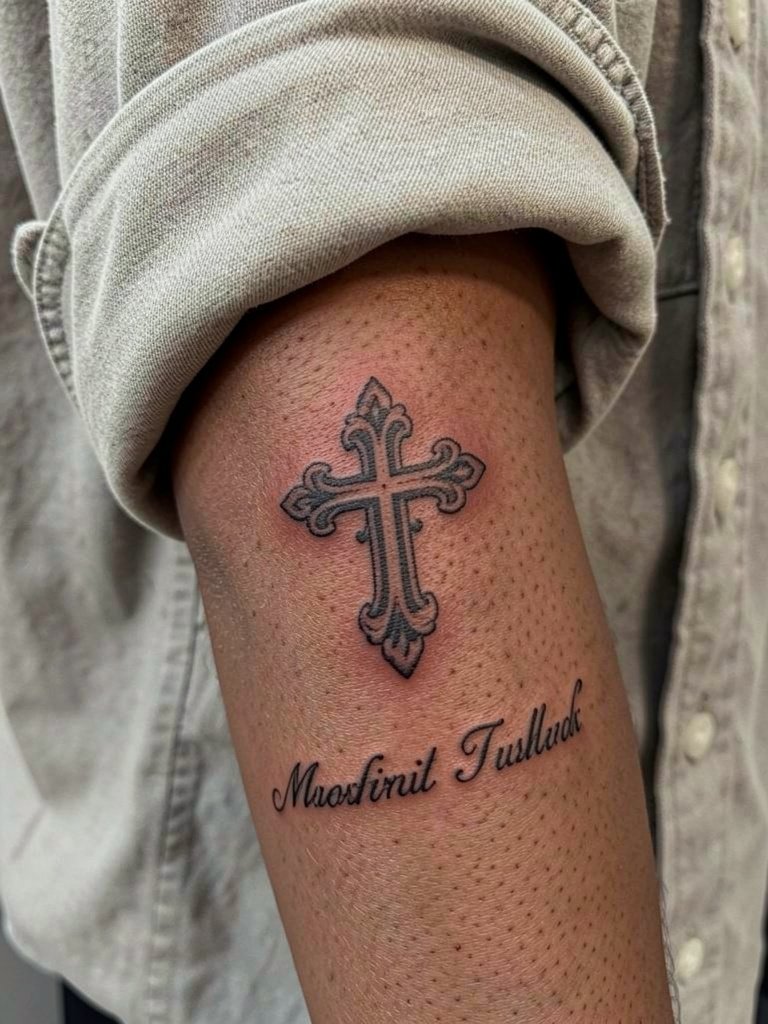
Combine a cross with restrained script to turn the motif into a fashion-centric mark. Specify exact word spacing and font size so the lettering does not crowd the cross arms as lines soften. Small script should use clean serif or handwritten lettering with adequate letter spacing to prevent blurriness at year two. For outward styling, an open-collar shirt or scoop-neck tee and a thin chain bracelet keep the typography readable alongside the cross. Bring two reference font samples at different scales so the artist can mock up the exact size.
13. Micro Cross Behind the Ear
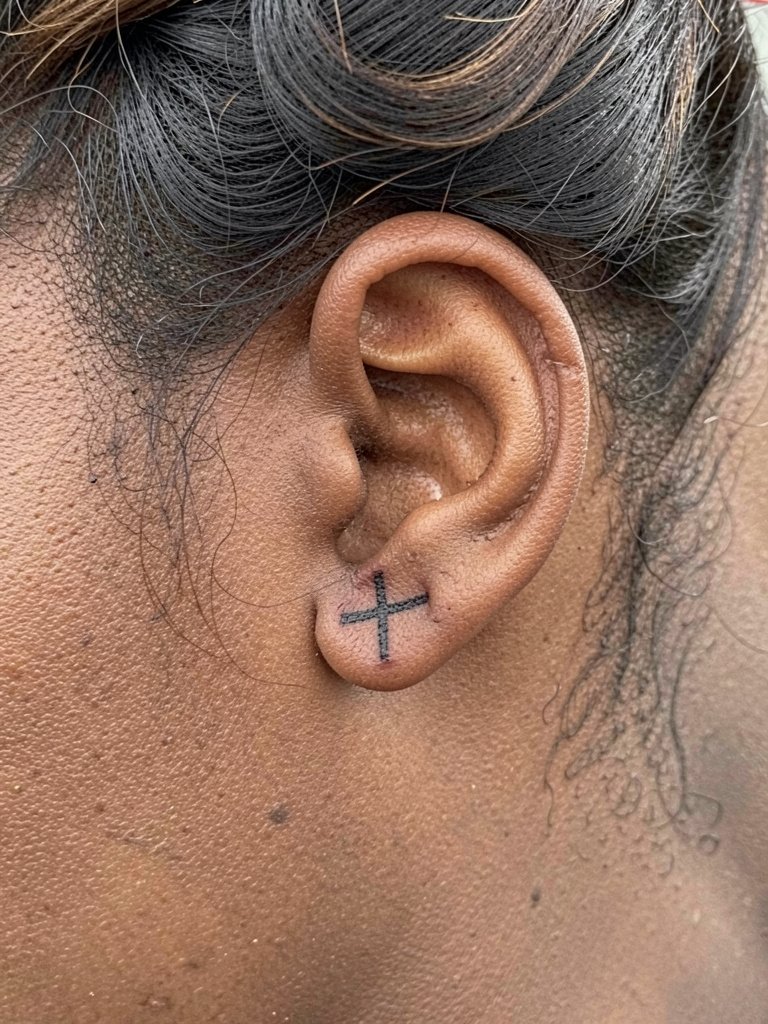
Behind-the-ear crosses are subtle nods to the style and are underrepresented in inspiration boards. The mastoid area is a small canvas so line weight needs calibration to avoid early blur. Because the region is tiny, request a micro but slightly bolder outline for durability. Session time is short and discomfort is moderate. For showing it off, wear hair up or choose collarless tops. Mention if you plan to wear heavy necklaces because strap friction during healing can rub the area.
14. Calf Gothic Cross With Room for Detail
The calf is forgiving for ornate crosses because it gives space for engraving and shading. If you want swirling filigree, this is the place to expand the arms and add stipple shading without crowding. Ask for healed photos of calf pieces with similar shading to see how grey washes settle on your skin tone. Pain is lower than ribs and touch-ups are typically infrequent for bold blackwork. For outfits that show the calf, cropped pants and low-profile sneakers create clean lines that highlight the tattoo.
15. Fine Line Forearm Pair for a Subtle Set

If you prefer a subtle nod rather than an obvious brand echo, matched fine-line forearm crosses deliver that aesthetic. Because fine lines can eat into each other on the inner forearm, specify that interior engraving be spaced wider and that the main silhouette keep slightly bolder contours. Expect a small touch-up window at 6 to 12 months if you favor single-needle work. For session day wear a loose button-down so the artist can access the inner surface easily and you avoid cuff friction during healing.
16. Chest Panel That Reads Like Jewelry
Upper chest panels photograph well with necklaces and open shirts. Pick the cross scale to match necklace length so the tattoo and chains do not compete. A common error is centering a large ornate cross too close to the sternum for someone who prefers asymmetry with jewelry. The surface there is lower-friction than the wrist, so decorative engraving tends to survive better. Plan session wear that opens easily at the chest to avoid fabric rubbing for the first week.
17. Rib-to-Hip Contour Cross for Private Placement
A rib-to-hip cross is private and body-contoured, which gives it intimacy and motion. The stretch and motion in this area raise blowout risk for extremely fine lines, so request slightly broader strokes in the main silhouette. If you want it to remain discreet, plan clothing that avoids waistband friction during healing. Expect a moderate pain level and a quick session if the design is narrow. This placement often works best for people who want an occasional reveal rather than daily display.
18. Outer Upper Arm Statement Cross

Outer upper arm placements are ideal if you want a strong silhouette without committing to a sleeve. The skin there is stable and large outlines age well. If you prefer a heavy black fill, say which surfaces should be saturated so the artist can plan session time for saturation passes. Pain is usually low and the work often completes in a single session for medium sizes. For wearing the piece, a muscle tank top keeps shoulder lines visible and frames the motif.
19. Ankle Cross With Bracelet-Friendly Composition
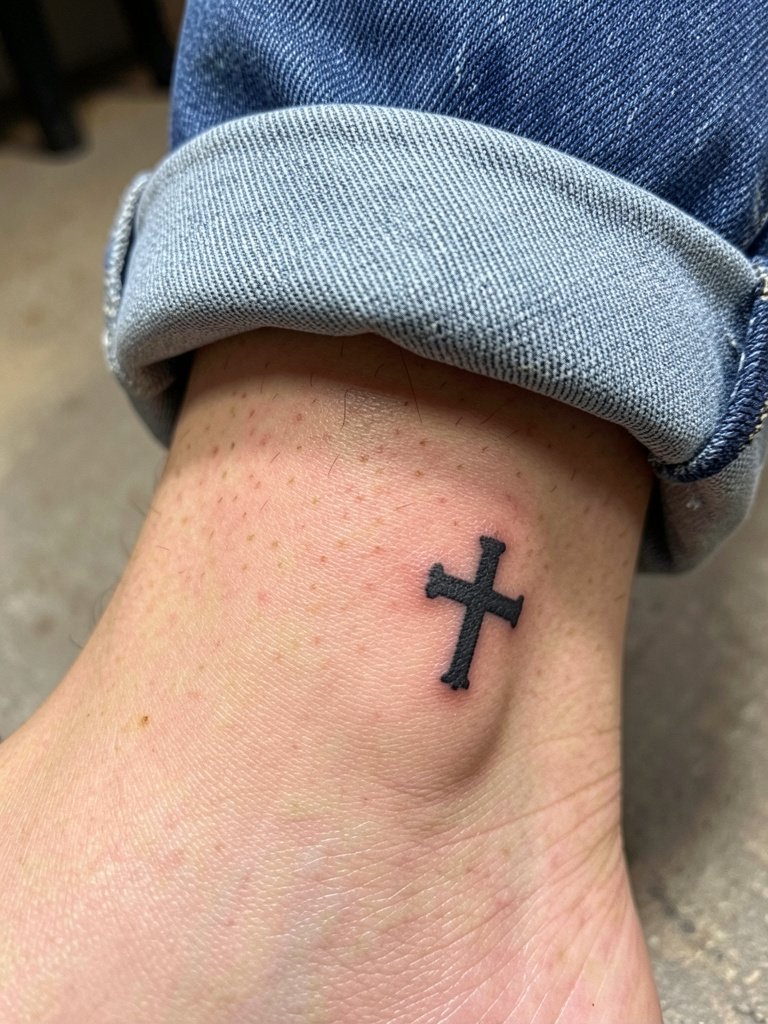
An ankle cross pairs naturally with anklet jewelry and cropped hems. Keep the design slightly bolder than a jewelry sketch so it does not lose crispness with repeated shoe and sock friction. The ankle sees a lot of moisture from socks and shoes, so plan footwear that reduces rubbing during the first two weeks. A common mistake is placing the cross too close to the shoe line where constant friction dulls the outline. For outfit pairing, cuffed straight leg jeans highlight the ankle area cleanly.
20. Upper Thigh Cross for Seasonal Shows

An upper thigh cross gives privacy and scale for ornamental detail. Because the area is hidden by most everyday clothing, choose a scale you want to reveal only seasonally. Healed photos help you judge how dense shading will hold on thicker thigh skin. Session comfort is higher because the area is fleshy, and touch-ups are uncommon unless the piece is extremely fine. For session wear, choose shorts that can be shifted without rubbing or tight seams near the tattoo.
21. Nape Micro Cross for Hair-Up Looks
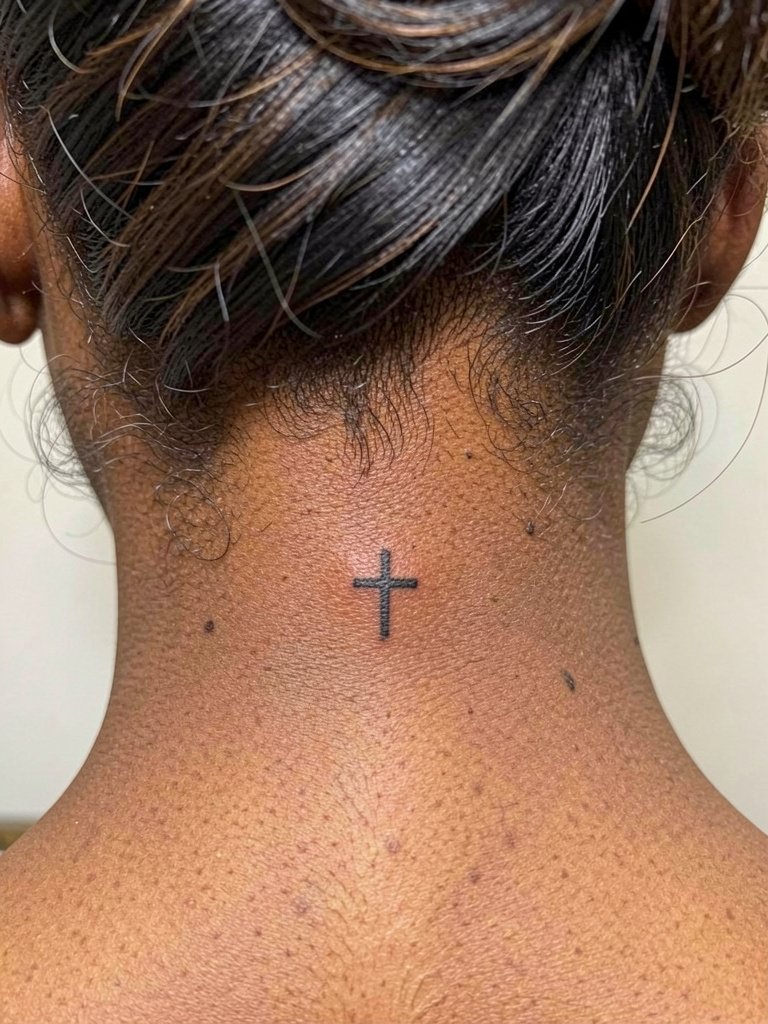
A nape cross rewards hair-ups and short styles. The mastoid and nape skin can be finicky for ultra-fine detail. If you want micro engraving, ask for slightly thicker anchor strokes so the motif reads after hair regrowth and over time. The session is quick but note that collars and shirt seams can rub during healing, so pick loose tops for the first week. Small stud earrings and collarless tees complement the area when you show it off.
22. Calf Panel Triptych for Larger Impact
A calf triptych gives strong visual impact without an arm sleeve commitment. Make sure the vertical spacing and scale match your calf height so the set reads as a unified piece. A common scheduling error is trying to do a full triptych in one long session and ending up with suboptimal saturation. Plan for sessions spaced with time to let initial saturation settle, and check healed panels before continuing. For summer wear, cropped pants and low-profile sneakers frame the sequence neatly.
23. Subtle Collarbone Cross With Necklace Pairing
A collarbone cross reads like a worn pendant when paired with chains. Choose a scale that sits under your preferred necklace length so both elements frame one another without competition. The collarbone skin has low friction, so delicate engraving can survive better than on the wrist. If you plan layered necklaces, confirm spacing so the top chain does not sit directly over fresh ink. For styling, a scoop neck tee keeps the collarbone visible and the tattoo intentional.
Frequently Asked Questions
Q: How do I decide between a single cross, a triple cross, or engraved detail for my placement?
A: Think in terms of scale and visibility. Single crosses suit smaller visible spots and are cleaner on wrists or behind the ear. Triple crosses or engraved versions work better when you have more surface to read detail, like forearms, calves, or chest. Pick a size first, then confirm how much engraving you want so the linework does not overcrowd the negative space.
Q: What realistic timeline should I expect for touch-ups and healed checks for these blackwork cross styles?
A: For fine-line crosses expect a likely touch-up at six to twelve months. Moderate ornamental work with heavier outlines often needs a touch-up around year one or only at year three, depending on how your skin heals. Budget time to see healed photos at six months before committing to larger complementary pieces.
Q: Where can I find healed photos and local studios that do Chrome Hearts cross-inspired work without naming artists directly?
A: Search hashtags like #chromeheartscross and #blackworktattoo on Instagram and TikTok and filter by your city. Browse Reddit threads and community posts to see user-shared healed photos and real cost discussions. Use location filters on social platforms and studio directories that show healed portfolios rather than only fresh flash.
Q: How should I dress for the session and the first week of healing for common placements like wrist, forearm, and chest?
A: Wear easy-access clothing that does not rub the tattoo. For forearms and wrists pick short sleeves or a loose button-down. For chest and collarbone pick an open-collar or scoop-neck top. During the first week avoid tight straps and heavy jewelry on the tattooed area so adhesive dressings and scabs do not catch.
Q: Will a small black cross look the same on different skin tones?
A: Blackwork reads well across skin tones, but fine details like tiny stipple or ultra-thin script may soften faster on textured or deeper tones. Request healed photos from the artist showing similar skin tones and ask for slightly bolder main outlines if you want those details to stay legible over time.
Q: Any special considerations for getting a cross near sensitive zones like ribs or sternum?
A: Yes. The ribcage and sternum involve higher discomfort for many people. Fine single-needle work on ribs splits opinion because one group warns of early blur from skin stretch, and the other group reports success with careful spacing and needle depth. If you choose these zones, ask for slightly wider spacing in the engraving and plan a break or numbing strategy to get through longer sessions.
