
The choice to cover most of your torso and limbs is less about bravado and more about patience and planning. A full-body plan that reads connected at year five starts with flow, not a single eye-catching panel. Pick an anchor zone, map how motifs travel across seams, and expect the project to change in look as each piece heals and ages.
1. Full-Body Japanese Irezumi Flow, Back-to-Thigh Composition
This style works when you plan narrative movement across the spine, shoulder caps, and thigh from the start. Start with the shoulder cap as an anchor and expand outward so scales, waves, and floral fills read as a single surface. Discuss exact color saturation bands and where the red will sit against black so the artist can map session order for saturation rather than random patching. A common mistake is doing small koi panels in different sessions without matching color recipes, which later reads like mismatched pieces. Expect long sessions on the back and thigh, and plan touch-ups in year two for color settling. For the session wear, bring a loose overshirt or open camp-collar shirt so your artist can access the shoulder and flank without uncomfortable twisting. The recommended show-off pairing is an open camp-collar shirt in navy or olive so the chest and upper back remain the visual focus when you want to reveal the work.
2. Polynesian-Inspired Tribal Bodysuit, Bold Geometry Across Chest and Arms
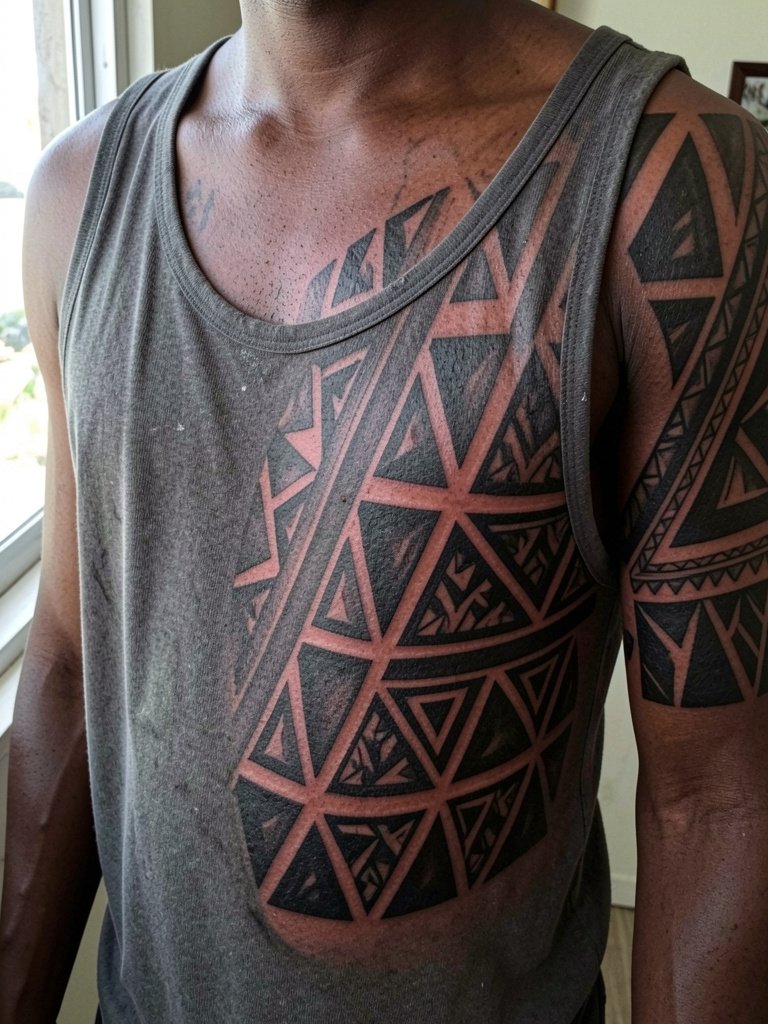
Choose this if you want high-contrast reading from a distance and minimal color maintenance. The key conversation at consultation is symmetry and how patterns align with bone landmarks so the geometry complements movement. Ask the artist to mock up the negative-space breaks at three different arm positions so you can see how the pattern breathes. A typical error is scaling the motifs too small on the ribs, which makes the shapes lose boldness after healing. Pain is moderate to high on the ribs and sternum, but the shoulder cap usually feels easier and makes a good first session for people who want momentum. For sessions, wear a sleeveless tank so the artist has clear access to the shoulder and chest seams. When showing the work, a fitted henley or sleeveless tank frames the shoulders and keeps the chest geometry readable.
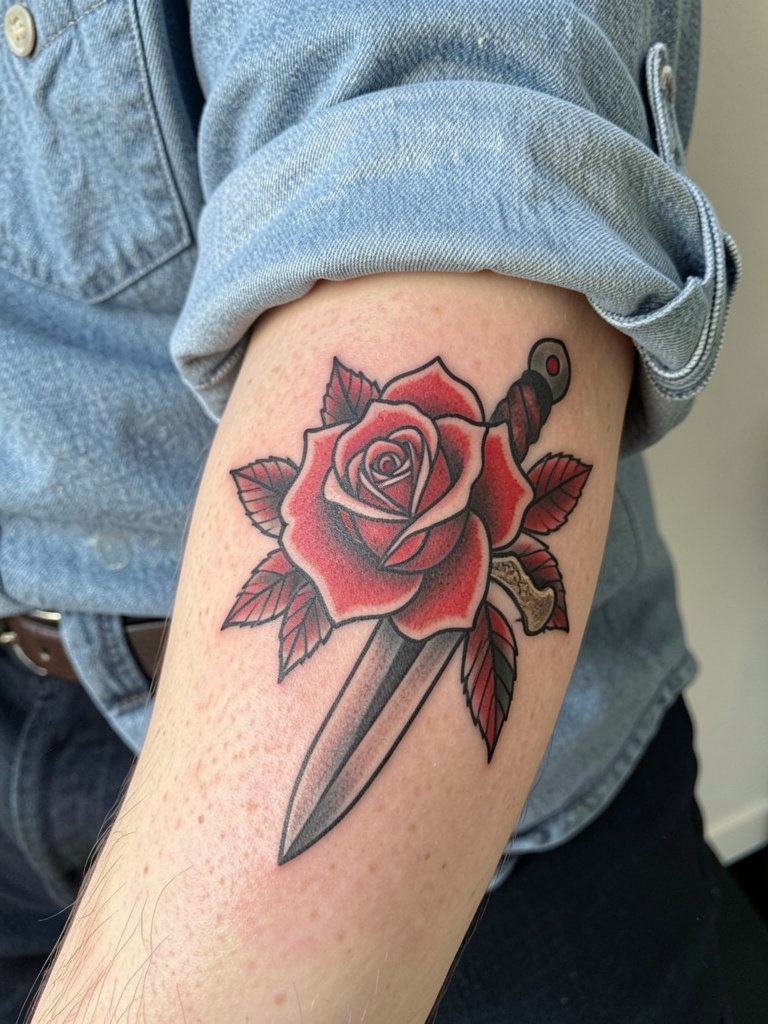
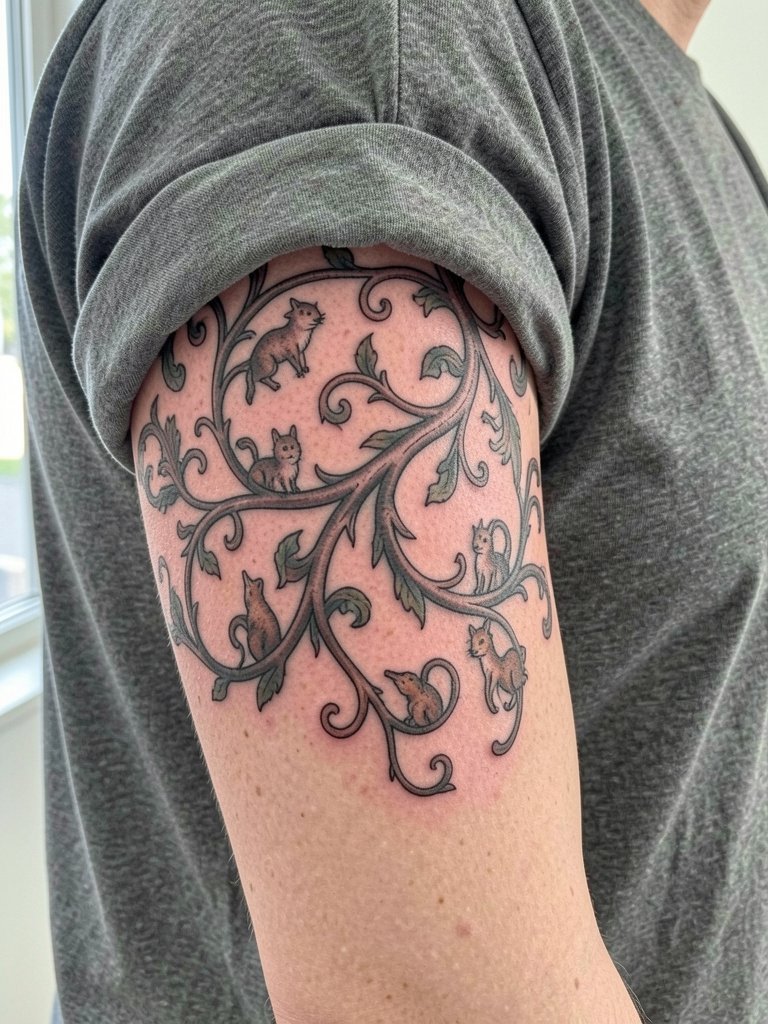
3. Neo-Traditional Chest-and-Sleeve Flow with Animal Motifs
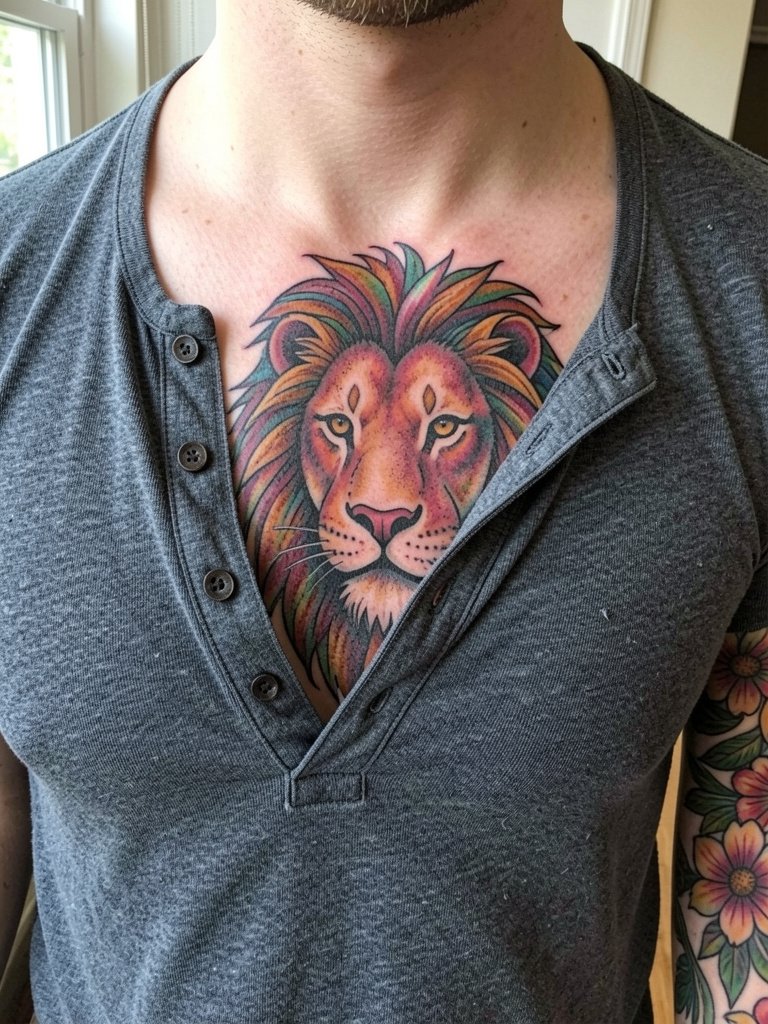
Neo-traditional lets you keep bold outlines and then layer painterly color without losing clarity as the tattoo ages. When you book, bring two reference photos: one for line weight and one for the color palette. The frequent problem is asking for painterly gradients but keeping single-needle line weight; that combination looks fragile after two years. Expect the chest panel to settle in color by month six and require minor saturation touch-ups at year one. This placement favors a fitted henley or a wide-neck tee for show-off wear so the upper chest reads cleanly. If you want the session to be more comfortable, request mid-session hydration breaks and a loose-fitting henley you can pop open between passes.
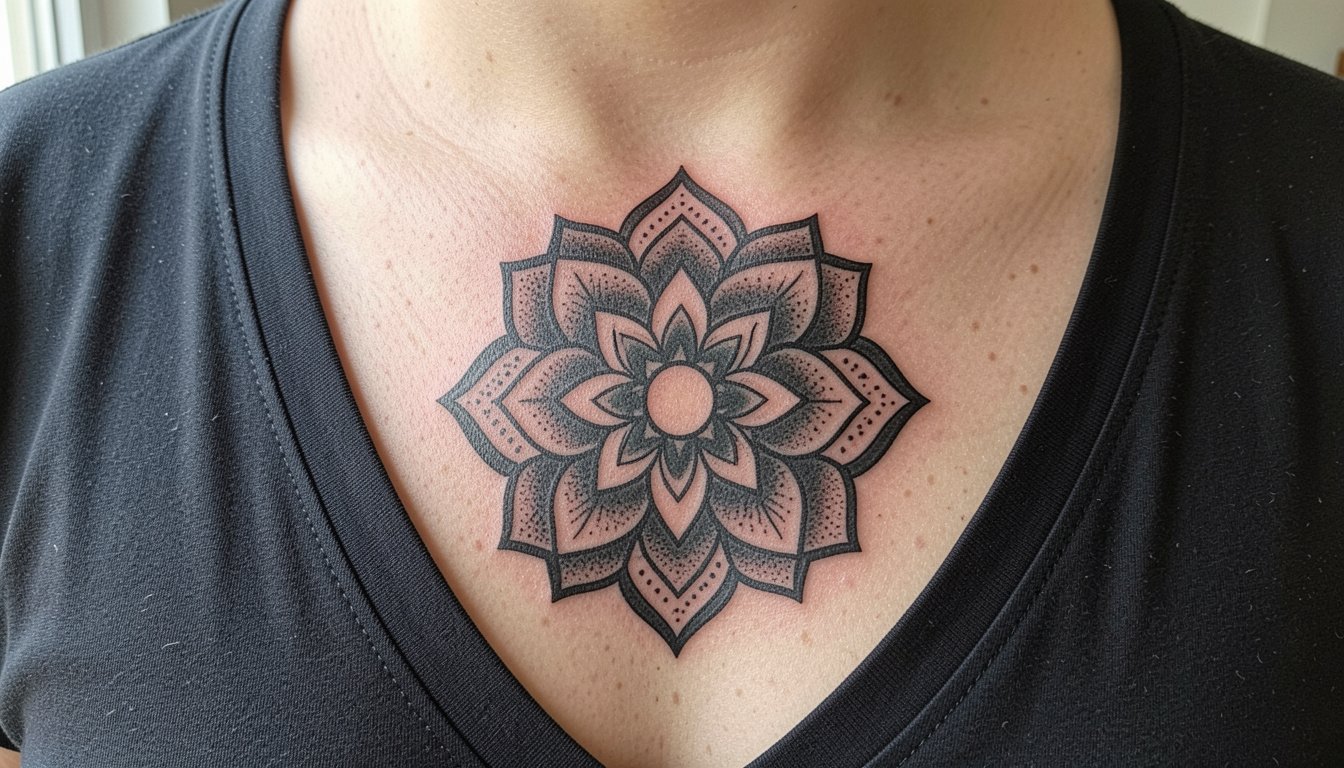
4. Blackwork Sacred Geometry Bodysuit, Sternum and Spine Symmetry
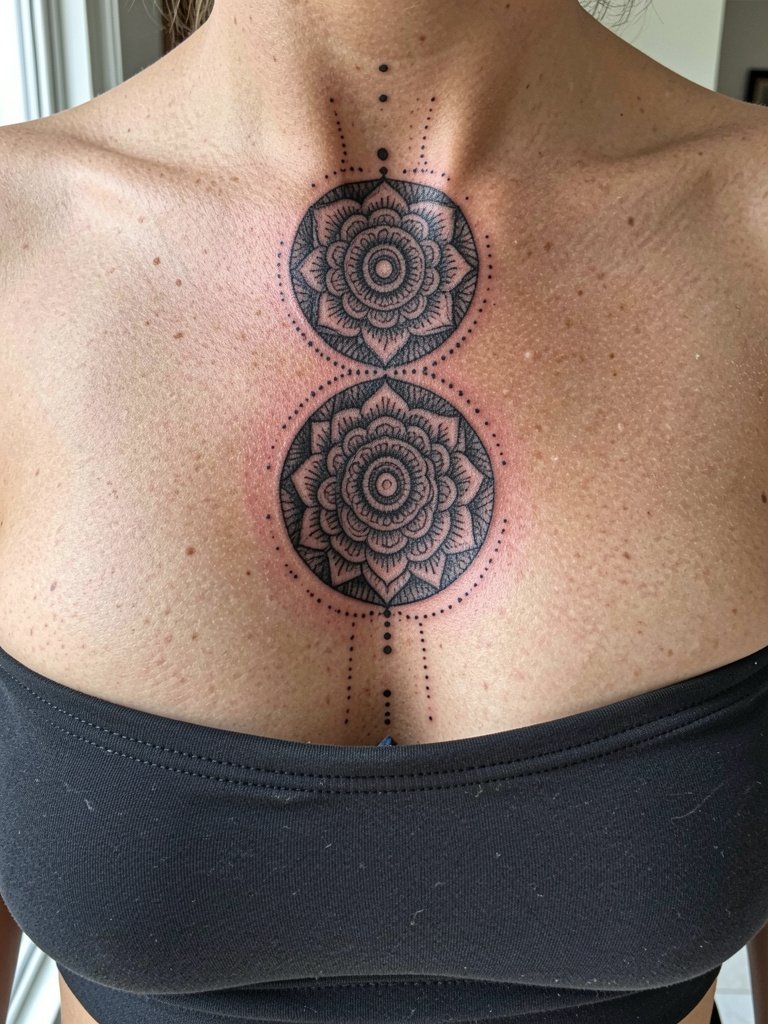
This ornamental approach reads best when the geometry follows anatomical landmarks rather than forcing symmetry across moving joints. Tell the artist exactly how many rings you want and how large the negative-space gaps should be so the mandala does not compress on the ribcage. A common mistake is starting rings too tightly on the sternum which leads to blurring after two years. Expect dot work sessions to be long and precise, so plan multiple short sessions instead of one marathon day. For session wear, a fitted bandeau or sports bra that sits normally makes access simple and lowers the risk of rubbing during travel home. For showing off the chest, an open-collar shirt in off-white or olive will keep the blackwork as the focal point.
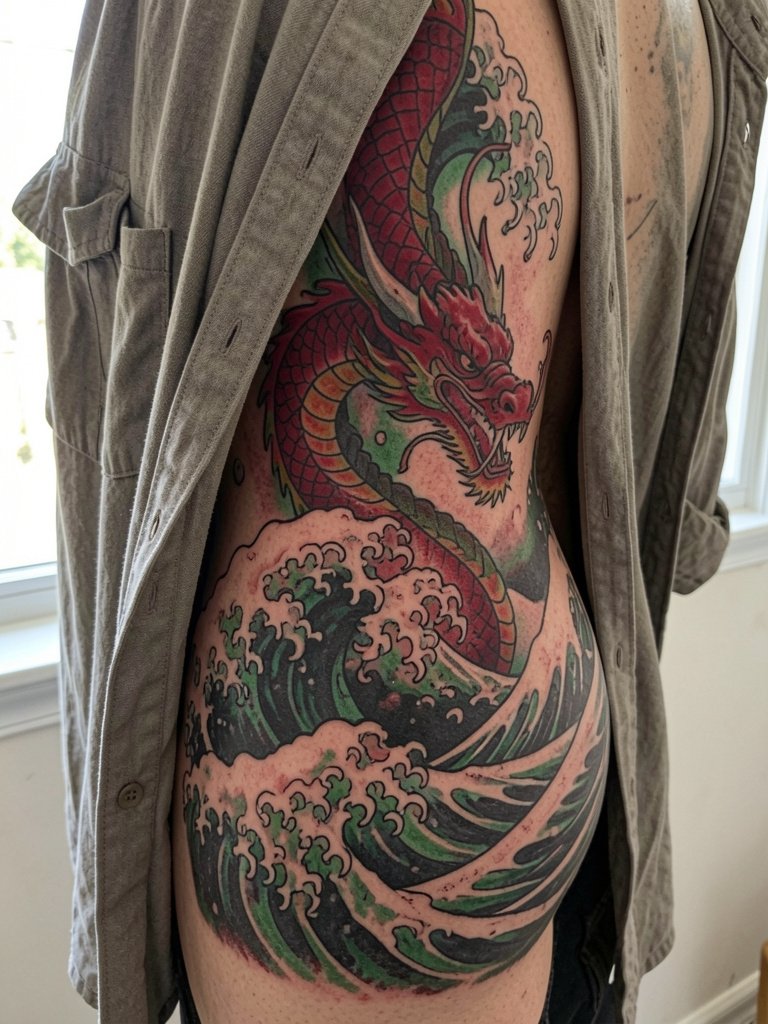
5. Full Back Dragon, Spine-Following Composition
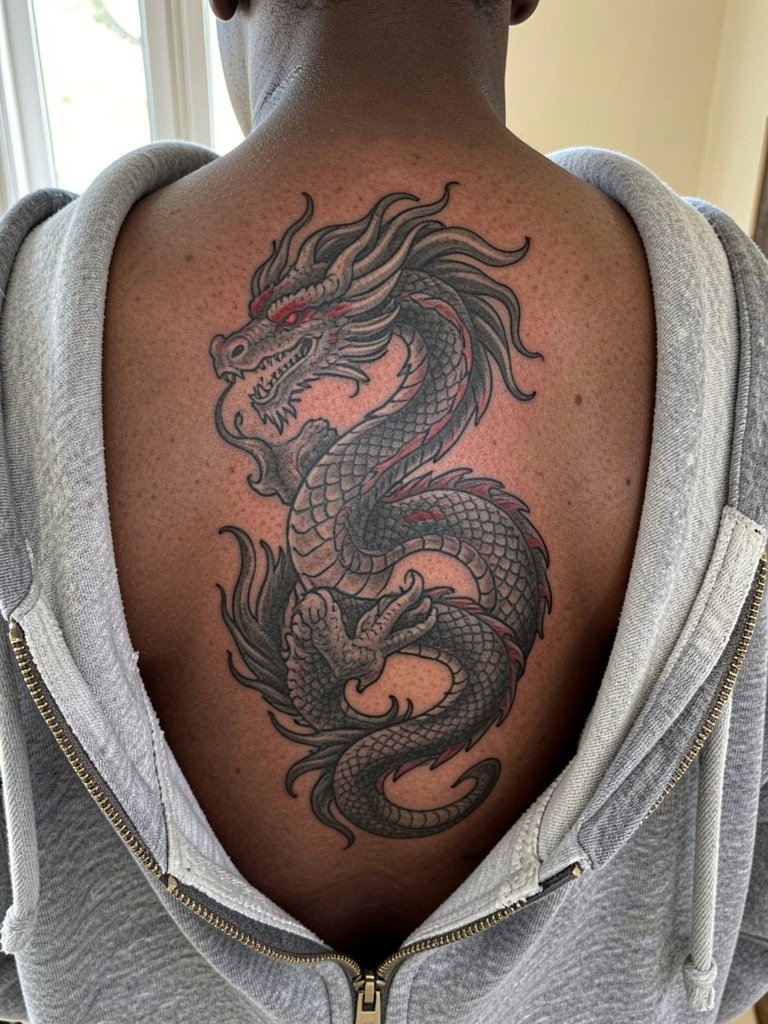
Dragons fit the back naturally because the spine gives you a centerline to compose around. When you plan, specify where the head sits relative to the shoulder blades so the motion reads when you turn. A mistake is compressing too many small scales into the lower back where stretch and friction blur detail. Back pieces can be staged with wider sessions early and detail sessions later. During appointments, wear a zip-up hoodie you can remove and put back on without rubbing fresh ink. For casual looks, a boxy tee or lightweight overshirt left unbuttoned is the easiest way to reveal upper-back elements without pulling clothing.
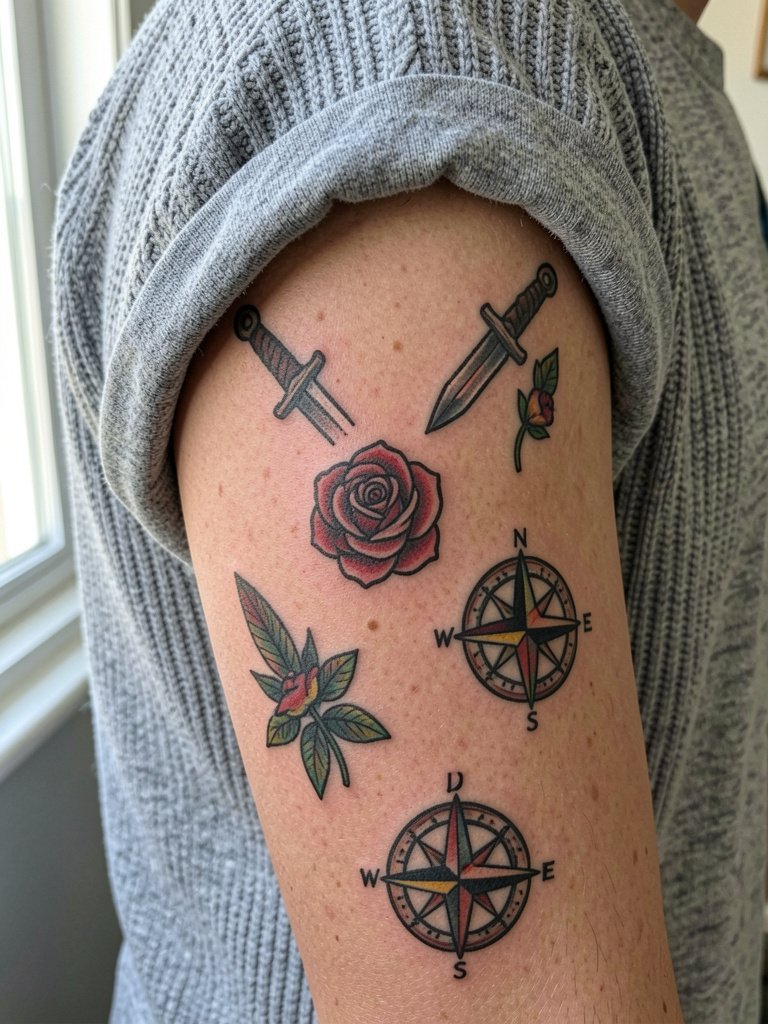
6. Traditional Western Patchwork, Designed to Connect Over Time
Patchwork systems answer the build-order problem by letting you add panels that are designed to link later. Start with outer forearm or shoulder cap panels that match your chosen palette and line weight so future pieces slot in. During your consult, bring a sketch that maps potential connector areas and ask the artist to leave a small buffer of skin for future fills. The usual mistake is mixing different outline thicknesses across sessions, which makes connectors stand out. Outer forearm sessions are low to moderate pain and usually finish within two to four hours. Style-wise, rolled-sleeve Oxfords and knit tees frame forearm panels well. For session wear, pick a shirt with roomy sleeves you can roll up without rubbing fresh ink.
Session Day Picks
These five items make sessions and the first healing week smoother for the chest, back, and forearm panels above.
-
Stencil transfer paper kit. Lets you preview how a lineweight and placement read on skin before the needle goes in, which matters for chest and sternum pieces in ideas 1 through 6.
-
Topical numbing cream. Applied per package instructions about 30 to 45 minutes before a session reduces discomfort on ribs and sternum without affecting how linework heals.
-
Thin protective film roll. A breathable barrier for areas prone to friction during the first 48 hours, useful when you have a back or thigh session and need to avoid rubbing from clothing.
-
Fragrance-free gentle body wash. Mild cleansing in the shower helps the initial skin crusting come off without stripping saturation, which is important for newly saturated blackwork and color panels.
-
Healing ointment. A thin layer during the first few days keeps the area moist and prevents heavy scabbing on fine-line or dense color work.
7. Realism Memorial Portrait Panels, Chest and Upper Arm
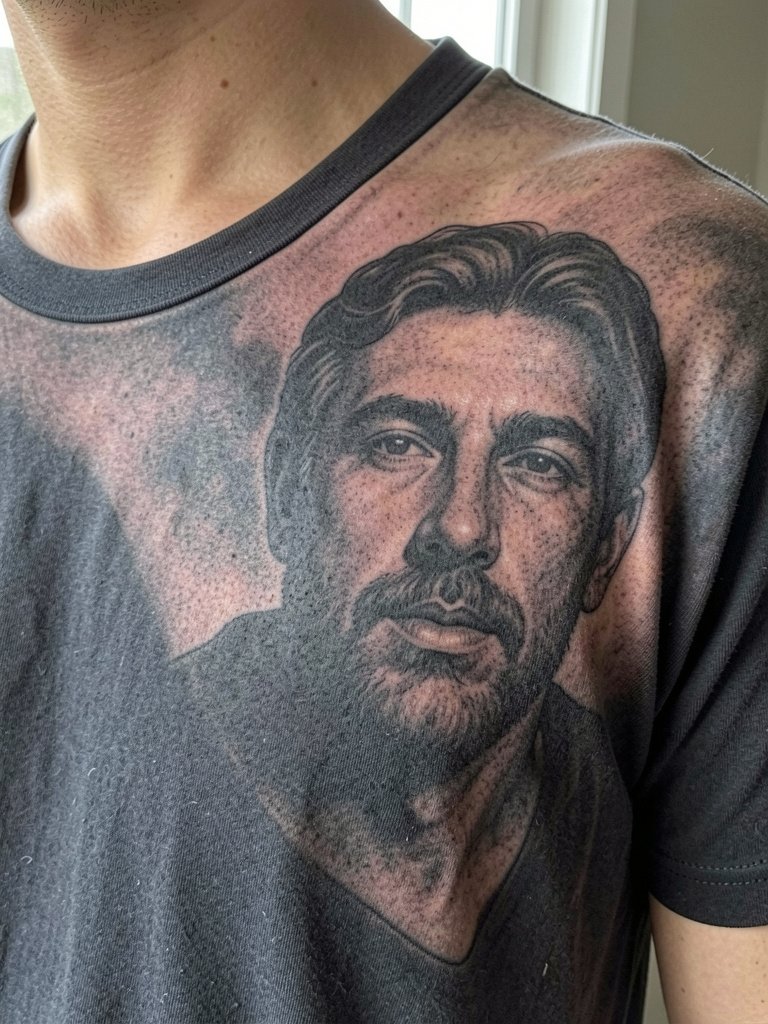
Large-scale portraits demand consistency in scale and reference lighting. Bring high-resolution, well-lit healed photos and ask the artist to show you printed mockups at three sizes so you can judge which diameter holds facial detail. A common mistake is insisting on very small portrait panels where fine detail becomes a blur within two years. Portraits on the chest age differently than on the arm because of skin tension and motion, so expect a touch-up window around year one. For session comfort, choose a wide-neck tee that you can lift or remove without stretching the chest skin.
8. Ornamental Mandala Panels, Sternum Into Upper Thigh
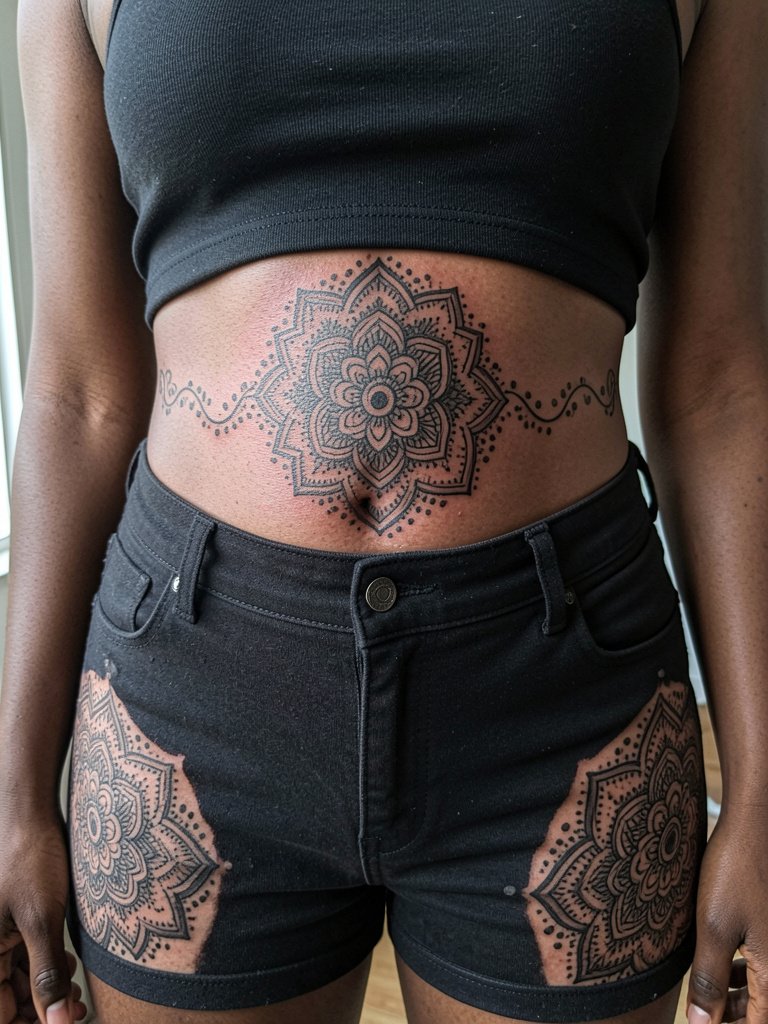
Mandala systems work best when you plan negative-space corridors that let each medallion breathe on its panel. Ask for test stencils showing the exact ring spacing and the size of the central negative-space so nothing compresses on the ribs. A common error is starting with tiny inner rings on the sternum which become indistinct as the body moves. These sessions are precision-heavy, so break them into shorter sittings to maintain consistent dot density. Wear loose drawstring shorts or mid-rise shorts so the thigh work is easy to access during appointments. For evening reveal, a deep-V knit or open-collar shirt frames sternum medallions without competing for attention.
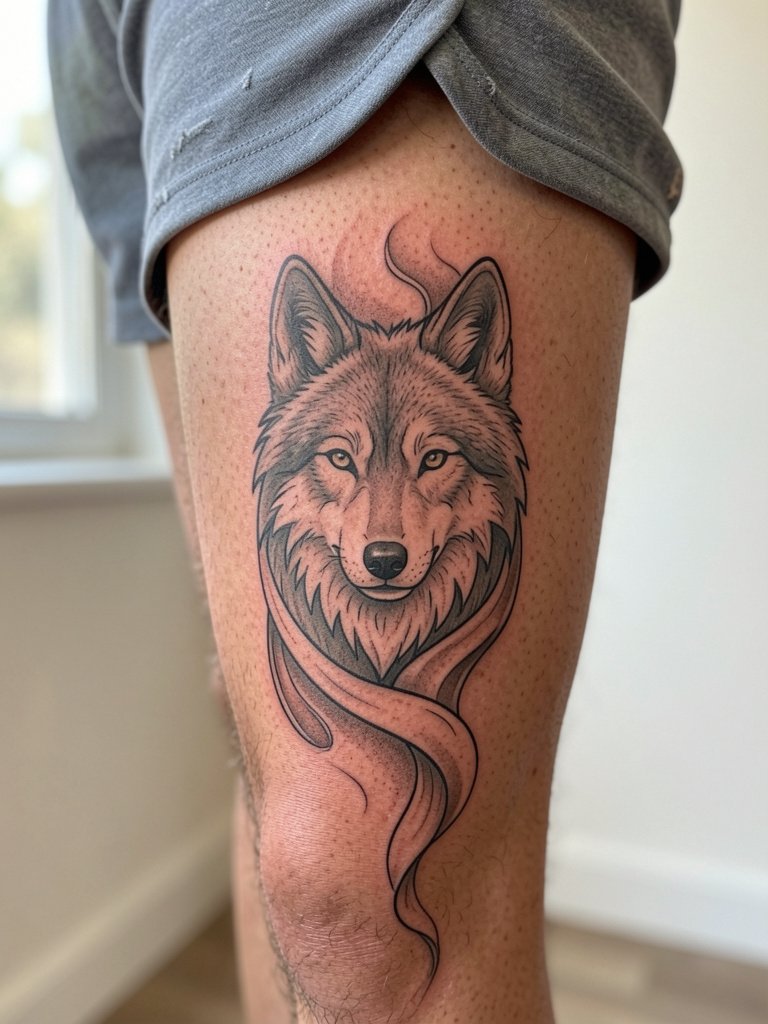
9. Black-and-Gray Mythological Bodysuit Elements, Warriors and Masks
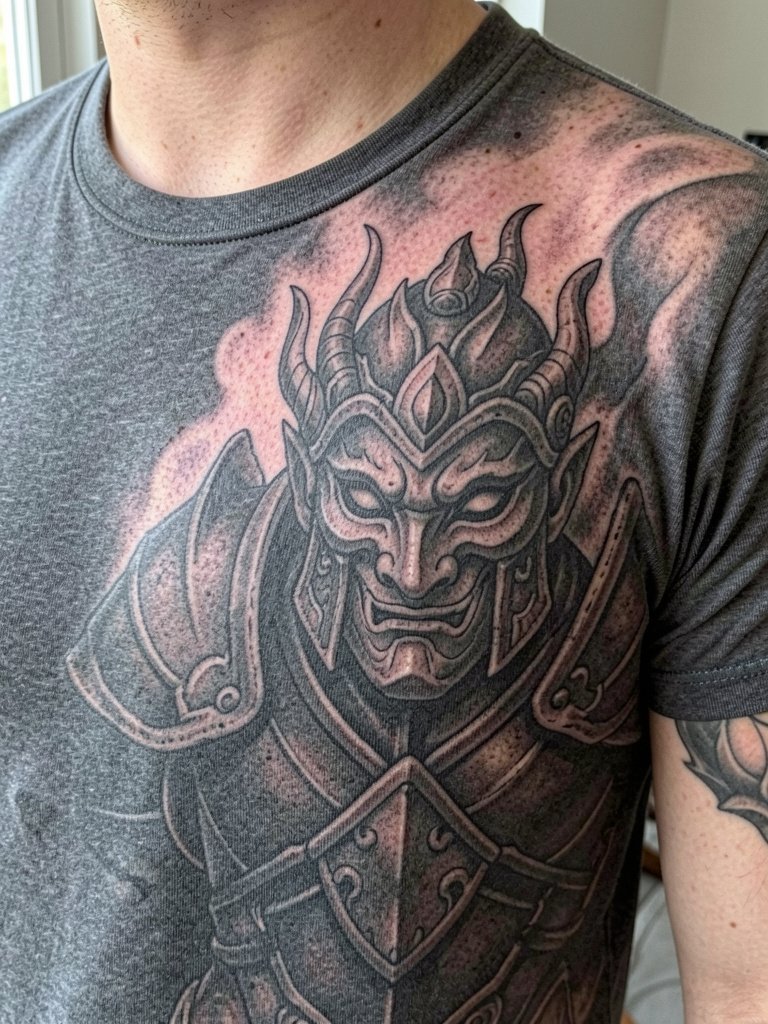
If you want a cohesive fantasy narrative without color maintenance, black-and-gray realism offers drama with fewer touch-ups. Discuss how shadow shapes will carry from the chest onto the arm, and ask the artist to map value endpoints so large shaded areas do not wash out into one flat tone over time. A frequent mistake is blending too many shaded textures without hard anchors, which then read as muddled at five years. Sessions that span chest and shoulder are moderately painful and benefit from planned hydration and pacing. For casual wear, a wide-neck tee or short chain necklace can complement the chest centerpiece without obstructing view.
10. Blackwork Negative-Space Torso, Large Blocks and Skin Sculpting
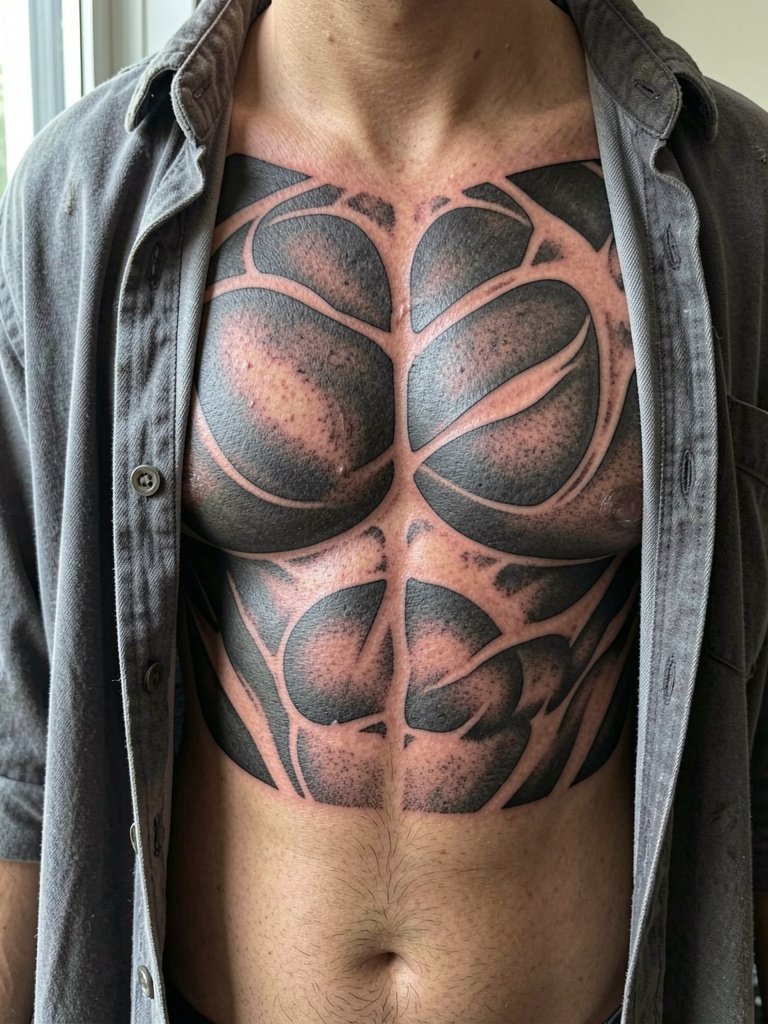
Large black fields age differently than small linework. One camp argues that heavy blackwork holds up best because saturation reads from a distance and avoids fine-line blur. Another camp counters that massive black areas can feel visually heavy and may limit future additions that need mid-tones and gradients. Name both positions and balance them against your expansion plans. When booking this kind of panel, request a healed portfolio of the artist's large blackwork at three and five years so you can judge settling. For the session day, wear a loose button-down or overshirt you can open without rubbing the fresh ink. For showing off the piece, an unbuttoned overshirt or boxy tee keeps the negative-space sculpture visible while staying casual.
11. Sleeve-to-Chest Continuity Piece, Illustrative Flow
Continuity pieces succeed when the connector zones are planned ahead of the first session. Bring a map showing how vines, negative space, and color islands will continue across the chest seam. The typical error is leaving awkward gaps at the armpit because early pieces did not anticipate future connectors. Sleeve-to-chest work often needs three to eight sessions depending on complexity. For appointments, wear a short-sleeve shirt that can be rolled smoothly without rubbing fresh ink. Rolled-sleeve Oxfords pair well for everyday styling and keep the arm and chest connection visible.
12. Script and Lettering Integrated into Large Panels, Sternum and Collarbone Accents
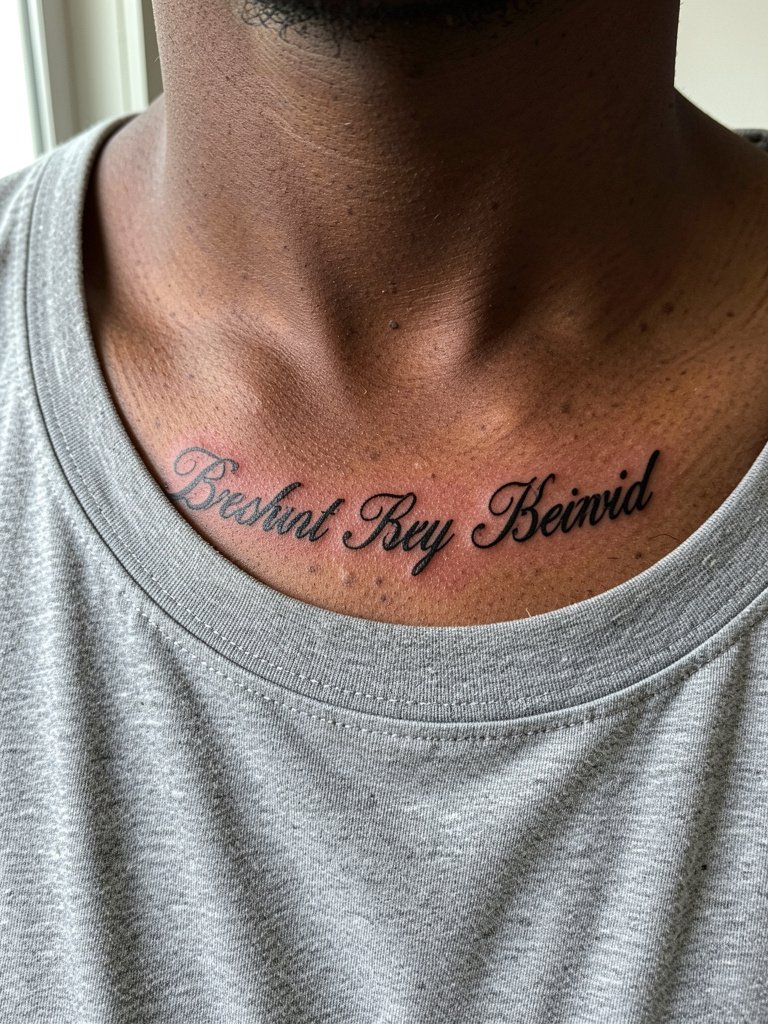
Lettering works as an accent but is unforgiving at small sizes. One side of the debate says fine single-needle script looks elegant but blurs quickly when crowded. The other side says slightly heavier script with generous tracking will remain legible for years. Call out exact letter height and spacing in your booking so the artist can recommend a size that survives movement on the sternum or collarbone. The typical mistake is copying a tiny social-media reference without scaling it up for the body. For show-off outfits, choose wide-neck tees or short chain necklaces that do not sit directly on the lettering. For the session, a button-down with roomy collar access keeps the area comfortable.
13. Patchwork Sleeve and Leg System, Mix-and-Match Panels
Patchwork is the low-risk route to large coverage. Plan your palette and line weight from the start so a future connector does not feel like a patchwork afterthought. Ask the artist to leave consistent gutters of skin between panels if you want to preserve the patchwork look, or ask them to plan hidden connector zones if you expect to merge pieces later. A common error is mixing ultra-fine single-needle symbols with bold traditional panels and then needing extensive rework to match line weights. Sessions are flexible and usually shorter, making them easier on budget and pain tolerance. For session wear, choose short sleeves you can roll without compressing the area. For showing off, a knit tee and minimal watch keep the forearm artwork visible and framed.
14. Ornamental Thigh and Hip Panels, Hidden Collector Pieces

Hip and thigh panels offer private reveal options that photograph well when planned. Because the area sits near a waistline, specify exactly where the waistband will sit relative to the design so future clothing choices do not chop off key elements. A common mistake is placing focal detail too close to the underwear line which leads to awkward cropping by pants or shorts. Session wear should be loose drawstring shorts that sit low without pressure on the fresh ink. For casual reveals, higher-hem shorts or fitted athletic shorts show the thigh panel cleanly.
15. Calf and Lower-Leg Continuity, Visible Season Placement
Calves are seasonal show-off spots and usually handle heavy detail well. Discuss how the piece reads from three to six feet away and whether you want the design to be visible when wearing trainers or only in shorts. People often forget that the back of the calf moves differently than the outer calf, so make the artist confirm orientation on a live stencil. Calf sessions are lower on the pain chart than ribs or sternum and fit into single long sessions for many artists. For session wear, athletic shorts or lounge shorts that roll easily are the most convenient. For summer reveal, higher-hem shorts and low trainers frame the work while keeping the shoe line clear.
Frequently Asked Questions
Q: How should I plan the build order if I want a full-body suit over time?
A: Anchor your plan at a low-pain, flow-friendly zone such as the shoulder cap or upper arm and build outward toward the chest and back. Use a style guide with consistent line weight and palette so individual panels slot into a single visual language. Break projects into phases by session length and prioritize connector zones so the work reads cohesive even during long gaps between appointments.
Q: How do darker skin tones affect style choices for large-scale pieces?
A: On deeper tones, contrast-driven designs like bold blackwork, heavy negative-space geometry, and saturated color blocks read more consistently over time. Seek healed examples on similar skin tones and ask for contrast maps from the artist showing where black, mid-tone, and negative-space will sit. For session wear choose clothing that avoids friction on new ink and pick pieces that reveal the work against solid neutral fabrics when you want to show it.
Q: Where can I find artists and healed portfolios for full-body styles without getting lost in social feeds?
A: Search style-plus-location phrases like "blackwork bodysuit [your city]" and filter by portfolio images that explicitly say "healed" or show months-old healed shots. Use tags such as #fullbodytattoo and #irezumi to narrow style, then add your city name to find local portfolios. Reddit tattoo communities and portfolio directories are useful to spot artists who regularly handle multi-session projects.
Q: What are realistic touch-up expectations for large blackwork versus color pieces?
A: Blackwork usually needs fewer color touch-ups but may require edge-cleaning at the one to two-year mark where heavy fills meet textured skin. Color pieces can keep their vibrancy if saturated properly, but expect periodic top-ups in the two- to five-year window for bright reds and yellows. Plan touch-ups into your long-term budget and ask artists for their typical revisit timeline during consultation.
Q: How should I approach aftercare choices like second-skin versus traditional dry healing for a large piece?
A: One camp favors second-skin products because the sealed environment minimizes external friction and keeps large panels clean during early healing. The other camp favors traditional wash-and-moisturize or dry healing for people who react to adhesives or for areas that ooze heavily. Decide based on your skin sensitivity and the artist’s typical outcomes, and if you have a history of adhesive reactions request a small patch test before using a full film application.
