
Bees read as friendly symbols on skin when the design respects size, movement, and line weight. If you pick a tiny, ultra-fine bee for a wrist or finger, plan for thicker contour and a small halo of negative space so the stripes and wings do not merge over time. The right placement and a few wardrobe choices make a cute bee feel deliberate instead of sticker-like, and the first idea below shows what that looks like on the wrist.
1. Tiny Fine-Line Bee on the Wrist

A tiny wrist bee reads best when the outline is intentional, not barely there. I recommend a slightly heavier contour than a Pinterest single-needle swatch so the wings and stripes keep separation as the tattoo settles. Common mistake is asking for the thinnest possible legs and wings, which can blur by year two on a high-movement wrist. For the session, expect twenty to forty minutes of work and a sharp rasp when the needle crosses bone near the wrist crease. This placement pairs well with a slim watch on the opposite wrist and a thin chain bracelet set on the non-tattoo wrist to keep attention balanced.
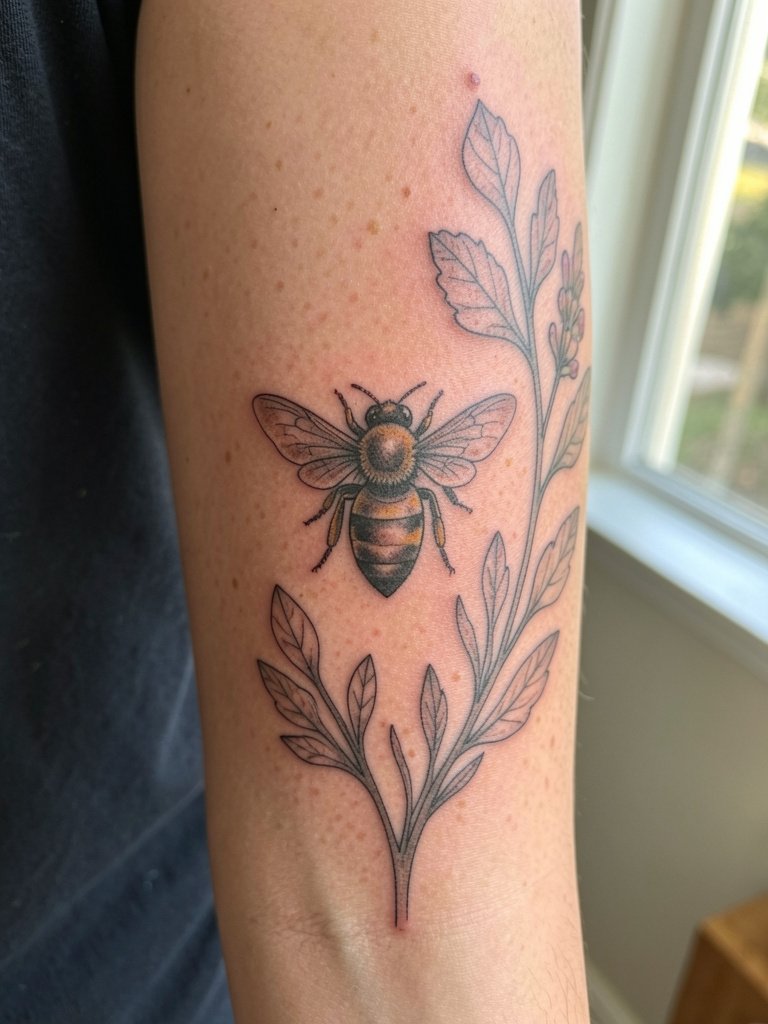
2. Bee with Tiny Floral Accent on Inner Forearm
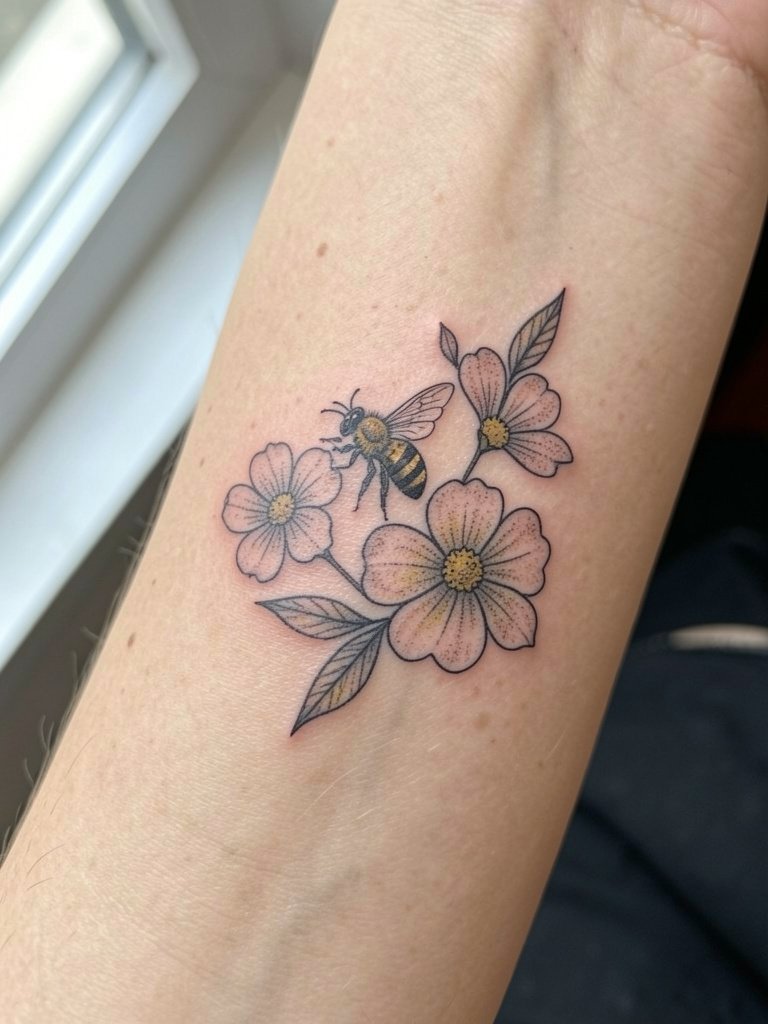
Pairing a bee with tiny botanicals softens the insect without turning it childish. Ask for the floral elements to sit slightly off the bee so the insect remains the focal point and the composition can be expanded later if you want a wrap. Healed at six months the colors will be brighter than at two years, when muted tones become the norm. The most frequent error is packing too many tiny petals into a micro piece. For the session wear a loose button-down so the artist can roll the sleeve, and consider bringing reference photos showing line weight you like rather than only color palettes. Add a linen button down shirt for easy showing off.
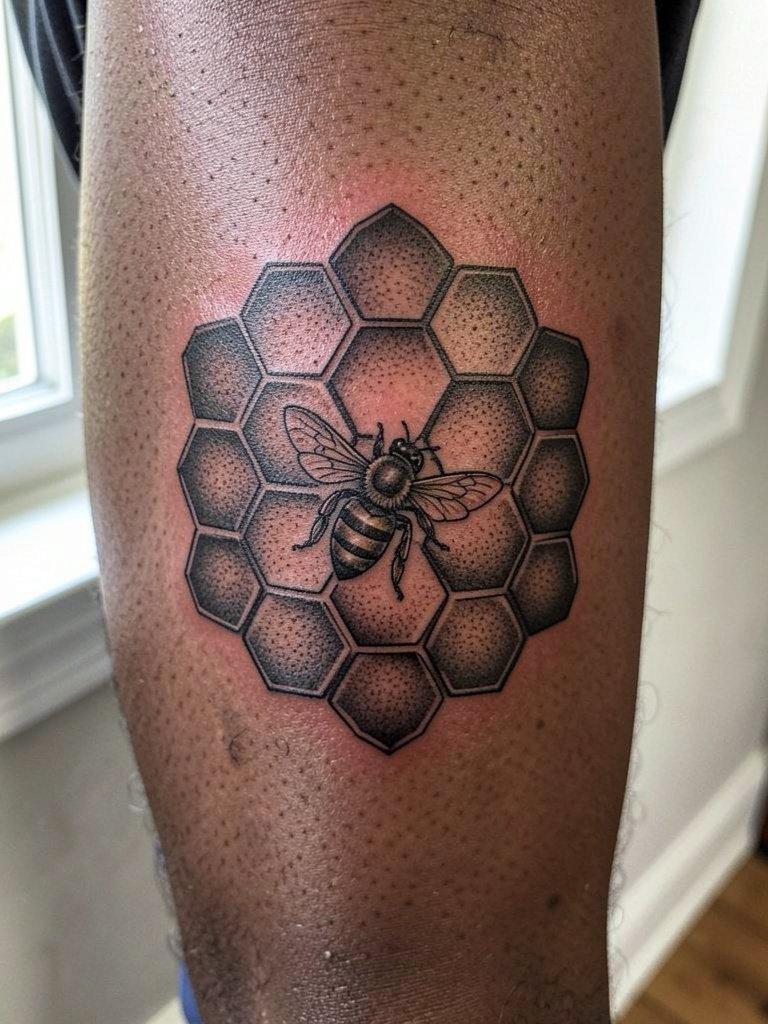
3. Geometric Bee with Honeycomb Backdrop on Outer Forearm
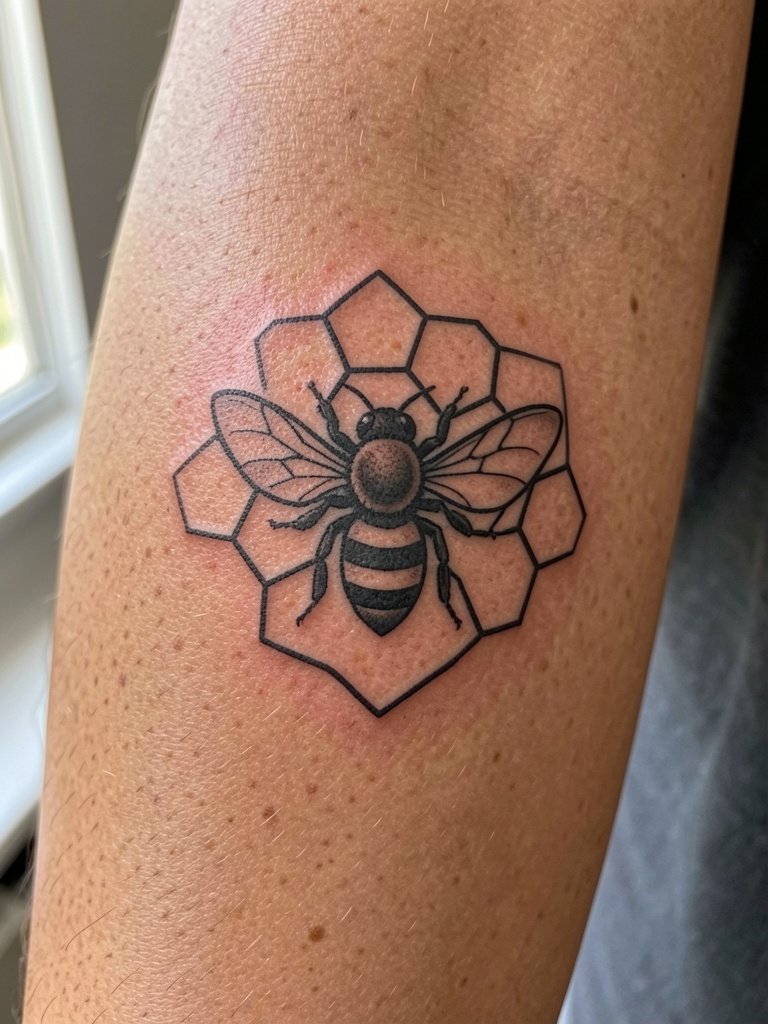
Geometric honeycomb gives structure to a small bee and helps the design read as modern instead of fussy. The trap is shrinking the honeycomb cells too small. The cleaner approach uses a few larger hexes so the grid does not become a blur. For consults, bring a reference that shows the exact honeycomb scale you want and a note asking for crisp line intersections, not over-shaded fills. Outer forearm sessions are comfortable for most people and take about an hour for a compact composition. Pair this with a solid color tank top so the graphic reads against a clean background.
4. Cute Cartoon Bee on the Ankle
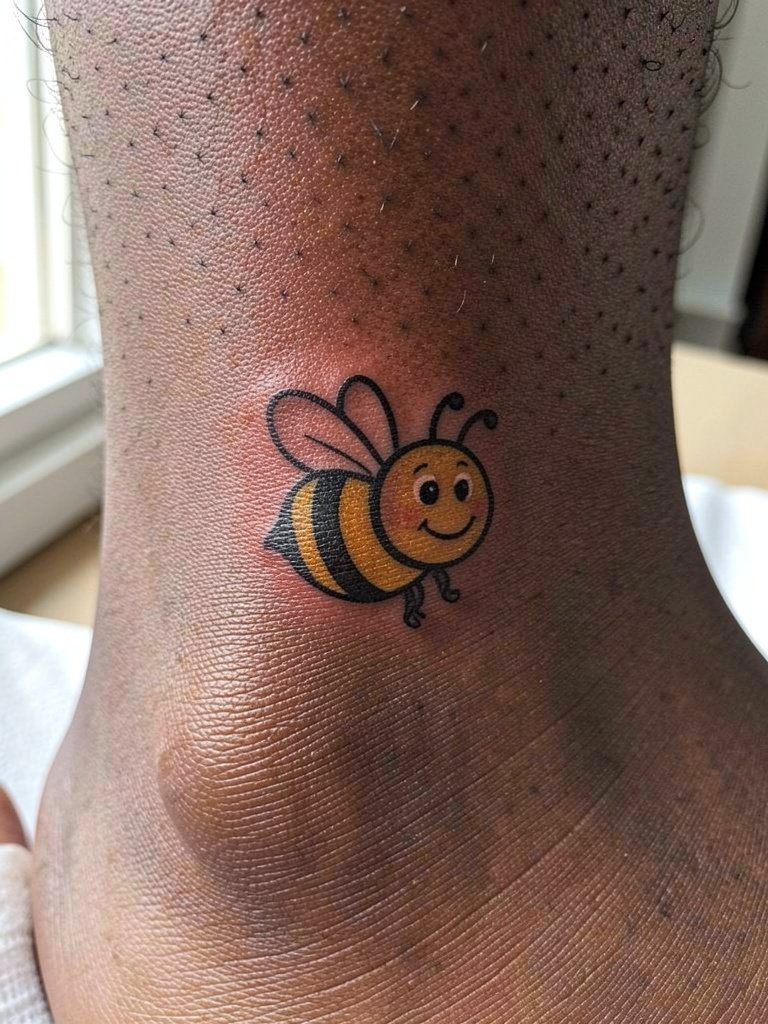
Cartoon bees age well when you embrace bold outlines and limit tiny interior detail. One camp favors playful, sticker-style bees for matching pairs. Another camp prefers realism for longevity and sophistication. If you want cute without childish, ask for thicker contour and solid color fills rather than thin hatch shading. Ankle work is slightly more painful because of less flesh over bone, and healing faces friction from socks. Show off with low-top sneakers and cuffed jeans, and slip on a pair of cropped straight leg pants when you want the tattoo visible.
5. Watercolor Bee on Outer Upper Arm
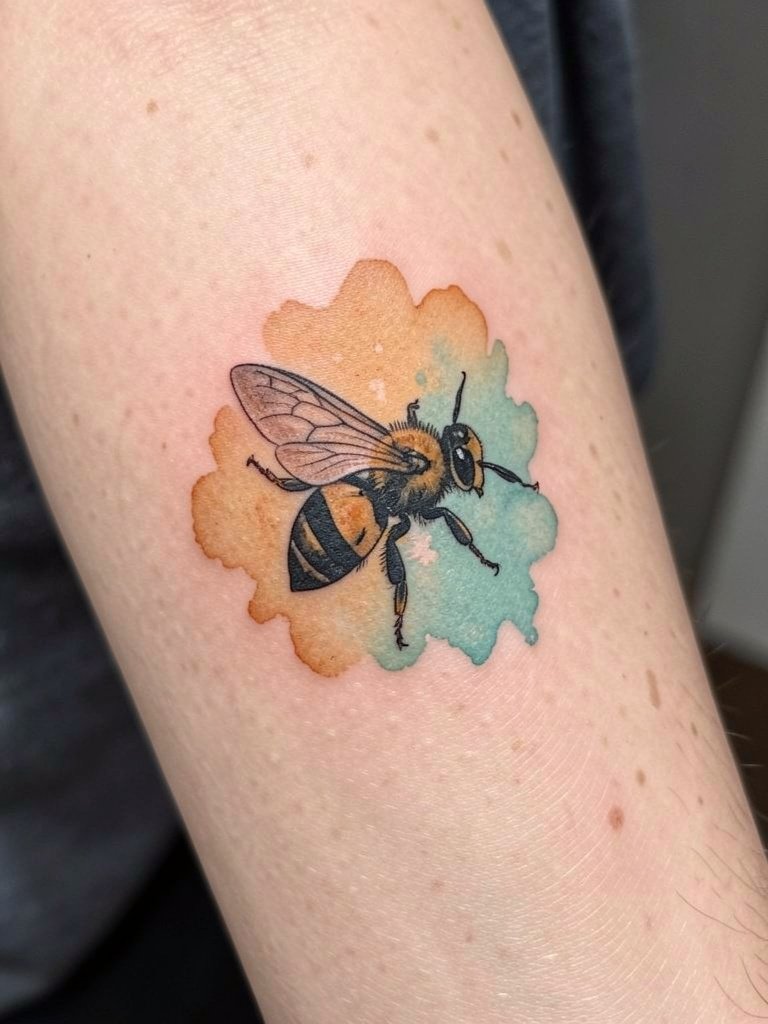
Watercolor makes a bee feel airy and painterly, but there is a tradeoff to consider. One camp loves the soft, painterly wash for a whimsical look. The other camp warns that watercolor-only details fade or blur faster than line-led designs. If you choose watercolor, insist on a defined black anchor for the bee itself so the motif keeps its shape as the color softens. Outer upper-arm pieces heal fairly predictably and can be refreshed at touch-up if saturation drops. For show-off moments, sleeveless tops or a racerback tank make color reads pop.
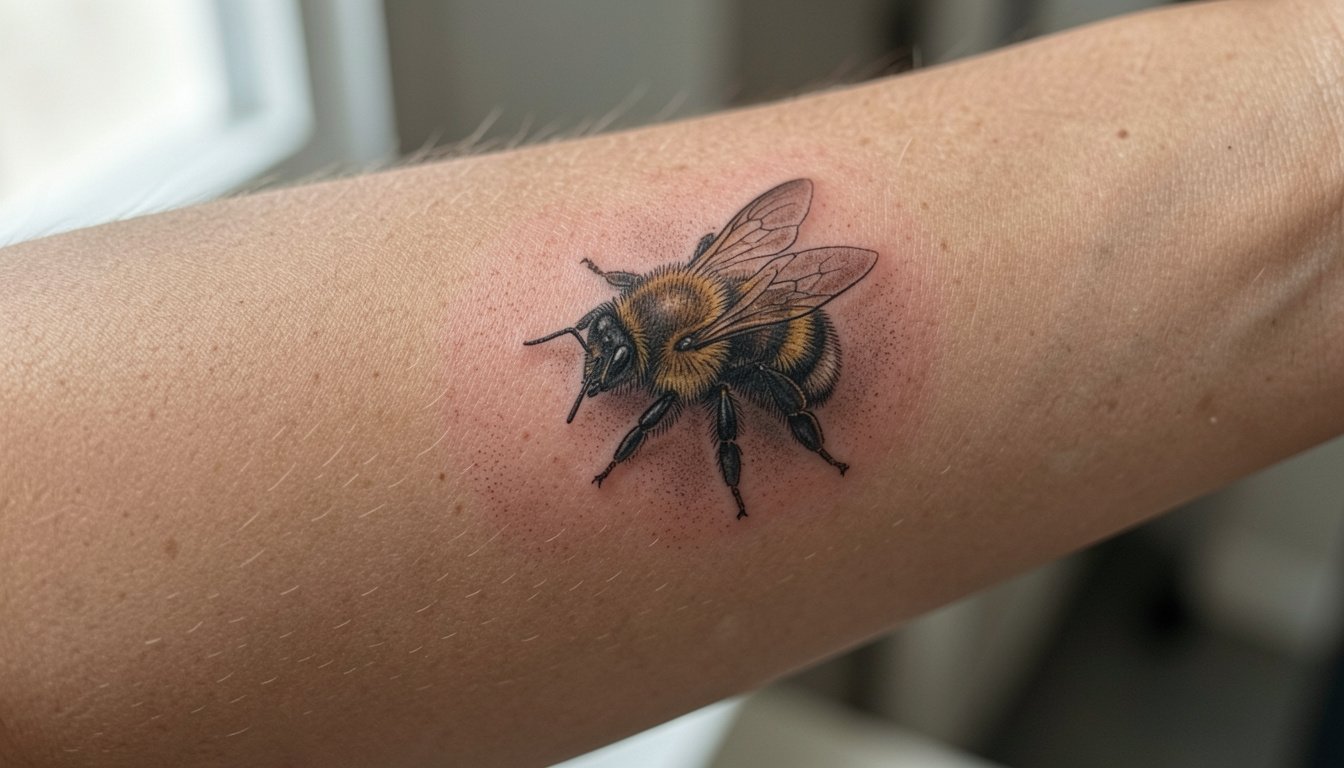
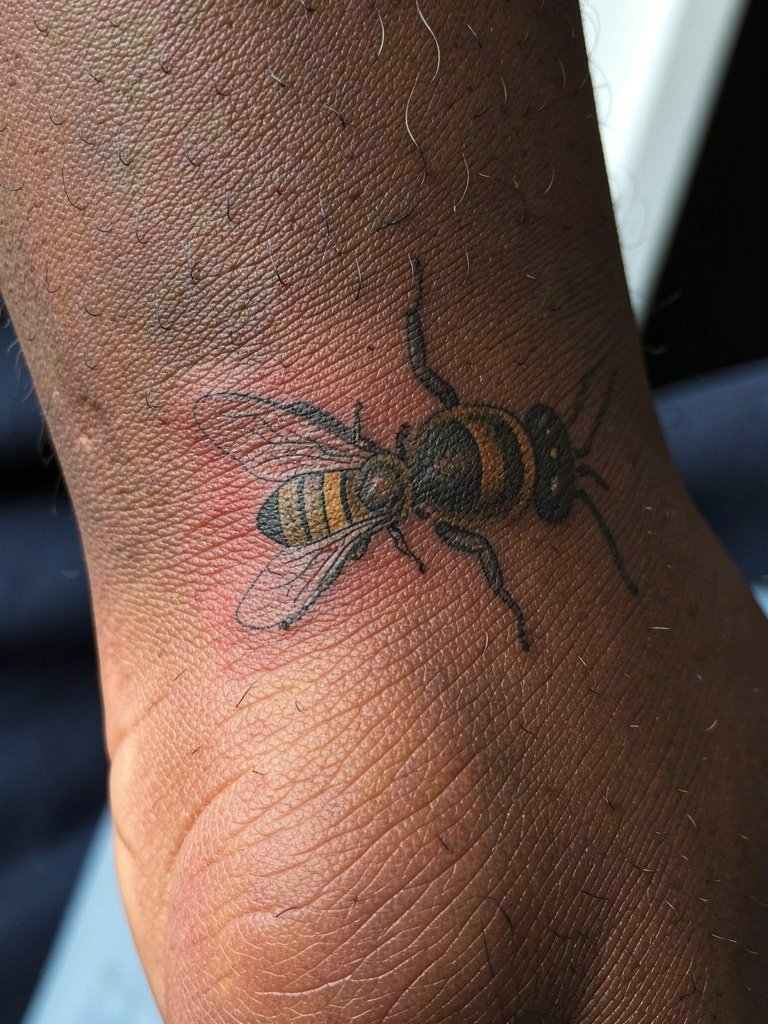
6. Realistic Bumble Bee on Inner Forearm

A realistic bumble bee shows detail but requires space for texture. The common mistake is shrinking a photorealistic reference too small. A realistic bee looks striking at two to three inches across, where stipple shading and saturation can hold. Expect longer session time and the need for a touch-up at six to twelve months if fine hairs lose contrast. Inner forearm placement gives stability for dot work and micro shading. For the appointment wear a short sleeve that can be rolled cleanly and consider a gold dainty bracelet on the opposite arm to frame the piece.
Pre-Session Essentials
The tiny wrist and inner forearm pieces above need different prep than a large back or calf tattoo, so these items smooth the session and the first week of healing.
-
Stencil transfer paper kit. Helps you preview line placement on skin before ink and is handy when you want exact spacing for a bee plus floral pair.
-
Topical numbing cream. Applied the recommended time before the appointment eases wrist and ankle sensitivity without changing the artist's work.
-
Protective film roll for small wounds. Keeps delicate wrists and fingers protected from friction during the first few days.
-
Fragrance free gentle body wash. Cleans healing skin without irritating fine-line work near the wrist and forearm.
-
Aquaphor Healing Ointment. Thin layers help keep micro-line pieces moisturized in the first 48 hours before switching to a fragrance free lotion.
7. Honeycomb Patchwork on the Calf
A honeycomb patch unifies multiple bees or creates a structured backdrop for a single insect. The mistake is packing too many tiny cells, which turns into visual noise on smaller canvases. If you want a patch that can expand later, design with a few anchor hexes and leave negative space around them. Calf pieces tolerate bolder work and age well because the skin there sees less stretch. Pair the look with cropped jeans or midi skirts that let the lower leg show, and pack cropped jeans for reveal days. Larger honeycomb layouts can take a single session or multiple sessions depending on saturation.
8. Bee with Wreath Halo on Upper Chest
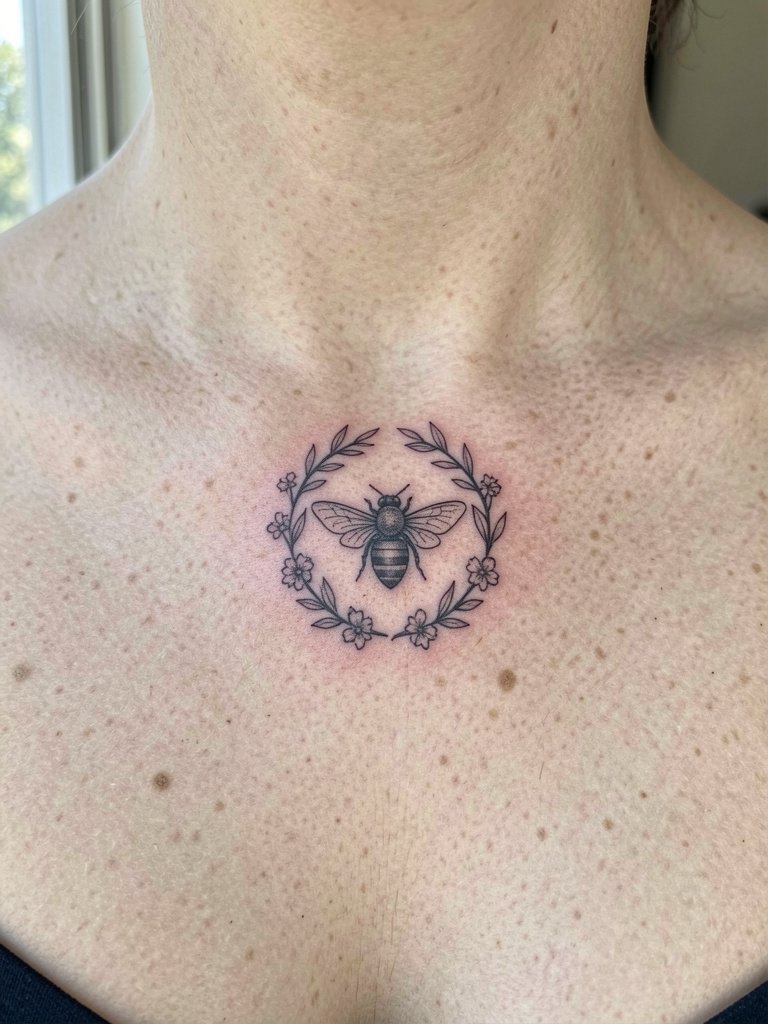
An ornamental wreath frames a bee and gives a centered, decorative quality without overpowering the motif. If this area is important for you, the design should be scaled to sit just below the clavicle so necklaces and necklines can complement it. Sternum and upper chest work splits opinion about fine line longevity because of movement with breathing. One camp suggests avoiding ultra-thin single-needle scripts on the sternum because lines can spread. The other camp says careful spacing and slightly heavier contour settle well. For session wear pick an off-the-shoulder or scoop-neck top that exposes the area naturally and try a layered necklace set to frame the healed piece.
9. Black-and-Gray Sketch-Style Bee on Shoulder Blade
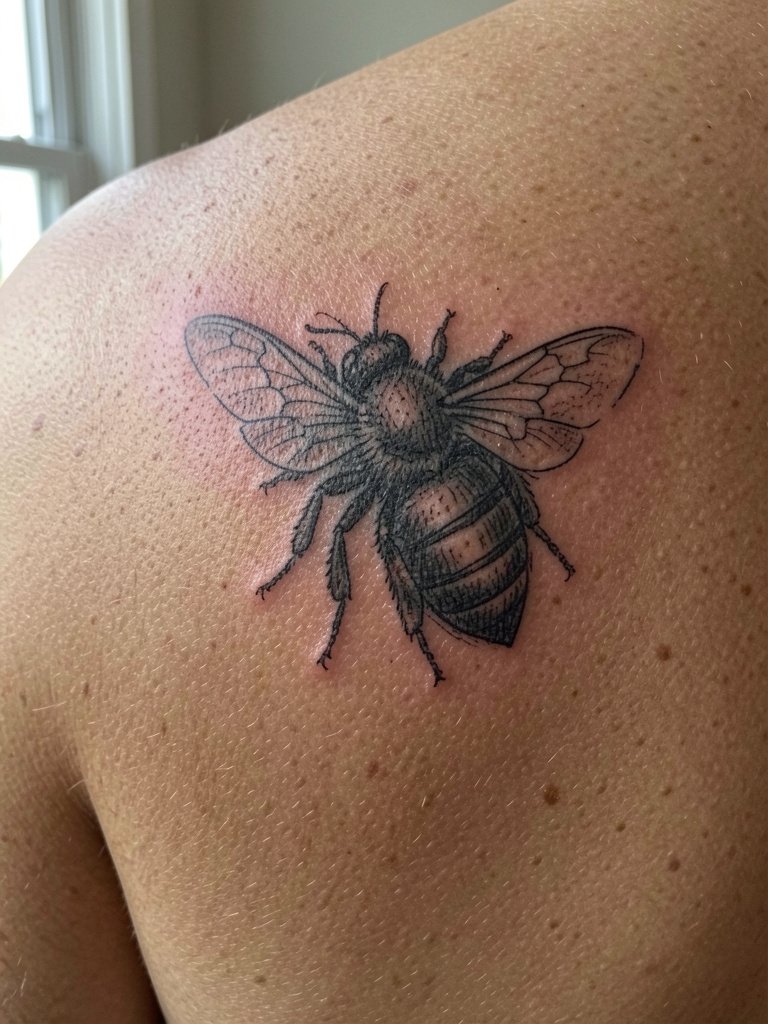
Sketch-style shading gives a lived-in, artistic look and often ages better than very thin color fills. Avoid asking for tiny sketched details in micro scale because the texture relies on space. Shoulder blade skin is forgiving and photos well with off-the-shoulder tops. Session feels like medium pressure and usually completes in a single appointment. If you want the texture to last, ask for confident, slightly bolder crosshatch strokes rather than hairline scribbles. For showing off, a boxy tee with rolled sleeves keeps the area visible without screaming attention.
10. Neo-Traditional Bee on Outer Upper Arm

Neo-traditional lines are forgiving for longevity because of strong contours and saturated fills. For clients who want cuteness with presence, this is a reliable option. The common error is over-detailing tiny color gradients inside a small bee, which can muddle over time. Outer upper arm tolerates saturation and holds bold color nicely. Wear a sleeveless top for the session and show off with a sleeveless top or racerback tank so the color reads clearly. Expect a touch-up at one year if you choose intense color.
11. Micro Bee Behind the Ear
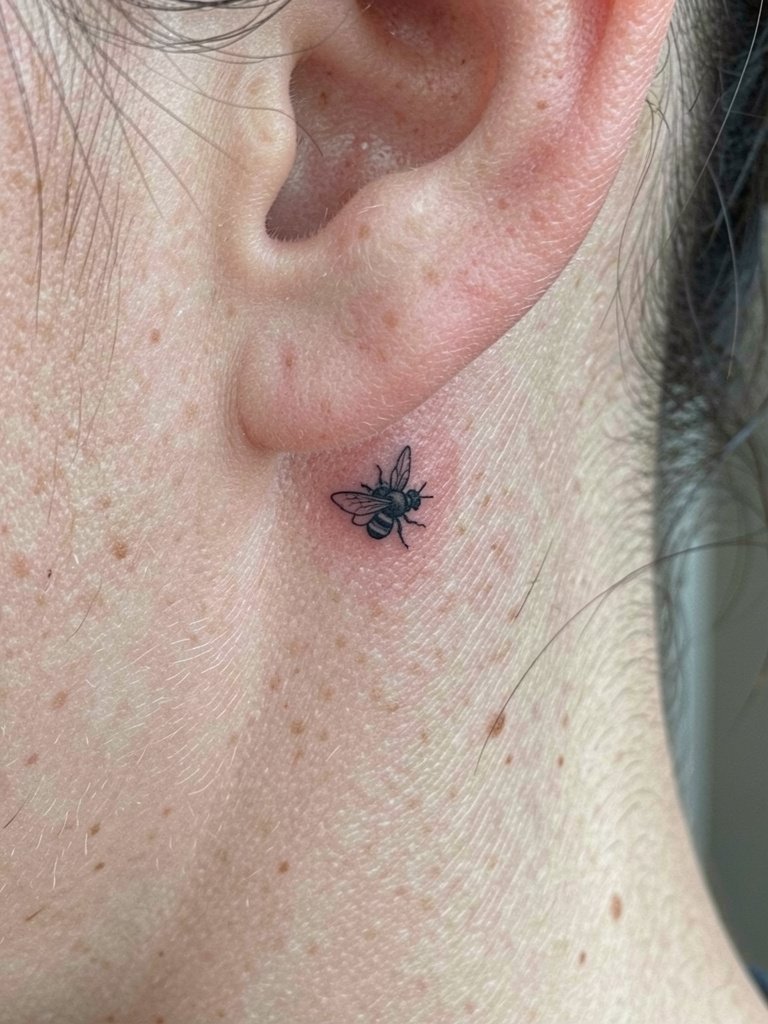
Behind-ear bees are discreet and peek out with updos. The main mistake is insisting on ultra-fine detail; because of the small canvas, keep the outline and core stripes readable. Note that behind-ear skin heals differently and you should look for healed photos from the artist, not just fresh shots. Session time is short but this area is sensitive due to thin skin. For the appointment wear your hair up or loose clips, and consider a pair of hair clips to keep the area exposed comfortably.
12. Bee and Leaf Cluster for a Memorial Forearm Piece
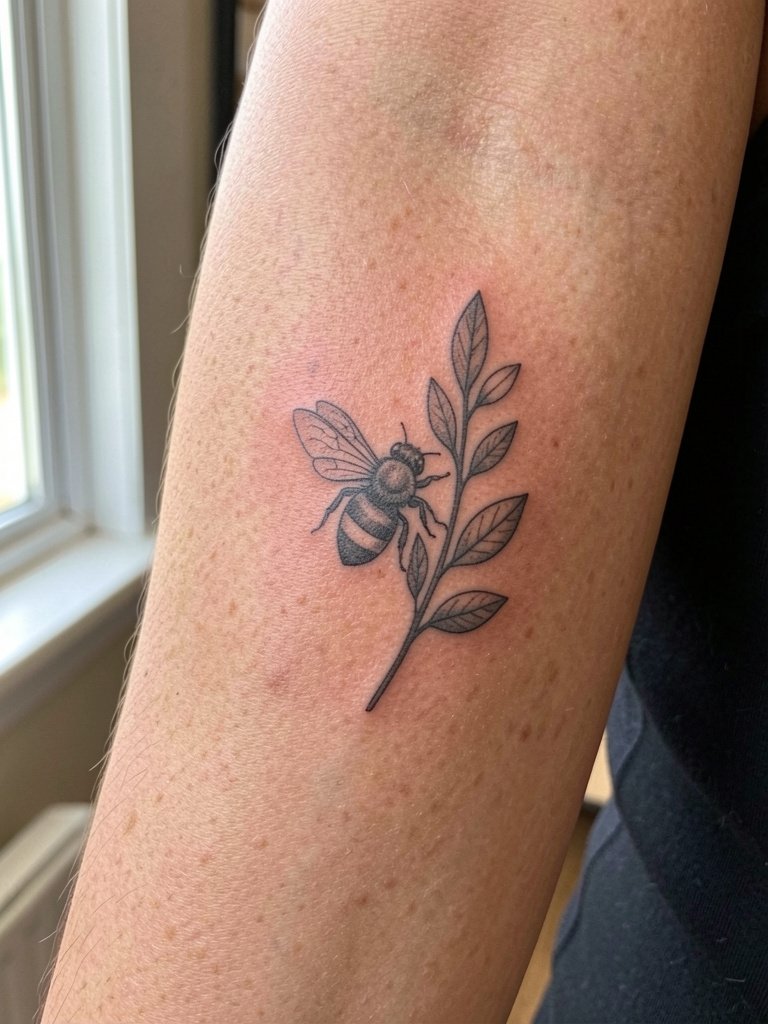
Botanical clusters let a bee carry sentimental meaning without literal symbols. If this is a memorial piece, plan the composition so the bee reads as the focal point and the leaves support the tone. One mistake is cramming names or dates into tiny petals, which reduces legibility over time. Inner forearm is an excellent canvas for line and shading; show healed examples from the artist to judge longevity. For session wear a loose sleeve you can roll and keep skin clean. A tiny memorial often needs a touch-up at one year to keep contrast.
13. Hidden Honey Drop Accent on the Wrist
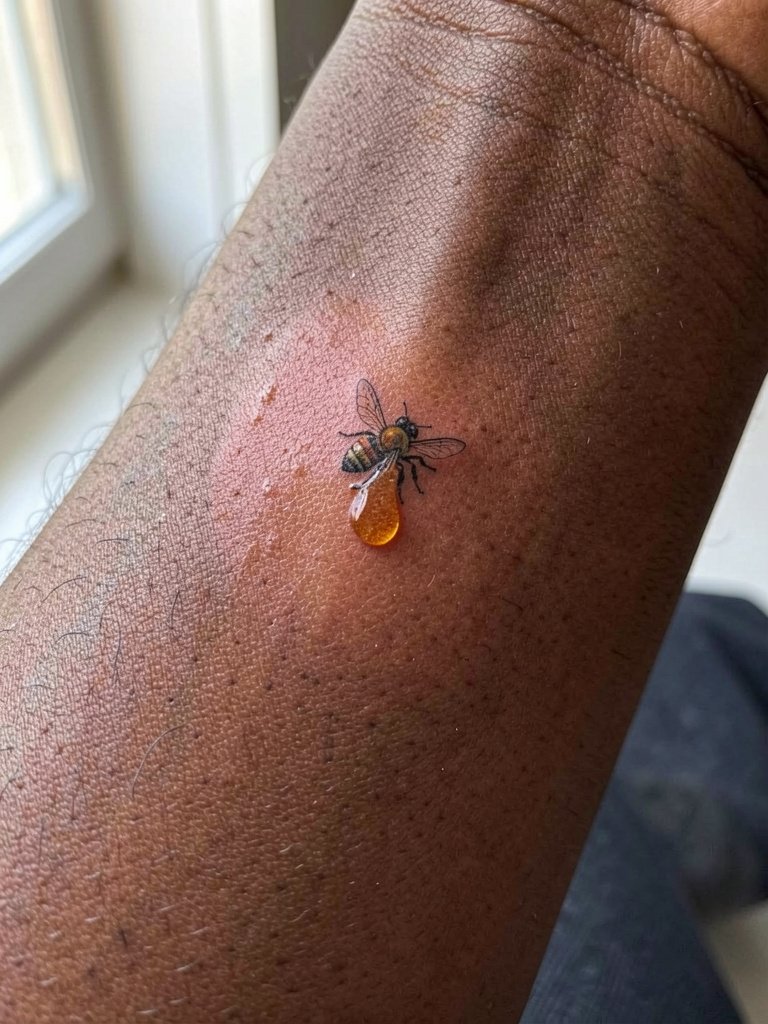
A honey drop adds a clever visual hook without changing the bee motif. Keep the drop slightly larger than a pinprick so color saturation holds on healing. The common error is making the drop so tiny that it fades into a speck after six months. Wrist skin moves a lot, so request a hair stronger contour around the bee. For appointments avoid bracelets on the tattoo wrist and consider stacking thin chains on the opposite wrist like a minimalist watch or bracelet to balance the look.
14. Matching Minimalist Bees for Friends, Behind the Ear

Matching bees are a low-pressure bond tattoo because the motif is small and easy to mirror. Keep design elements simple so the two pieces read identical even as they age. The most common mistake is trusting a random flash and assuming it scales identically on two different ear areas. Behind the ear is sensitive and requires an artist who posts healed examples for that spot. For reveal-day styling, pull your hair into a bun or clip and pair with small studs for a subtle complement. Bring two reference prints of the exact size you want so placement matches across both people.
15. Forearm Wrap Bee and Flower Composition
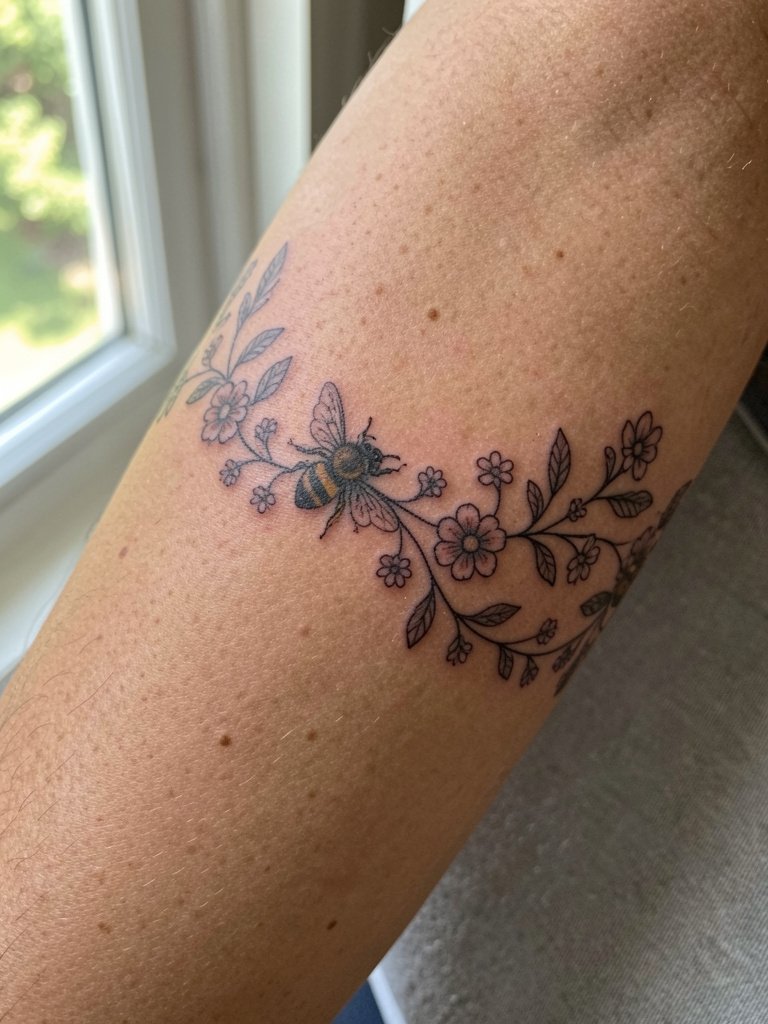
A forearm wrap scales well from tiny to medium and keeps the bee readable by spacing elements along the arm. Avoid compressing multiple motifs into a cuff that circles fully; give the bee room to sit as a focal point. Talk with your artist about how the design reads at three inches versus five. Forearm wraps photograph beautifully with rolled sleeves, so pack a rolled cuff linen shirt for the session and the first reveal.
16. Stylized Dot-Work Bee on the Shoulder

Dot-work creates texture while avoiding busy linework. The pitfall is making dots too sparse in small pieces, which then look spotty rather than intentional. Shoulders are forgiving for stipple shading and the style often ages well because it does not rely on super-fine single lines. Sessions feel steady and can be longer if the area needs dense stippling. Show off with a boxy tee or tank that keeps the shoulder visible.
17. Tiny Bee on the Nape of the Neck
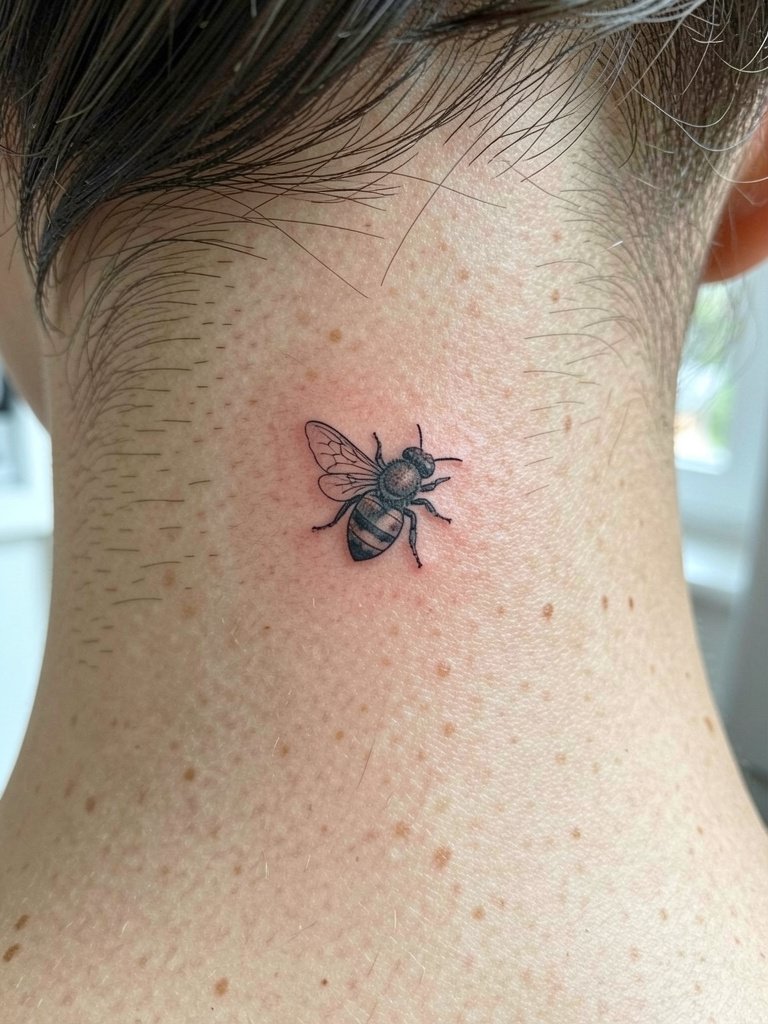
A nape bee is discreet and sweet when you want peekaboo visibility. The common mistake is using ultra-thin leg lines that vanish against hair rubbing. Nape skin heals well but you should expect some rubbing from collars and hair, so a slightly stronger contour helps longevity. This spot asks for someone who shows healed nape examples. Come with hair up and a hair tie, and consider simple stud earrings so attention stays on the area. A small stud can frame the reveal nicely.
18. Botanical Sleeve Accent with Central Bee
If you imagine expanding into a sleeve later, design the bee as a compositional anchor with leaves and small stems flowing around it. A mistake is centering the bee with no visual room for future elements. Mid-forearm is stable and photographs well, but note that sleeves change tension as they grow. During the consult bring scale references and ask how the piece reads at different distances. Pair with rolled sleeves and a gold dainty bracelet when showing the work.
19. Minimal Line Bee on the Ribcage

Ribcage placements are known for a more intense session and variable healing. Fine-line bees on ribs are controversial. One camp argues the stretch and movement blur ultra-thin lines within two years. The other camp says slightly wider spacing and careful needle depth let fine line settle fine. If you choose this spot, request mockups scaled slightly larger than your saved image and plan for a touch-up if lines soften. Numbing and pacing matter, so consider session splits to manage pain and swelling.
20. Little Bee on the Top of the Foot
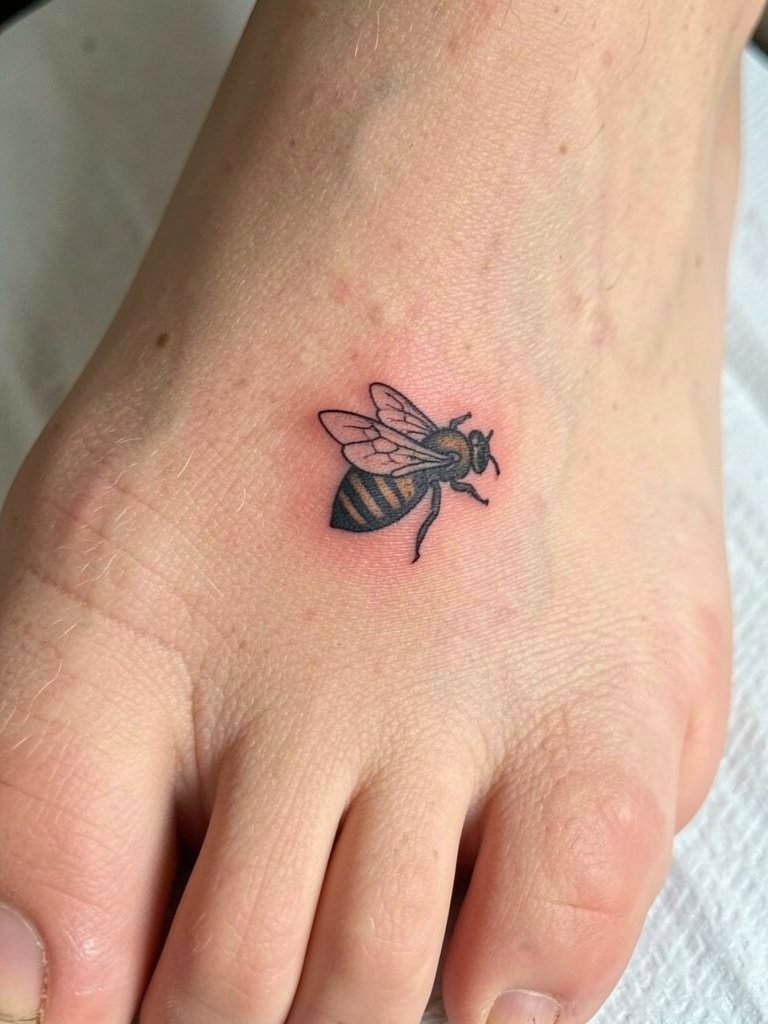
Foot tattoos face heavy wear and fading from shoes and socks. If you want a foot bee, pick thicker outlines and minimal tiny detail to improve survival. A common mistake is selecting a full micro-realism reference for a high-friction area. Plan for potential touch-ups at six to twelve months. For the appointment wear shoes that are easy to remove and bring socks you can slip on gently afterward. Low-profile sandals work for reveal days and photos.
21. Bee with Script Banner on the Inner Wrist

Adding a short word or date creates a focused meaning but demands readable lettering. Tiny cursive often spreads and becomes mush if the letters are too thin. Opt for a slightly heavier script weight and keep the text short. Inner wrist placement is high-movement so expect a touch-up timeline similar to other fine-line placements. For showing off, a scoop-neck tee and layered necklaces let the wrist pop when you gesticulate, and a short sleeve tee works well for session access.
22. Tiny Bee on the Thumb Side of the Hand
Hand and thumb tattoos are notoriously exposed and can fade faster than other spots. If you pick this, use bold shapes and minimal thin accents. The most common mistake is relying on micro-line detail that erases under heavy washing. Expect frequent touch-ups and factor that into the long-term plan. For the session bring a glove-friendly wrap to protect the area afterward, and plan for light duty at work while healing.
23. Single Bee with Tiny Stars on the Ankle
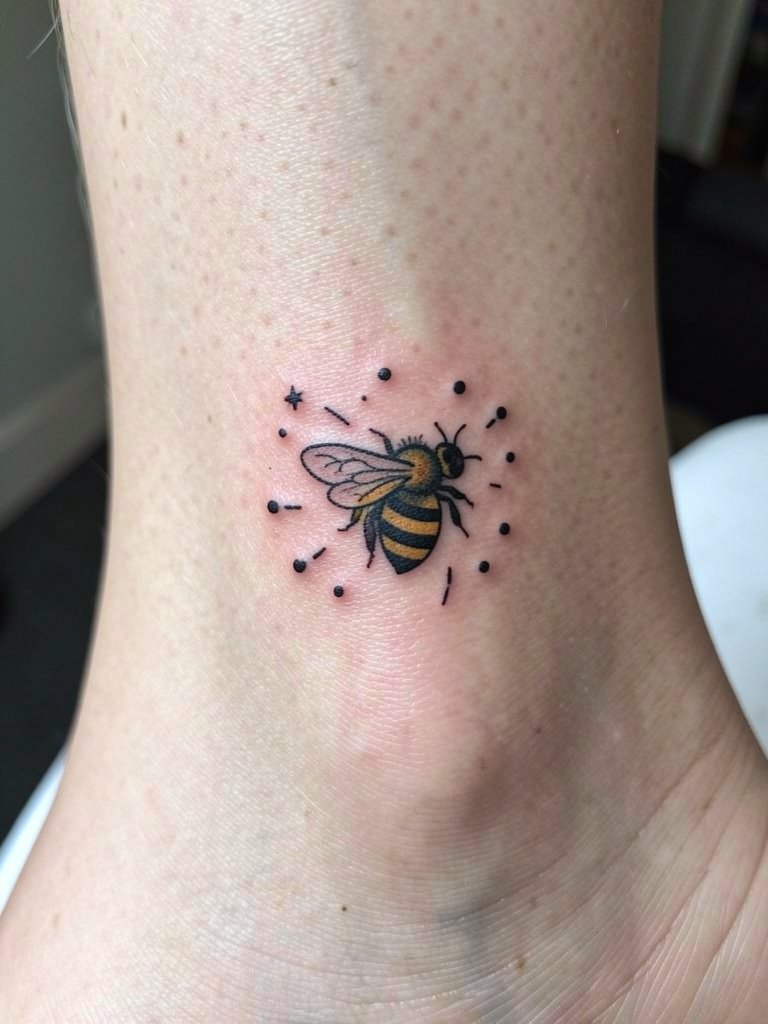
Small accent stars add whimsy and help the composition breathe on the ankle. Keep star dots large enough to retain presence after healing. If you want a matching set with friends, use identical spacing templates to avoid divergence. Ankle sessions require you to keep footwear gentle during healing, so bring slip-on shoes and plan for sock-free windows. Low-top sneakers and rolled trousers show the finished piece beautifully.
24. Micro-Realism Bee on the Inner Bicep

The inner bicep gives shelter and stability for micro-realism. Note the anatomical clarity in your mockup because inner bicep is the area facing the torso and not the outer arm. Micro-detail is safer here than on wrists or feet, but still require slightly bolder contrast than a large portrait would. Sessions are comfortable and healing tends to be predictable. For the appointment wear a loose tank top so the artist can access the medial bicep easily and move naturally.
25. Vintage-Style Stamp Bee on the Hip

Hip pieces can stay intimate or be shown off with low-rise clothing. A distressed stamp effect hides minor imperfections and can age gracefully. Common mistake is putting ultra-fine texture too close to the waistband where abrasion eats detail. When you plan placement, confirm the tattoo sits above the waistline at rest. For styling choose fitted low-rise jeans that sit below the piece so the skin shows naturally and no fabric rubs the design.
26. Honeycomb Accent Near the Collarbone

Honeycomb near the collarbone frames the shoulder and chest elegantly. Avoid an overly dense grid in this location because movement and clothing can accelerate softening. A thin band of hexes with a single bee gives a custom look without overwhelming the clavicle area. For session wear a wide V-neck or scoop-neck top so the artist has clear access, and show the healed piece with off-the-shoulder tops or off shoulder tops to highlight placement.
27. Playful Bee and Smile Curve on the Calf
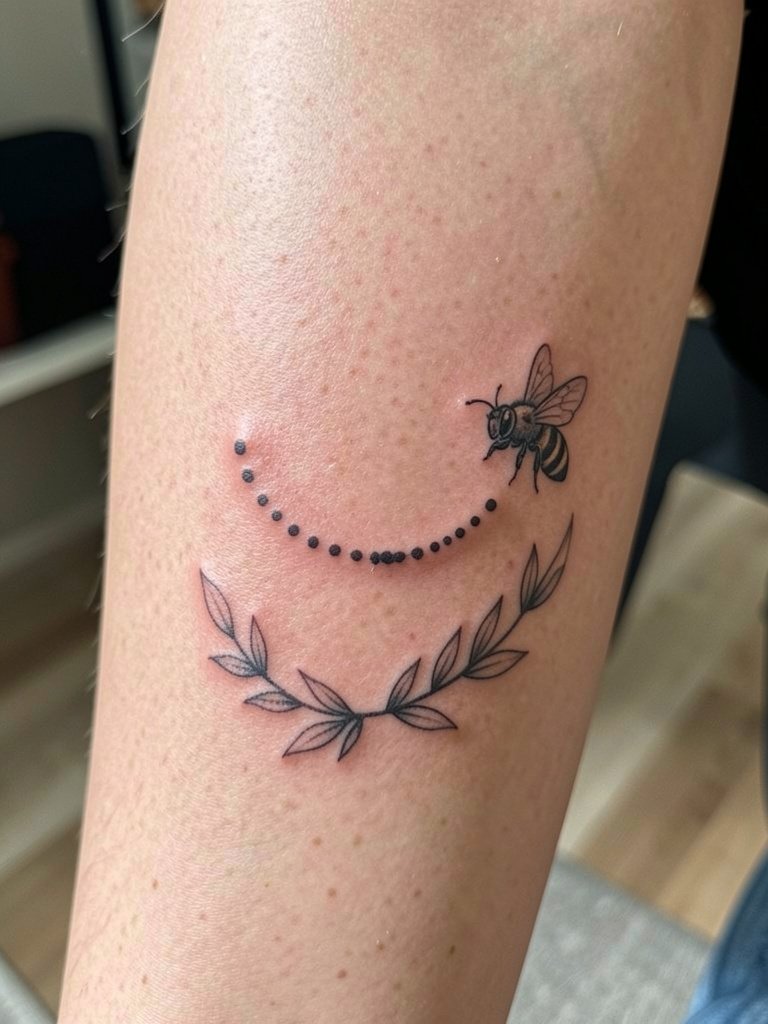
A curved accent gives movement and makes a simple bee feel composed without being literal. Calf skin is forgiving and photographs well with cropped pants. The mistake people make is stacking too many tiny marks that become a single blur from normal viewing distance. Plan the spacing deliberately and ask to see healed calf examples with similar density. For reveal days wear shorts or midi skirts so the lower leg can show, and choose footwear that does not rub the area during the first two weeks.
Frequently Asked Questions
Q: How much does a cute bee tattoo usually cost?
A: Prices vary by shop minimum and the design size, but think in ranges rather than exact numbers. Tiny black single-bee flash pieces commonly start around a lower three-digit range while small botanical or color pieces can reach a mid-three-digit range depending on linework and color. If budget matters, book a consult and ask the studio about minimums and how they price session time.
Q: I want a tiny fine-line bee. How do I avoid it blurring fast?
A: Size up slightly from your smallest reference and request a hair stronger contour around wings and stripes so the components have breathing room as the ink settles. Also check the artist's healed photos for small work. Plan for a possible touch-up at six to twelve months if you want the crispest long-term look.
Q: Watercolor or black outline for a cute bee, which should I pick?
A: Watercolor gives a soft painterly feel but can soften faster. Black-outline or hybrid designs provide a clear anchor so the bee keeps shape even as color washes fade. Decide whether you want a painterly effect now and budget for a future refresh, or prioritize lasting definition with line-led work.
Q: Where can I find portfolios and healed examples of bee tattoos without naming artists?
A: Search targeted hashtags like #beetattoo, #beetattooideas, #finelinetattoo, and #microtattoo on Instagram and TikTok and use location filters to find nearby studios. Look for posts that include “healed” in captions and scan comments for first-hand healing reports. Reddit communities like r/tattoos and r/TattooDesigns are also useful for spotting artists who share healed work and for hearing about lived experience with specific placements.
Q: What should I wear to my session for different bee placements?
A: Pick clothing that gives the artist direct access and keeps the area comfortable during healing. For wrist and forearm bring short sleeves or a loose button-down. For shoulder and upper arm wear a tank or sleeveless top. For chest and collarbone wear a wide V-neck or scoop-neck top. If you plan to show the finished piece, pack complementary items like a rolled-cuff linen shirt or cropped jeans to photograph the healed work.
Q: I have deeper skin. Any special considerations for a cute bee design?
A: On deeper skin tones, contrast matters more than subtle pastel tints. Stronger outlines, higher contrast shading, or selective saturated color will help the bee read clearly. Ask for healed examples on similar skin tones and expect that highly diluted pastels may need more saturation to stay visible.
Q: How painful are these placements and how long will sessions take?
A: Pain varies by placement. Ribs and sternum rank higher on most pain charts while outer upper arm and calf are lower. Tiny wrist, ankle, and foot spots can feel sharp because of thin skin over bone. Session times for micro bees typically run from twenty minutes to an hour for single motifs and one to two hours for compositions with florals or honeycomb. Plan breaks for longer sessions and follow the artist's pacing for the cleanest result.
