

The tiny wave trend looks calm on feeds, but I have noticed the waves that still read clearly after three years are rarely the thinnest ones. Plenty of people choose whisper-fine single lines because they photograph clean. The pieces that age best usually have slightly stronger linework, thoughtful spacing, and placement that avoids constant rubbing. Read these ideas the way you would a stencil at the table, and you will leave the shop with a wave you still like later.
1. Single Wave Linework on Inner Wrist
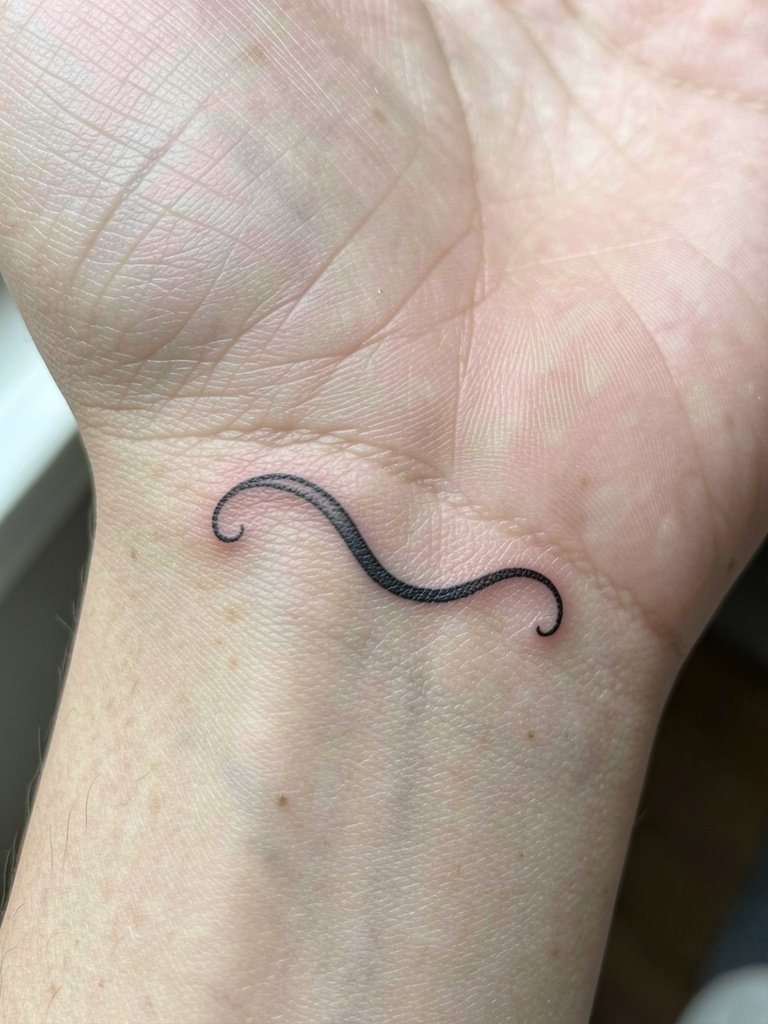
A single-curve wave on the inner wrist reads calm and unobtrusive, and it is a great first-tattoo placement. The inner wrist moves and gets sun exposure, so the common mistake is asking for a razor-thin spine that will blur. One camp prefers whisper-fine single-needle linework for that sleek look. The other camp argues a hair heavier line weight holds longer and keeps the shape, especially with wrist friction. For the session, expect about 20 to 40 minutes and mild soreness. Wear a short-sleeve shirt you can push up easily and bring a thin cuff bracelet if you want to preview how jewelry will sit, try thin chain bracelet set so the artist can see spacing.
2. Minimal Horizon Line with Tiny Wave on Forearm
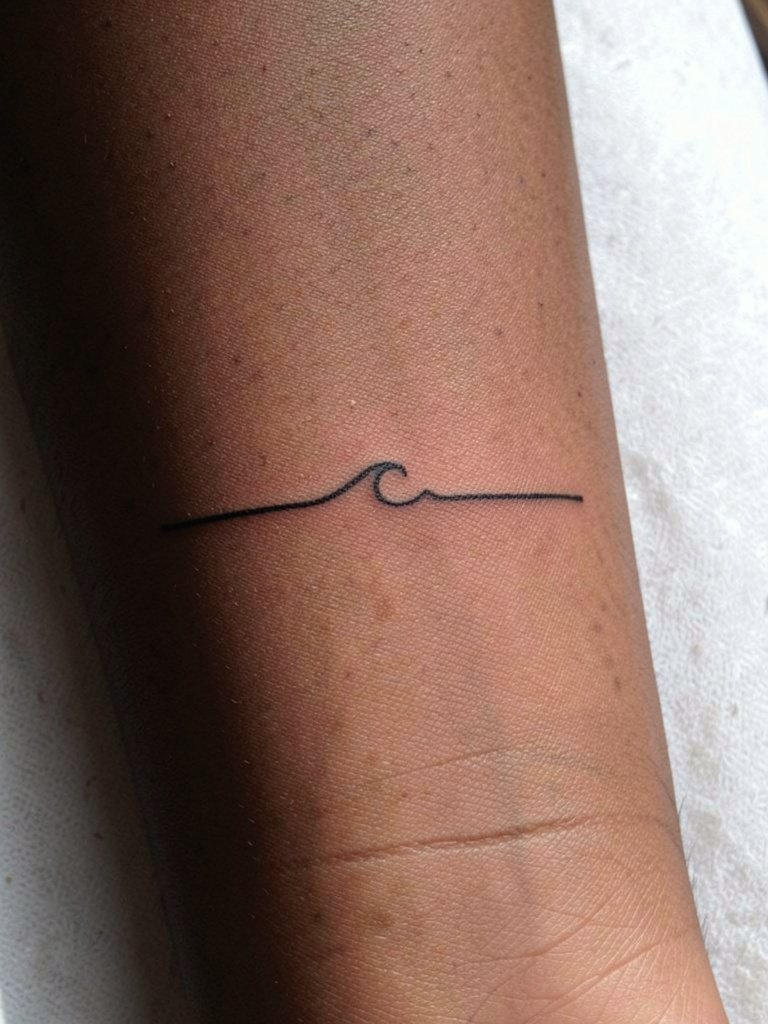
This horizon line pairs a calm baseline with a single crest to make the ocean feel like a quiet scene. The forearm gives the wave a long canvas so you can keep the linework delicate without risking immediate blur. A mistake I see is compressing the horizon and crest too close together so the piece reads crowded after one year. Expect a one-session appointment under an hour with light swelling. For outfits that show this off, rolled linen sleeves frame the piece nicely, and a linen button down shirt works well for the reveal.
3. Tiny Wave Behind the Ear

Behind-the-ear placements read very private because they are mostly covered by hair. They are prone to minor swelling during healing because of thin skin. The most common error is asking for text or tiny detail that the area cannot hold cleanly over time. Plan for a quick 15 to 30 minute session and tie your hair up for access. For the appointment wear hair pulled back with a claw clip hair so the artist can work without tugging.
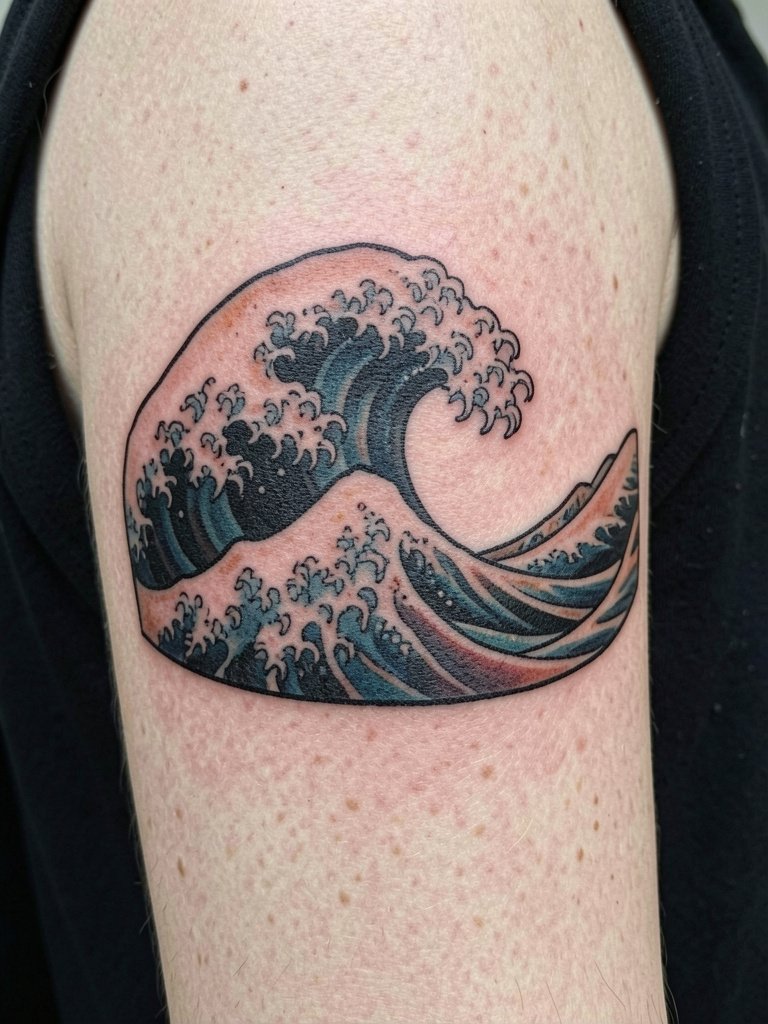
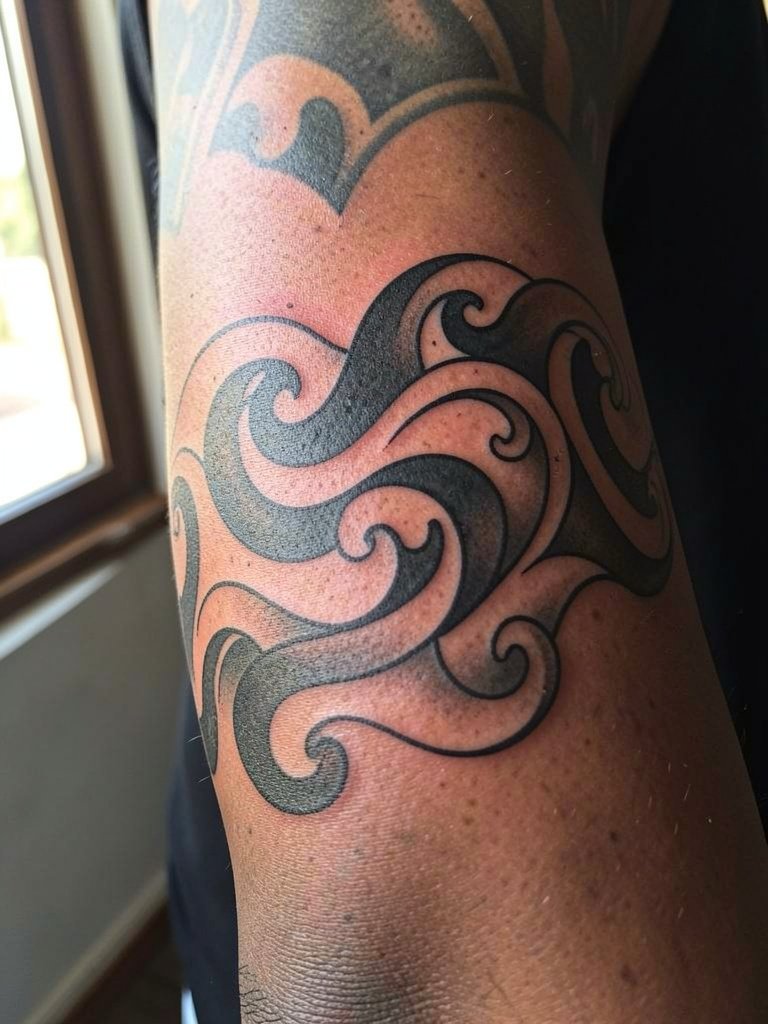
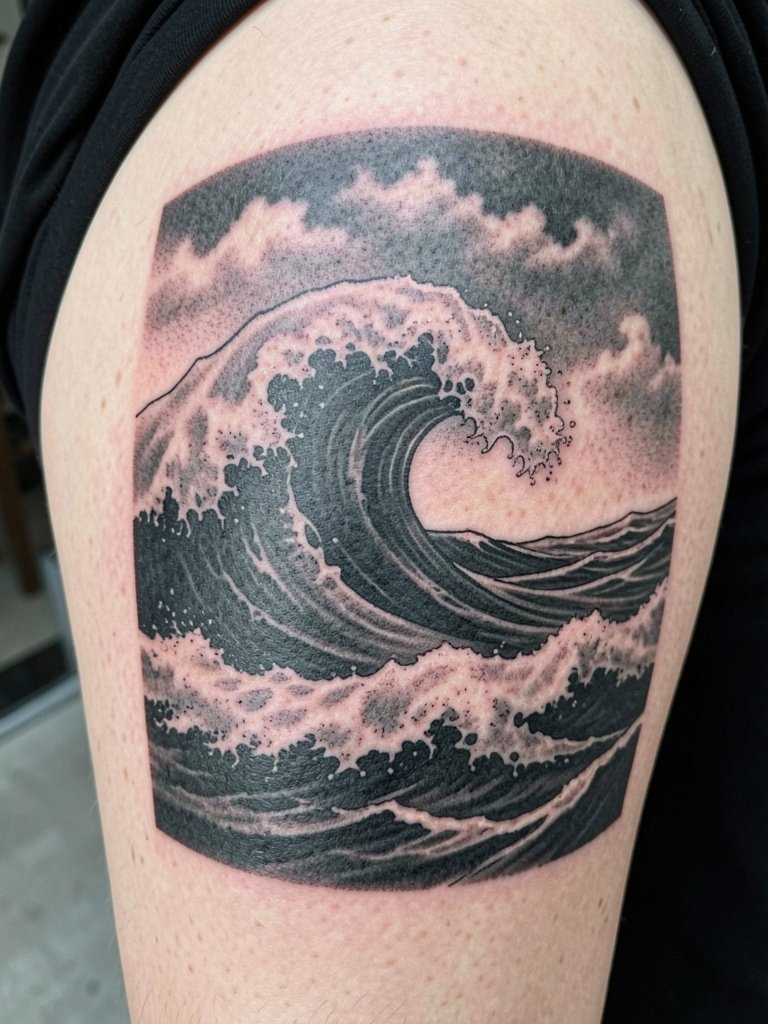
4. Japanese-Style Crashing Wave on Outer Upper Arm
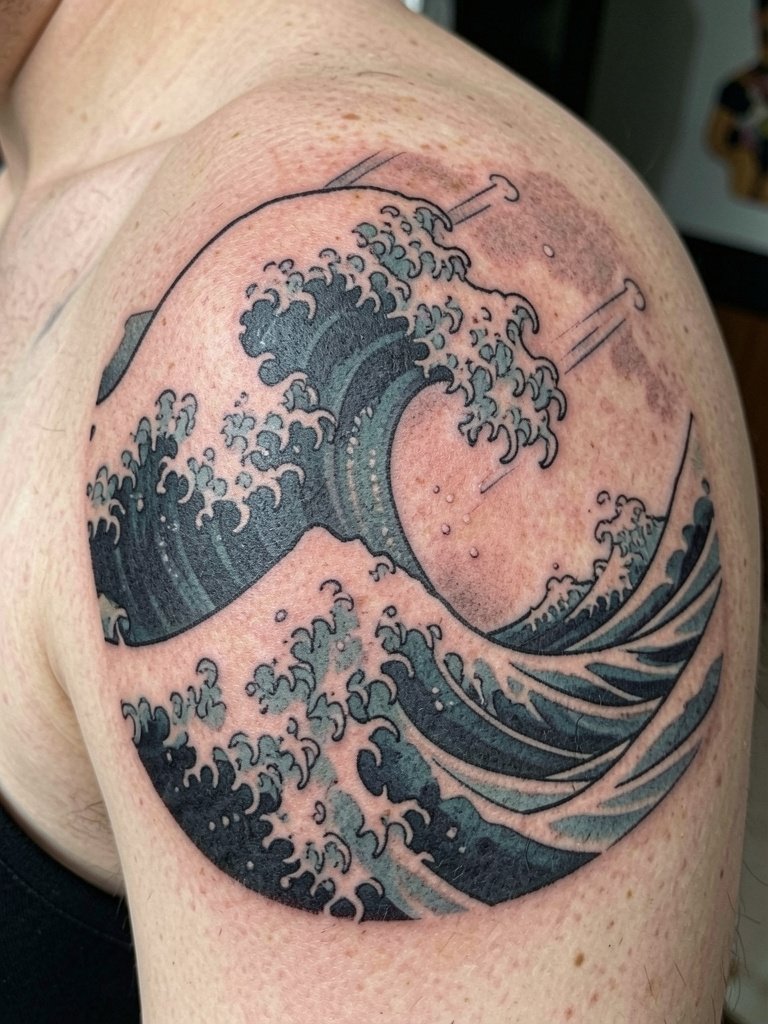
A Japanese-inspired wave gives motion and scale without needing color saturation across the whole piece. It sits nicely on the shoulder cap where the body curve accentuates the curl. A typical mistake is shrinking these motifs down so the intricate foam patterns lose their definition. Expect a medium session of one to two hours for a shoulder piece. For summer styling, tank tops or racerback cuts show the shoulder cap effectively, and a racerback tank top is an easy wardrobe fit for after the healing window.
5. Watercolor Wave Wash on Calf
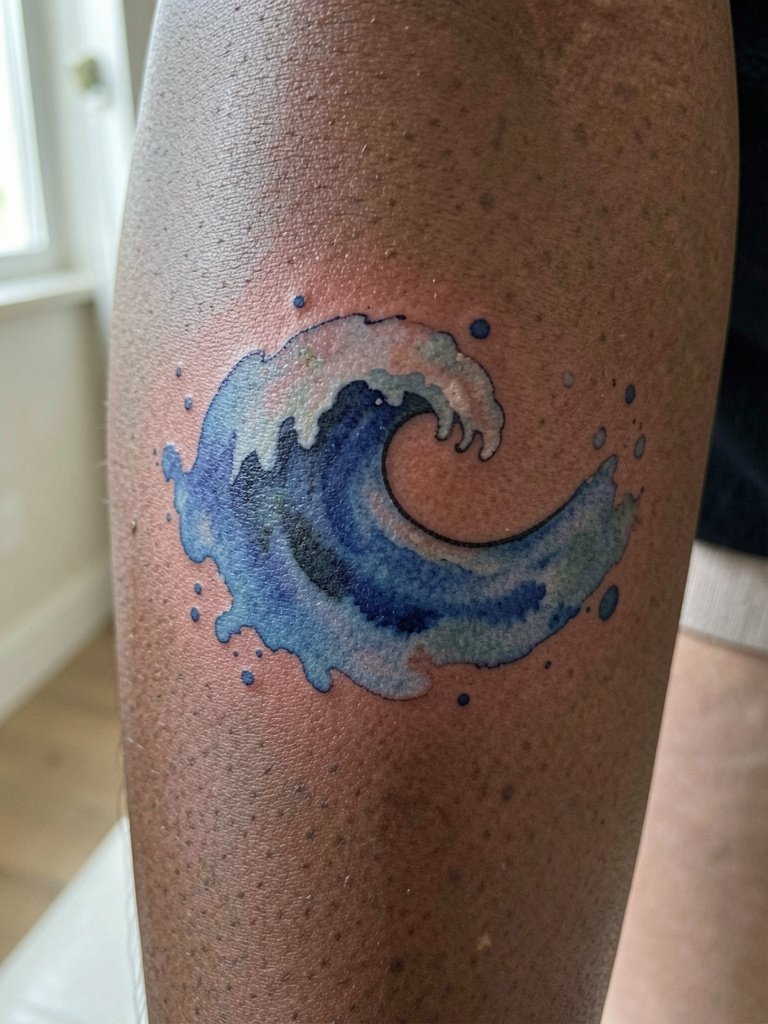
A watercolor wave uses a painterly blue wash to suggest movement while avoiding heavy outlines. Watercolor ages differently than black and grey and often needs touch-ups sooner. The common mistake is too-thin wash coverage that becomes patchy as it fades. Calf skin tolerates shading well and usually needs one to two sessions. For showing off this placement in warm months, mid-calf boots or rolled jeans work well, and a pair of rolled hem shorts makes the tattoo visible while the area heals.
6. Ship in Waves on Outer Forearm
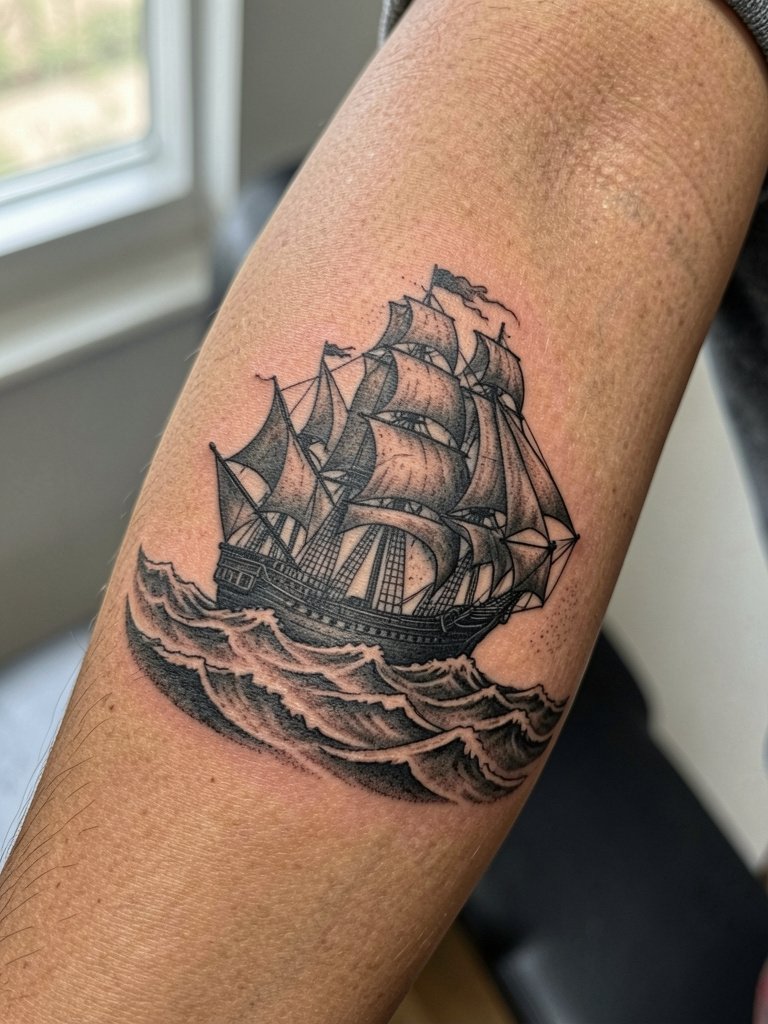
Narrative pieces like a ship in waves turn a motif into a story on the forearm where the composition can run lengthwise. People often try to cram too much detail into a small forearm patch and lose clarity. This piece typically requires one to three sessions depending on size and shading. Expect moderate pain and slower session fatigue because the forearm gets sensitive after an hour. For showing it off, oversized tees or cuffed work shirts frame the outer forearm nicely, and an oversized tee men will let the design peek out.
Inline Product Block
Session Day Picks
These items help smooth the first week across the small wrist pieces and the larger forearm and calf work we covered above.
- Stencil transfer paper kit. A clean transfer helps you and the artist preview lineweight on your skin before the needle starts, which matters for micro and horizon pieces in ideas above.
- Topical numbing cream. Useful for ankle or rib sessions to reduce sharp needle pain when your appointment is expected to last over an hour.
- Thin protective film roll. Keeps small hand and foot tattoos clean during the first days of frequent washing and friction.
- Fragrance-free gentle body wash. Mild cleansing for larger black and grey pieces during showers without irritating fresh ink.
- Aquaphor healing ointment. Thin applications for the first few days lock in moisture for fine line and shaded work while avoiding heavy build-up.
7. Bold Traditional Wave Flash on Upper Arm
Traditional flash waves use thick outlines and simplified forms so they read clearly for years. A common mistake is trying to shrink a full flash into a tiny wrist piece where the balance is lost. These hold up well because of the strong black outlines and limited color. Expect a 45-90 minute session depending on size. Short sleeves or muscle tanks display the upper arm piece best, and a muscle tank top is a good choice for the reveal.
8. Abstract Wave Swirl for Side Torso
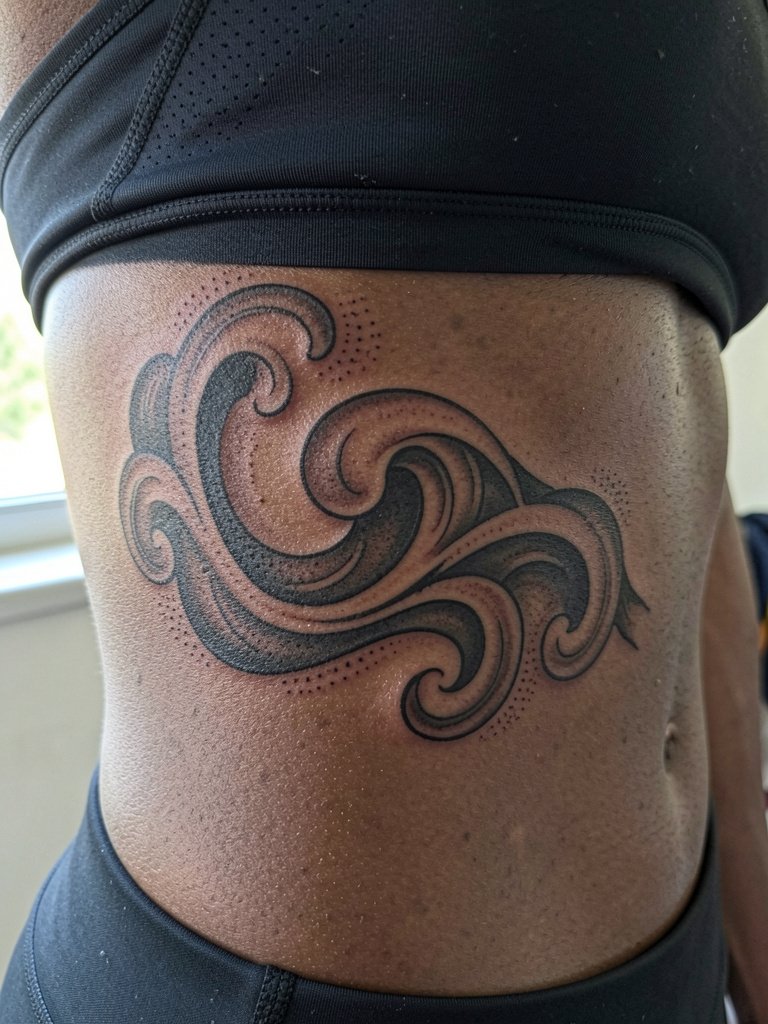
Curving abstraction on the ribs uses negative space to suggest motion while staying modern. The ribs are a sensitive area, and the mistake is asking for too-fine detail that the skin will stretch and blur. One camp says fine line on ribs blurs quickly and is not ideal. The other camp says with correct depth and spacing fine line can settle well on ribs, and they will show healed photos to demonstrate. Sessions here are longer and more uncomfortable, so wear a loose sports bra and comfortable top for access. Consider a sports bra seamless for the appointment.
9. Wave Band Wrap on Bicep
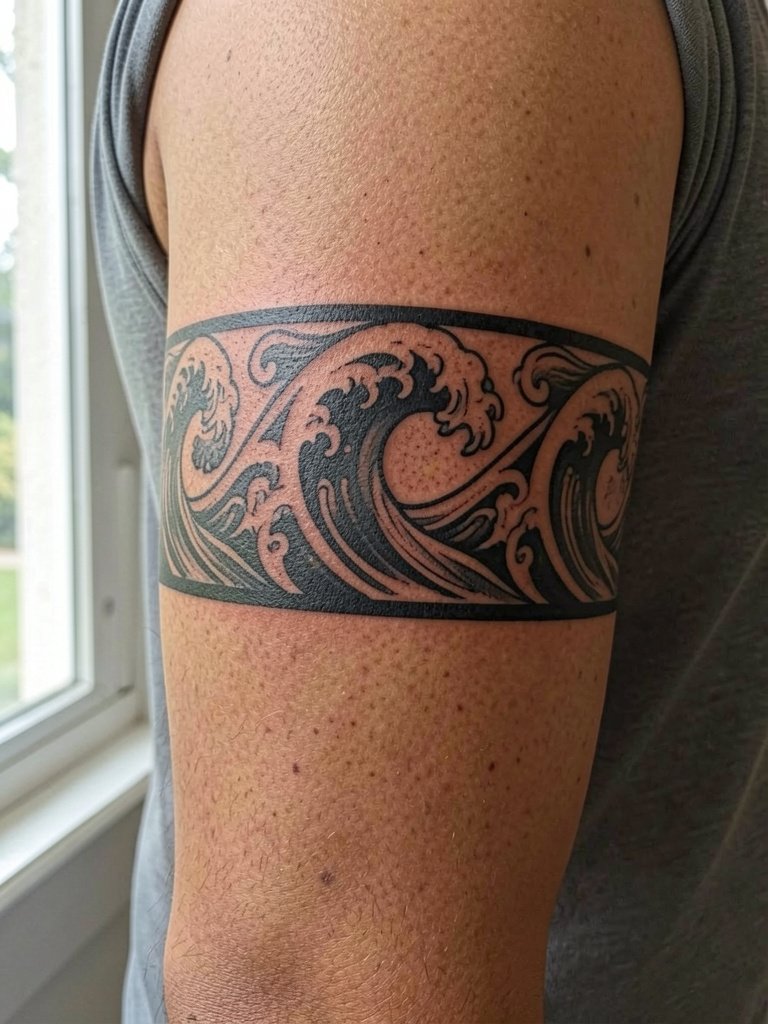
Wave bands bring rhythm to the arm and can be striking in bold blackwork. Cultural sensitivity matters here, and a common mistake is borrowing Polynesian visual language without context. If you choose this route, research meanings and pick elements that respect origin. Biceps are moderately painful and a single-session band usually holds well. Short sleeves and boxy tees frame the wrap, and a boxy tee women gives a casual contrast.
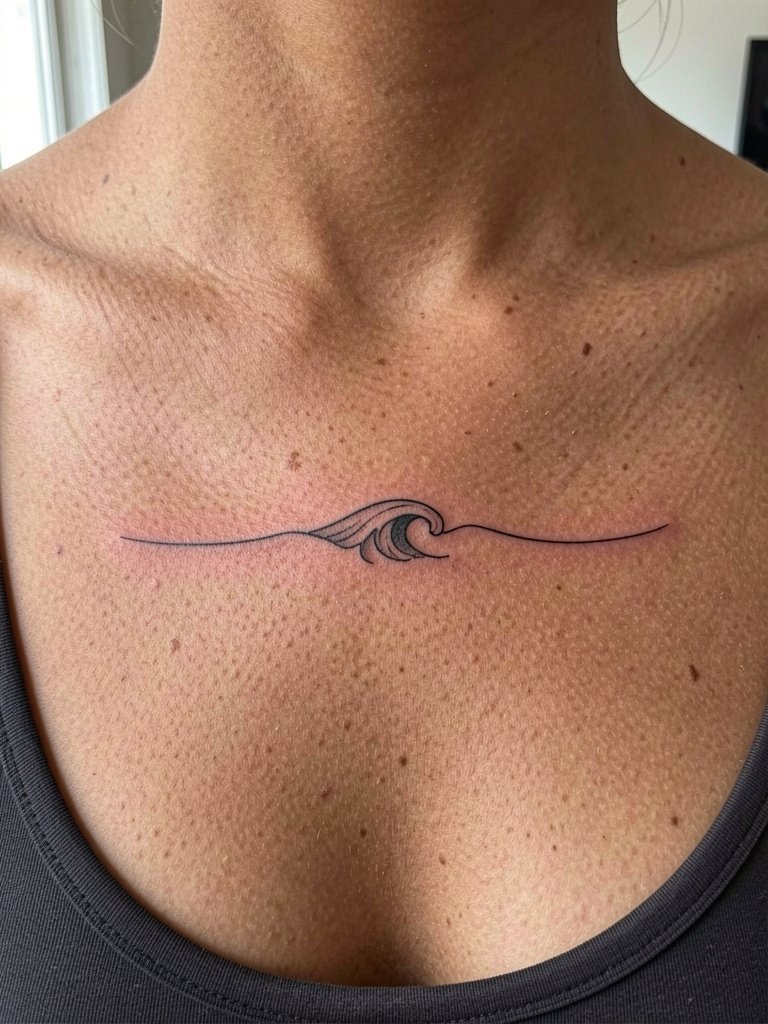
10. Ocean Horizon with Negative Space on Collarbone
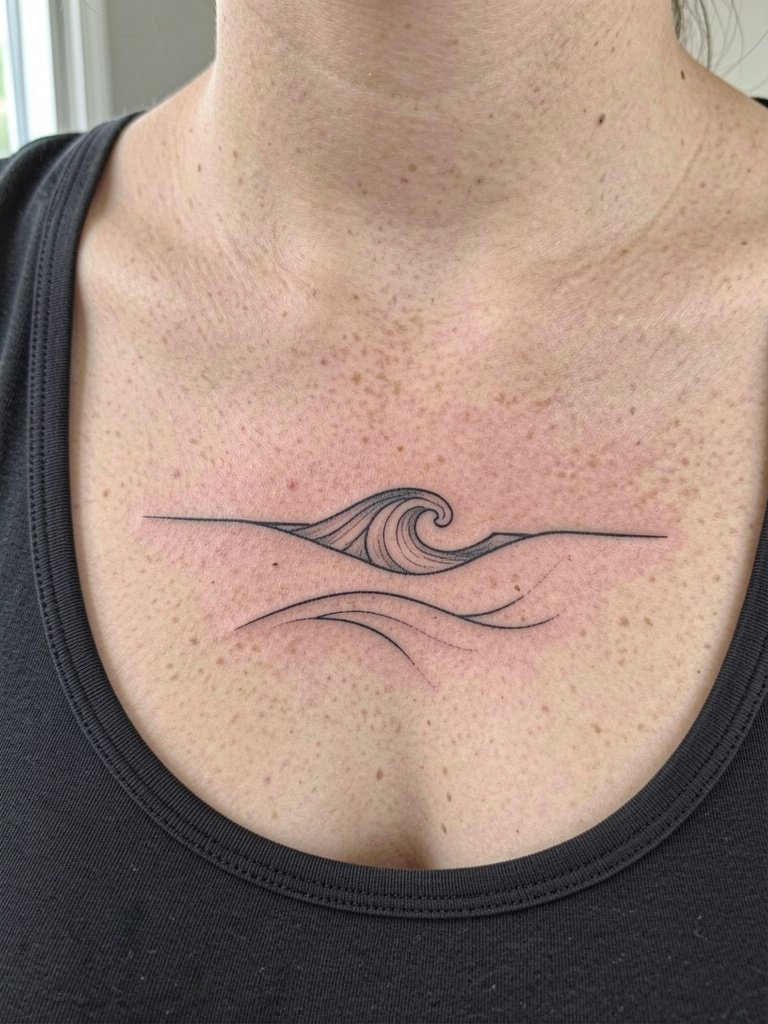
Negative space horizons give a modern, airy feel on upper chest without heavy ink. The common error is packing too much into the small collarbone area so the negative space disappears once healed. This placement is visible with low or square-neck tops and heals with mild soreness. For the session wear a top that gives collar access, like a square neck top.
11. Blue Accent Micro Wave on Fingers
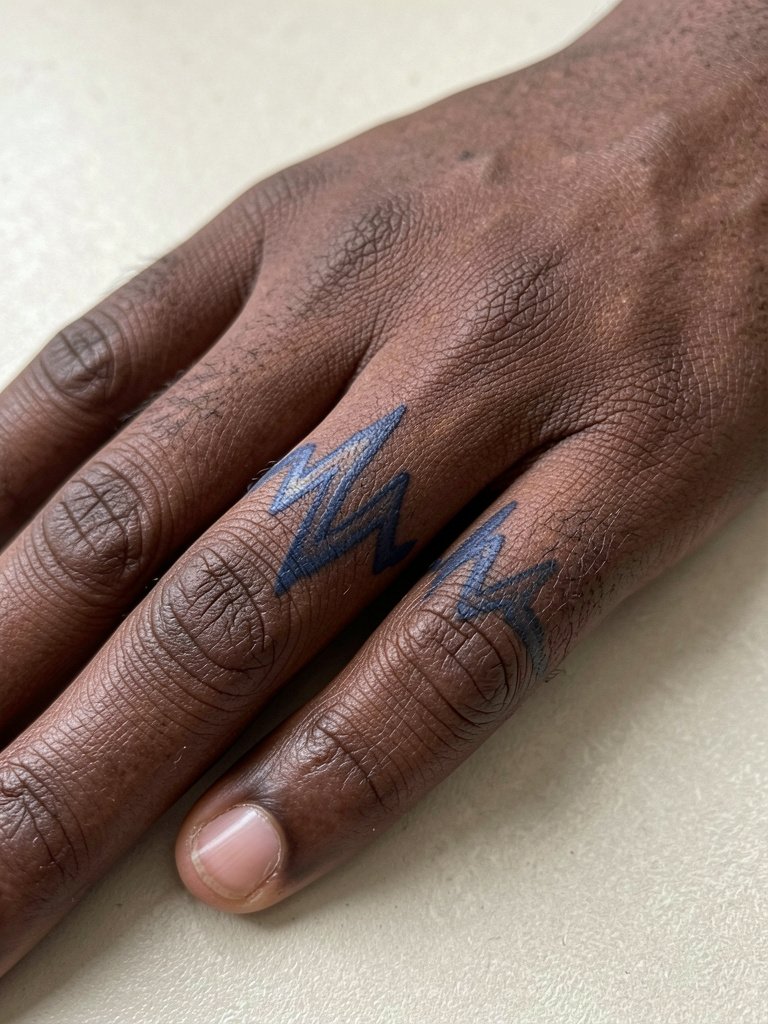
Hands and fingers fade faster because of frequent washing and friction, so blue accents can look vivid at first and need touch-ups sooner. One camp loves color for its immediate ocean feel. The other camp prefers black and grey for longevity. Name both views when planning. Keep the scale slightly larger than a dot to maintain shape. Expect brief sessions and potential touch-ups at one to three years. For showing off, sandals and short sleeves help, and low-profile flat sandals women pair well.
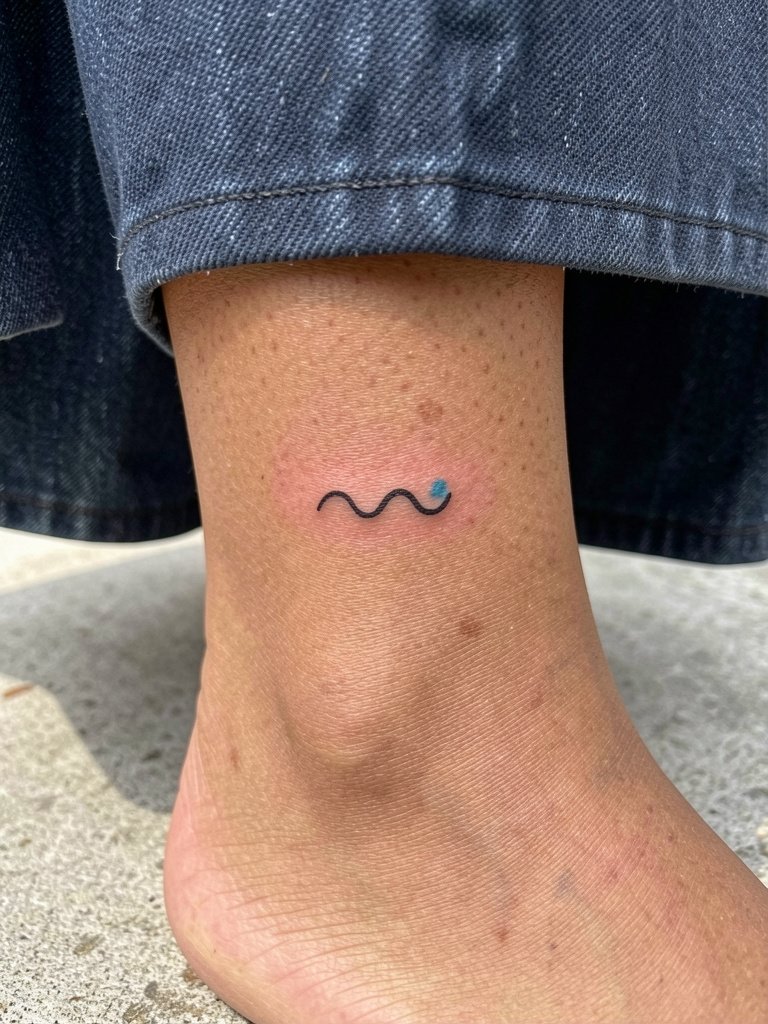
12. Wave with Shell Accent on Ankle
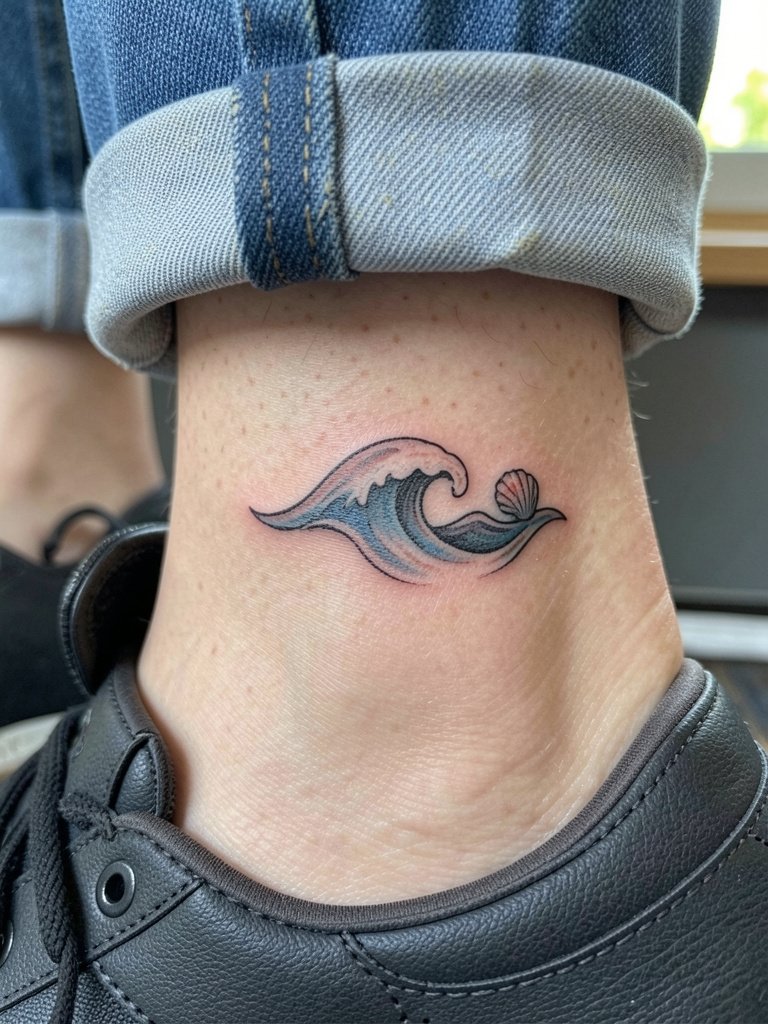
Ankle tattoos face friction from socks and shoes, so clean silhouettes outperform tiny filigree here. The common mistake is requesting micro textures that the ankle loses quickly. Keep the shell as a simple silhouette and slightly increase line weight for durability. Plan for a short session with moderate sting. For the appointment wear low-top sneakers or sandals and roll pant cuffs up, and try no show socks to show the ankle while keeping footwear comfortable.
13. Ocean Scene with Storm Clouds on Ribcage
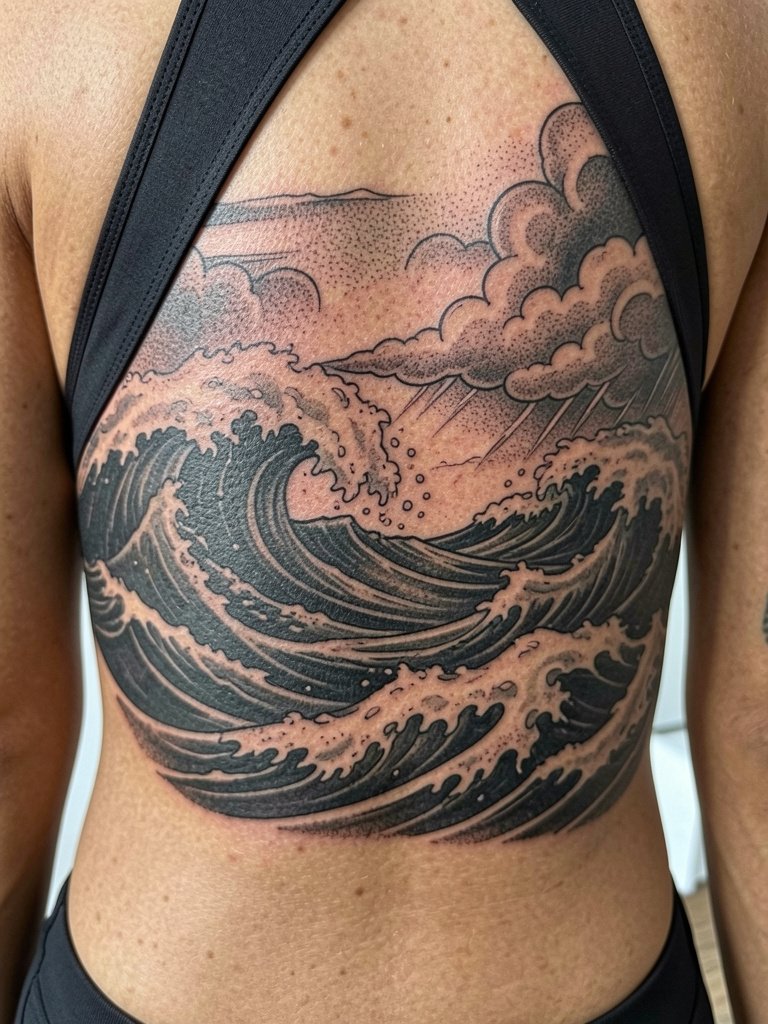
Dramatic ocean scenes with cloudwork create mood and look striking on the ribs, but ribs are a high-pain placement. A mistake is compressing too many tiny details that do not translate after healing. Discuss contrast and spacing for the cloud-to-wave junction so highlights do not bleed. Prepare for a longer session and bring a comfy sweater for aftercare. For the session wear a loose button-down that opens easily, and a open front shirt keeps you comfortable.
14. Blackwork Wave Sleeve Filler
Wave filler designs are useful for linking disparate pieces into a sleeve. The common mistake is using too many micro elements that compete with existing tattoos. This is filler work, so expect a multi-hour session block as part of a larger project. For visibility when finished, sleeveless tanks and cuffed shirts show the overall flow, and a sleeveless tank top highlights the sleeve.
15. Tiny Wave with Starfish Accent on Inner Forearm
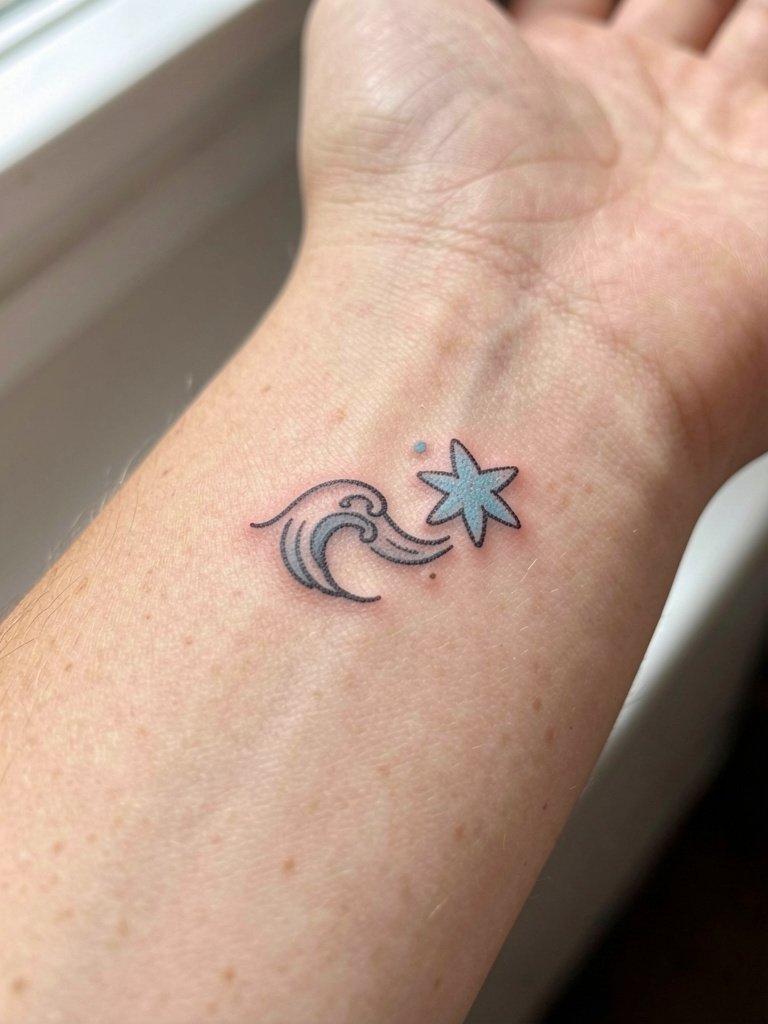
Pairing a tiny shell or starfish with a small wave personalizes the motif without clutter. The error is overloading the inner forearm with many tiny icons that age differently. A clean layout with one accent keeps the composition lasting. Expect about 30 to 45 minutes. For the session, wear a rolled sleeve or a rolled sleeve top so the artist can work without constraint.
16. Bold Curve Wave at Lateral Hip
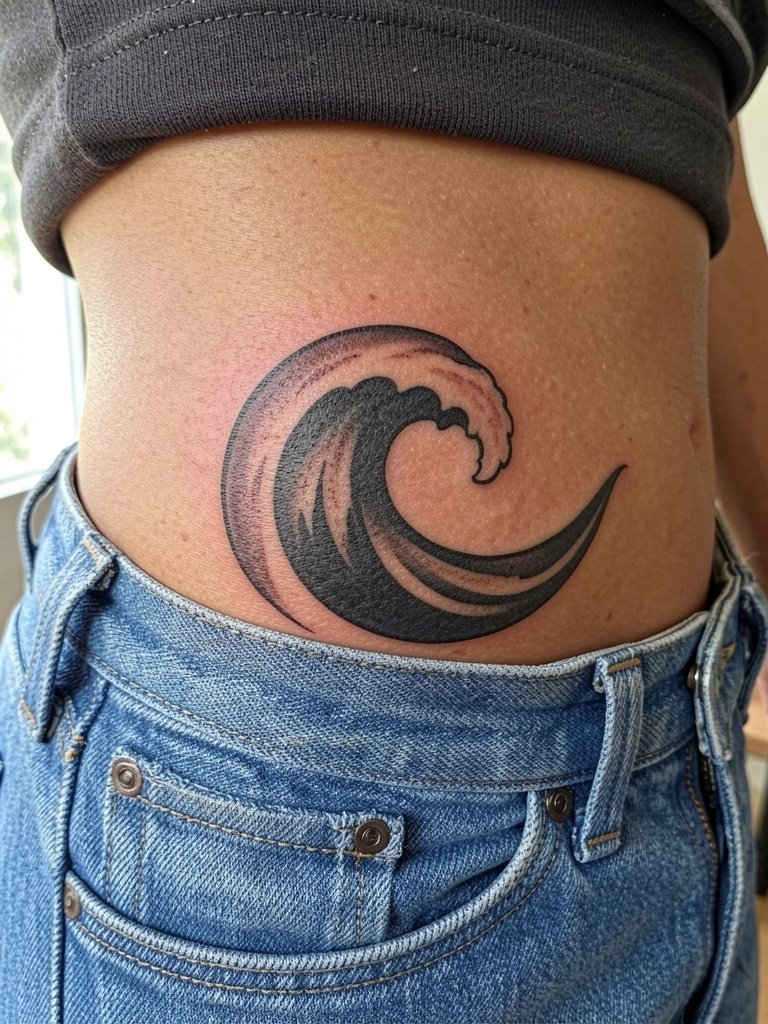
The lateral hip is a curving canvas that flatters bold, simple shapes. A mistake is requesting filigree too close to the waistband where friction shortens longevity. One session usually covers this placement comfortably. For appointment ease wear low-rise pants that sit under the tattoo, and try low rise bikini bottom style swimwear if you want to preview how the area looks with swimwear.
17. Negative Space Spiral Wave on Upper Chest
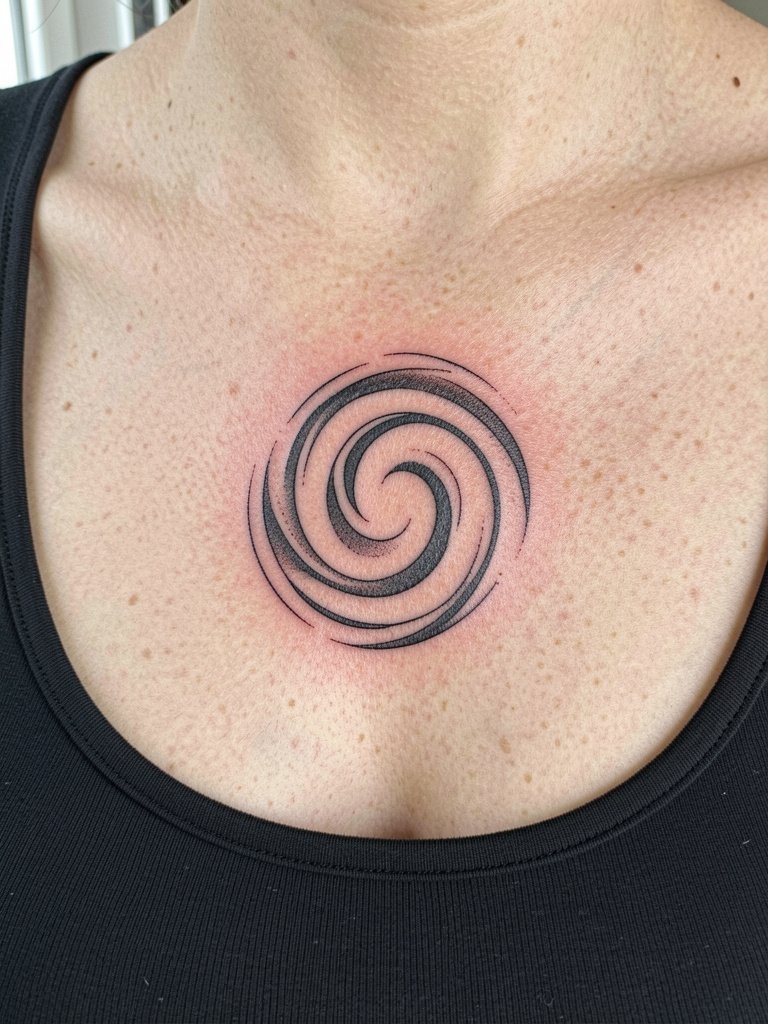
Upper chest spirals use negative space for a modern, graphic effect that reads like a mark of calm. The usual mistake is crowding the clavicle so the design loses its airy quality. Expect a shorter to medium session and mild discomfort. For clothes, square-neck or scoop-neck tops pair well, and a scoop neck tee will display the piece.
18. Micro Realism Wave on Thigh
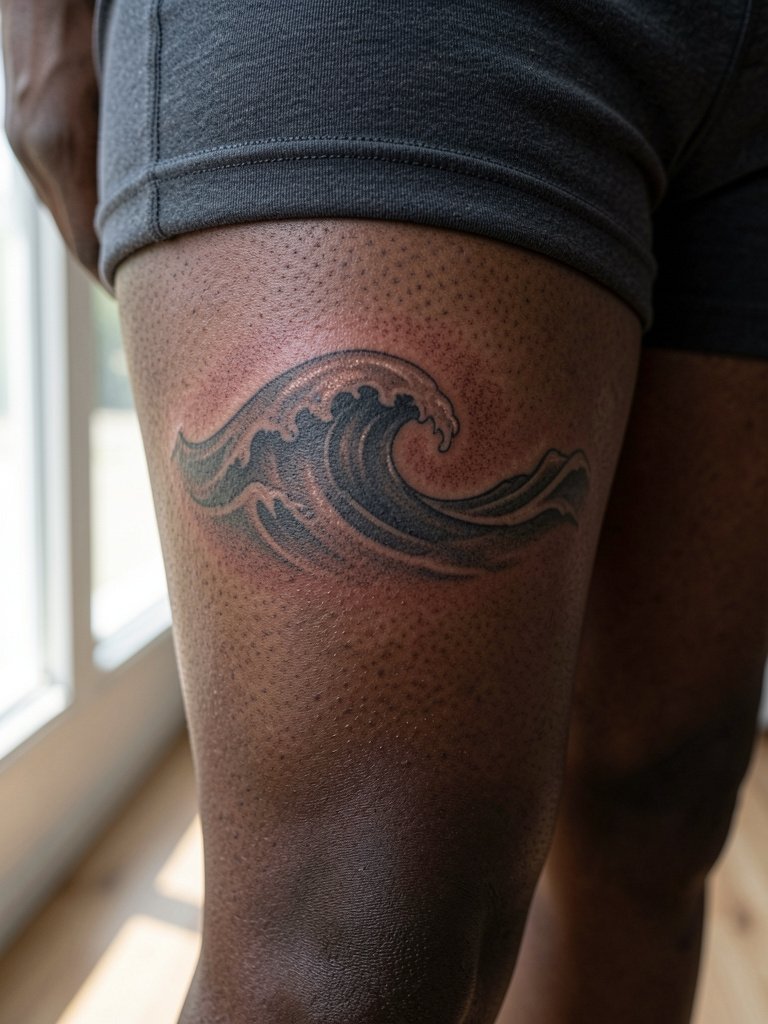
The outer thigh offers longevity for detail because it faces less friction. The mistake is minimizing contrast so micro realism flattens after healing. This placement tolerates small, detailed shading and one session of moderate length. For the session wear loose shorts you can pull up comfortably, and consider biker shorts women for privacy and access.
19. Wave Crest on Shoulder Blade
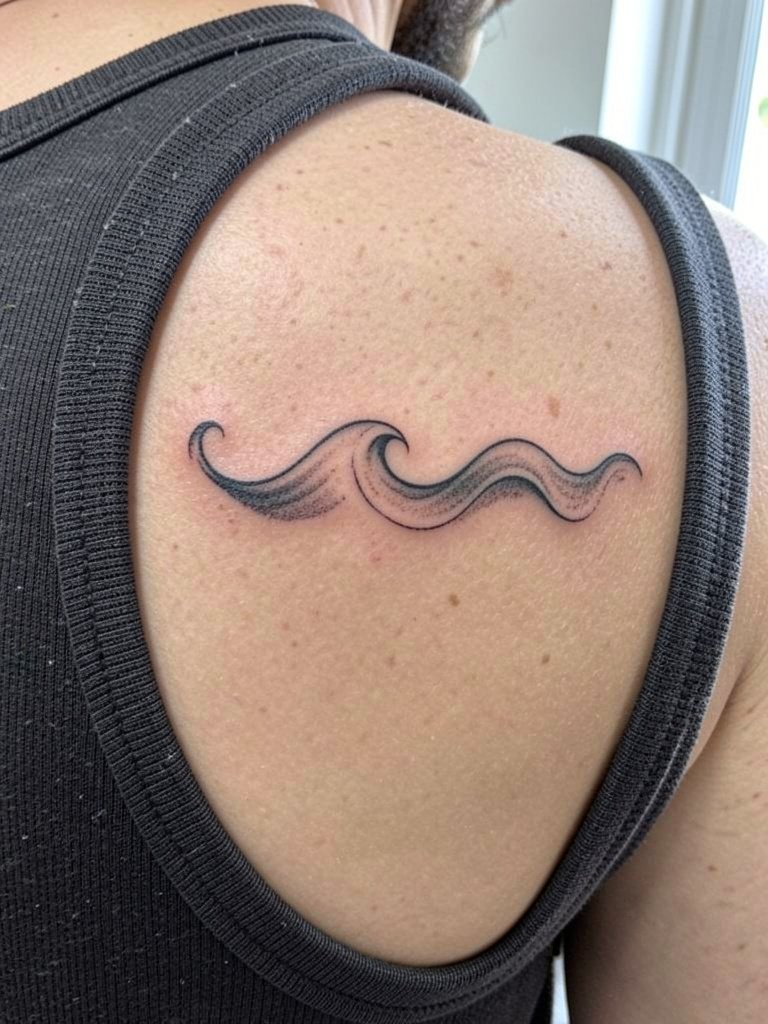
The shoulder blade is a forgiving canvas for modest waves and can be discreet under clothing. A common error is placing the design too close to the spine where movement distorts it. Sessions are short to moderate in time. For checking placement ahead of time, wear a racerback or tank top and a racerback tank top so you can see how the curve sits on the blade.
20. Tiny Wave on Top of Foot
Foot tattoos endure lots of rubbing from shoes and have higher fade risk. The common mistake is placing extremely fine detail on the dorsum where it will blur. Slightly bolder line weight helps and a protective film in the first days reduces friction. Expect a brief appointment and day-two swelling. For showing footwear choices, slides and sandals work best, and slide sandals keep the tattoo visible.
21. Wave and Sun Horizon on Outer Forearm
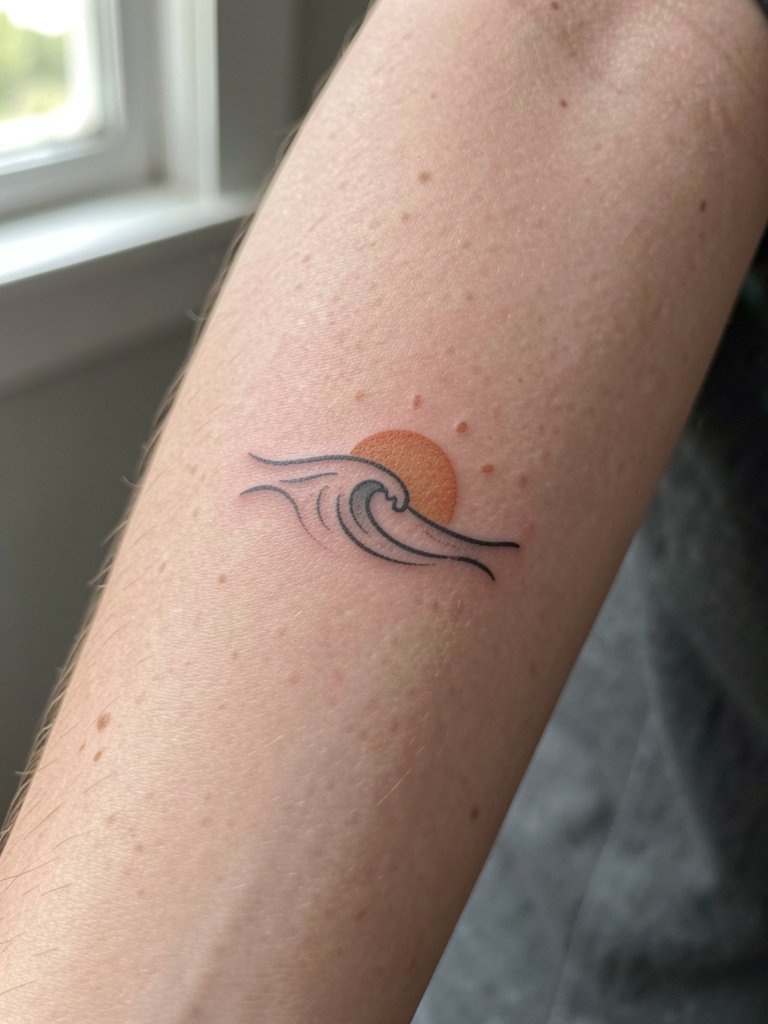
Combining a sun or horizon turns a wave motif into a scenic micro composition. The mistake is shrinking the sun to a pinprick that vanishes as color fades. A modest color dot or muted ink holds visual balance better. Forearm placement takes about 30 to 60 minutes. For showing it off, rolled linen sleeves or short sleeves look intentional, and a linen button down shirt can be styled accordingly.
22. Dot-Work Wave Mandala on Upper Arm

Mandala-style waves use stipple shading to build texture and quiet rhythm. The error is borrowing sacred geometry without acknowledging origins if the pattern has cultural significance. Dot work needs contrast to avoid looking muddy over time, so plan spacing carefully. Upper arm sessions vary by size. For wardrobe, short sleeves and boxy tees show the pattern nicely, and a boxy tee women is a good fit.
23. Tiny Horizon Tattoo on Collarbone
The clavicle gives a refined placement for a tiny horizon, but the error is trying to push too many details into a thin strip of skin. Keep the horizon simple and slightly bolder than your initial visual preference so it survives sun and clothing friction. Sessions are quick and the area can be tender. For clothing, low scoop necks and delicate necklaces complement the placement, and a layered necklace set pairs subtly.
24. Black and Grey Scenic Wave on Thigh
Thigh pieces let you go scenic without the maintenance headaches of hands or feet. Black and grey usually ages more predictably than saturated color in this spot because sun exposure is lower. The common mistake is overly aggressive fine detail that disappears when the skin moves. Plan the composition at a larger scale for longevity. For session wear, loose shorts are ideal, and a pair of loose drawstring shorts makes access easy.
25. Small Wave Behind the Kneecap
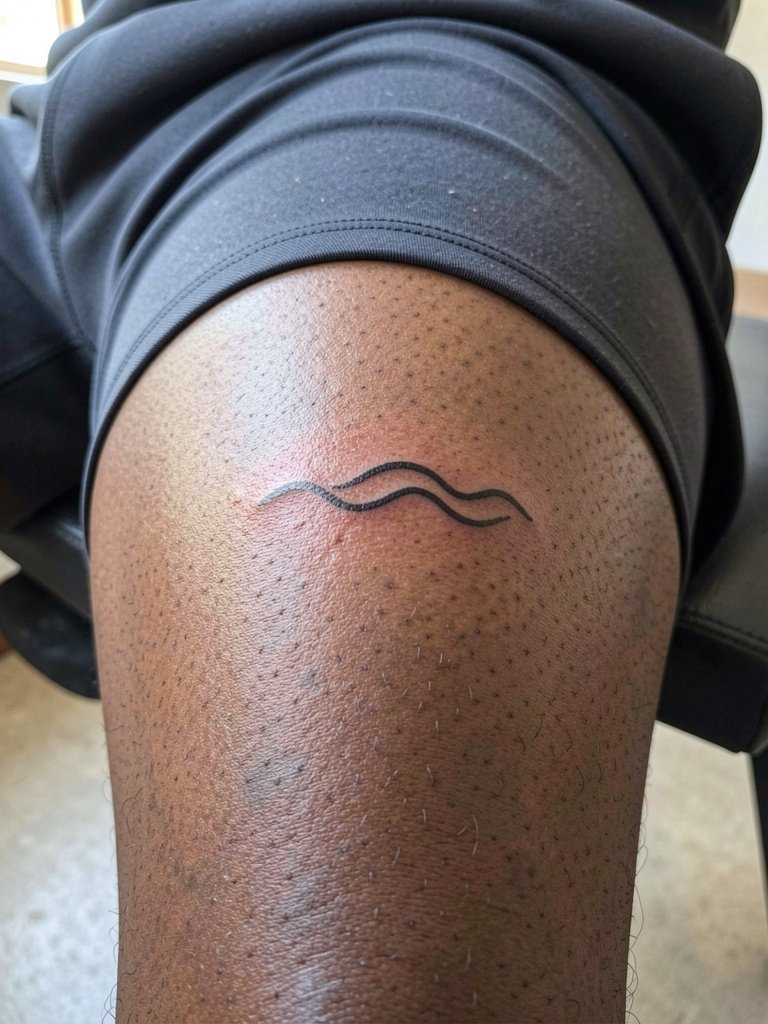
The area behind the knee moves a lot and can blur fine detail. The mistake is picking tiny filigree that the popliteal crease eats. A compact silhouette with slightly firmer line weight helps. Sessions here are short but uncomfortable for some. Wear loose shorts or athletic wear, and a biker shorts women option will keep you comfortable for the appointment.
26. Small Wave on Upper Chest Near Sternum
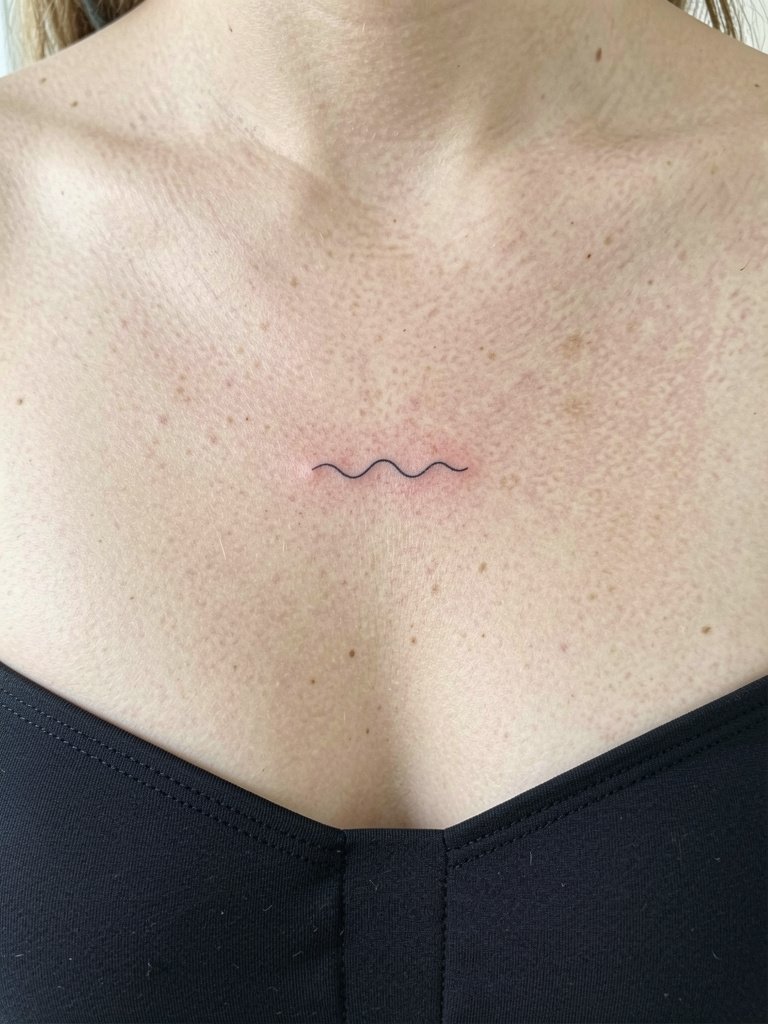
Sternum placements need planning for how the skin stretches across movement and undergarments. The common error is placing thin script or micro detail right in a crease. If you want clarity over time, ask for slightly wider spacing and discuss how the design sits with a bra or top. These sessions are sensitive and may need breaks. For the appointment wear a comfortable bandeau or sports bra that allows access and modesty.
27. Abstract Black Spiral Wave at Nape
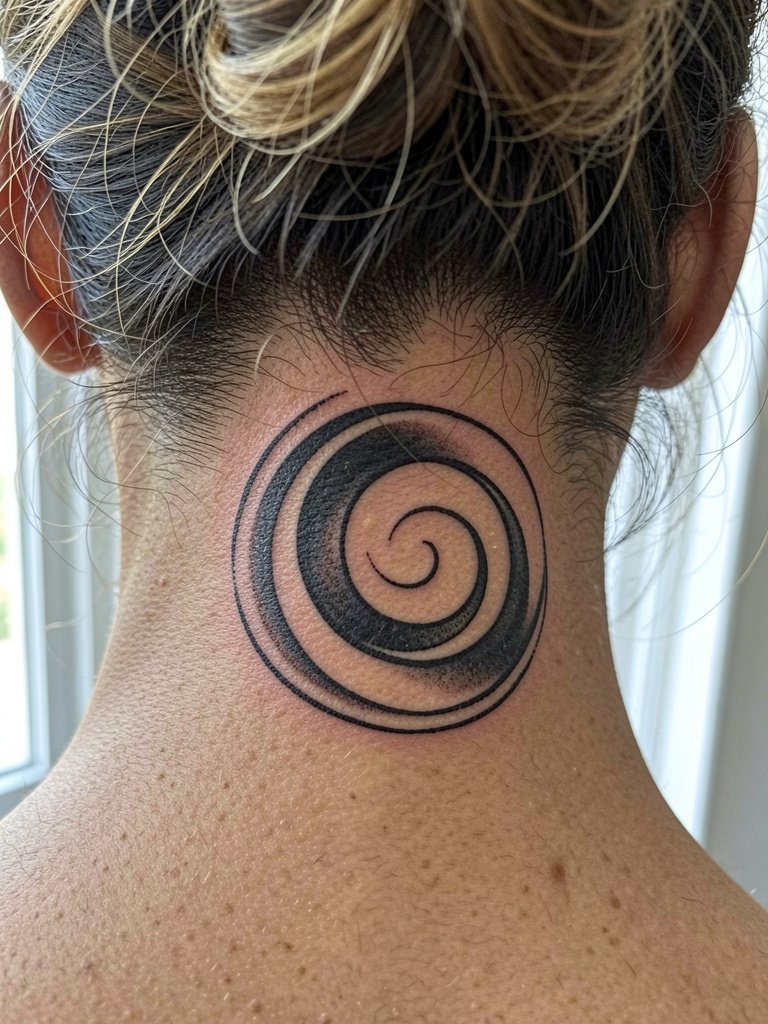
The nape is a discreet spot that looks intentional when hair is styled up. A common mistake is requesting tiny micro text or filigree where the area simply does not hold detail. Expect a quick session with low to moderate discomfort. For the appointment, have hair up in a simple clip and bring a set of hair ties. Use an open back top to preview how the piece sits with fashion.
Frequently Asked Questions
Q: How do I pick between a fine line wave and a bolder line design for longevity?
A: Artists split into two camps on this. One camp favors fine single-needle work for the elegant look on small placements like wrists and ankles. The other camp argues for slightly bolder line weight because it preserves shape as skin and pigment shift. In practice, a mid-weight line with deliberate spacing is a reliable compromise for most placements.
Q: Will blue ink fade faster than black and grey on an ocean piece?
A: Color and black-and-grey followers each have a clear point of view. Supporters of blue ink say it gives the motif literal sea energy and vibrant photos. Critics say black and grey keeps the design readable longer and often needs fewer touch-ups. If you want blue, plan for future color refresh and choose protected placements or use blue as a small accent.
Q: Where should I look to find artists and healed photos for wave tattoo styles?
A: Search Instagram and TikTok with hashtags like #wavetattoo, #finelinetattoo, #japanesewave, and use location filters for your city. Pinterest boards help compare composition styles quickly. On Tattoodo or studio websites, look for healed shots rather than only fresh photos, and check Reddit tattoo threads for long-term healing examples.
Q: What should I wear to my session for different placements?
A: Pick clothing that gives the artist easy access without adjusting mid-session. For shoulder or upper arm pieces, a racerback tank top works. For ribcage or sternum, a fitted sports bra is practical. For legs or thigh work, loose shorts that can be pulled up comfortably are best. Bringing a layer to cover up after the session helps keep the area clean.
Q: Do tiny wave tattoos often need touch-ups, and which placements are riskier?
A: Tiny tattoos on high-motion or high-friction zones—hands, fingers, feet, and ankles—are likeliest to need touch-ups. The main causes are repeated washing, abrasion, and sun exposure. If you like a micro wave, slightly increase the line weight and choose a spot with less daily friction to stretch the interval before a touch-up.
