
Someone I know spent months scrolling star tattoo galleries and kept running into the same decision roadblocks: which style will still look crisp in five years, where will a small star not blow out, and how do you care for blackwork so it keeps contrast. I visited five shops across Brooklyn and talked to a handful of artists who specialize in linework and blackwork. What follows is a focused list of dark star tattoo ideas, practical notes on aging and placement, and the aftercare essentials that actually matter.
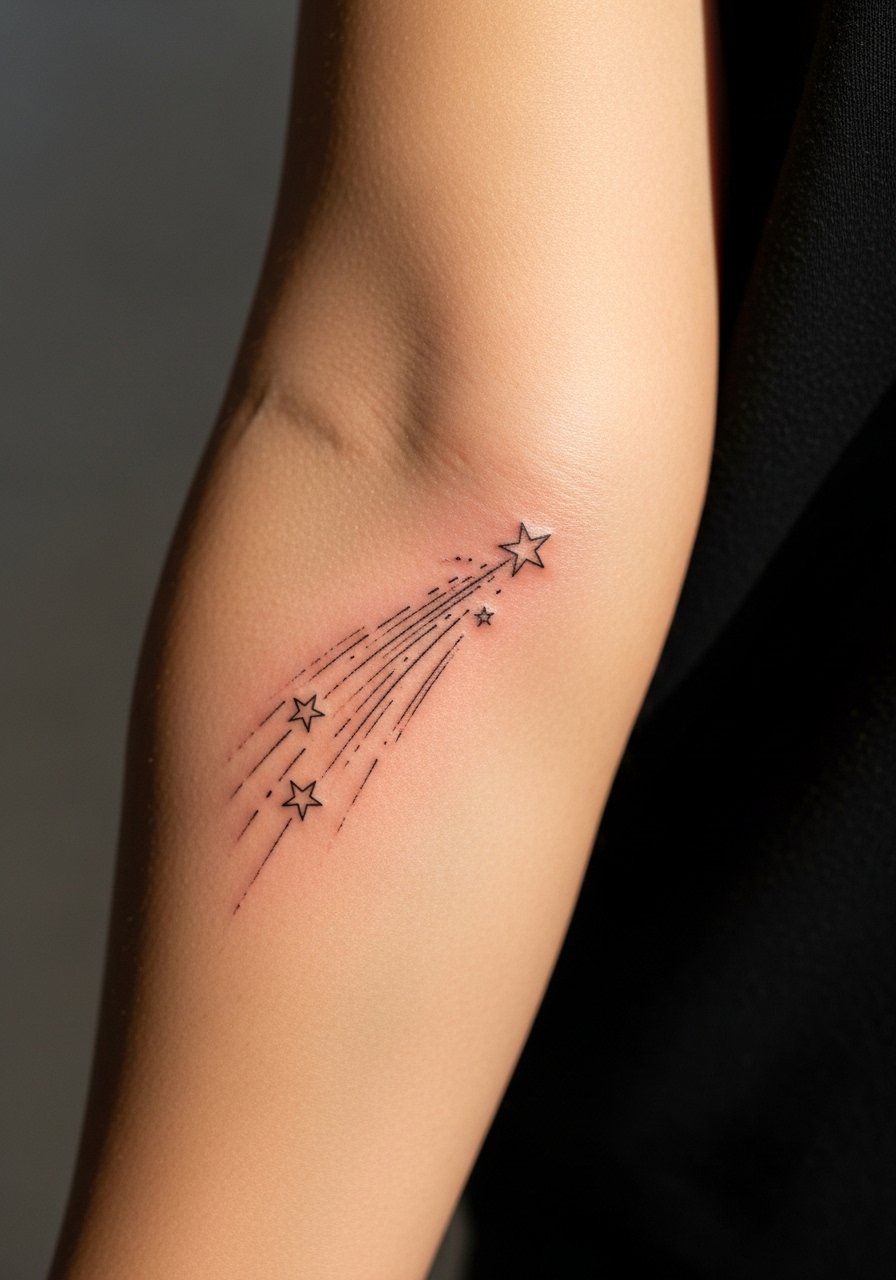
1. Shooting Star Forearm Streak
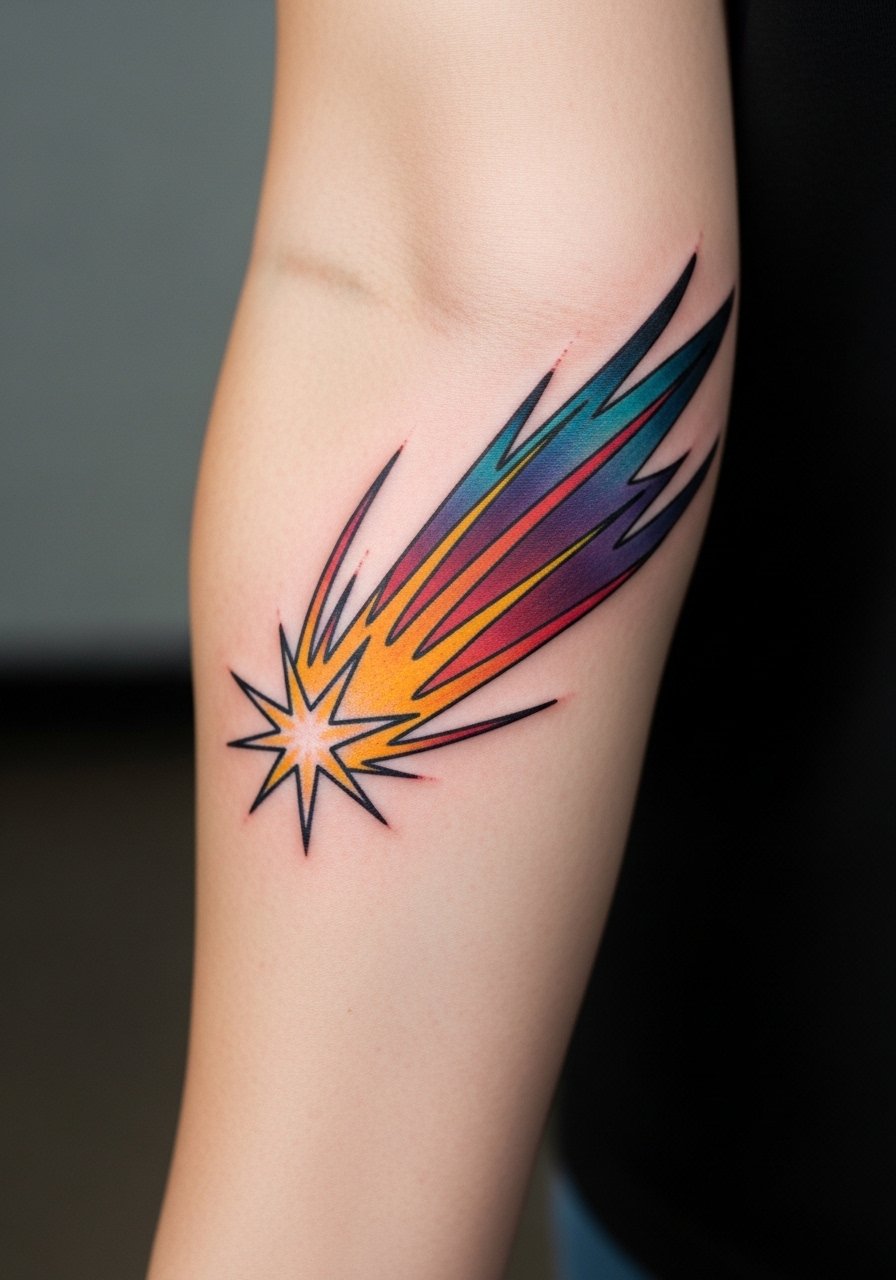
Someone I know first saw this on a forearm and said it read like motion on skin. The streaking tail works best in neo-traditional linework with varied lineweight and subtle stipple shading for depth. Tell your artist you want the streaks to have negative-space gaps so they do not blend into one blob as the ink settles. Pain on the outer forearm is lower than inner forearm. Expect a single session under two hours for a 4-6 inch piece. Common mistakes are compressing the tail too tightly or using overly thin lines that blur at year two. For long-term contrast, ask for stronger saturation in the star itself and softer tails.
2. North Star Compass on Upper Arm

Fair warning, upper-arm work still needs solid outlines to stay crisp. The North Star reads best as a compact compass motif with heavy black outlines and subtle gray wash in the negative space. When you consult, specify the diameter and ask for bold points rather than micro detailing so the shape survives touch-ups and sun exposure. Session time is usually one sitting. People who try to shrink this design too small regret it because proportions matter for compass symmetry. It suits someone who wants a visible symbol of direction without sleeve commitment.
3. Five-Pointed Nautical Star on Wrist
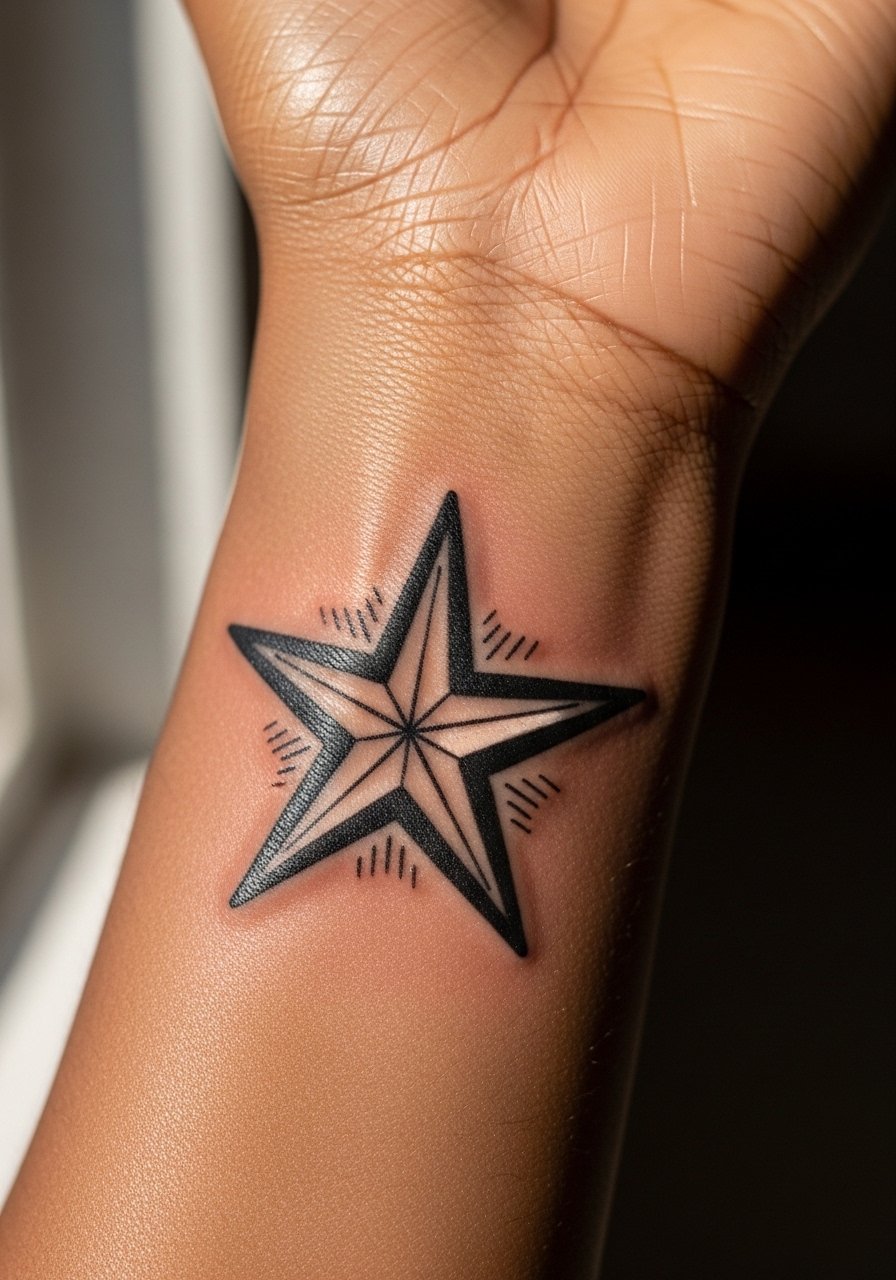
Most small wrist stars are classic for a reason, but one frequent mistake is choosing a needle-thin outline. For wrists, request a filled black pentagon center with clean negative-space triangles so the contrast holds up. Pain on the wrist is higher than forearm but tolerable in a short session. At six months the edges might soften, and at two to five years you may be glad you asked for saturated black rather than a faint outline. If your job requires discretion, consider the inner wrist placed slightly rotated to be less visible when shaking hands.
4. Moon and Stars Constellation Cluster on Calf
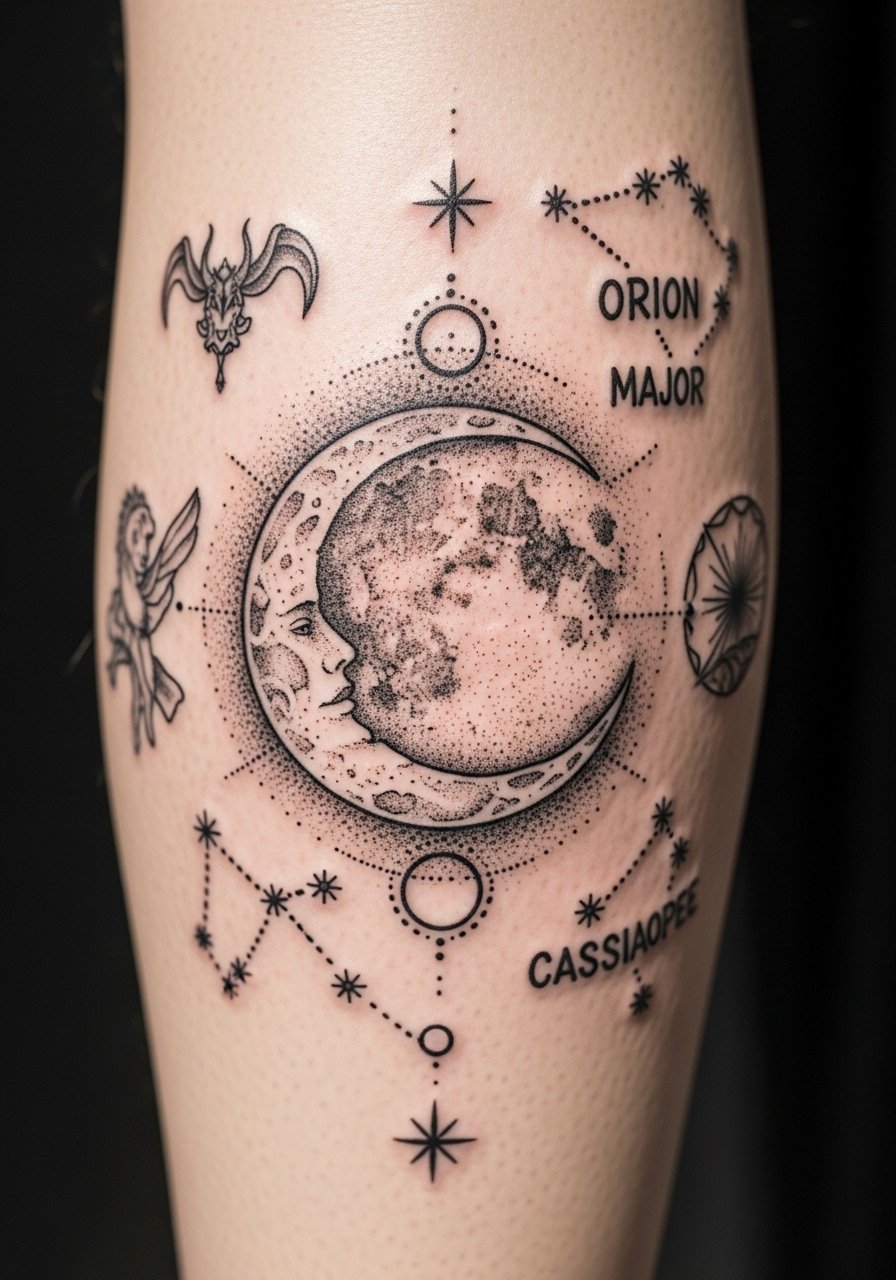
There is something about a cluster of tiny stars arcing around a crescent that reads very cinematic on the calf. Start the conversation with reference constellation shapes rather than random dots, so the spacing avoids crowding. Calf placements tolerate a mix of dot work and small linework, but keep the micro stars at a slightly larger size than micro singletons so they do not vanish over time. Session time depends on span but plan for two sessions if you want layered shading. Blowout risk on the calf is low, but any small bursts of linework will show fading first after sun exposure.
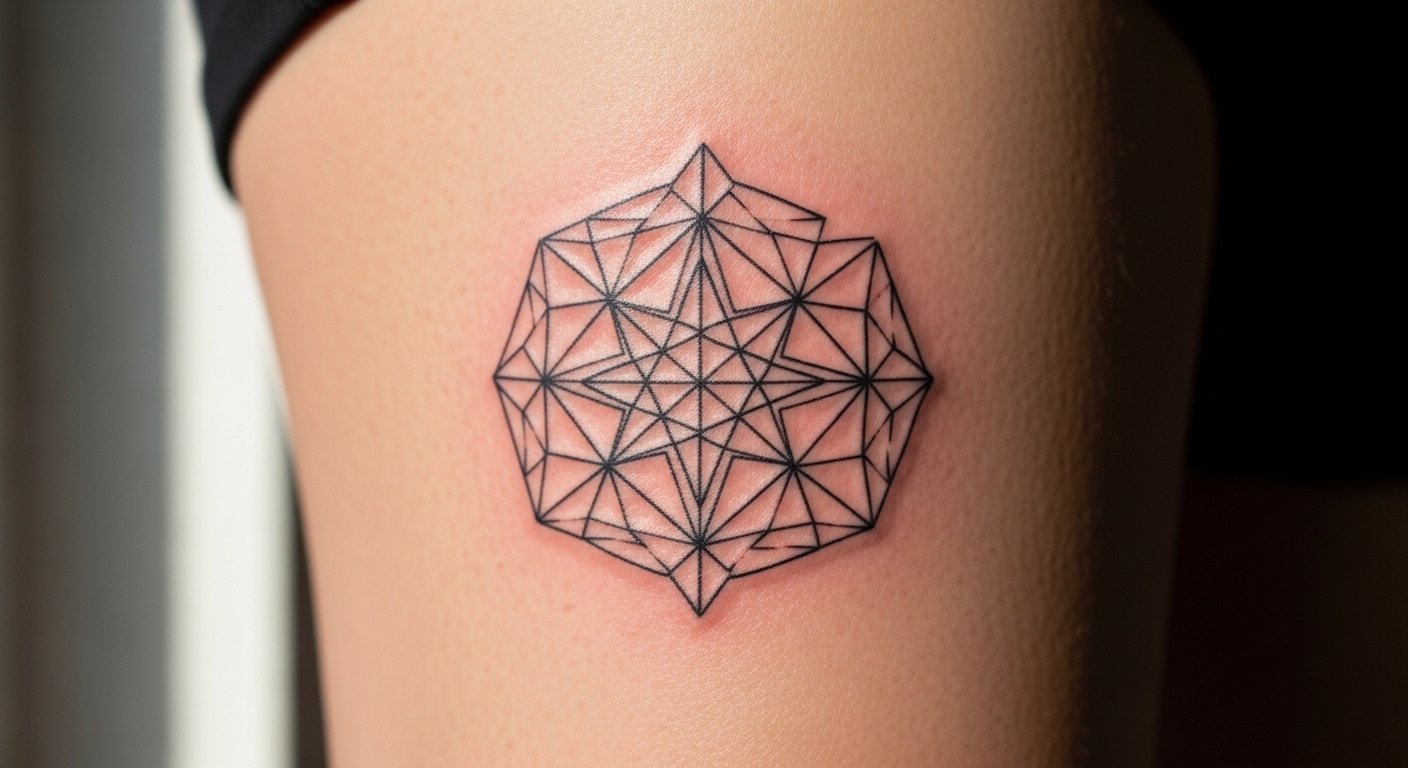
5. Geometric Star Grid Pattern for a Sleeve Build
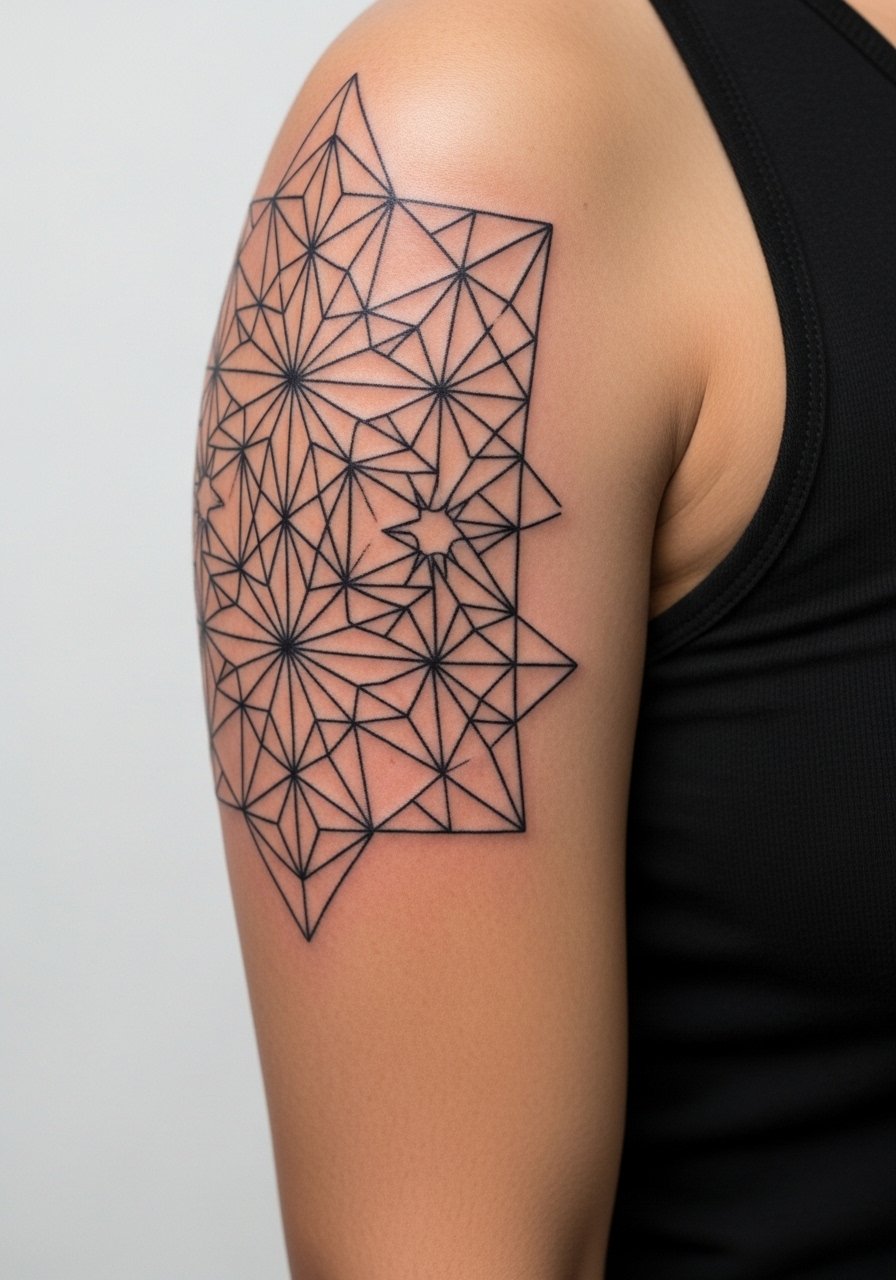
The biggest mistake with geometric grids is going too small and tight. The lines need breathing room and consistent spacing to avoid a muddy look later. If you want a sleeve build, plan for three to four sessions and bring a grid reference showing exact spacing. Expect some discomfort on inner bicep panels during long sittings. Over time the straight linework will demand touch-ups where the skin creases. Ask for slightly thicker key anchor lines so the pattern retains shape as minor fading occurs.
6. Patriotic Star with Flag Elements on Shoulder
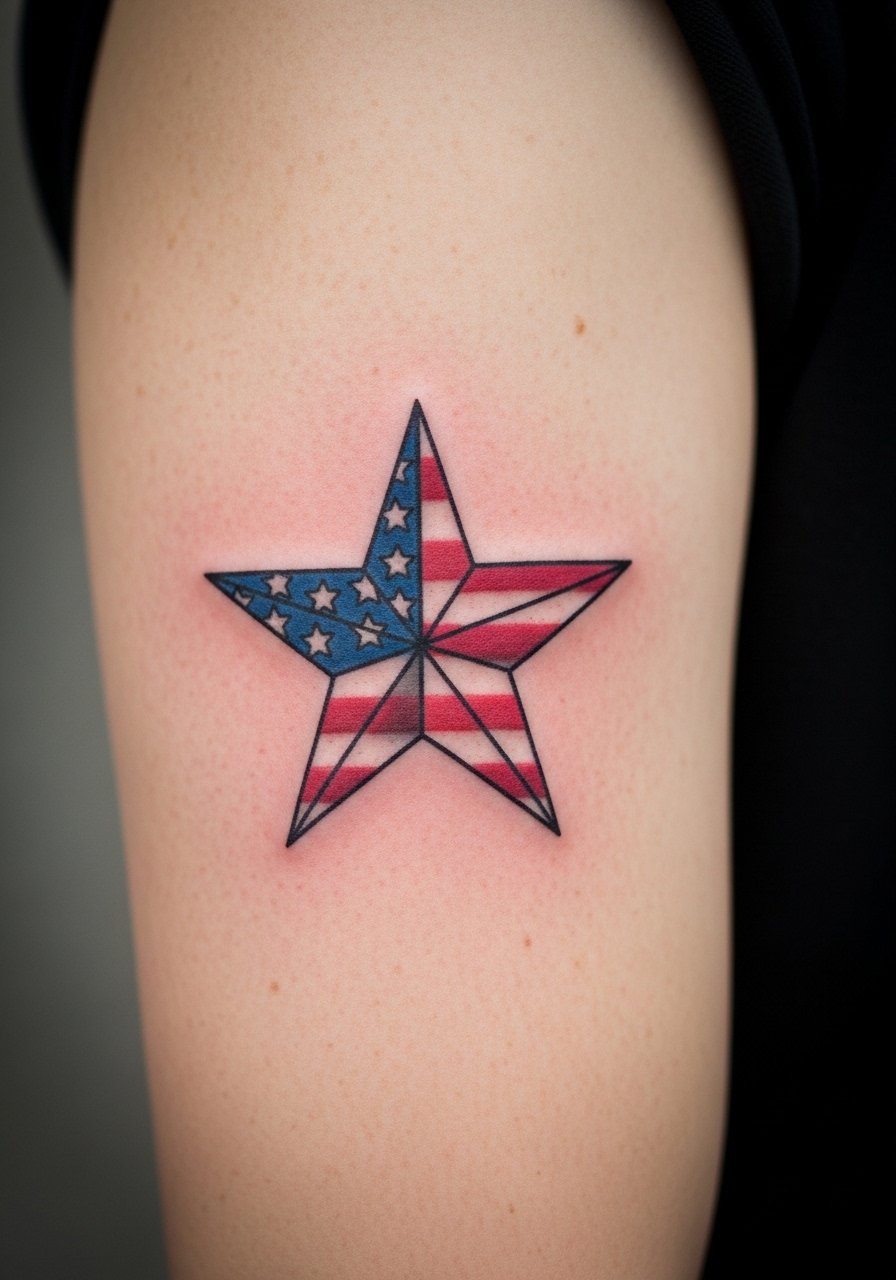
Visual impact is immediate when a bold star gets color accents on a black base. Tell your artist how much color you want and whether you prefer a washed gray background or heavy black negative space. Shoulder and bicep placements are forgiving for color saturation. For placement, keep the motif mid-bicep so it reads with T-shirts and sleeve lines. One common error is asking for tiny flag details that blur into a blob later, so opt for larger fields of color and bold outlines.
7. Starburst Radiating Explosion on Chest
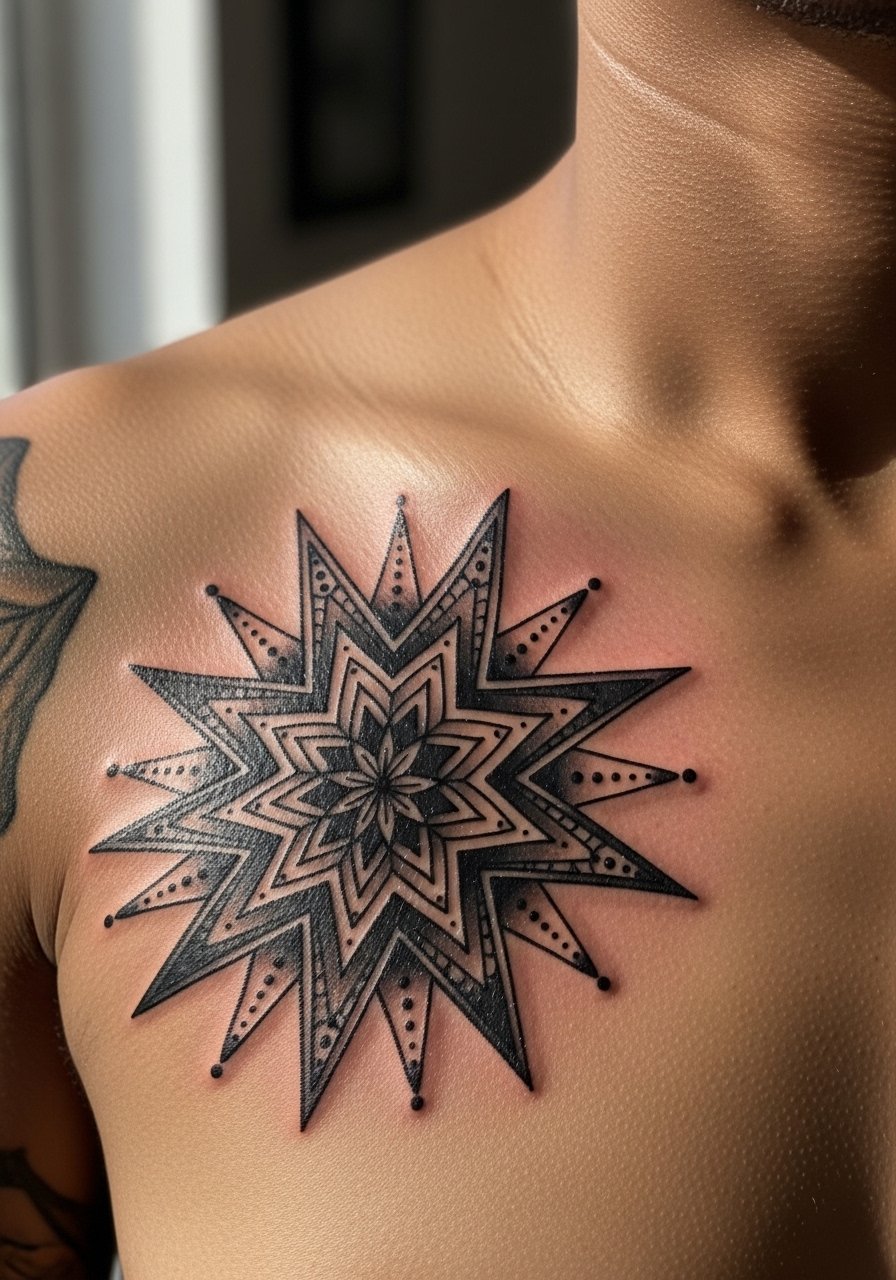
The chest is a high-impact canvas that also comes with higher pain. Artists split on whether extremely fine ray tips hold up on sternum-adjacent skin. One camp argues the stretch and movement blunt fine rays within a couple of years. The other camp says with proper needle depth and spacing, rays keep their integrity. When booking, ask your artist where they stand on fine rays and whether they recommend thicker ray ends. A single session often suffices for a 4-inch burst, and over time the center retains contrast while peripheral rays may soften.
8. Star Trail with Streaking Tail on Inner Forearm
When you sit down with your artist for this one, bring reference photos that show exact line weight and tail length. Inner forearm is a friendly placement for linear designs, but avoid ultra-fine tails that disappear after a year. A common version that ages poorly uses hairline strokes without spacing, which blurs into gray at two years. Request slightly staggered tail lines and moderate saturation on the star head. Session time is usually under an hour for a 6-inch trail and pain is lower on the inner forearm.
9. Stars and Skull Overlay on Forearm or Calf

There is dramatic contrast when small stars interrupt shaded realism. Expect a longer session range and some soreness for this medium-large composition. A frequent mistake is crowding stars too close to shaded areas, which can make them vanish as the grayscale settles. For best longevity, ask your artist to punch the stars with solid black centers and leave crisp margins between them and the skull shading. Touch-ups are more likely where heavy shading meets tiny linework. If you choose calf placement, expect slightly easier healing than the forearm.
10. Minimalist Single Outline Star Behind the Ear or Wrist

Most minimalist outlines look great at first but suffer if the line weight is too hairline. The biggest mistake is asking for a micro outline that lacks any interior saturation. Behind the ear is more sensitive and can take more time than a wrist micro. For longevity, request a slightly thicker outline and centered placement so edges do not blur into hair follicles or creases. Expect a quick session under 30 minutes. For careers that care about visible neck ink, consider wrist placement instead.
11. Star with Wings Motif on Collarbone or Rib

Mistake lead. The biggest mistake with winged stars is forgetting how ribcage movement alters feather flow. Ribs demand more spacing and slightly bolder feather tips so the wings do not melt together as the skin flexes. If you choose collarbone, the piece reads well under shirts and can be showcased with shirt collars. Ribs are higher pain and some artists caution about fine feather strokes there. If you plan to show this often, ask for a touch-up timeline. Hands-on experience around conventions suggests one touch-up within two years is common for feathered detail in mobile areas.
12. Bold Star on Dark Skin with Heavy Shading

A visual impact lead. Bold blackwork is the most reliable way to make stars pop on melanin-rich skin tones. Ask for saturated fills and deliberate negative-space highlights rather than thin outlines. Forearm placement keeps the contrast visible and gives artists room to balance saturation with texture. A common mistake is copying a light-skin approach and using thin outlines that vanish. Expect one to two sessions depending on size. For long-term contrast, wear sun protection on the area and plan for a touch-up where the skin receives heavy sun.
Tattoo Prep and Aftercare Essentials
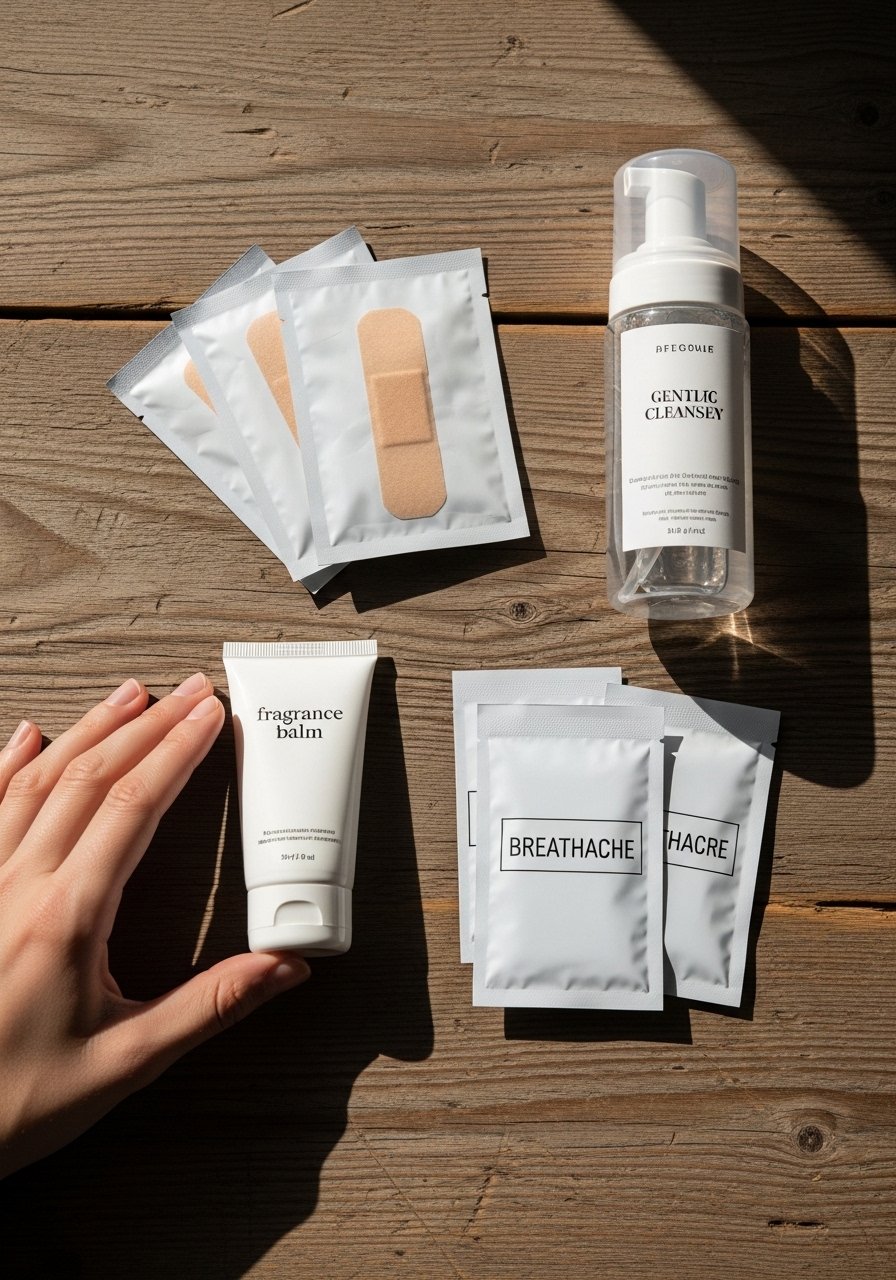
Before you show up, hydrate well and wear comfortable clothing that gives the artist access to the placement. Aftercare is not glamorous but it determines how crisp linework and saturation age. Below is a practical shopping list meant to cover immediate healing and longer-term maintenance. Links go to Amazon search pages with the tag included.
Fragrance-free gentle foaming cleanser for new tattoos. Use this for the first five to seven days to remove ointment and dried plasma. A foaming formula rinses clean without stripping ink.
Lightweight fragrance-free balm in a small tube. Apply thin layers after cleansing to keep the tattoo from drying and cracking. Pick a balm that absorbs quickly so it does not clog pores.
Medical-grade second skin bandage, single-sheet packs. Use for the first 24 to 48 hours on larger pieces or when told by your artist. It reduces scabbing risk and keeps friction down.
Breathable tattoo-specific wrap, 6-inch roll. Handy for protecting chest or back work when clothing rubs the area.
Sachet-sized saline wound wash. A gentle rinse option for sensitive skin or if you're traveling and cannot use tap water briefly.
Broad-spectrum mineral SPF 50 stick for tattoos. Use after the tattoo is fully healed to protect blackwork from UV fading.
Silicone scar sheet pack for smoothing raised areas later. These can help flatten and even skin texture where heavy shading creates slight raised scars.
Aquaphor Healing Ointment. This is the one mainstream product here. It is useful for very dry skin, but apply sparingly and only for short windows during the earliest phase.
Every tattoo is different. Always follow your artist's specific aftercare instructions. Consult a dermatologist if you have skin concerns or unusual healing issues.
Frequently Asked Questions
Q: What does a star tattoo typically cost and how are costs broken down?
A: Costs vary by city and artist, but expect pricing to reflect size, session time, and artist experience. Small wrist stars book quickly and may be a short session rate. Larger blackwork or sleeves require session-based bookings. Reach out to local studios and ask for an estimate based on your preferred size and placement.
Q: Will fine-line star trails blur if I get them across an inner forearm sleeve?
A: It depends on line spacing and artist technique. Fine line can blur faster when lines sit too close together. For a sleeve, ask the artist to space lines and introduce negative space or slightly thicker anchor lines so the pattern reads even after a couple of years.
Q: Are there special considerations for star tattoos on darker skin tones?
A: Yes, heavier saturation and bold fills often read best on melanin-rich skin. Artists may use solid black areas and negative-space highlights rather than relying on pale grays. Ask to see healed examples on similar skin tones and discuss contrast strategies during the consult.
Q: How soon can I get a touch-up for a star that faded at the edges?
A: From what I've seen, touch-ups are commonly scheduled after healing checks, often around three to six months if the edges need reinforcement. Many people plan a touch-up within two years for fine details or after heavy sun exposure.
Q: Is it safe to get a ribcage star with delicate wings or stipple shading?
A: Ribs are higher pain and movement can affect how fine detail settles. Artists split into two camps on ultra-fine work there. One group says very fine stipple blurs quickly. The other group says with adequate spacing and proper depth it holds up. Ask your artist where they stand and whether they recommend slightly bolder detail for ribs.
Q: Where should I look to discover artists who do quality star work without naming them directly?
A: Use style-specific hashtags on social platforms, search local studio location tags, and check tattoo directories for blackwork or neo-traditional portfolios. Reddit r/tattoos threads and booking apps can help you find artists who specialize in the exact technique you want.
