
I spent months collecting healed photos and talking to artists before I got serious about sacred geometry tattoos. The tricky part wasn’t picking a symbol — it was picking a style and placement that would actually look balanced years from now. These 30 sacred geometry tattoos focus on symmetry, longevity, and how they feel on the body.
This list leans into blackwork, fine line, and dotwork sacred geometry tattoo ideas. I picked placements that respect body symmetry and trending 2026 styles like sleeve-wrapping mandalas and golden-ratio spirals. From what I’ve seen, these options hold up best healed and give clear direction for your artist.
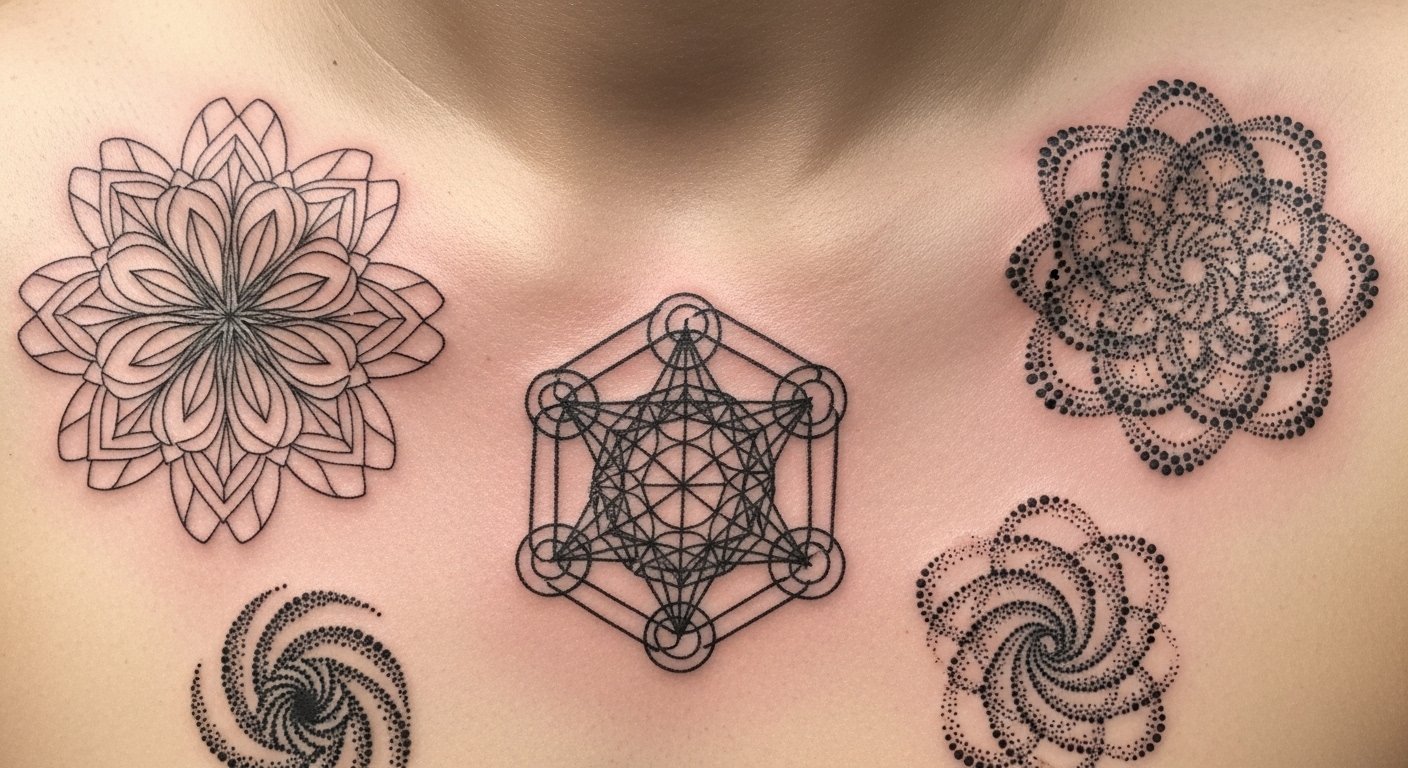
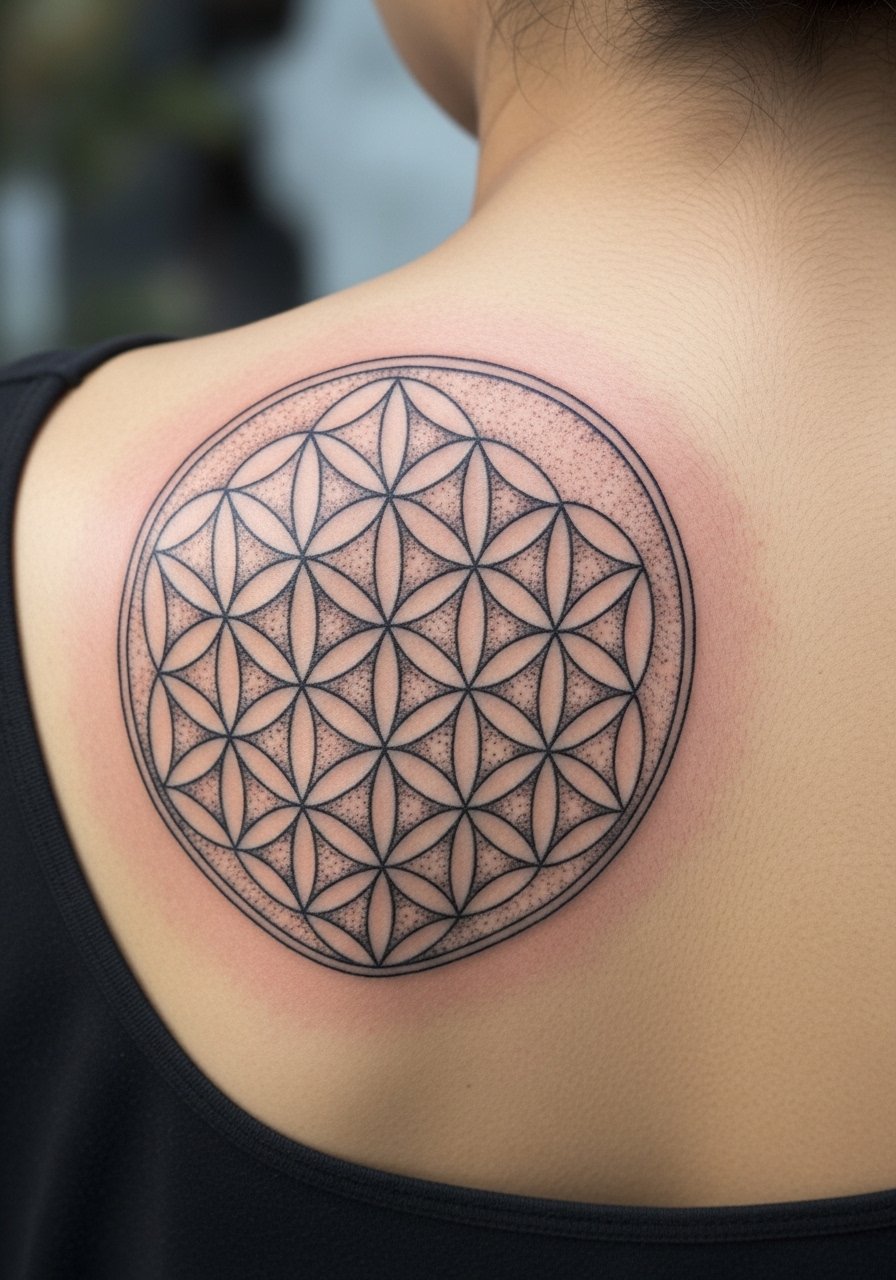
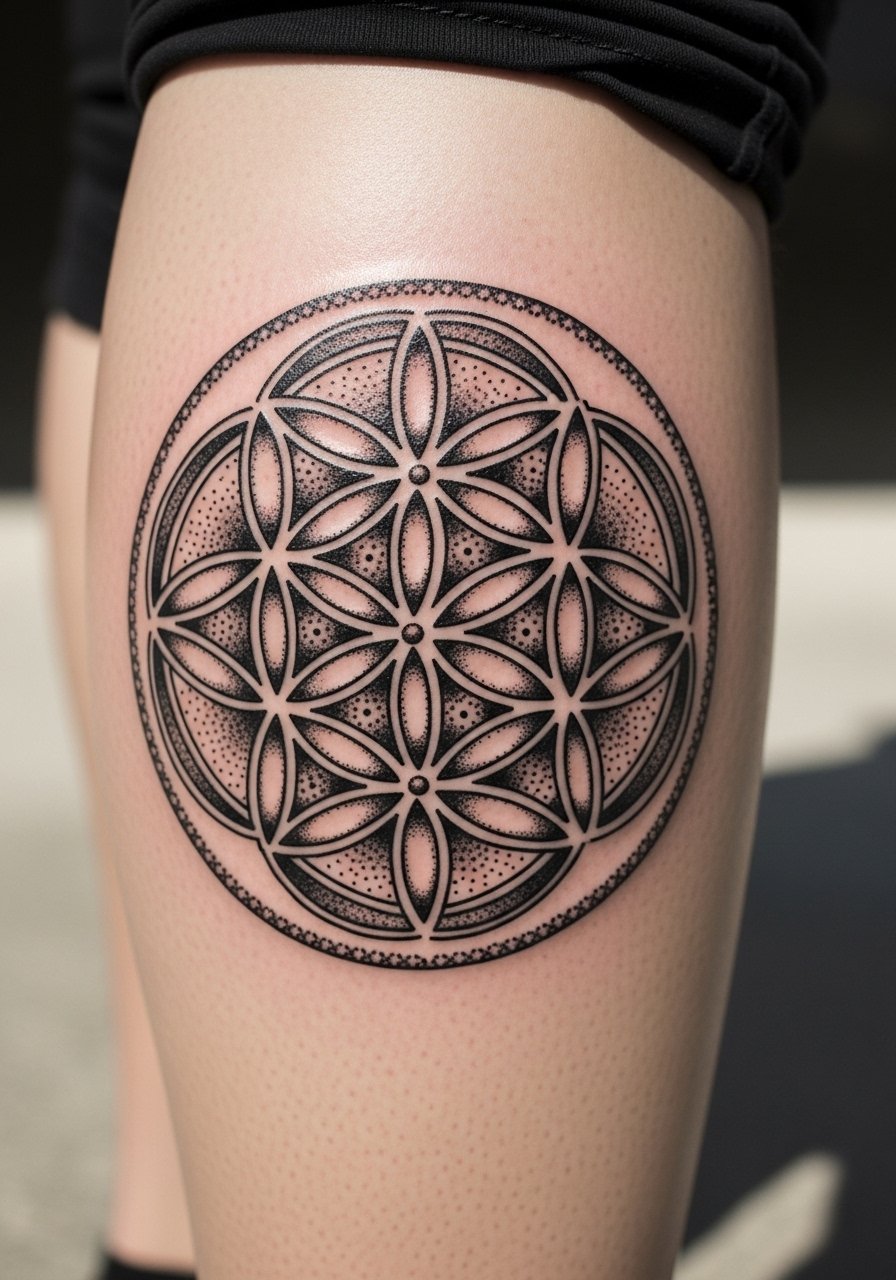
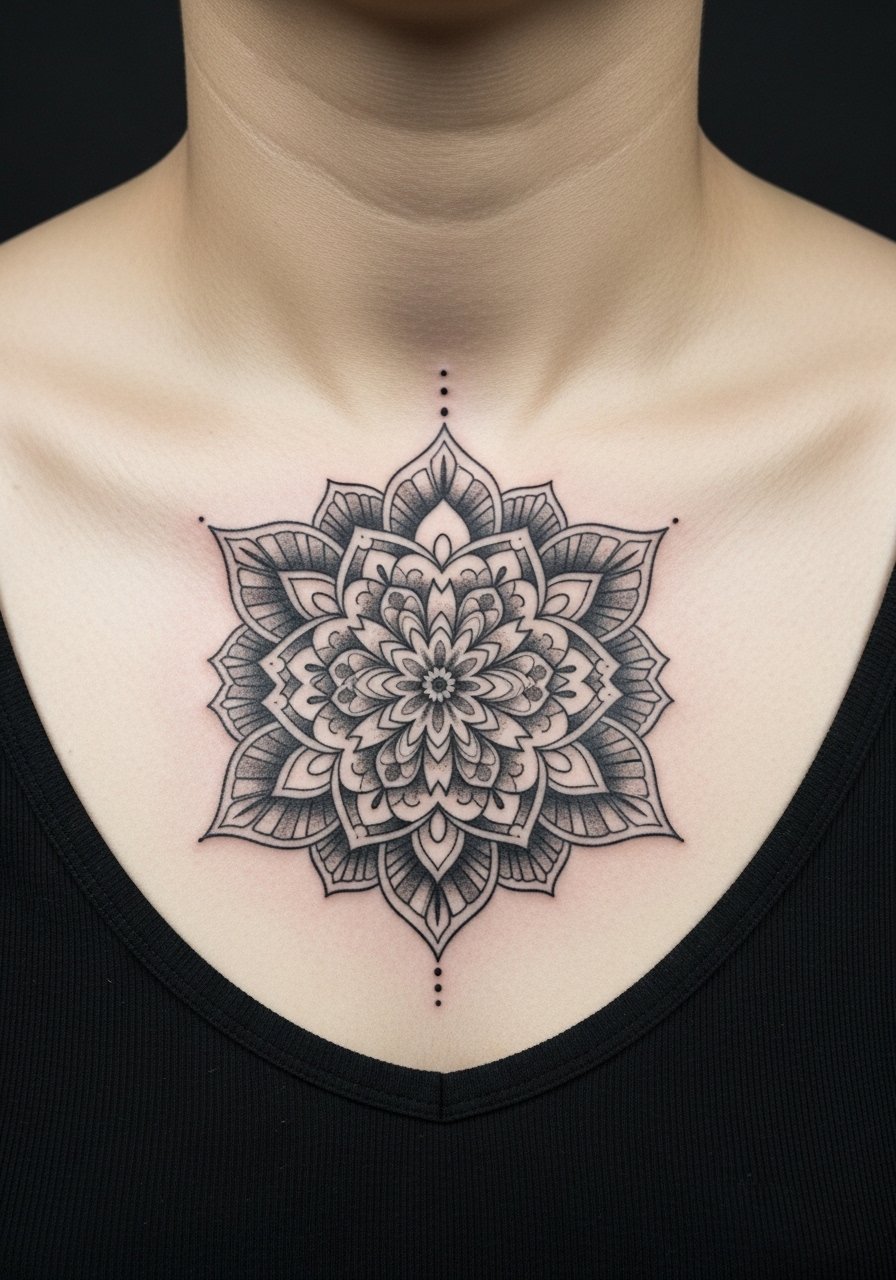
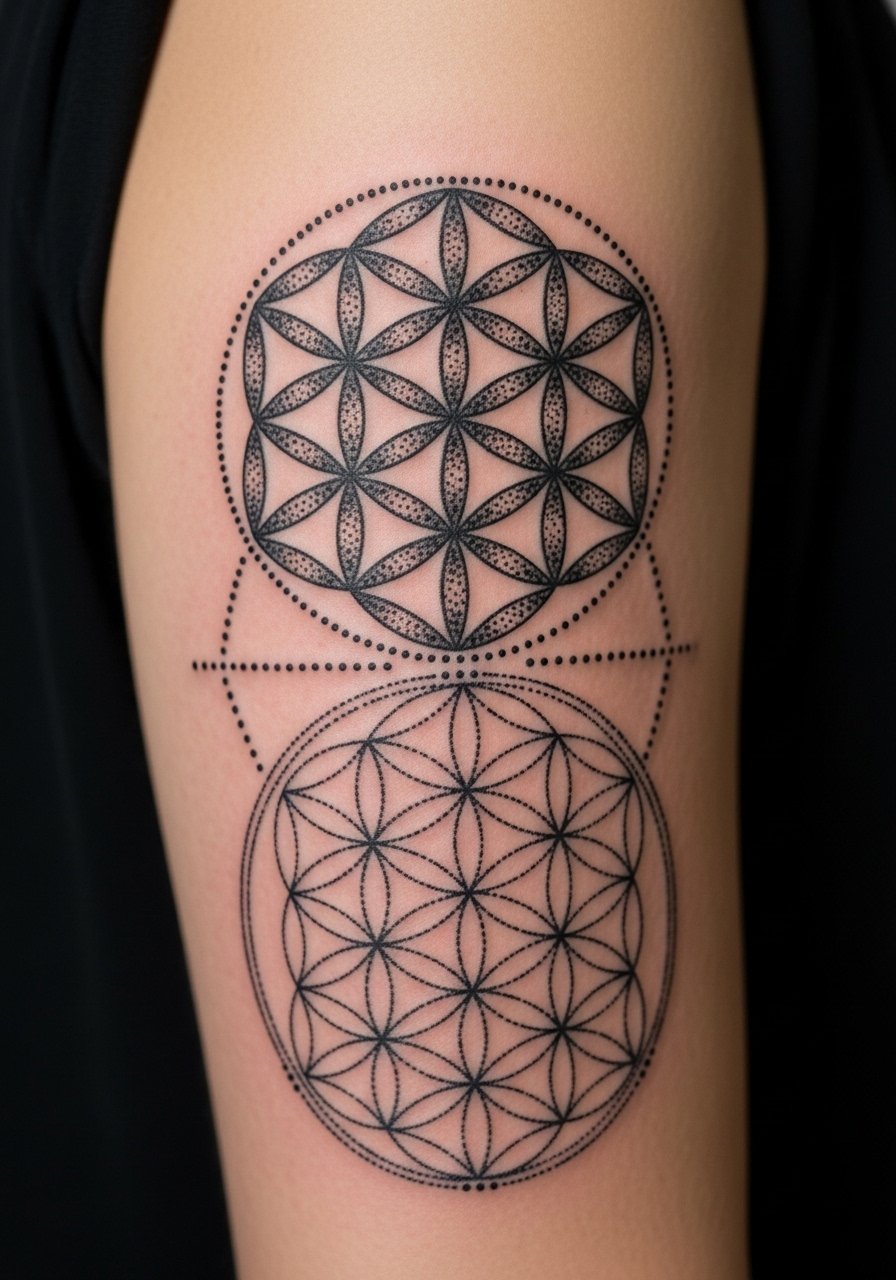
1. Flower Of Life Mandala On Upper Back
Style/Technique: Dotwork / Blackwork
Pain Level: Medium (4/10)
Session Time: Multiple sessions for full detail
Best For: Symmetry-focused statement piece
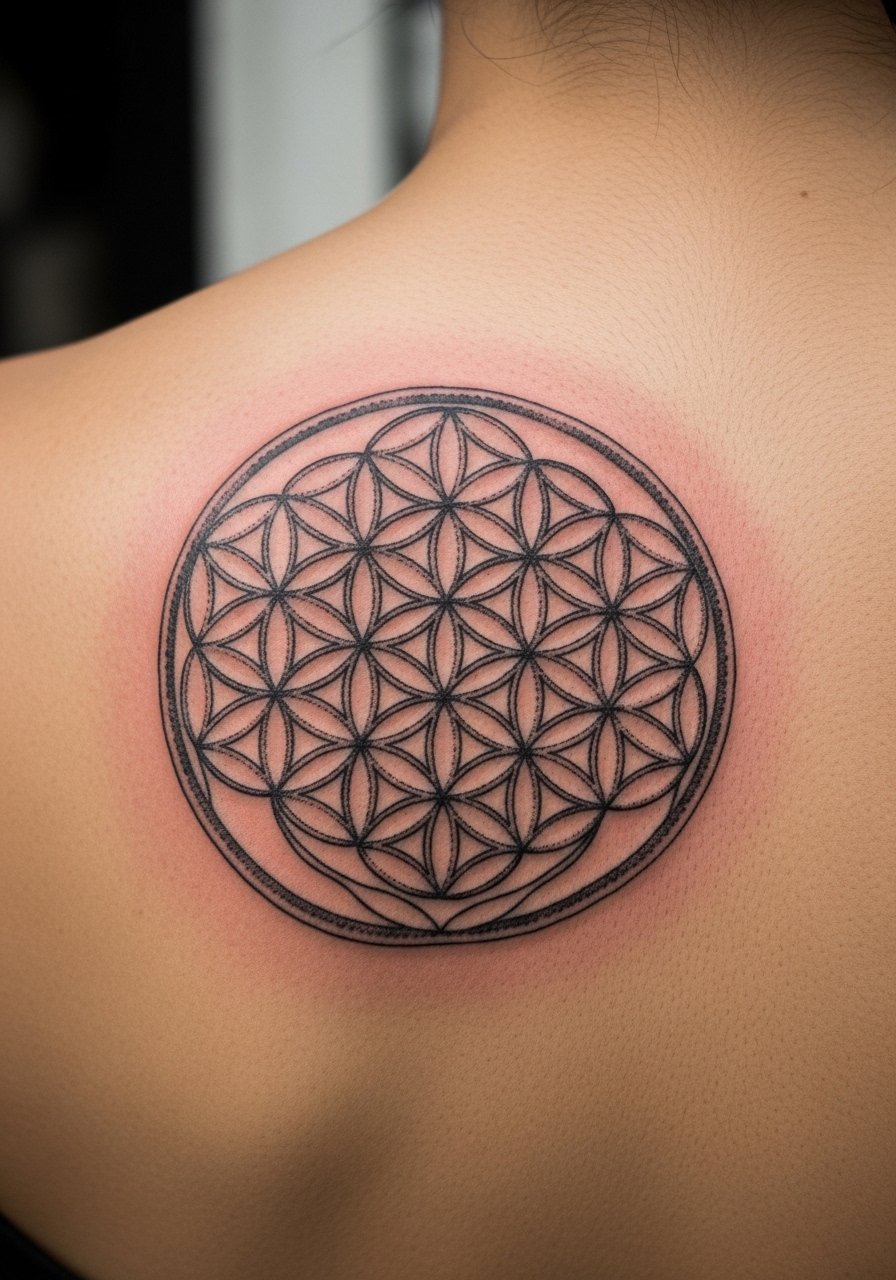
The Flower of Life reads as both delicate and architectural. On the upper back it uses natural symmetry, which helps the circles sit perfectly. Expect medium discomfort and multi-session work. Dotwork keeps the texture alive while black ink preserves contrast long-term. Common mistake: asking for too-small detail — these need space. Ask for an artist experienced in mandalas who understands body mapping and symmetry.
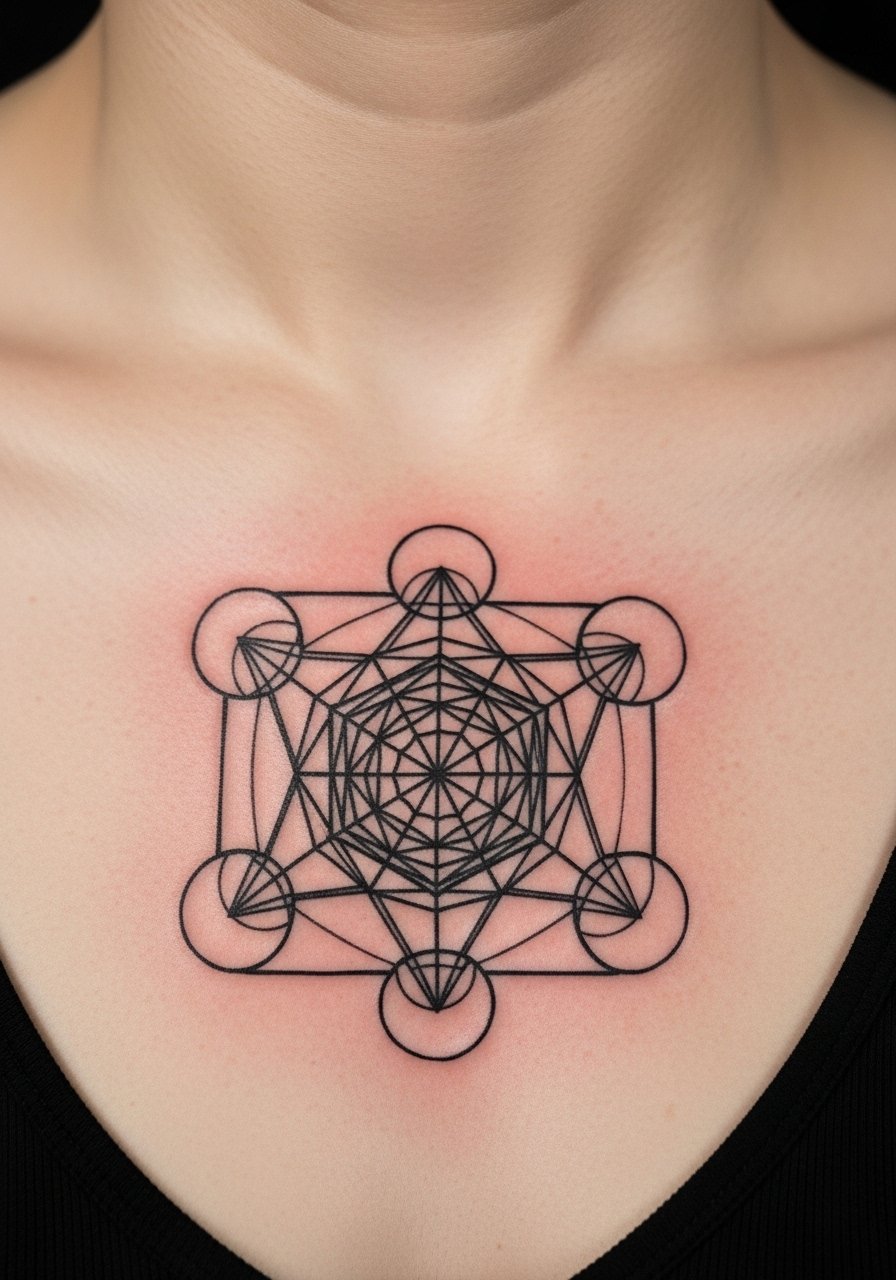
2. Metatron’s Cube On Chest Plate
Style/Technique: Geometric Blackwork
Pain Level: Medium-High (5-6/10)
Session Time: 2–3 sessions for crisp lines
Best For: Strong spiritual statement, visible when wanted
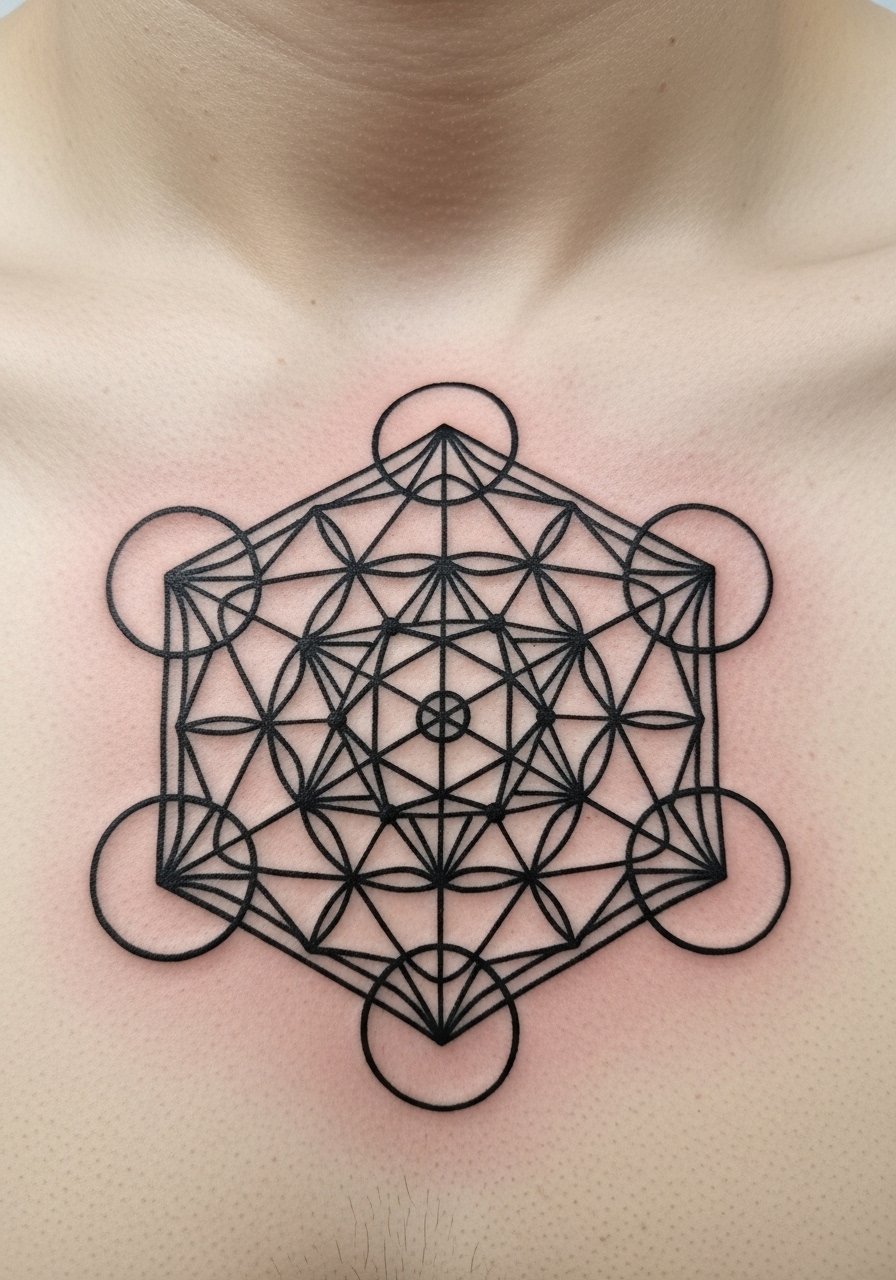
Metatron’s Cube is all about interconnected balance. The chest gives enough flat surface for precise linework and a centered composition. Lines must be perfectly straight — go to an artist who specializes in architectural geometry. Expect a few sessions and a careful aftercare plan; fine lines can blur if rushed. Avoid overly thin single-needle execution unless the artist has proven healed examples.
3. Seed Of Life On Inner Wrist
Style/Technique: Fine Line / Minimalist
Pain Level: Low (2-3/10)
Session Time: Single short session
Best For: First tattoo, subtle symbolism
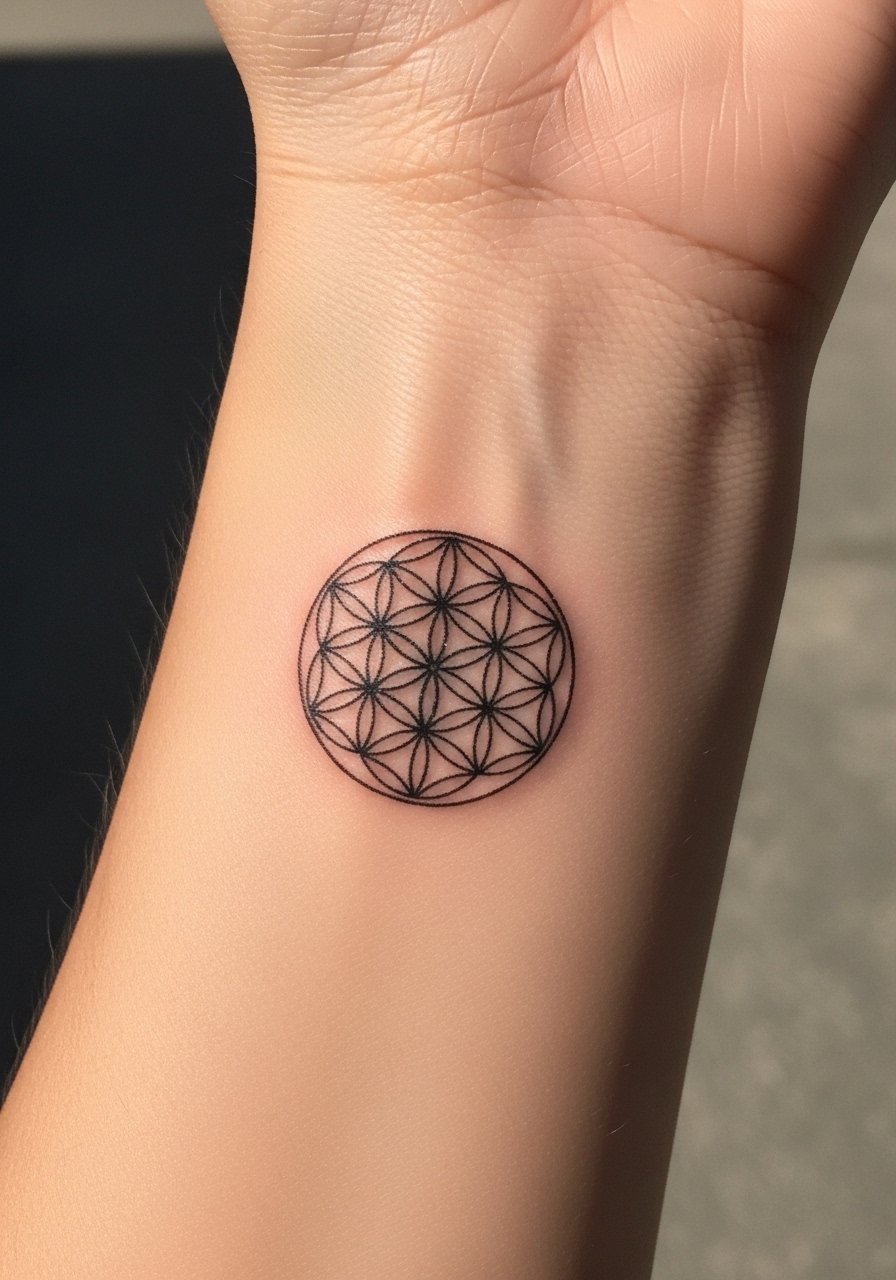
Seed of Life is compact and meditative. The inner wrist shows the motif off without overwhelming. Pain is manageable but expect sensitivity. Fine line works here but can blur over years; ask for slightly bolder line weights for longevity. A common mistake is making it too tiny—give the circles breathing room. This is a classic "small sacred geometry tattoos" choice for first-timers.
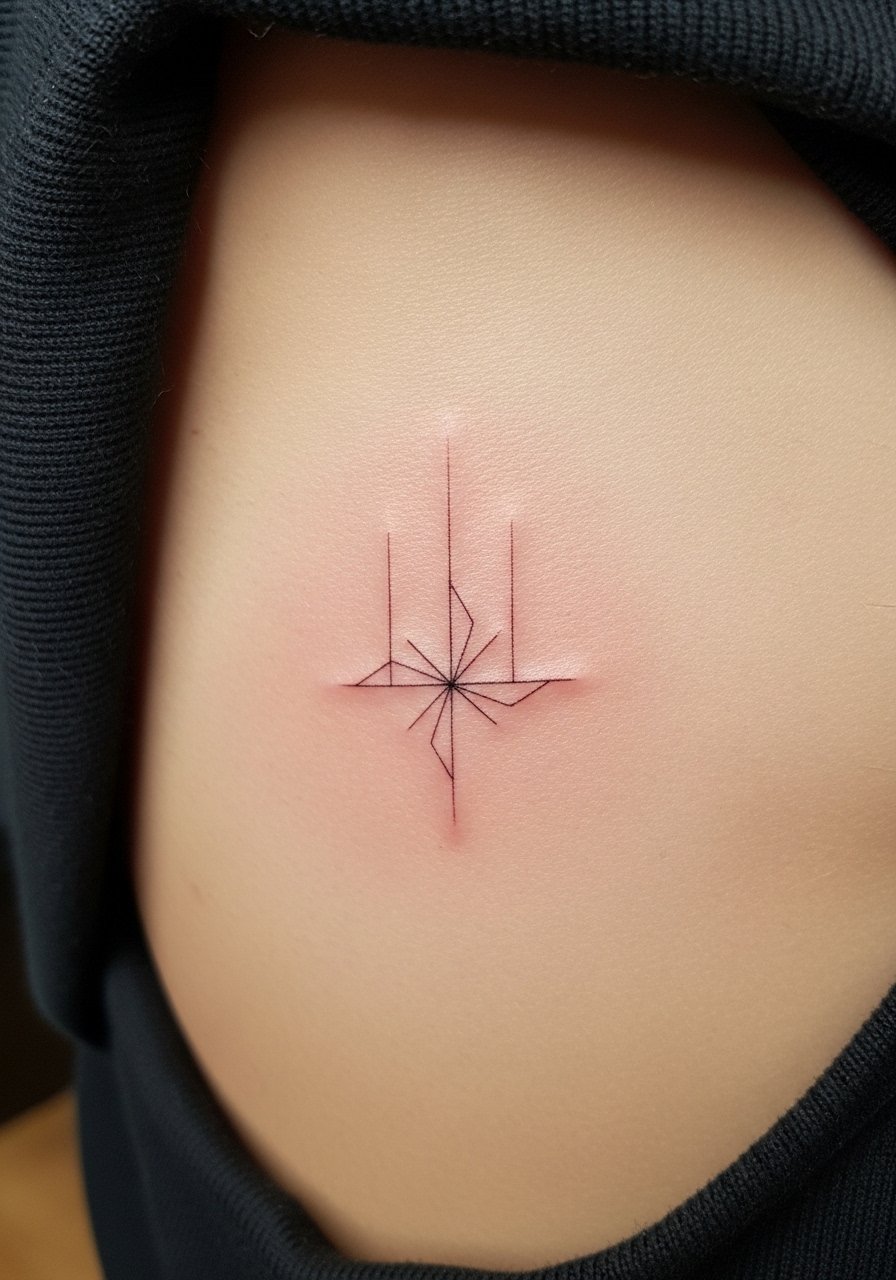
4. Sri Yantra Down The Spine
Style/Technique: Ornamental Blackwork
Pain Level: High (7-8/10)
Session Time: 2–3 sessions, careful alignment
Best For: Deeply spiritual, meditation-focused piece
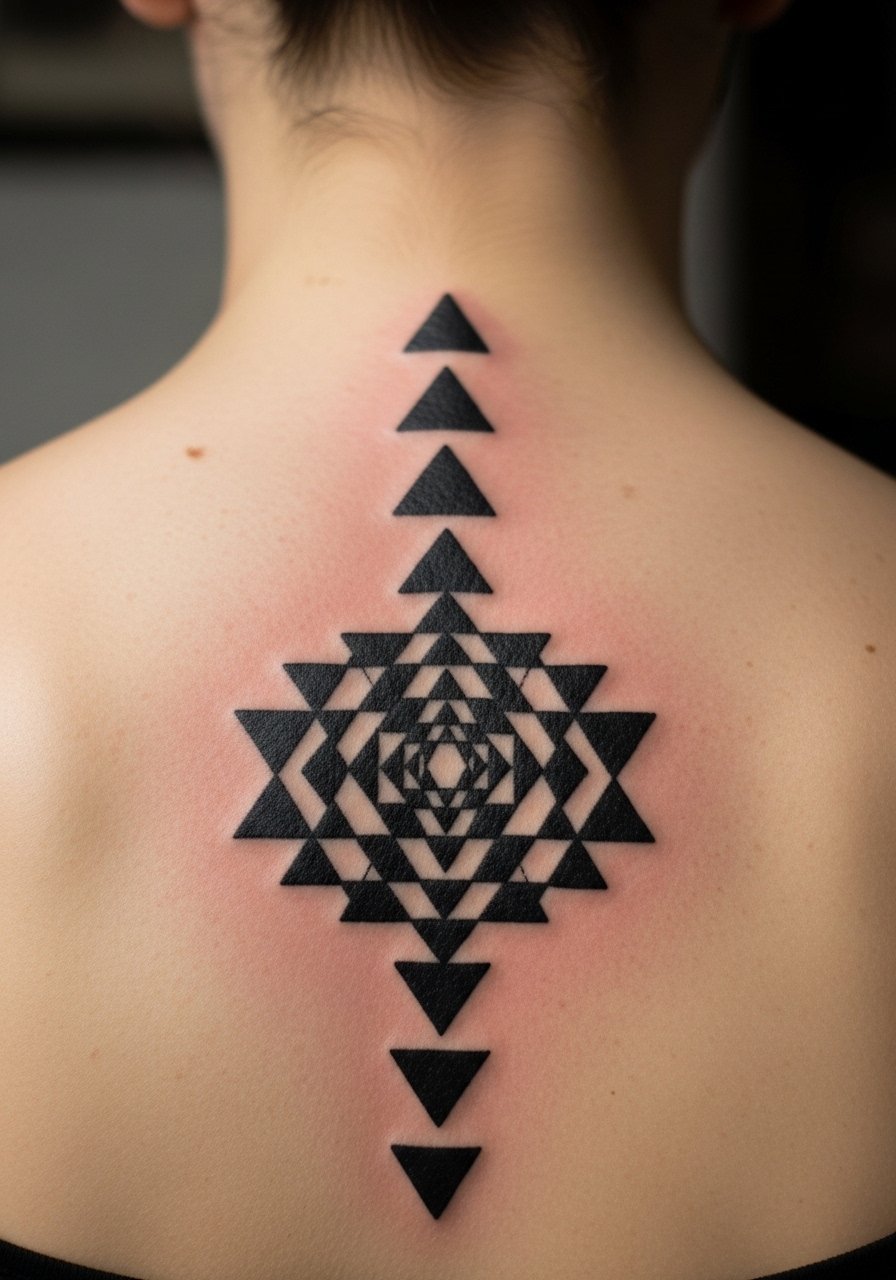
The Sri Yantra needs precision and symmetry to function as a meditative anchor. The spine’s vertical axis helps center the bindu point. This placement is painful and needs an artist who maps proportions precisely. Healing requires patience; stretching and movement can affect lines. Avoid off-center stencils — always proof the alignment before ink.
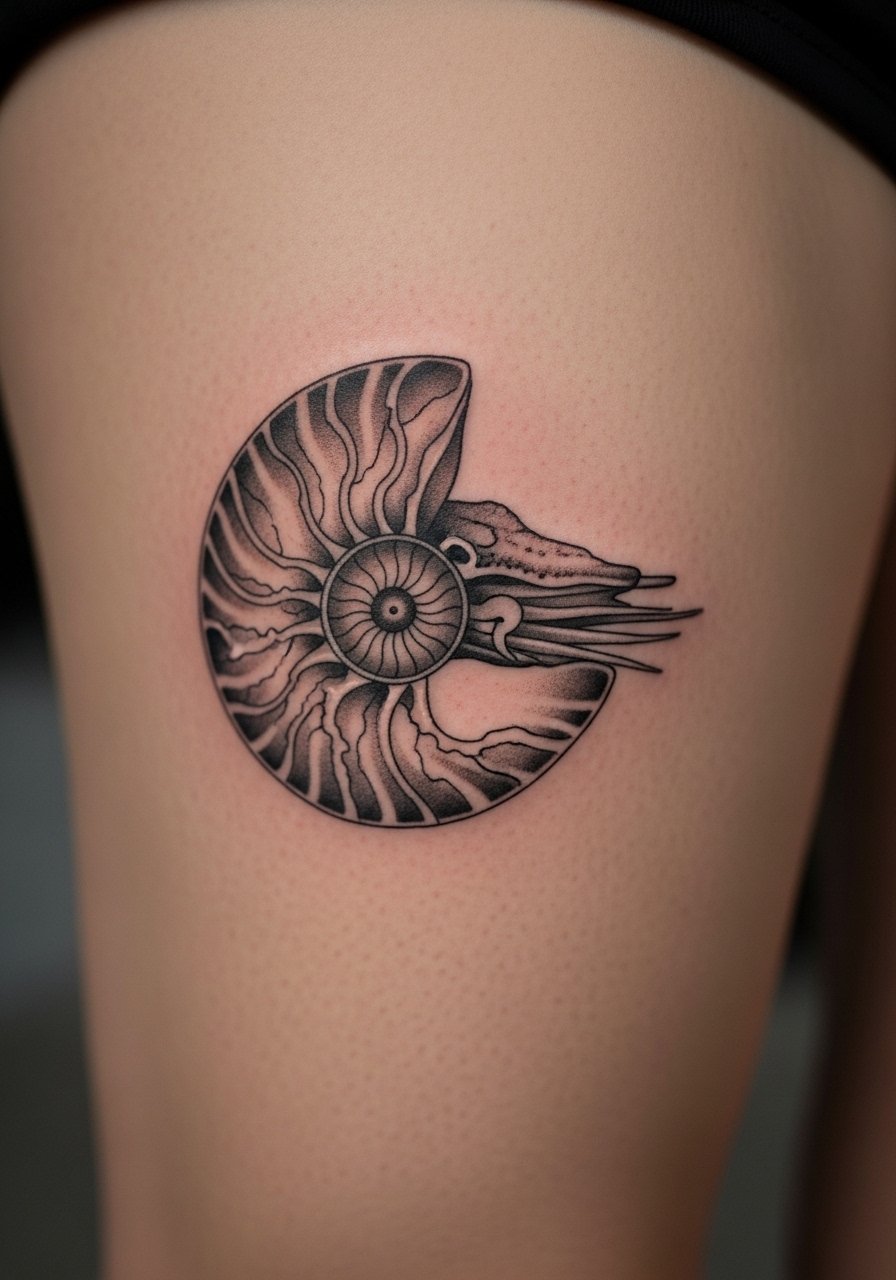
5. Golden Spiral Nautilus On Outer Thigh
Style/Technique: Illustrative Geometric
Pain Level: Low-Medium (3-4/10)
Session Time: 1–2 sessions for shading and linework
Best For: Nature/math hybrid, flowing placement
The golden spiral feels organic and timeless. Thigh placement allows the curvature to wrap naturally. It’s less painful and ages well thanks to thicker black lines with subtle shading. Artists who reference the golden ratio will get the proportions right. A common error is forcing too much tiny detail; keep the spiral readable from a short distance.
6. Vesica Piscis On Collarbone
Style/Technique: Minimalist Fine Line
Pain Level: Medium (4/10)
Session Time: Single short session
Best For: Symbolic duality in a discreet spot
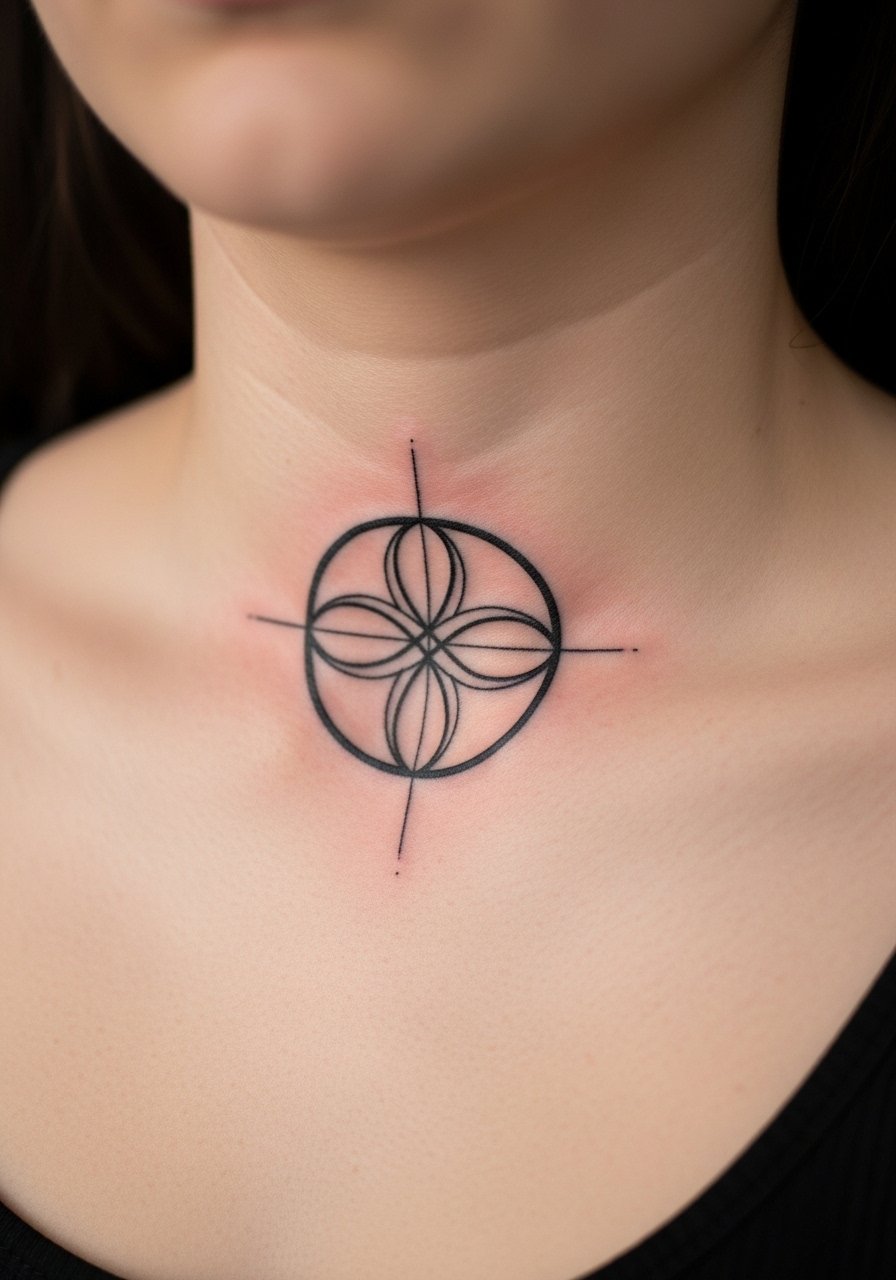
Vesica Piscis is perfect for someone who wants subtle sacred meaning without heavy ornament. Collarbone emphasizes the Venn-like union. Fine line looks elegant but can fade; ask for slightly bolder strokes for years-long clarity. Expect some tenderness. Avoid overly complex filler that ruins the minimalist intent.
7. Pentagram Star In Circle On Outer Forearm
Style/Technique: Traditional Geometric / Blackwork
Pain Level: Low (2-3/10)
Session Time: 1–2 sessions
Best For: Bold wrist-to-forearm visibility
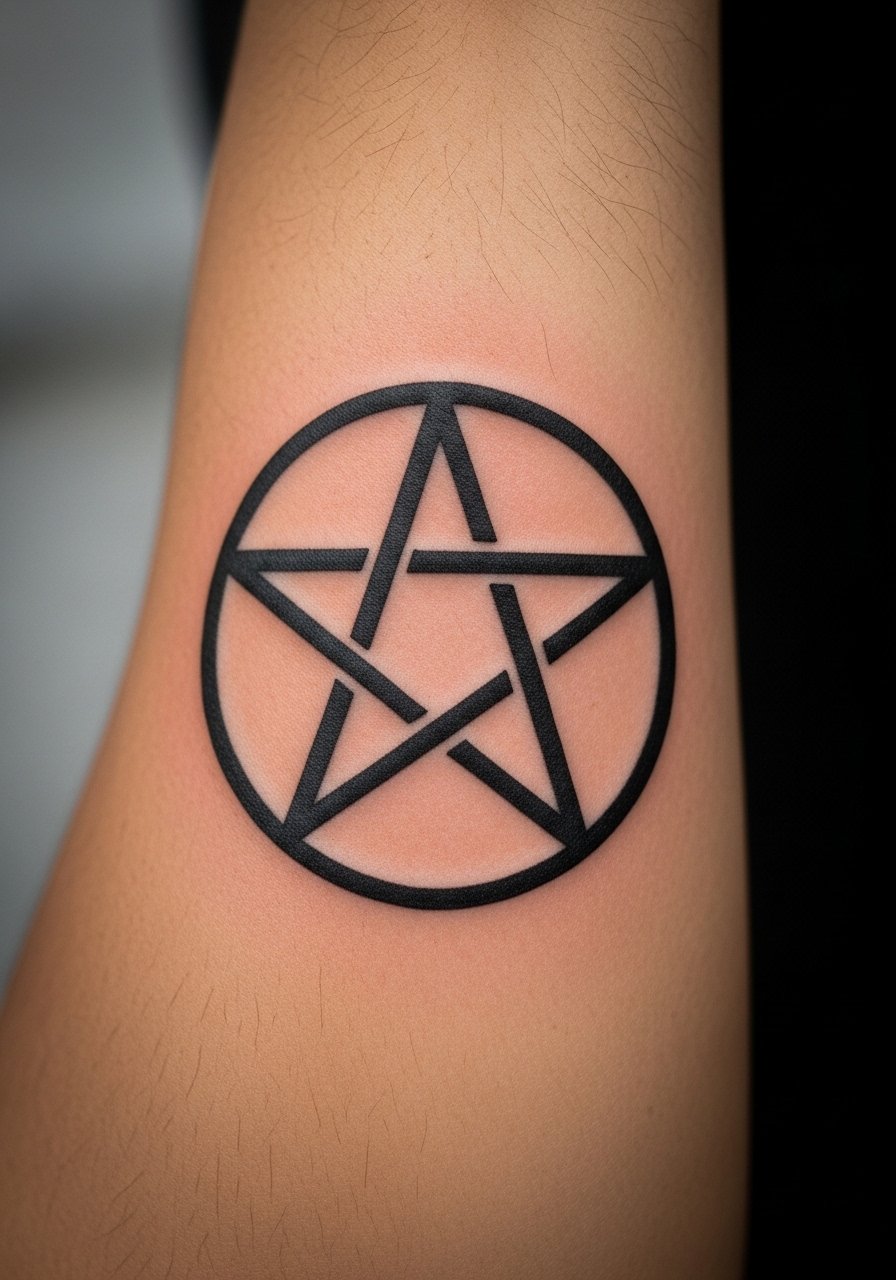
A pentagram inside a circle reads clearly and ages reliably with bold blackwork. The outer forearm provides a flat canvas for strong lines that resist blur. This style is forgiving; thick outlines protect inner details. A common mistake is cramped points — keep shapes proportional. If symbolism matters, discuss variations with your artist.
8. Fruit Of Life Start On Upper Back (Sleeve Builder)
Style/Technique: Dotwork Modular
Pain Level: Medium (4-5/10)
Session Time: Multiple sessions — scalable
Best For: Building a sleeve/backpiece over time
Fruit of Life is modular and perfect as a start to a geometric sleeve or backpiece. Dotwork creates depth and lets you expand with additional spheres. Expect multiple sessions and a staged plan. The risk is inconsistency in spacing; hire someone experienced with modular sacred systems. From what I’ve seen, this approach ages beautifully when blackwork anchors the dots.
9. Torus Vortex On Shoulder Cap
Style/Technique: Abstract Blackwork / 3D Illusion
Pain Level: Medium (4/10)
Session Time: 2 sessions for shading and flow
Best For: Mimicking energy flow on curved anatomy
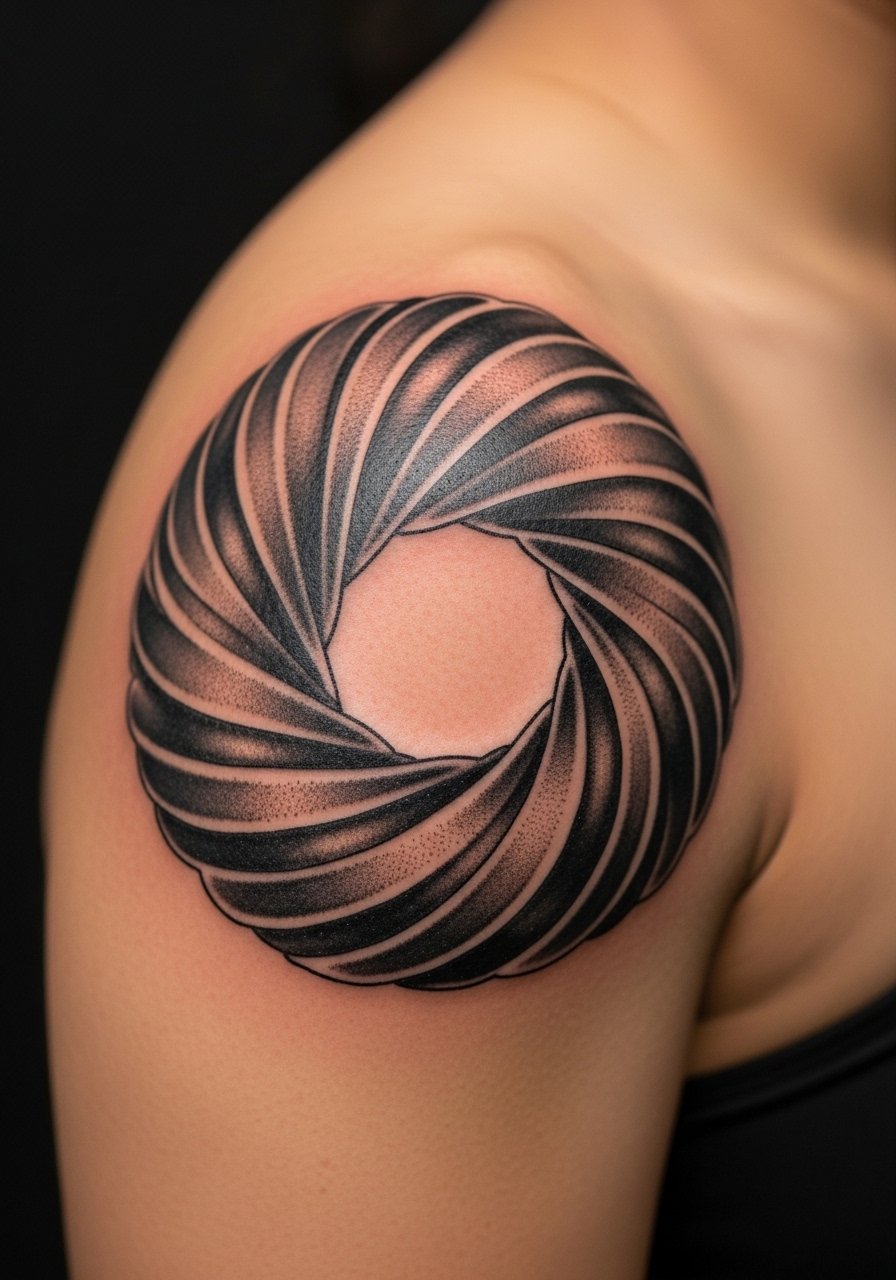
A torus vortex plays with 3D illusion and looks great on rounded shoulder anatomy. The curve helps the vortex read as motion. Artists who understand flow and shading will give the design life. Keep contrast high; subtle grays can get lost over time. A common mistake is ignoring body contours — the pattern must wrap the shoulder without distortion.
10. Geometric Mandala Sleeve Around Arm
Style/Technique: Neo-Traditional Geometric / Blackwork
Pain Level: Medium-High (5-7/10 overall)
Session Time: Many sessions — multi-part project
Best For: Large-scale symmetry and flow
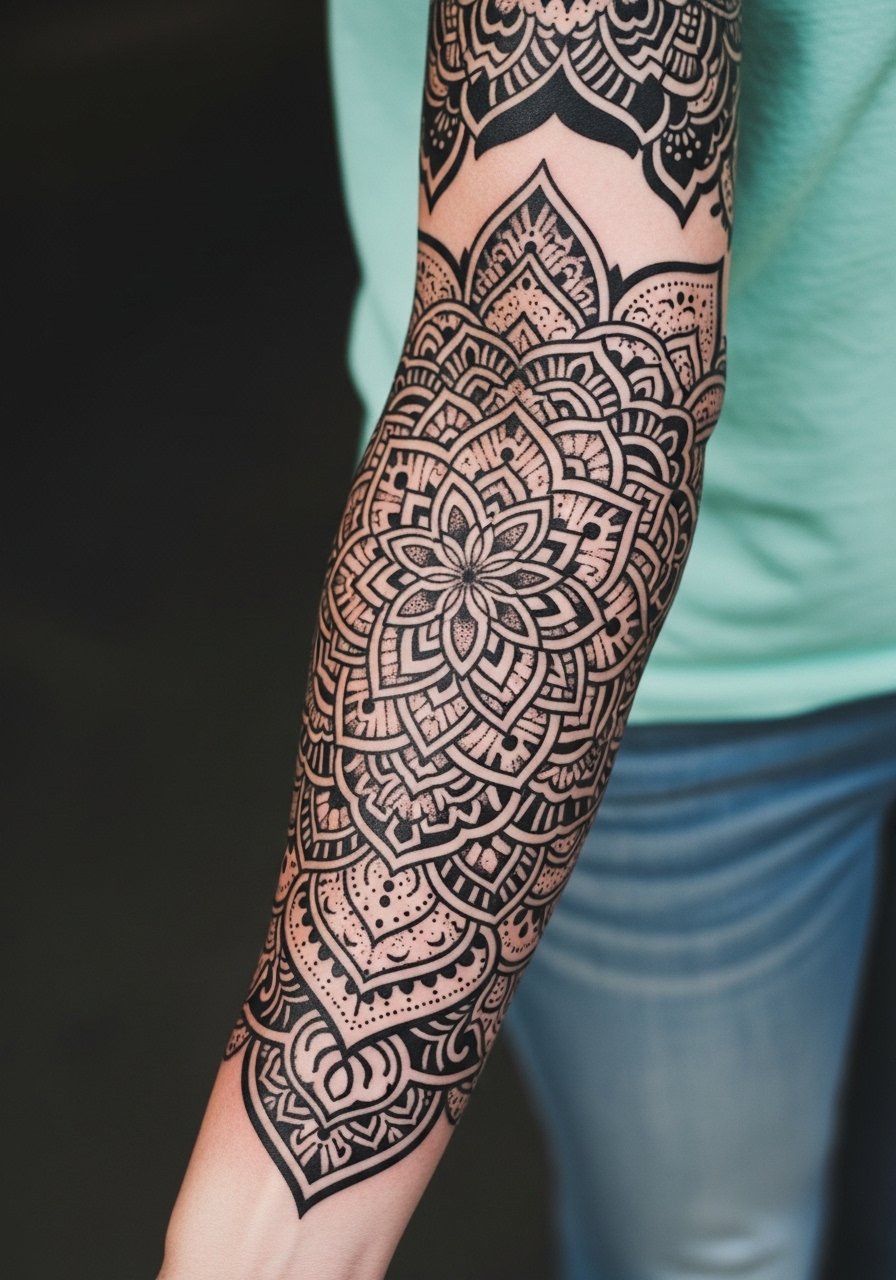
Sleeve mandalas combine symmetry and body flow. They’re designed to move with muscles and curves, so consult an artist experienced in arm wraps. Plan multiple sessions; expect moderate pain in inner arm areas. Blackwork and dotwork together provide long-term clarity. Avoid overfilling with tiny details that blur; let negative space breathe.
11. Triangle With Inner Circle On Finger Side
Style/Technique: Fine Line Minimalist
Pain Level: High (6-8/10 for finger)
Session Time: Short session, high touch-ups likely
Best For: Tiny symbolic placement, very visible

Finger geometry is intimate and symbolic but notorious for fading. The triangle with an inner circle looks striking but expect touch-ups. Pain is high and healing is tricky due to constant motion. If you want longevity, ask for bolder lines and discuss aftercare rigor. Avoid tiny, ultra-fine detail that will disappear.
12. Hexagon Balance Pattern On Ribcage
Style/Technique: Blackwork Modular
Pain Level: High (7-8/10)
Session Time: 2 sessions for size and breathing room
Best For: Hidden, meaningful pieces that stay personal
Ribcage hex patterns are striking and intimate. The curve of the ribs can make modular patterns look dynamic. This is a painful area but worth it for a private piece. Blackwork keeps hex lines readable as skin shifts. Avoid overcrowding; leave negative space to maintain balance and reduce future blurring.
13. Square Metatron Cube Base On Sternum
Style/Technique: Architectural Geometric / Blackwork
Pain Level: High (7/10)
Session Time: 2–3 sessions for exacting lines
Best For: Centered chest geometry with grounding energy
Using a square base grounds the Metatron’s Cube visually. Sternum placement is dramatic but sensitive. Precision matters: small offsets ruin the symmetry. Expect careful stencil proofs and a steady hand from your artist. From what I’ve seen, blackwork ages best here — fine lines risk softening on chest movement.
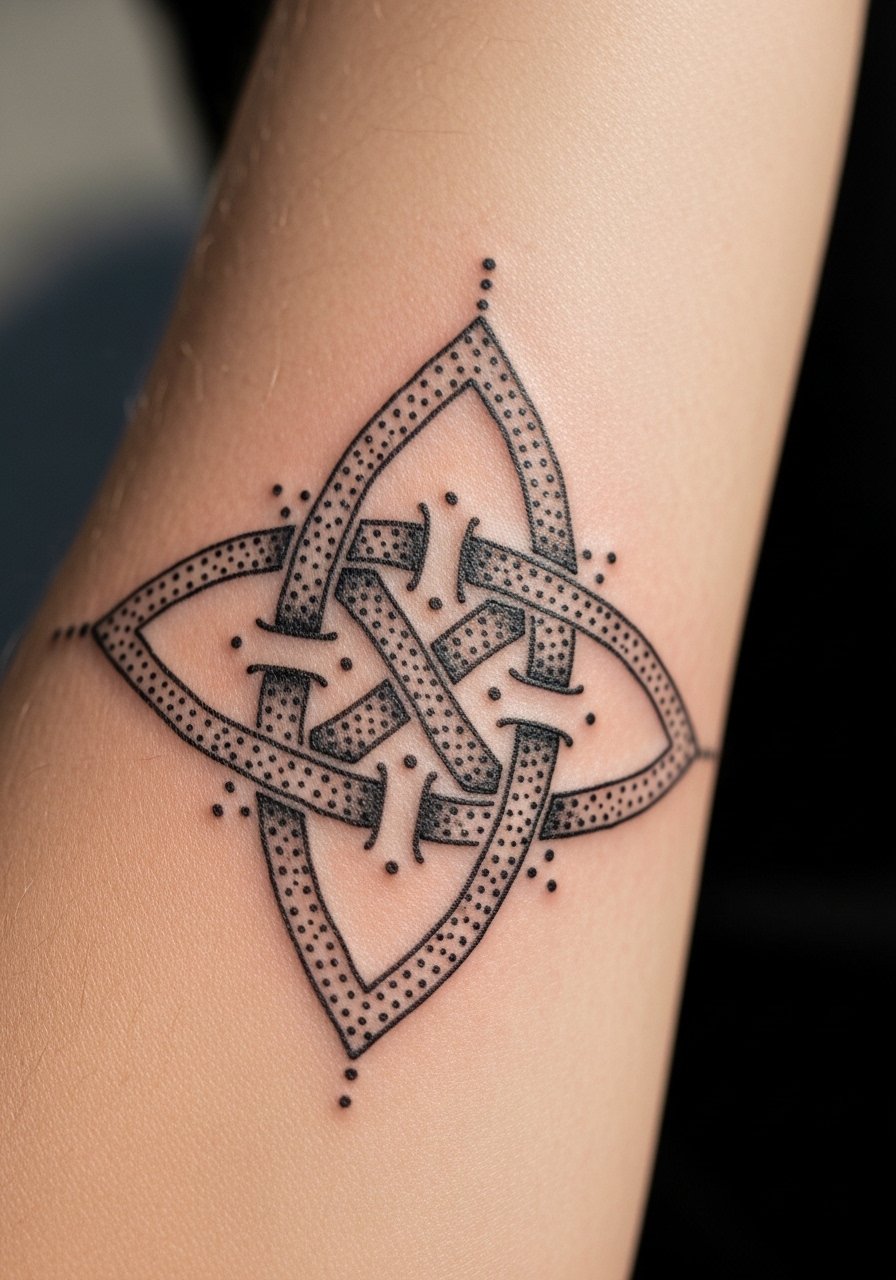
14. Micro Sacred Knot Handpoke On Wrist
Style/Technique: Handpoke / Organic Linework
Pain Level: Low-Medium (3-4/10)
Session Time: Short sessions, meditative pace
Best For: Folks wanting an organic, slightly imperfect look
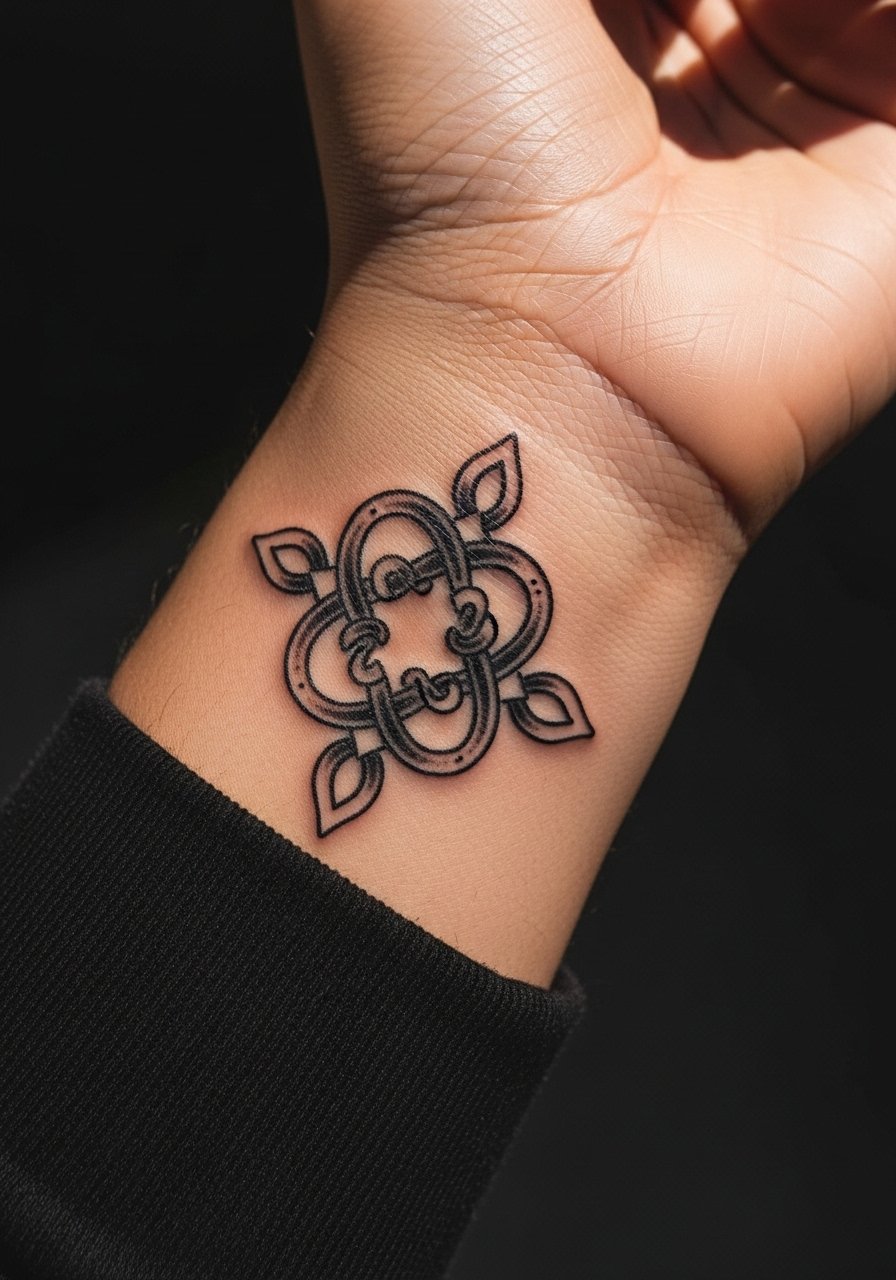
Handpoke geometry feels intimate and slightly raw. The imperfections are intentional and meditative. It’s lower impact in pain but requires an artist skilled in handpoke technique. Healing looks different from machine work — lines may be softer. This is a great way to get a tactile, handmade aesthetic rather than crisp machine geometry.
15. Half Mandala Behind Ear
Style/Technique: Fine Line / Minimal Mandala
Pain Level: Medium (4-5/10)
Session Time: Short session
Best For: Small decorative symmetry, semi-hidden
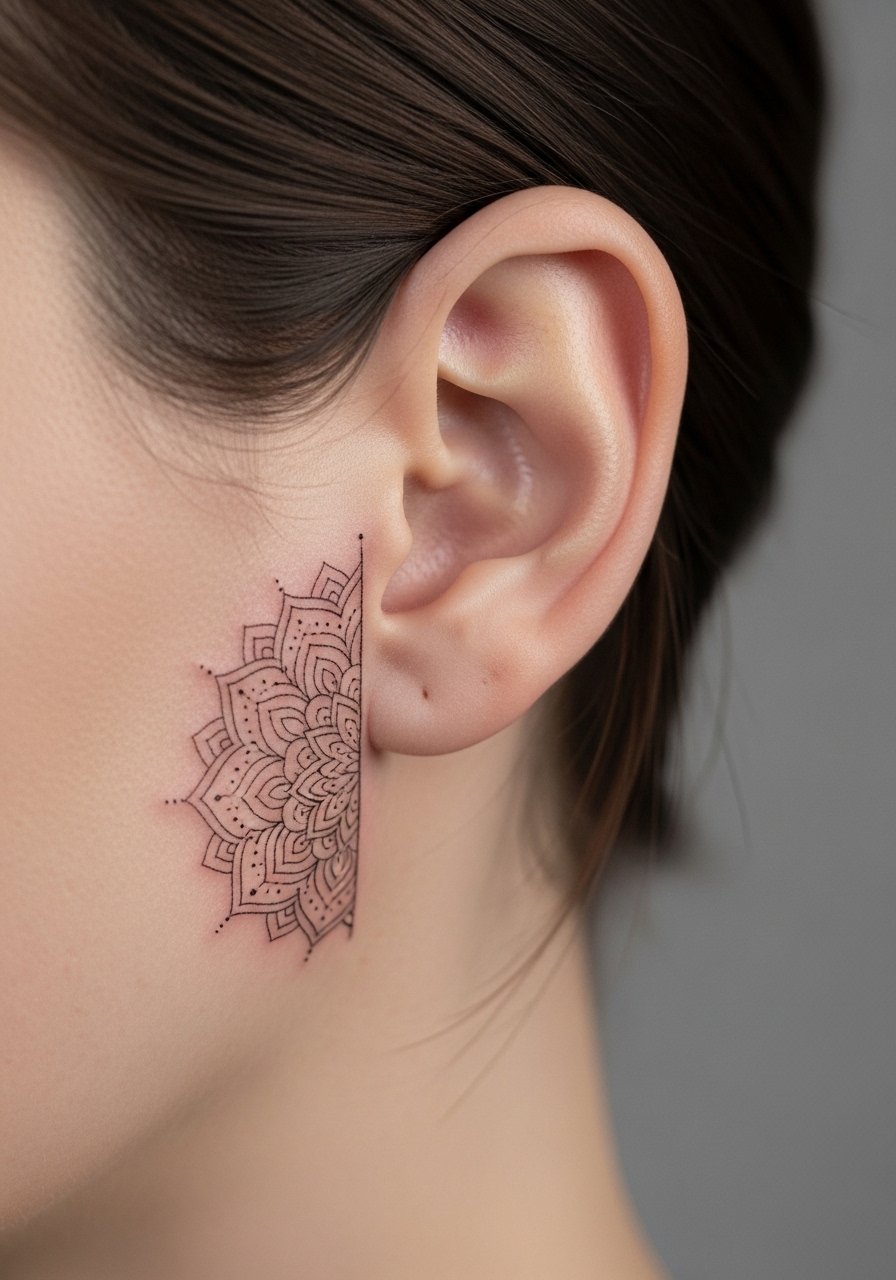
A half mandala behind the ear gives a hint of symmetry without taking up a lot of space. It’s subtle and ages okay if lines aren’t ultra-thin. Pain is moderate and healing needs careful sleeping position attention. The main mistake is cramming too many petals; keep design airy so it reads healed.
16. Geometric Animal Hybrid On Shoulder Blade
Style/Technique: Geometric + Figurative Blackwork
Pain Level: Medium (4/5/10)
Session Time: 2 sessions for form and geometry
Best For: Symbolic animal motifs with sacred structure
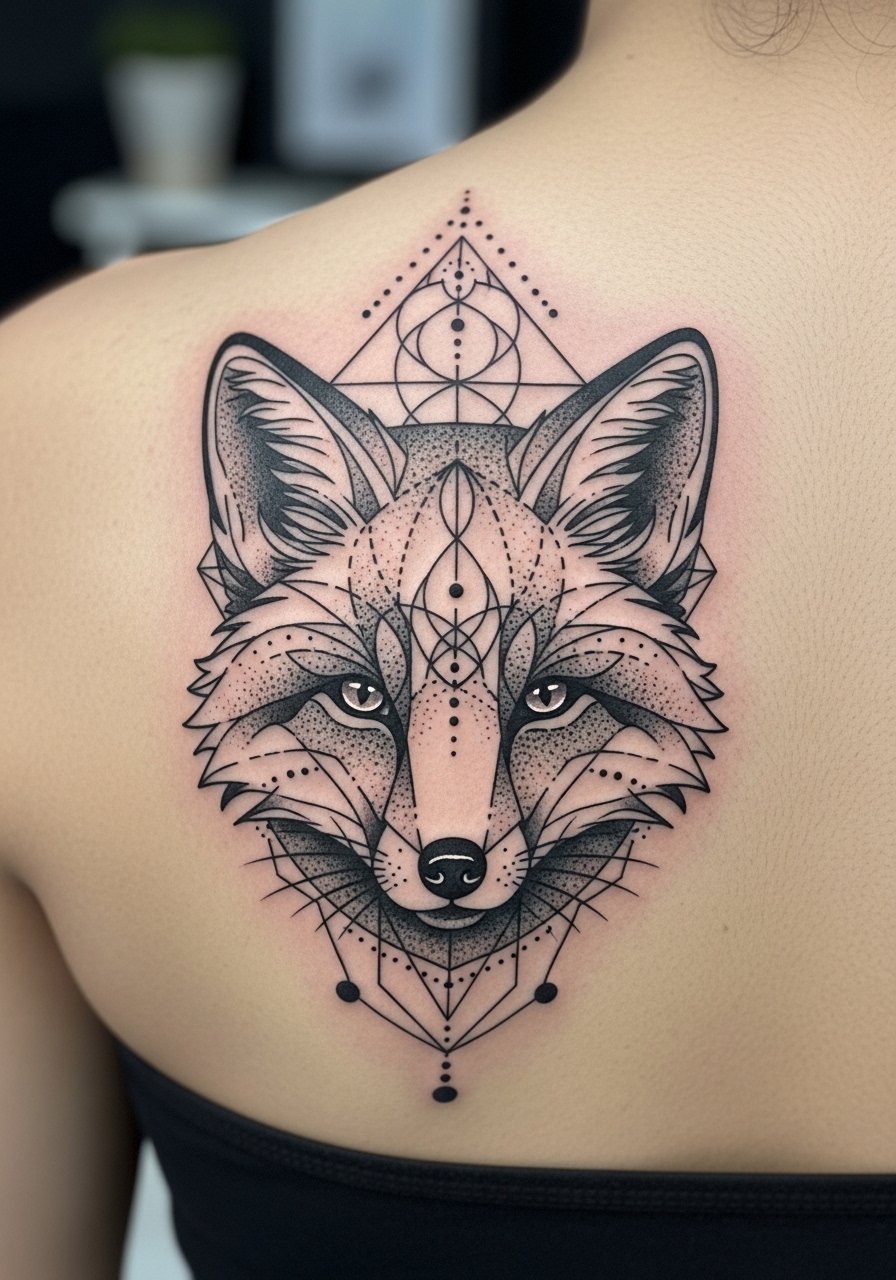
Mixing sacred geometry with animal forms gives a personal edge. The shoulder blade provides a flat plane for both figurative shape and precise geometry. Artists who blend dotwork and blackwork will make the hybrid look cohesive. Avoid overcomplicating the animal’s geometry — keep core shapes readable.
17. Orbital Sphere Ankle Band
Style/Technique: Minimal Geometric Band / Blackwork
Pain Level: Medium (4/10)
Session Time: Single session
Best For: Subtle wrap-around symmetry
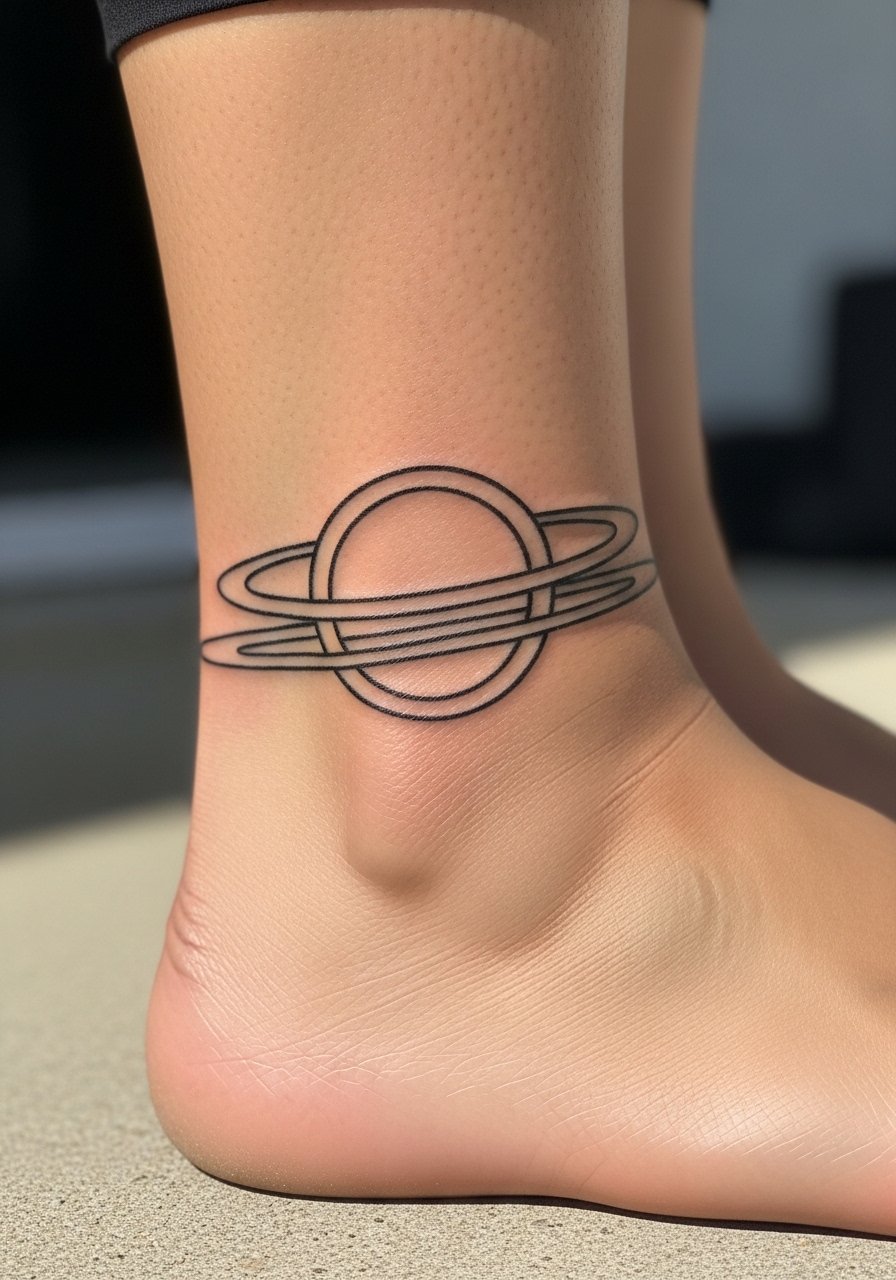
An ankle orbital band is a discreet way to wear sacred geometry daily. The band wraps and follows the ankle’s curve; spacing must be consistent. Pain is moderate and healing benefits from low-friction clothing. A frequent error is making lines unequal around the curve — insist on a test wrap and transfer before inking.
18. Interlocking Triangles On Sternum
Style/Technique: Fine Line / Minimal Ornament
Pain Level: High (6-7/10)
Session Time: Short but precise session
Best For: Bold center-chest symbolism with geometry focus
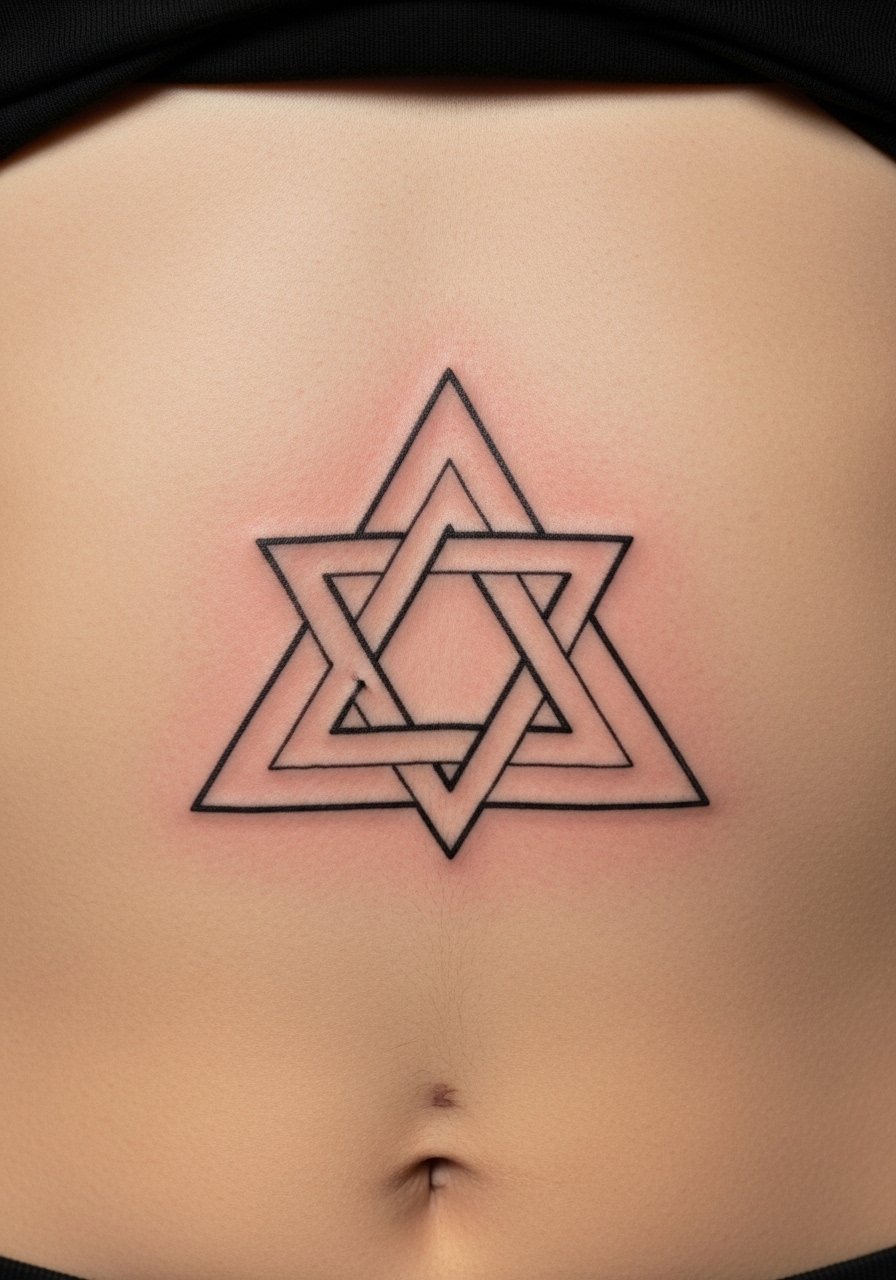
Interlocking triangles are compact but symbolic. The sternum draws attention and needs perfect alignment. Expect soreness and a careful aftercare window. For age resistance, ask for slightly reinforced line weight; razor-thin triangles can blur together over time. Ask to see healed sternum examples from your artist.
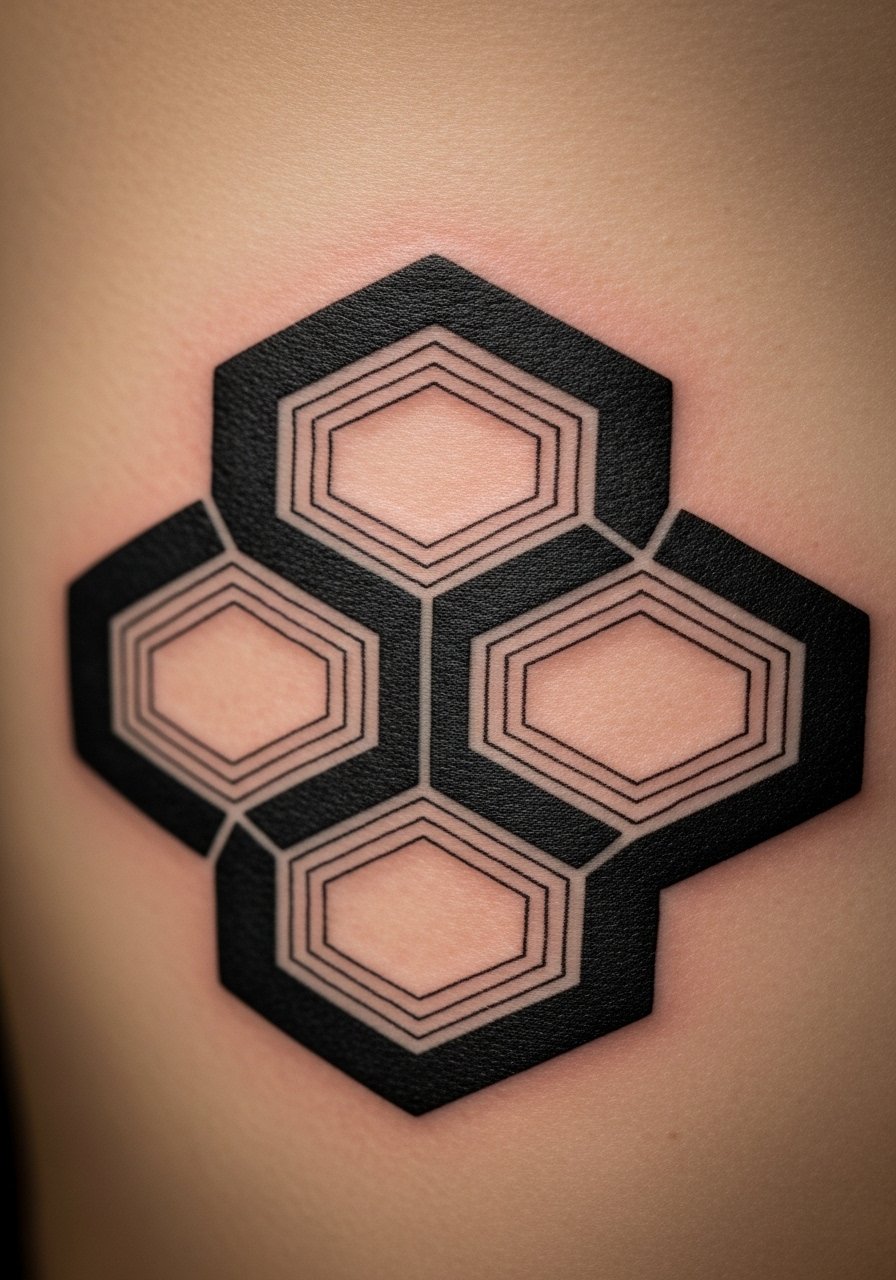
19. Concentric Hexagons On Upper Arm
Style/Technique: Blackwork / Modular Repeats
Pain Level: Low-Medium (3-4/10)
Session Time: Single session for medium size
Best For: Bold but understated arm piece
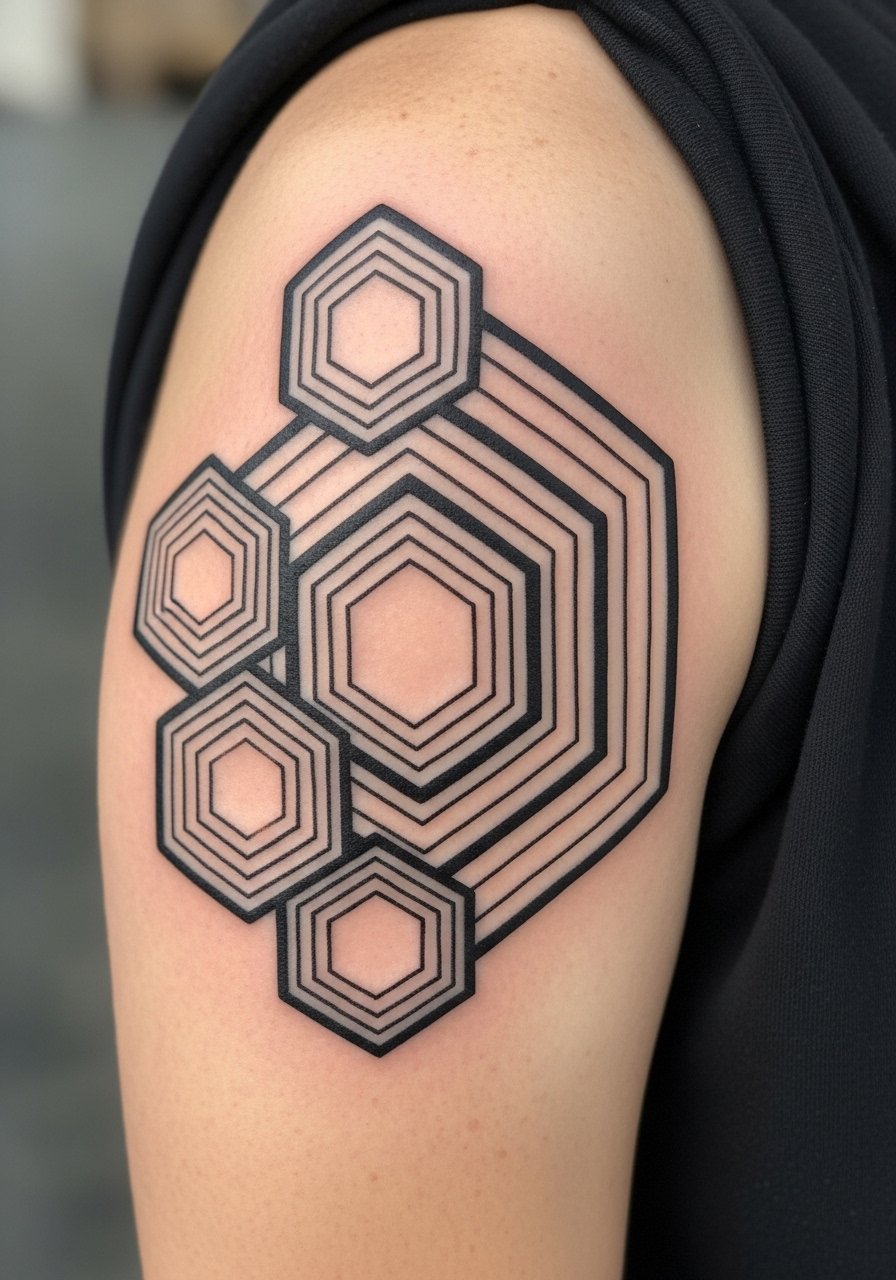
Concentric hexagons create a stable, honeycomb-like feel. Upper arm placement is forgiving and low-pain. This design is durable — bold outlines keep the geometry readable as it ages. Avoid too many micro-lines inside hexagons; keep contrast for longevity. Artists who work with modular repeats will nail spacing.
20. Fibonacci Spiral Across Bicep
Style/Technique: Illustrative Geometric / Fine Line
Pain Level: Low-Medium (3-4/10)
Session Time: 1–2 sessions for flow and contouring
Best For: Organic math-inspired look that follows muscle curve
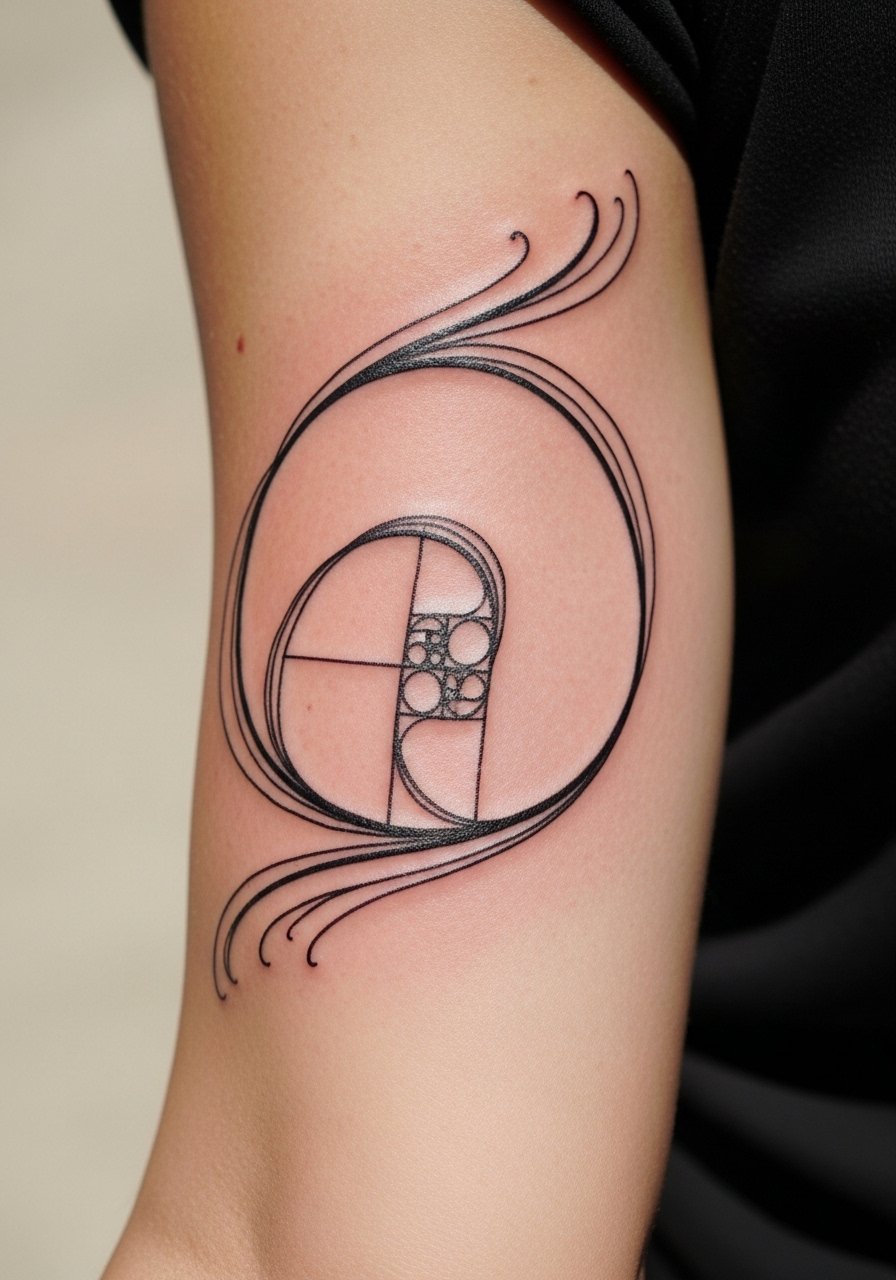
Fibonacci spirals look natural on curves like the bicep. The design blends nature and math and reads like motion. Keep lines a touch bolder where they might soften over time. A mistake I see is forcing an overly precise mathematical overlay without fitting it to body contours — ask your artist to map it to your muscle lines.
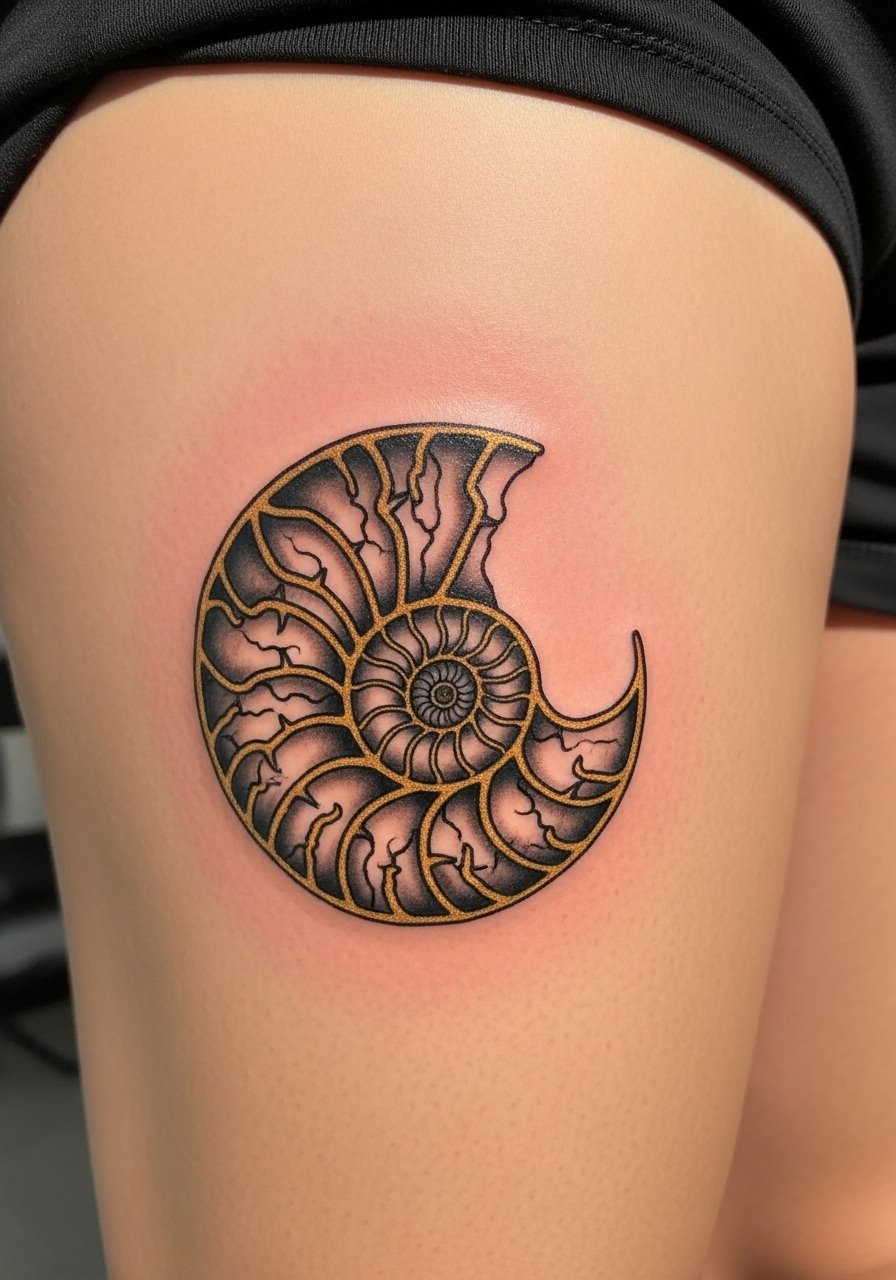
21. Chambered Nautilus Thigh Accent
Style/Technique: Illustrative / Golden Ratio Emphasis
Pain Level: Low (2-3/10)
Session Time: 1–2 sessions depending on size
Best For: Feminine, nature-inspired sacred geometry
The chambered nautilus is an elegant way to wear the golden ratio. Thigh placement is low-pain and allows larger scale without distortion. This motif ages well with bold outlines and soft shading. Common mistake: cramming too much tiny internal detail; let the spiral breathe for clarity.
22. Handpoke Sacred Knot On Forearm Wrap
Style/Technique: Handpoke / Organic Geometric
Pain Level: Low-Medium (3/4/10)
Session Time: Multiple short sessions
Best For: Meditative process tattoo with handmade look
A handpoke forearm wrap feels intentional and slightly imperfect in a good way. The technique creates a tactile texture that blackwork machines don’t replicate. Expect a longer, meditative process and a natural softening of lines. It’s a lovely choice if you want something that reads as handmade rather than precisely machined.
23. Dotwork Seed Of Life Calf Panel
Style/Technique: Dotwork Panel / Blackwork Accents
Pain Level: Low (3/10)
Session Time: 1–2 sessions
Best For: Expandable calf geometry that can connect to leg pieces
A calf panel of Seed of Life lets you build outward into larger geometric systems. Dotwork gives depth while black outlines anchor the piece. Calf placement is forgiving and ages well. Avoid overly faint dotwork — ask for contrast to survive years of movement and sun exposure.
24. Symmetric Spine Line Mandala
Style/Technique: Fine Line + Blackwork Vertical Mandala
Pain Level: High (7/10)
Session Time: Multiple sessions for symmetry and flow
Best For: Elegant, centered back pieces that read down the spine
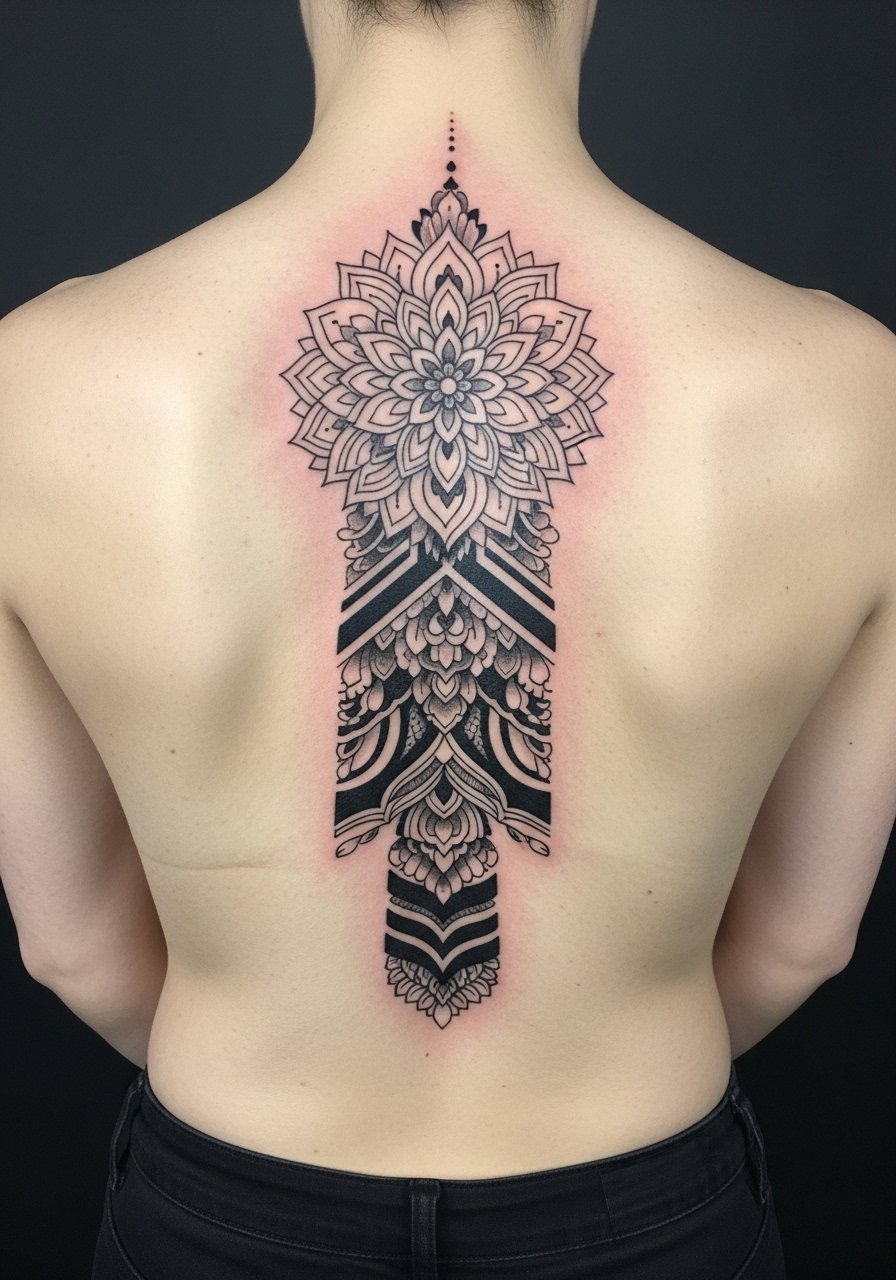
A vertical mandala online the spine feels deliberate and balanced. The trick is mapping to spinal anatomy so each tier sits symmetrically. Pain can be high near the vertebrae. Artists who study body symmetry and divine proportions will ensure the mandala reads as intended. Avoid freehand stencils without precise measuring.
25. Micro Geometry On Side Rib (Tiny Panel)
Style/Technique: Fine Line Micro-Geometry
Pain Level: High (7-8/10)
Session Time: Short session but sensitive area
Best For: Tiny sacred piece with private placement
Small micro-geometry on the ribs is intimate and symbolic, but ribs are unforgiving for fine lines. If you want a tiny piece here, accept touch-ups may be needed. I usually recommend slightly stronger line weight to retain shape. Don't insist on ultra-micro detail unless your artist shows healed rib examples.
26. Mandala Chest Plate Around Clavicles
Style/Technique: Ornamental Blackwork / Fine Line Accents
Pain Level: Medium-High (5-7/10)
Session Time: Multi-part session for symmetry
Best For: Decorative upper-chest architecture
A clavicle mandala frames the chest beautifully and ties into body symmetry. This placement needs precise centering and an artist who comps to the clavicle line. Healing is straightforward if aftercare is followed; avoid clothing that rubs excessively during the first two weeks. Keep inner details balanced with negative space.
27. Layered Circles On Shoulder Blade
Style/Technique: Minimal Blackwork / Layered Geometry
Pain Level: Low-Medium (3-4/10)
Session Time: Single session for medium size
Best For: Subtle depth with minimalism
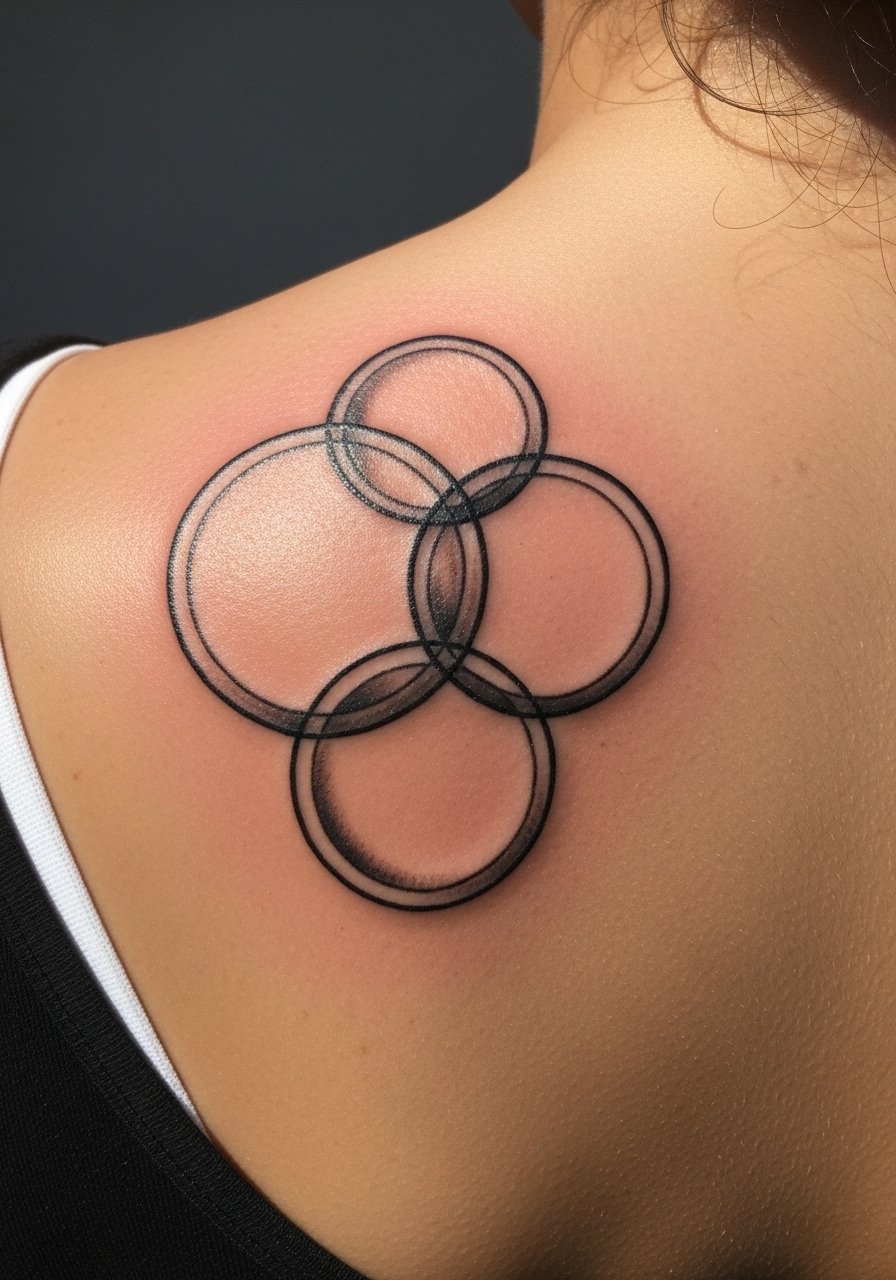
Layered circles create depth without heavy ornament. Shoulder blade placement is low-pain and easy to conceal. Use slightly varied line weights so layers remain visible as skin ages. Avoid putting too many concentric rings — clarity beats complexity here.
28. 3D Torus On Thigh With Shading
Style/Technique: 3D Blackwork / Illustrative
Pain Level: Low-Medium (3-4/10)
Session Time: 2 sessions for depth and gradient
Best For: Sculptural geometric pieces on curved surfaces
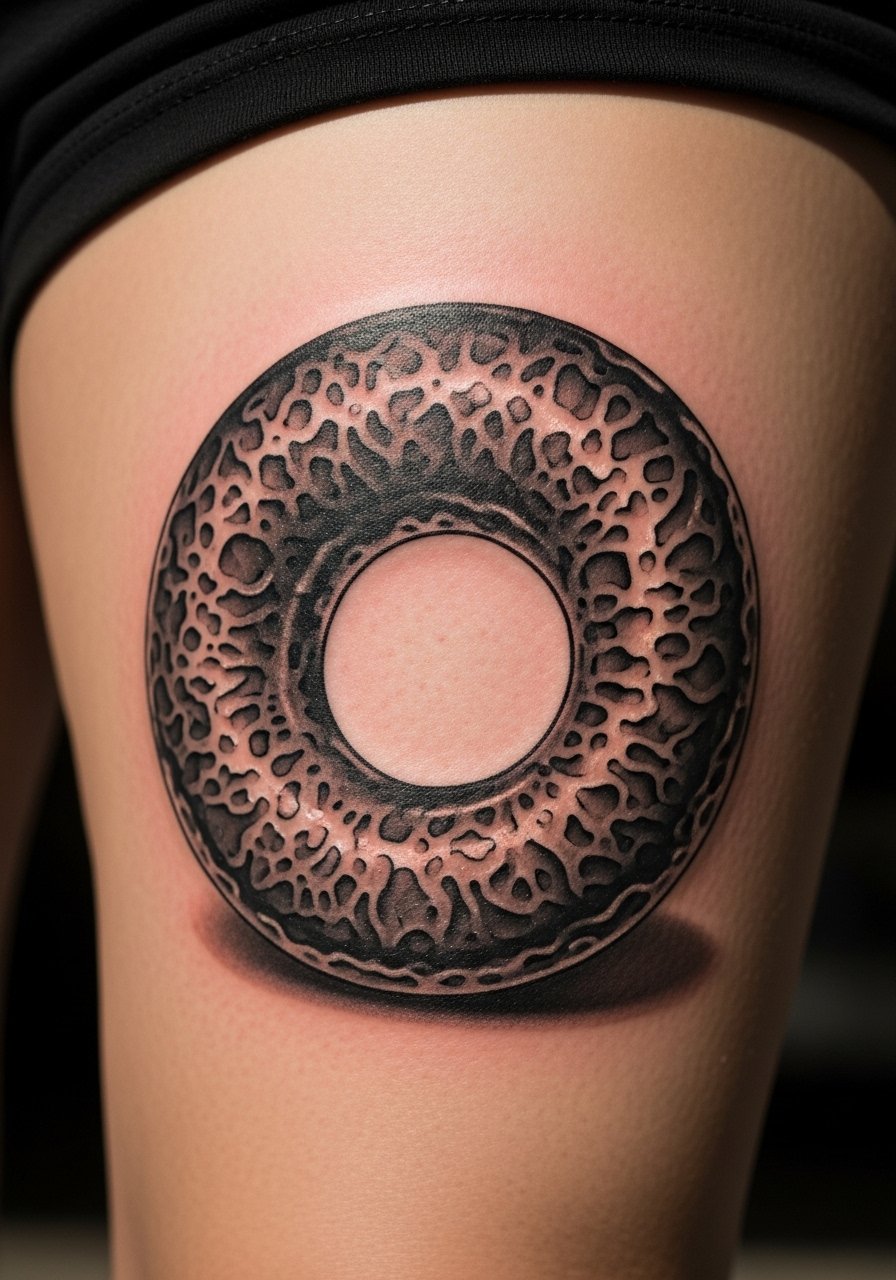
A shaded torus reads like a sculpture on skin. The thigh’s curvature supplements the 3D illusion. Artists who understand light and gradient will make it pop. Keep contrast strong and avoid soft gray-only approaches that can flatten with time.
29. Fruit Of Life Patchwork Sleeve Start
Style/Technique: Dotwork Modular Sleeve Starter
Pain Level: Medium (4-5/10)
Session Time: Multiple sessions — planned expansion
Best For: Collectors building a sacred geometry sleeve over years
Starting a Fruit of Life sleeve as a patchwork lets you add layers, animals, or spirals later. It’s modular and forgiving if you plan ahead. Use dotwork to add texture and blackwork to frame zones. Avoid inconsistent spacing between spheres — it makes expansion awkward.
30. Golden Ratio Jawline Curve Accent
Style/Technique: Fine Line / Subtle Curve
Pain Level: Medium (4-6/10 near jaw)
Session Time: Short session for placement accuracy
Best For: Subtle, asymmetric placement that follows facial bone
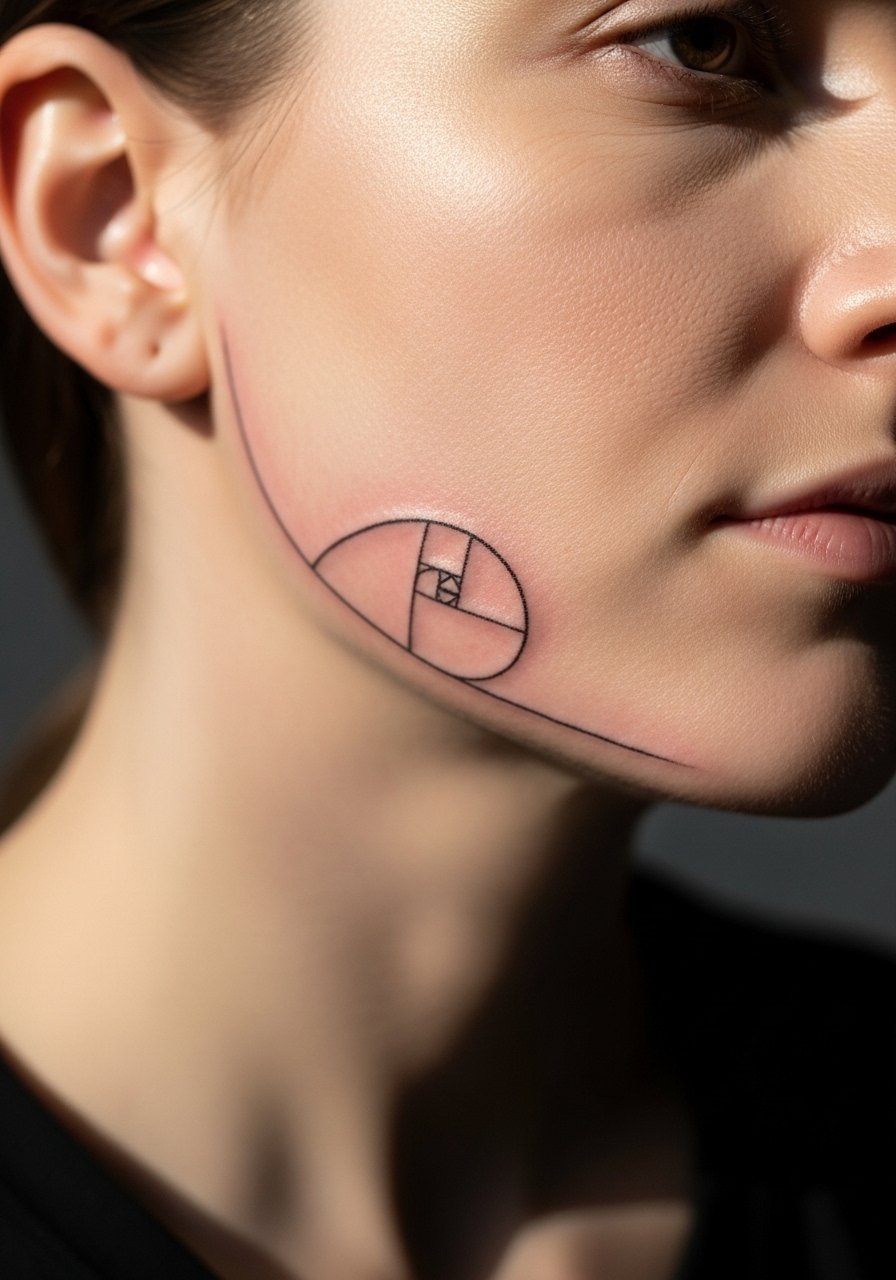
A golden-ratio curve near the jaw is unexpected and elegant. Placement must respect facial anatomy, so choose an artist who sketches directly and maps proportions. Healing is manageable but watch for irritation from shaving or clothing contact. Keep the curve simple to retain readability.
Tattoo Prep and Aftercare Essentials
Aftercare Essentials:
- Aquaphor Healing Ointment, 14oz tube — For first 3–5 days to protect fresh lines
- Saniderm Transparent Adhesive Bandage, 6-inch roll — Second-skin healing option many artists recommend
- CeraVe Fragrance-Free Moisturizing Lotion, 16oz — Lightweight daily moisturizer for days 4–14
- Dr. Bronner's Unscented Castile Soap, 8oz — Gentle cleaning during first week
Before Your Appointment:
- Tattoo Numbing Cream with Lidocaine 5% — Use only if your artist approves, 30–45 minutes before
- Tattoo Stencil Transfer Paper (A4 Pack) — Handy if you design or test placements at home
Long-Term Maintenance:
- SPF 50 Sunscreen Stick for Tattoos — Daily UV defense to prevent fading
- Mad Rabbit Tattoo Balm — Recommended by some artists for ongoing vibrancy
- Hustle Butter Deluxe 8oz — Vegan aftercare alternative for healed tattoo maintenance
Optional Comfort Items:
- Tattoo Numbing Spray — For touch-ups or sensitive areas (ask artist first)
- Hydrocolloid Bandages (Large) — Useful for small healing patches or friction spots
From my experience, artists I follow often mention Saniderm and Aquaphor as practical essentials. Mad Rabbit and Hustle Butter come up a lot in long-term maintenance conversations.
Frequently Asked Questions
Q: How bad does a tattoo actually hurt?
A: Pain depends on placement more than size. Outer arm and thigh are easier (around 2–4/10); ribs, spine, and fingers can hit 7–9/10. It’s more of a persistent scratching or burning. If you’re nervous, ask about a numbing cream with lidocaine and pick a less sensitive area for your first sacred geometry tattoo.
Q: Will fine line sacred geometry blur over time?
A: From what I’ve seen, ultra-fine single-needle work can soften. Blackwork and slightly bolder line weights age best for geometric clarity. If you want tiny sacred geometry, expect touch-ups down the line and prioritize healed examples from your artist.
Q: How do I keep my geometric lines sharp long-term?
A: Sunscreen and moisturizer are non-negotiable. Use an SPF 50 sunscreen stick daily and keep skin hydrated with fragrance-free lotion. I’ve noticed UV exposure and dry skin are the biggest culprits in fading and loss of contrast.
Q: Can I exercise right after getting a tattoo?
A: Wait at least 48–72 hours, and longer for high-movement areas. Sweating and friction can interrupt healing and push out ink. For limb pieces, skip gym sessions for a week; always follow your artist’s specific timeline.
Q: Should I get a test tattoo first to see how my skin holds geometry?
A: Only if you actually want a small piece. Don’t get something you don’t love just to test pain. Instead, ask your artist to show healed examples on your skin tone and area. That gives a clearer expectation than a random test patch.
Q: How long until a tattoo is fully healed?
A: Surface healing is usually 2–3 weeks; full settling can take 2–3 months. The first week is critical — gentle cleaning with a mild soap and product like Aquaphor or using Saniderm if recommended will protect lines while skin regenerates.
Q: Do sacred geometry tattoos look different on darker skin tones?
A: Yes. Black and bold work tends to show up strongest across tones. Bright colors can appear muted on deeper skin, and white ink often disappears. I recommend asking to see healed work from your artist on skin similar to yours.
Q: What’s a common mistake people make with sacred geometry choices?
A: Picking ultra-dense detail in a tiny area. Sacred symbols need room to breathe. I’ve seen beautiful concepts ruined by cramming too much into a small canvas — choose scale and placement that let symmetry shine.
