
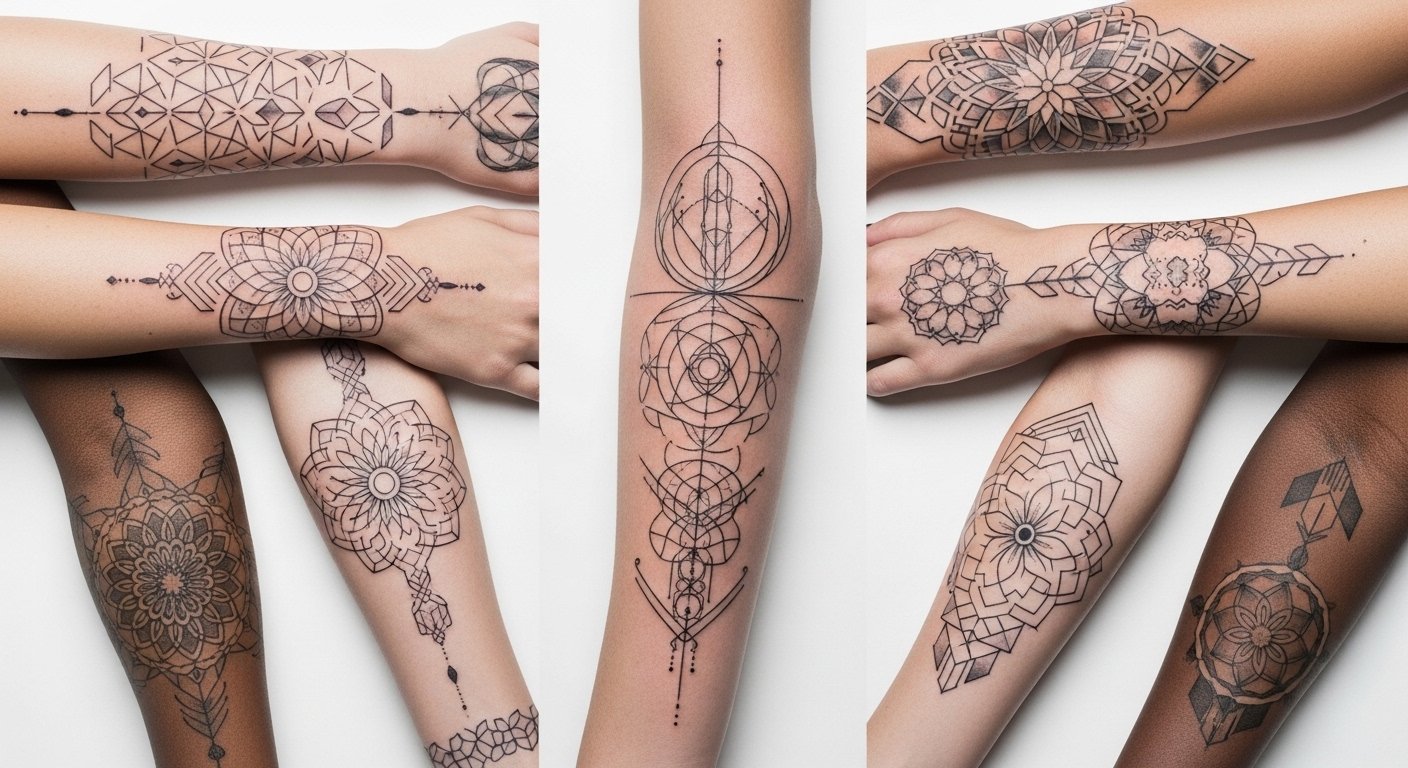
I spent months pinning geometric pieces before I realized the real question: which shapes and placements still look intentional years later? Geometric tattoos are precise, versatile, and surprisingly forgiving when planned right. Here are 30 ideas that read smart on day one and age well over time.
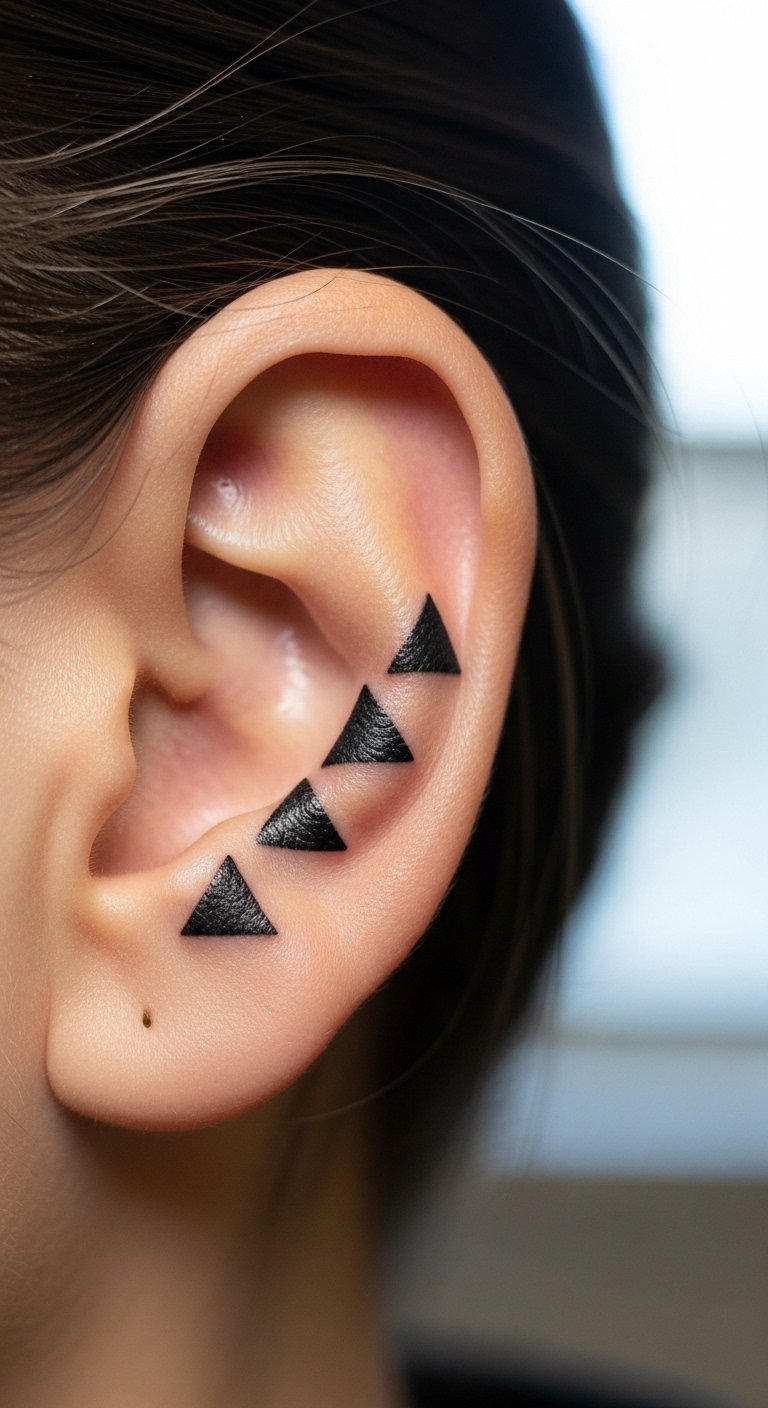
Minimalist Triangle Cluster Behind Ear
Style/Technique: Fine Line / Minimalist
Pain Level: Low (2-3/10)
Session Time: 30–60 minutes
Best For: First tattoo, hidden placement
I like tiny triangle clusters because they read intentional and spare. Behind the ear is low-pain and easy to hide with hair. Fine lines settle quickly but can blur if lines are too close—space them. Heal time is about 2–3 weeks; avoid sleeping on it. Common mistake: asking for hairline-thin lines—ask for slightly bolder single pass lines so the shapes remain crisp after healing. Look for artists who post healed micro geometric work.
Blackwork Geometric Mandala On Upper Back
Style/Technique: Blackwork / Mandala
Pain Level: Medium (4-5/10)
Session Time: 2–4 hours
Best For: Statement piece, covers wide flat area
A bold geometric mandala sits beautifully on the upper back. The symmetry creates a calm, intentional effect. Blackwork holds best over time—solid fills fade slower than thin lines. Expect surface healing in 2–3 weeks; full settling in a few months. Avoid overly intricate micro-details that will fuzz. Ask for examples of healed blackwork mandalas so you know how the negative space ages.

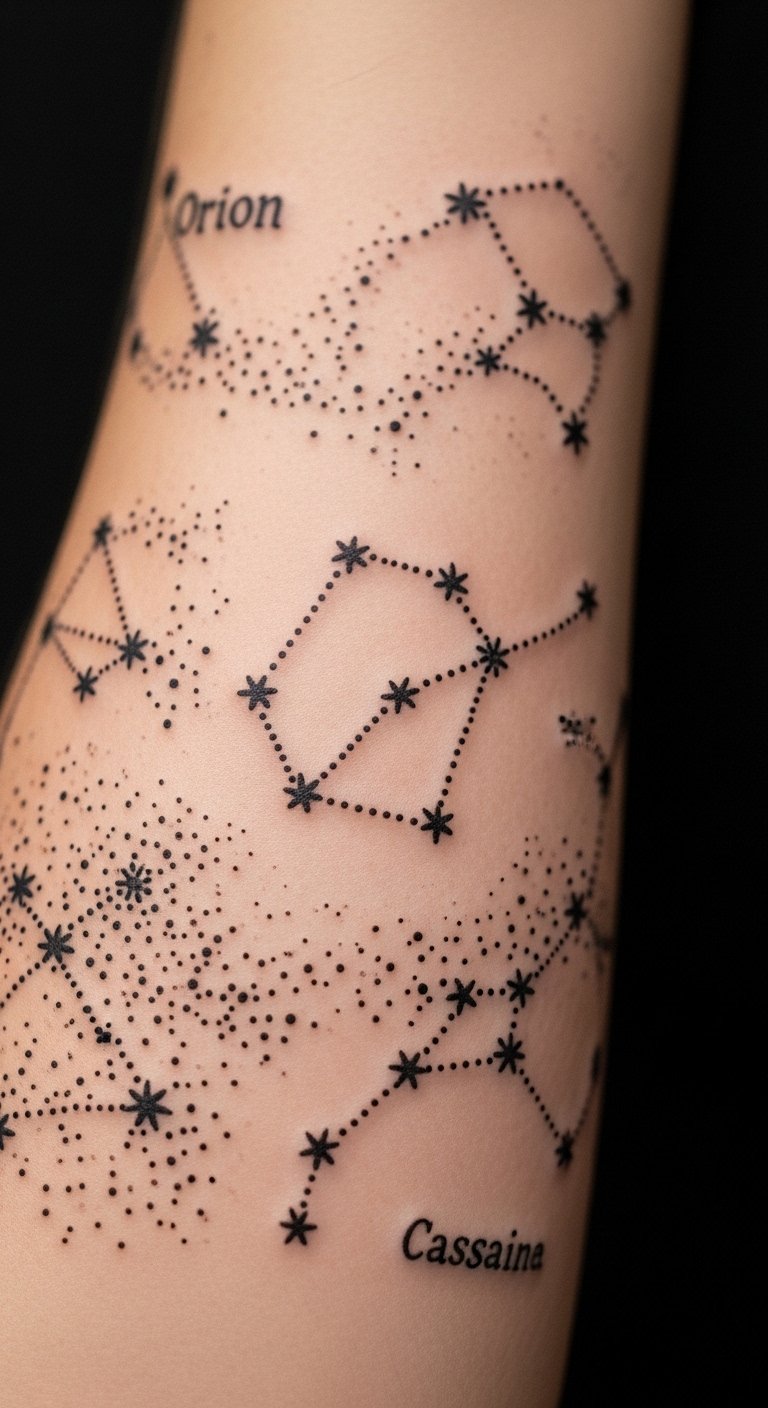
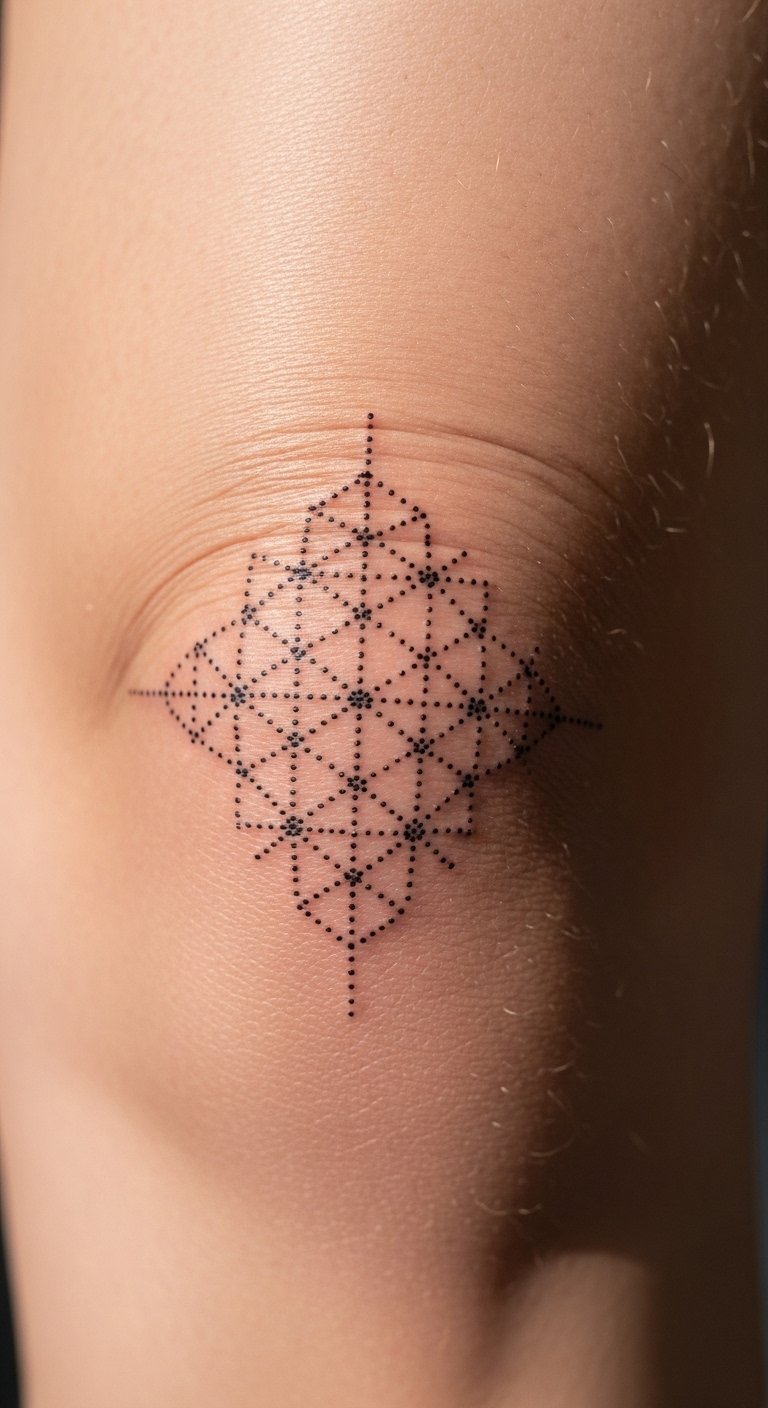
Dotwork Constellation Forearm Band
Style/Technique: Dotwork / Minimalist Band
Pain Level: Medium (3-4/10)
Session Time: 1–2 hours
Best For: Visible piece, easy to build into sleeve
Dotwork constellation bands feel intentional because every dot maps a coordinate. On the forearm they’re comfortable to heal and low-interruption for daily life. Dotwork can look patchy if dots are too sparse—ask for consistent spacing. Expect light scabbing and peeling days 3–7. Dotwork remains visually strong if done by a steady-hand artist who shares healed photos.
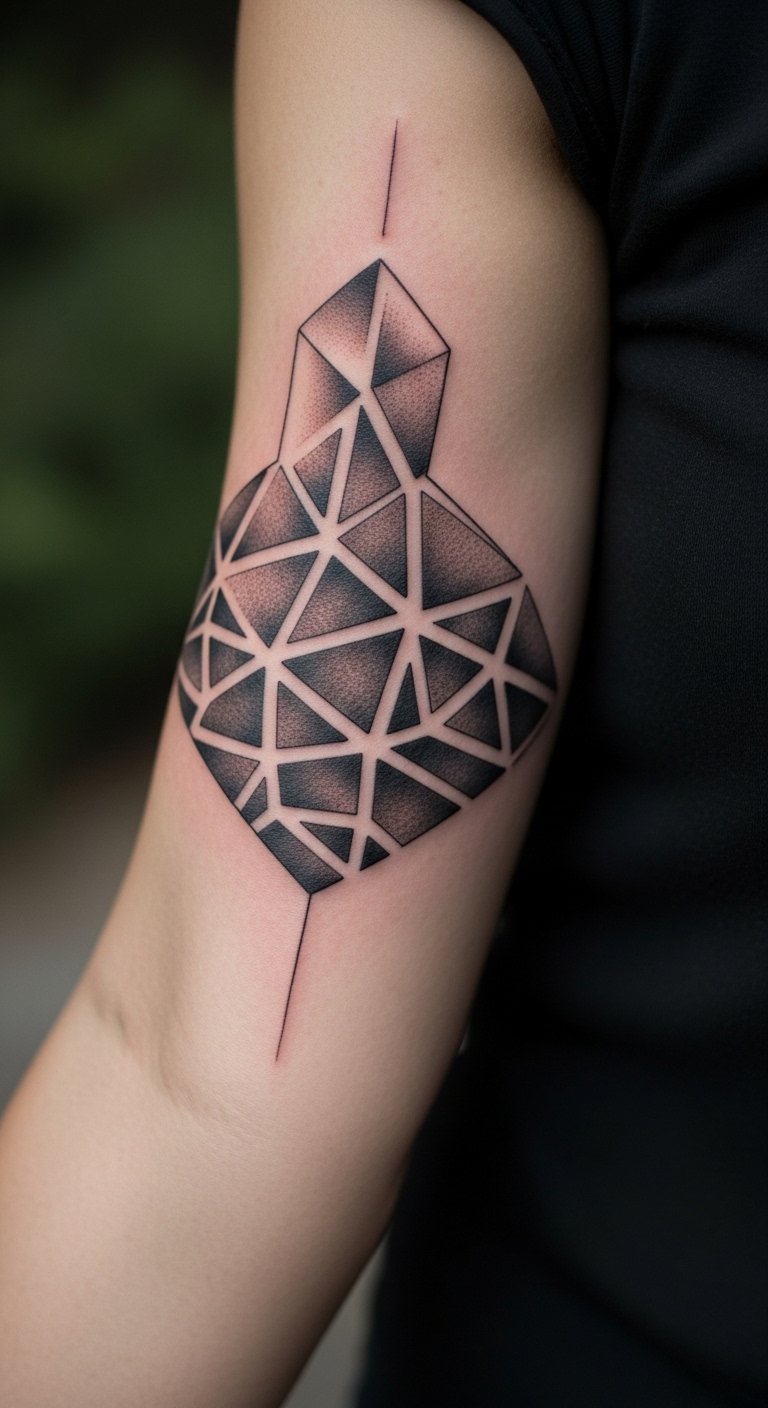
Interlocking Cubes On Inner Bicep
Style/Technique: Fine Line / Optical Geometry
Pain Level: Medium (4/5/10)
Session Time: 1–2 hours
Best For: Statement, upper-arm concealability
Interlocking cubes create a tactile, intentional 3D look. Inner bicep offers decent flat area and is modestly painful—expect more discomfort than outer arm. Fine lines need room; healed photos show slight softening in corners. Avoid tiny overlapping cubes that will merge. Ask your artist for grid-based stencils to ensure straight edges and consistent spacing.
Minimalist Line Mountains On Ankle
Style/Technique: Minimalist / Line Art
Pain Level: High (6-7/10)
Session Time: 30–90 minutes
Best For: Small, visible, travel-friendly
A simple geometric mountain range on the ankle feels purposeful and wearable. Ankles are bony and sting more; plan shorter sessions. Thin lines here tend to blur faster because skin is thin—bold the peaks slightly. Heal carefully to avoid rubbing from socks; expect surface healing in 2 weeks. This placement is great if you want a meaningful yet understated piece.

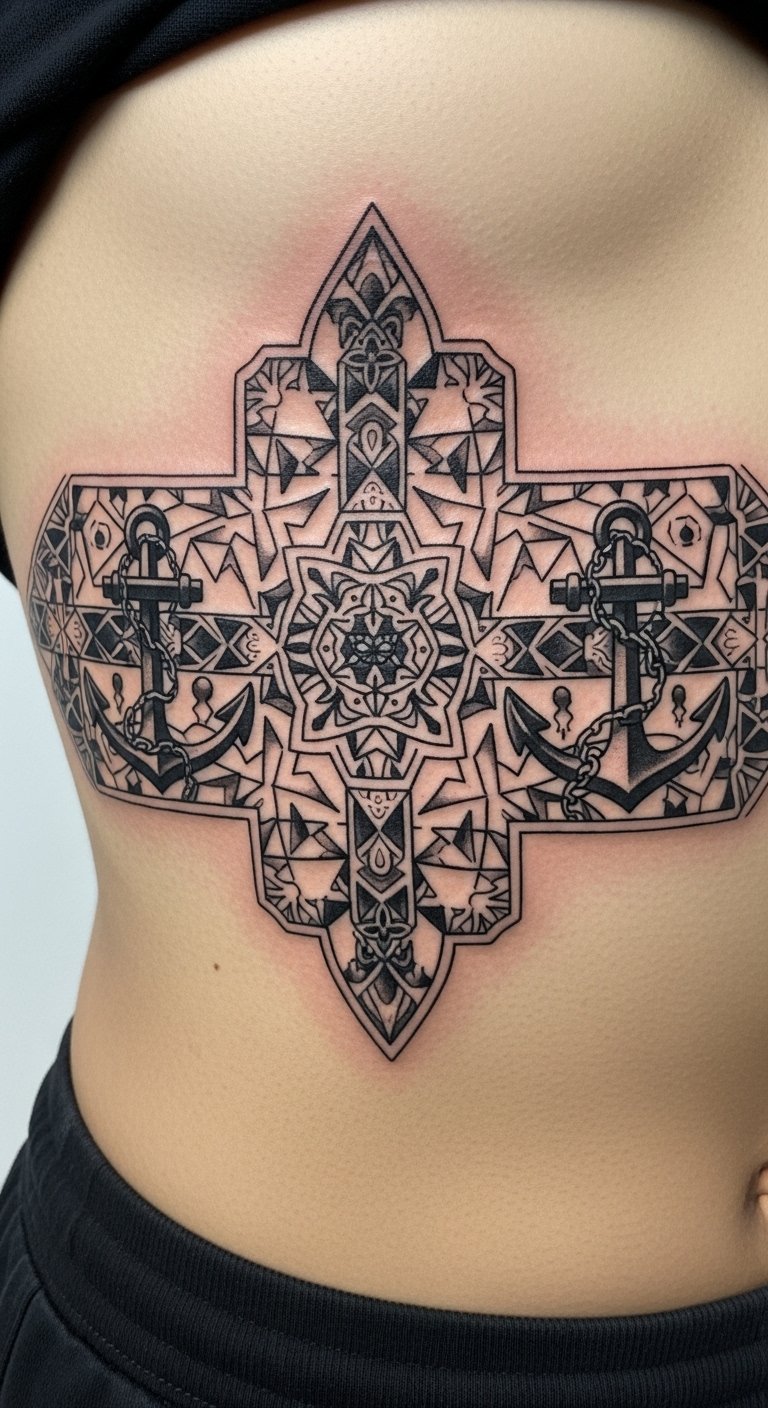
Symmetric Geometric Ribcage Panel
Style/Technique: Neo-Traditional Geometry / Blackwork Accents
Pain Level: High (8/10)
Session Time: Multiple sessions
Best For: Large, private, dramatic effect
The ribcage amplifies geometric symmetry for a dramatic, intentional panel. This area is painful and needs patience over multiple sessions. Healed results look striking if negative space and bold anchors are used—fine filigree can fade. Keep movement minimal during early healing and expect longer full recovery. A common mistake is over-detailing; scale up main shapes for longevity.
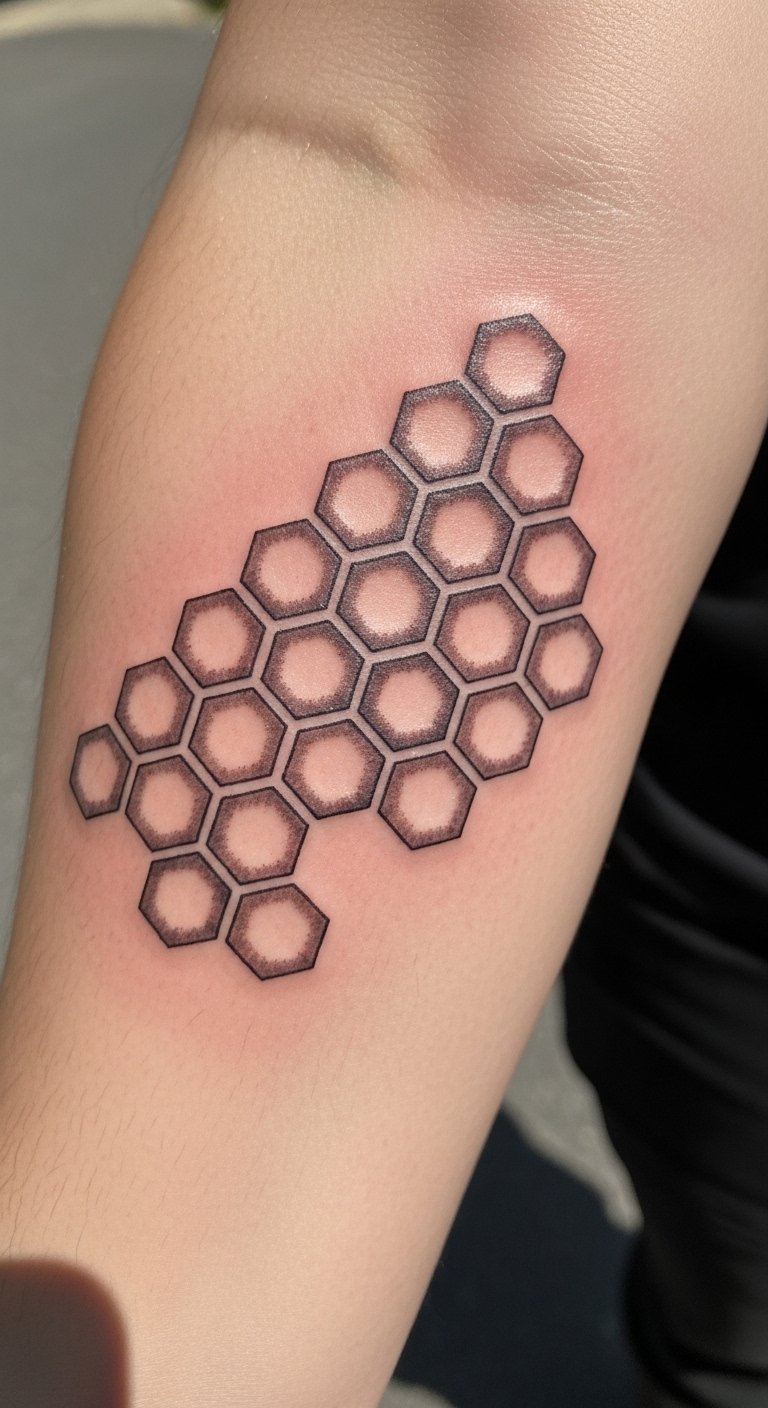
Hexagonal Honeycomb Sleeve Segment On Outer Forearm
Style/Technique: Blackwork / Repetitive Geometry
Pain Level: Medium (4/5/10)
Session Time: 2–4 hours per segment
Best For: Sleeve foundations, modular expansion
Honeycomb patterns read modern and intentional—great as sleeve building blocks. Outer forearm tolerates repeated sessions well. Solid black edges and negative space keep the pattern readable long-term. Watch for repeating seams where artist matches stencils; ask about flow into future pieces. Healing is straightforward; keep moisturized to preserve saturation.
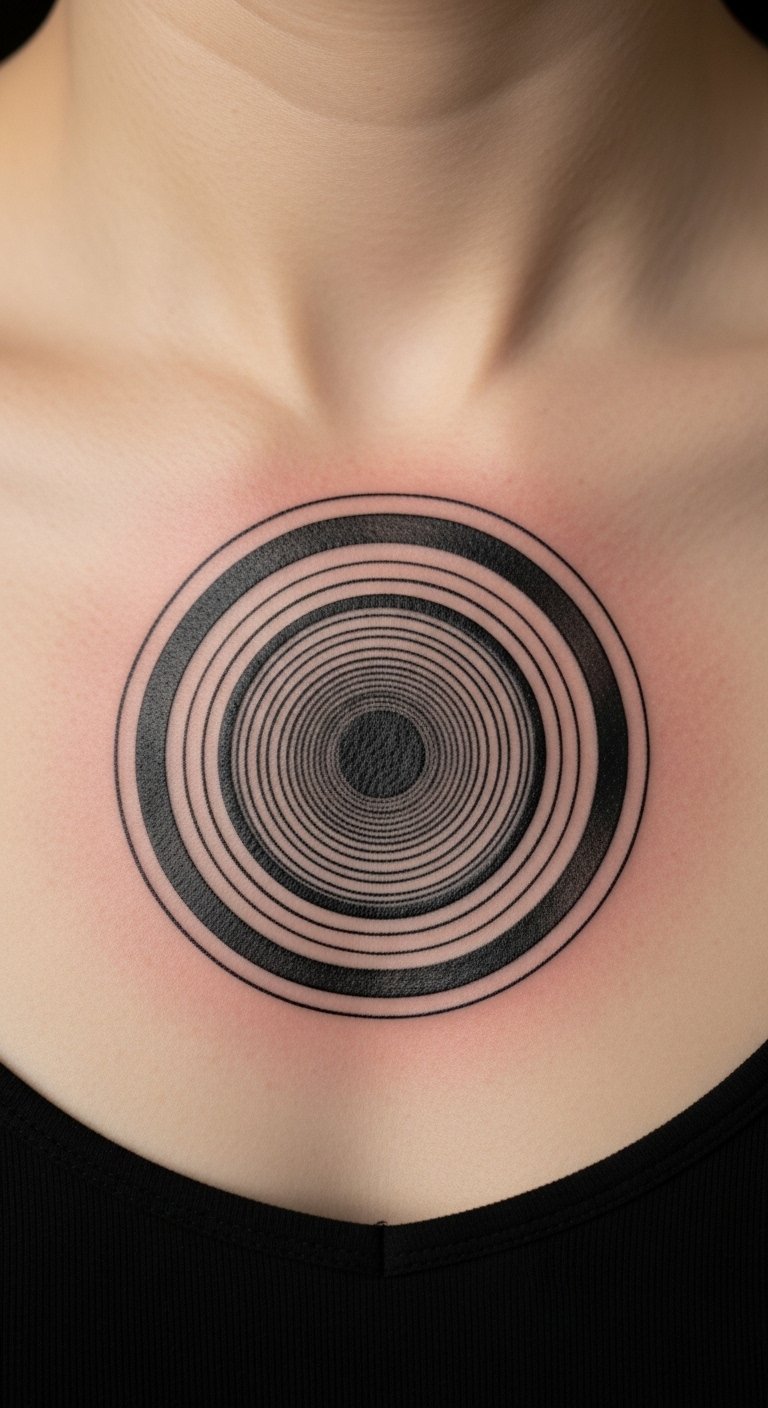
Optical Illusion Circle On Sternum
Style/Technique: Linework / Optical Illusion
Pain Level: High (7-8/10)
Session Time: 1–3 hours
Best For: Bold center-chest statement
Sternum placement emphasizes symmetry—an optical circle draws the eye inward. Expect higher pain and careful aftercare because movement and breathing affect healing. Lines should be slightly bolder than you'd think to compensate for potential springing of the skin. Ask for healed photos of sternum lines; this spot shows blurring if lines are too tight.
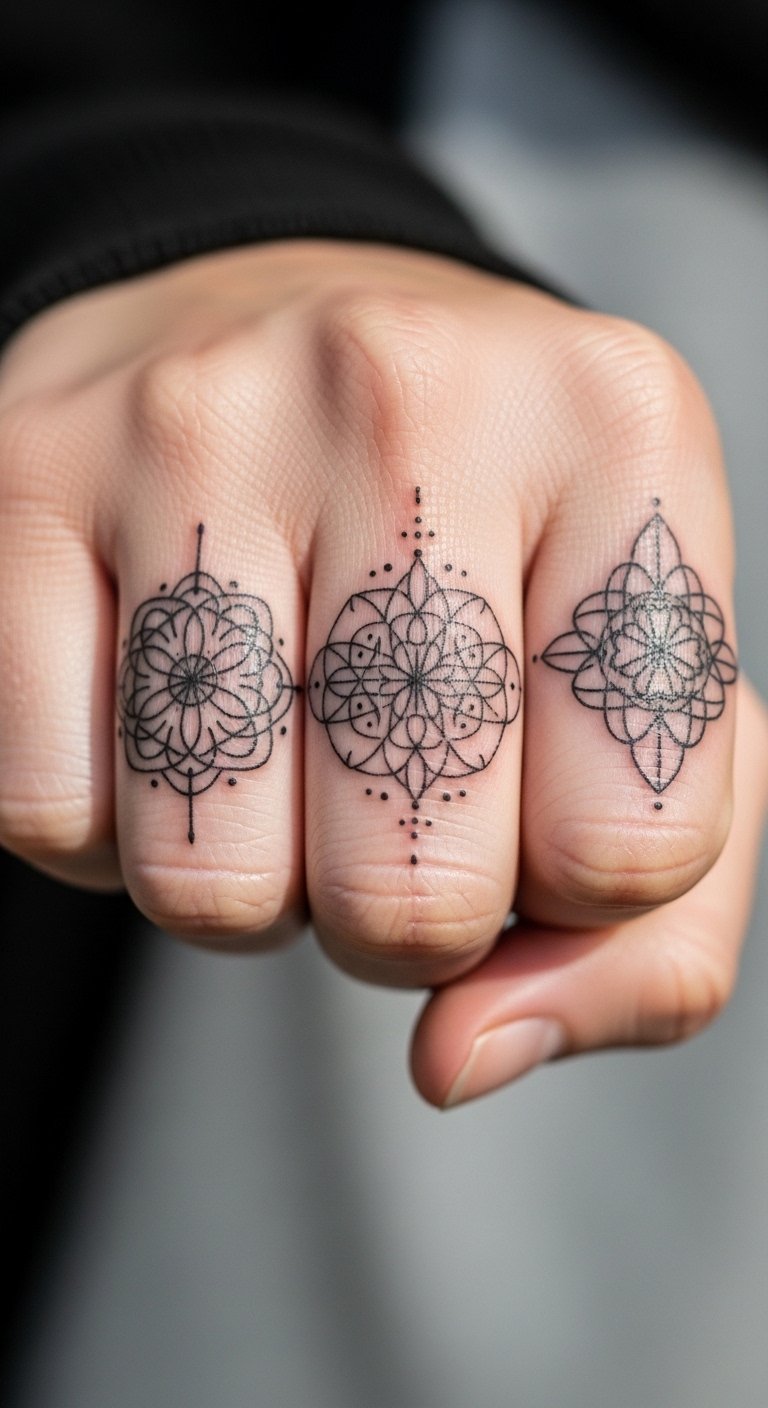
Sacred Geometry Finger Stack (Negative Space)
Style/Technique: Fine Line / Negative Space
Pain Level: High (8/9/10)
Session Time: 1 hour per finger
Best For: Tiny meaningful marks, visible hands
Finger geometry is intimate but high maintenance—ink here fades quicker because of wash-and-wear. Use bold negative-space shapes rather than micro-lines. Expect touch-ups; heal time is quick superficially but color needs months to settle. A common mistake: too many tiny details—keep shapes bold and simple for longevity.
Layered Triangles Over Clavicle
Style/Technique: Minimalist / Geometric Layering
Pain Level: Medium (4/5/10)
Session Time: 1–2 hours
Best For: Visible collarbone accent
Layered triangles along the clavicle read elegant and intentional. The area is sensitive but not brutal; thin lines settle nicely if not overly dense. Healed photos often show slight feathering where skin flexes—space layers for breathability. Avoid ultra-fine detail right on the clavicle bone; ask for slightly thicker strokes to keep definition.

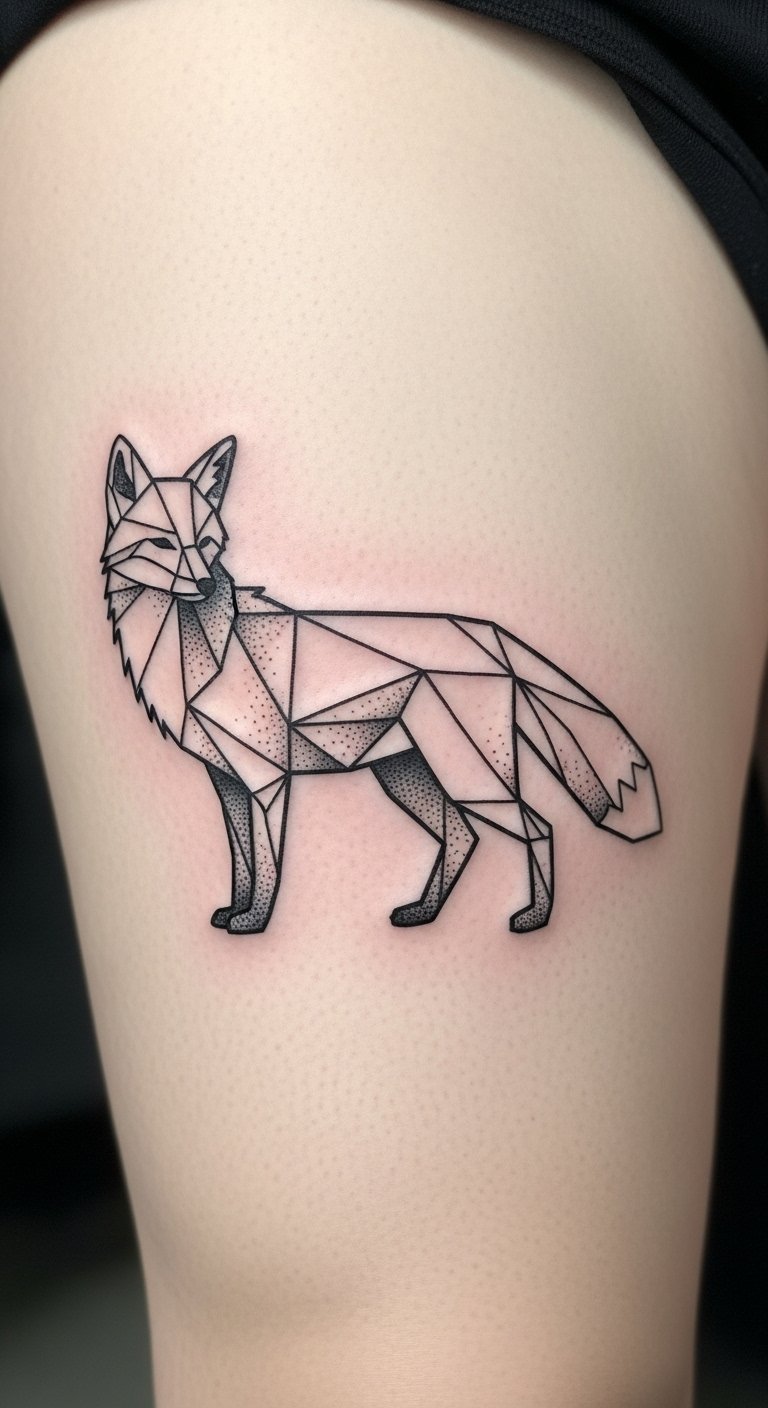
Geometric Animal Silhouette On Thigh
Style/Technique: Geometric / Neo-Illustrative
Pain Level: Low-Medium (3/4/10)
Session Time: 1–3 hours
Best For: Large, meaningful, easy to hide
I love geometric animal silhouettes for combining meaning with structure. Thigh skin heals readily and tolerates larger blocks of black or color. Healed pieces look solid; gradients or dotwork within the silhouette age well. Mistake to avoid: overly tiny facets—scale shapes so they remain distinct after healing. Bring reference images of healed geometric animal work.
Micro-Geometrics Behind Knee (Pop of Dotwork)
Style/Technique: Dotwork / Micro-Geometry
Pain Level: High (7/8/10)
Session Time: 30–90 minutes
Best For: Unexpected placement, playful detail
Behind-the-knee placements are unusual and can feel intentional. The area is sensitive and flexes—expect high pain and more careful healing. Dotwork here can look amazing healed, but avoid too-tight clusters that crease. Wear loose clothes while healing. This is a fresh choice many people overlook.
Mandala Knee Cap (Protective Circle)
Style/Technique: Blackwork / Mandala
Pain Level: High (7–8/10)
Session Time: 1–2 hours
Best For: Circular focal point, movement-friendly piece
Knee cap mandalas read like a badge of intent. Pain is higher and the skin flexes, so bold lines and medium-sized details fare better. Healed mandalas maintain silhouette if center elements are scaled for movement. Common error: intricate micro-lacing—scale up. Ask to see healed knee pieces to judge longevity.

Asymmetric Polygon Half-Sleeve On Outer Arm
Style/Technique: Blackwork / Asymmetric Geometry
Pain Level: Medium (4/5/10)
Session Time: Multiple sessions
Best For: Statement, sleeve integration
An asymmetric polygon composition looks modern and intentional—especially as a half-sleeve. Outer arm is forgiving and displays patterns well. Healed blackwork keeps its boldness; dense patterns can feel heavy if not balanced with negative space. Avoid tucking tiny elements into moving areas that will blur. Bring examples of healed asymmetric sleeves.
Fractal Linework On Calf
Style/Technique: Fine Line / Fractal Geometry
Pain Level: Medium (4/5/10)
Session Time: 1–3 hours
Best For: Vertical leg statement
Fractal lines running down the calf create movement and scale. The calf provides a curved canvas that preserves long lines. Fine line fractals can spread slightly when healed—ask for modest line weight. Healing is stable; keep swollen ankles elevated early. This is a modern, wearable option that still reads handcrafted.

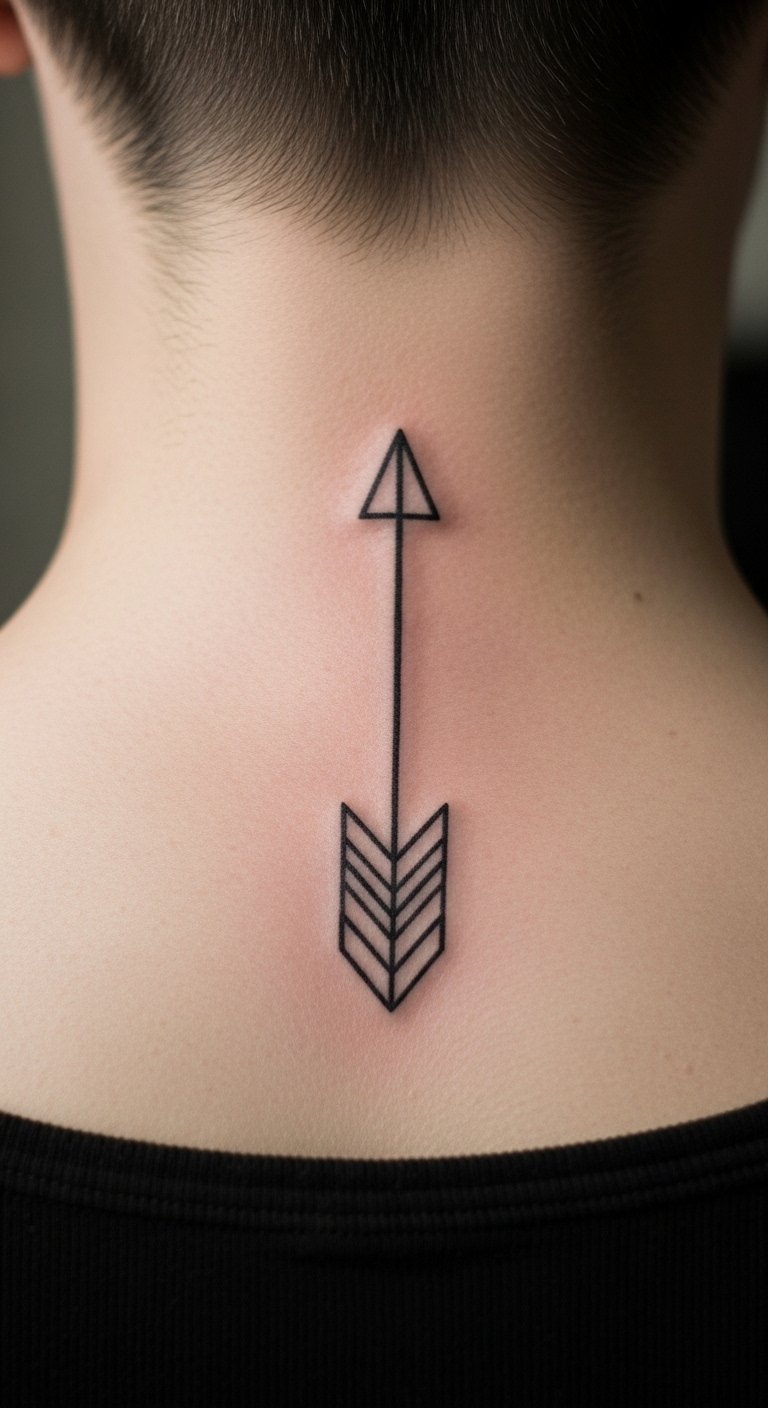
Geometric Arrow Back of Neck
Style/Technique: Minimalist / Fine Line
Pain Level: Medium (4/5/10)
Session Time: 30–60 minutes
Best For: Small bold placement, easy to conceal
A stacked geometric arrow on the nape reads crisp and directional. Back of neck is moderately sensitive; hair growth can hide it as needed. Thin lines heal predictably if not too fine. Avoid tiny crosses and micro-fill—ask for slightly stronger line weight for longevity. Keep long hair away during initial healing to avoid irritation.
Negative Space Chevron Sternum Accent
Style/Technique: Blackwork / Negative Space
Pain Level: High (7/8/10)
Session Time: 1–2 hours
Best For: Center-chest accent, symmetrical work
Negative-space chevrons over the sternum give a graphic, intentional look. Bold black surrounds preserve crisp negative shapes over time. Because of movement, lines need slight thickness. Healed images show strong contrast if saturation is dense. Avoid trying to micro-detail the small spaces—larger blocks read better after healing.

Geometric Wave Sleeve Around Wrist
Style/Technique: Minimalist / Repetitive Geometry
Pain Level: Medium (4/5/10)
Session Time: 1–2 hours
Best For: Bracelet-style visibility
A geometric wave cuff around the wrist reads like jewelry and feels deliberate. The wrist sees a lot of wear, so bold lines and simple repeats last longer. Expect touch-ups eventually. Avoid micro-dots on the wrist edge—use solid lines and keep the pattern slightly oversized to survive friction.

Isometric Cityscape On Rib Side
Style/Technique: Fine Line / Isometric Geometry
Pain Level: High (8/10)
Session Time: Multiple short sessions
Best For: Narrative pieces, hidden layouts
An isometric cityscape along the ribs combines geometry with narrative. Ribs mean high pain and careful session planning. Healed isometric lines show slight softening—use heavier outlines for buildings and finer interior lines. This placement reads like a private skyline; avoid cramming too many tiny windows.

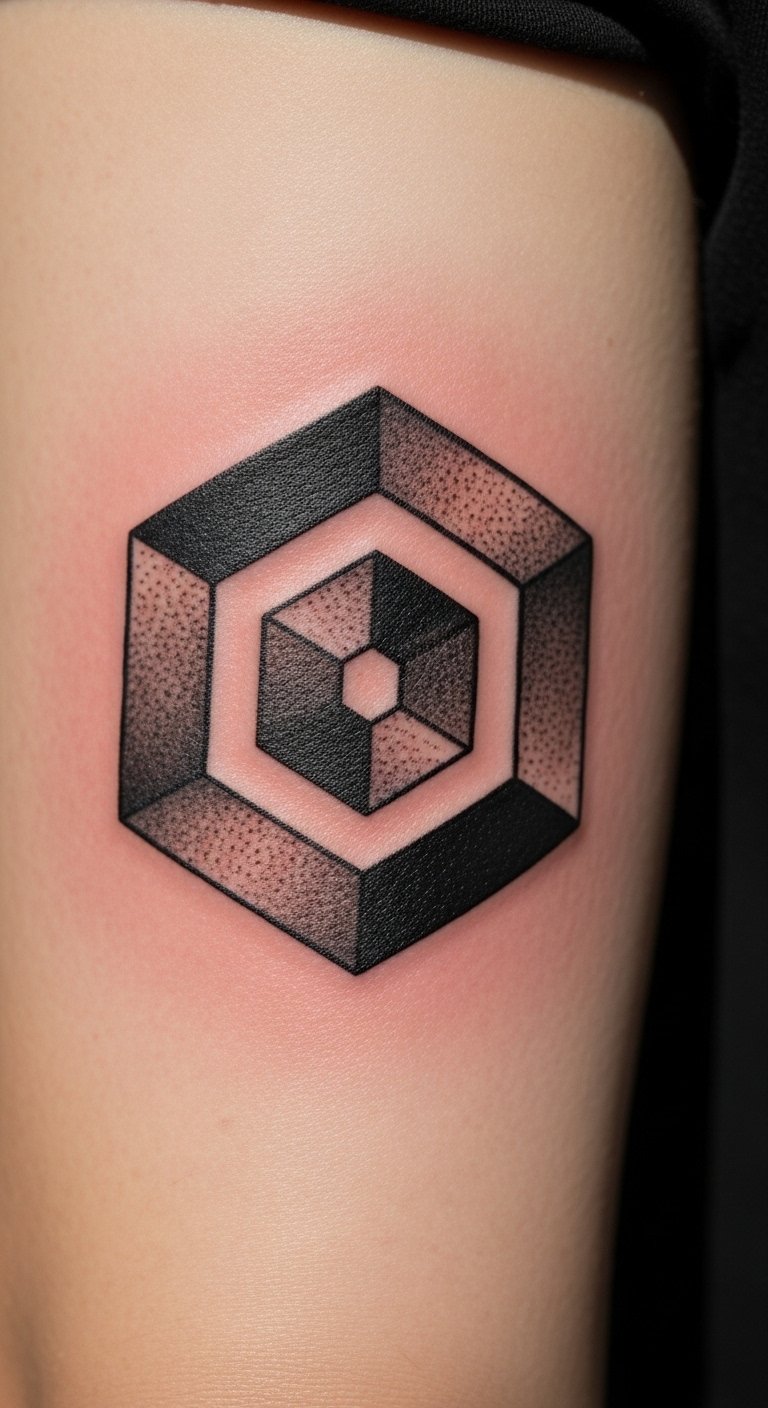
Concentric Hexagons On Palm Edge
Style/Technique: Blackwork / Edge Geometry
Pain Level: Very High (9/10)
Session Time: 30–60 minutes
Best For: Bold, hands-on statement (short-lived)
Palm-edge geometry looks striking but fades fastest due to skin turnover. Expect heavy touch-up frequency. If you want the look with better longevity, place the design slightly off the palm on the outer hand. A common mistake is underestimating maintenance—discuss refresh plans with your artist.

Geometric Floral Half-Collarbone Accent
Style/Technique: Fine Line / Geometric Floral
Pain Level: Medium (4/5/10)
Session Time: 1–2 hours
Best For: Feminine-meets-structural placement
Combining flowers with geometric frames softens the math while keeping intention. Collarbone placements show beautifully in healed photos; choose medium line weight to avoid feathering. Healing needs short-term extra care due to clothing friction. Avoid tiny petals inside tight shapes—scale floral elements.

Stacked Squares On Outer Thigh
Style/Technique: Minimalist / Block Geometry
Pain Level: Low (2/3/10)
Session Time: 1–2 hours
Best For: Concealable, large simple shapes
Stacked squares on the outer thigh give a deliberate, modular feel. Thigh skin holds ink well; blocks retain solidity over time. Keep gaps between squares to prevent merging with time. Healed examples show crisp silhouette if spacing is adequate. This is a low-pain, low-maintenance option.

Modular Geometric Scar Camouflage
Style/Technique: Dotwork/Negative Space / Scar-Friendly
Pain Level: Variable (depends on scar sensitivity)
Session Time: 1–2 hours
Best For: Scars, texture-based camouflage
Using geometry to work with scars is a fresh angle I see less often. Dotwork and negative space can mask irregular texture and make scarring look intentional. Healing over scar tissue requires an experienced hand—expect varied ink uptake. Ask for healed scar camouflage examples and proceed slowly. This approach can make a past mark feel chosen rather than covered.

Geometric Lace On Lower Back
Style/Technique: Fine Line / Lace Geometry
Pain Level: Medium (4/5/10)
Session Time: 2–3 hours
Best For: Accent wear, low-back visibility
A lace-like geometric panel on the lower back reads modern and intentional. Healed lace shows how thin lines soften—balance with slightly bolder anchors. Avoid ultra-fine filigree that may blur. Keep in mind friction from clothing; use breathable fabrics during early healing.

Triangular Compass On Upper Chest
Style/Technique: Minimalist / Geometric Compass
Pain Level: Medium (4/5/10)
Session Time: 1–2 hours
Best For: Directional symbolism, visible chest work
A triangular compass pairs geometric clarity with subtle meaning. Upper chest holds lines well but moves with breathing; choose medium weight lines. Healed compasses look bold when the points are slightly thicker. Don’t cram tiny letters or micro-dots into the points.

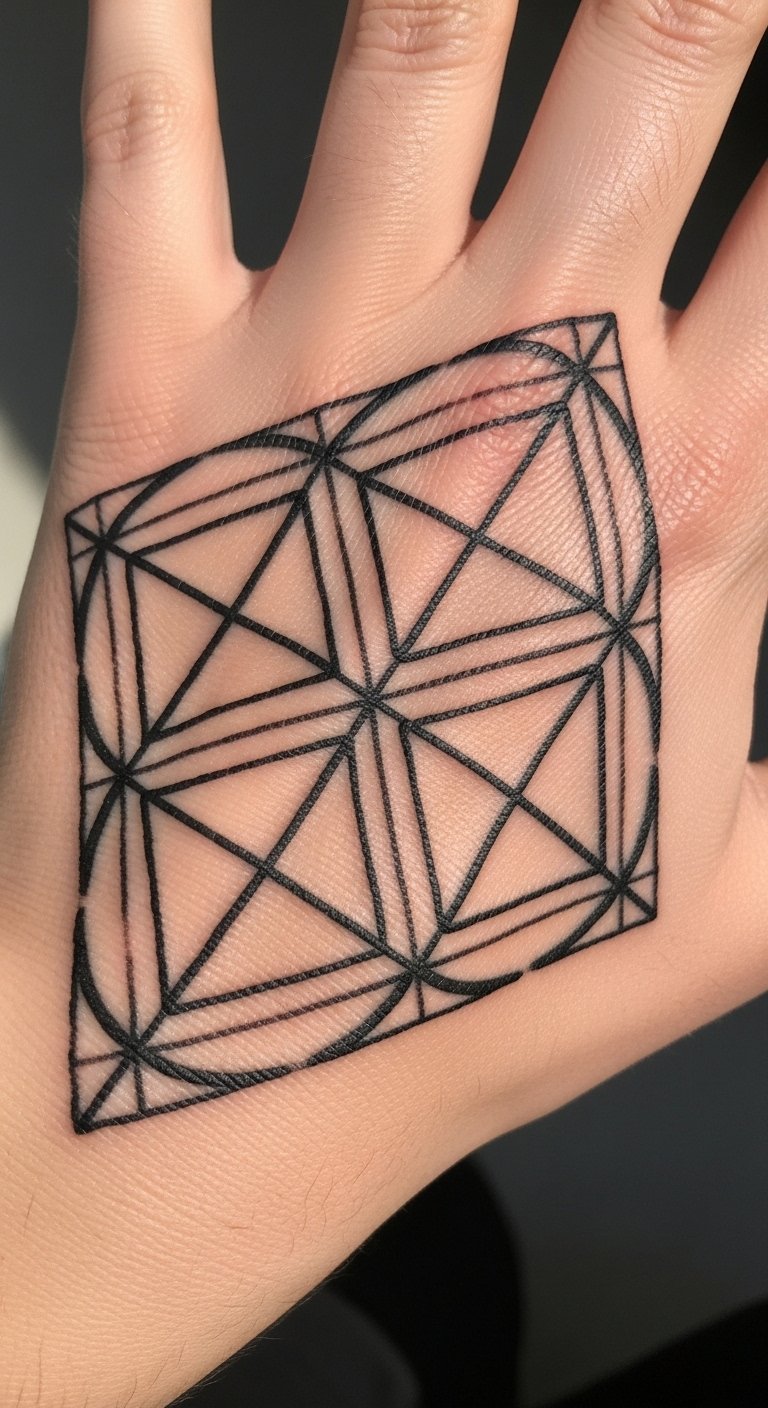
Lattice Back-of-Hand Accent
Style/Technique: Blackwork / Lattice Geometry
Pain Level: High (7/8/10)
Session Time: 1–2 hours
Best For: Hand-focused statement, short-term intensity
Back-of-hand lattice feels intentional like a ring or bracelet. Hand tattoos need touch-ups more often; opt for thicker lattice bars. Healed lattice shows softened intersections—spacing prevents merging. Keep in mind hand exposure—sunscreen helps but maintenance is more frequent.
Geometric Sunset On Side Rib
Style/Technique: Minimalist / Color-Accented Geometry
Pain Level: High (7/8/10)
Session Time: 1–2 hours
Best For: Small color pieces that read structured
A geometric sunset (stacked triangles and semi-circles) on the ribs mixes color with clean lines. Color on ribs can fade unevenly—black anchors and clear shapes help colors sing after healing. Avoid tiny gradients near flex points. Ask for healed color-on-rib examples before committing.

Optical Grid Over Shoulder Blade
Style/Technique: Fine Line / Optical Grid
Pain Level: Medium (4/5/10)
Session Time: 1–2 hours
Best For: Subtle shoulder statement, builds into back pieces
A precise grid on the shoulder blade looks architectural and intentional. Shoulder blade skin holds lines well; healed grids can look slightly softened—ask for bolder main axes. Avoid overly dense mini-grids; larger pitches age better. Healing is easy if you keep movements gentle initially.

Geometric Barcode On Inner Wrist
Style/Technique: Minimalist / Fine Line Barcode
Pain Level: Medium (4/5/10)
Session Time: 30–60 minutes
Best For: Subtle, scannable-style visual
A barcode-style geometric on the inner wrist feels deliberate and modern. Wrist skin wears quickly; use slightly thicker bars to remain distinct. Healed results are great if you accept potential for touch-up in a few years. Avoid tiny bars and fused spacing.

Stacked Diamond Spine Accent
Style/Technique: Blackwork / Vertical Geometry
Pain Level: High (7/8/10)
Session Time: Multiple short sessions
Best For: Centered spine accent, linear symmetry
Stacked diamonds running down the spine have a powerful, intentional rhythm. Spine placements are painful and require careful positioning. Healed diamonds look best with solid black centers or framed negative space. Avoid micro-ornamentation that could blur along the spine.

Tattoo Prep and Aftercare Essentials
Aftercare Essentials:
- Aquaphor Healing Ointment, 14oz tube — Recommended for first 3–5 days to lock in moisture
- Saniderm Transparent Adhesive Bandage, 6-inch roll — Second-skin healing option many artists recommend for 24–72 hours
- CeraVe Fragrance-Free Moisturizing Lotion — Daily moisturizer for days 4–30
Before Your Appointment:
- Tattoo numbing cream with 5% lidocaine — Apply only with artist approval, 30–45 minutes pre-session
- Tattoo stencil transfer paper — Useful if you’re testing placement at home
Long-Term Maintenance:
- SPF 50 sunscreen stick for tattoos — Daily protection to prevent UV fading
- Mad Rabbit Tattoo Balm — For keeping healed tattoos vibrant
- Hustle Butter Deluxe — Vegan-friendly ongoing care
Optional Comfort Items:
- Tattoo numbing spray — For sensitive sessions or touch-ups
- Hydrocolloid bandages for small tattoos — Alternative to Saniderm for tiny areas
Notes: Artists I follow often recommend Aquaphor or Saniderm for initial healing and CeraVe or Mad Rabbit for longer-term moisturizing. Choose products with minimal fragrance and test patch-wise if you have sensitive skin.
Frequently Asked Questions
Q: How bad does a tattoo actually hurt?
A: Pain depends on placement. Outer arm/forearm = ~3/10. Ribs/spine/ankle = ~7–9/10. It’s more like steady pressure and scratching than sharp jolts. For sensitive areas try numbing cream with 5% lidocaine only if your artist approves.
Q: How long until a geometric tattoo looks “normal” after healing?
A: Surface healing is 2–3 weeks. Full settling of lines and color takes 2–3 months. Geometric lines may soften slightly—choosing slightly bolder line weight helps them keep shape.
Q: Will thin geometric lines blur?
A: Tiny, densely packed lines are most at risk. Avoid micro-lacing in high-movement areas. Ask for slightly larger negative spaces and healed photos from the artist.
Q: Can tattoos be used to disguise scars with geometry?
A: Yes. Modular geometry and dotwork can mask texture and draw focus away from scar irregularities, but healed uptake varies—ask for healed examples of scar work.
Q: How do I prevent geometric tattoos from fading?
A: Sun is the main factor. Use SPF 50 sunscreen stick daily and moisturize with CeraVe lotion. Black holds best; very bright colors need more attention.
Q: Are geometric tattoos timeless?
A: The cleaner the geometry and the simpler the shapes, the more timeless they feel. Trends come and go with ornamentation; core shapes like circles, triangles, and grids age gracefully.
Q: How do I care for a tattoo during workouts?
A: Wait 48–72 hours for light activity; 1 week before heavy sweating is safer. Sweat can trap bacteria and lift scabs—keep the area clean and dry, and use breathable clothing.
Q: Do tattoos look different on different skin tones?
A: Yes. High-contrast black and solid shapes read consistently across tones. Light pastel colors may appear muted on deeper tones—ask to see healed examples on similar skin.
Sources: About 30% of U.S. adults report having at least one tattoo (Statista, 2023). Younger adults show higher prevalence—roughly half of people aged 18–29 report tattoos in several national surveys (Ipsos/YouGov aggregated trends).
Conclusion
I recommend taking time with placement and line weight choices—small changes now decide how geometric work reads years from now. Start with clear references and healed photos. Keep Aquaphor and an SPF stick on hand during early aftercare. Which geometric style are you leaning toward?
