
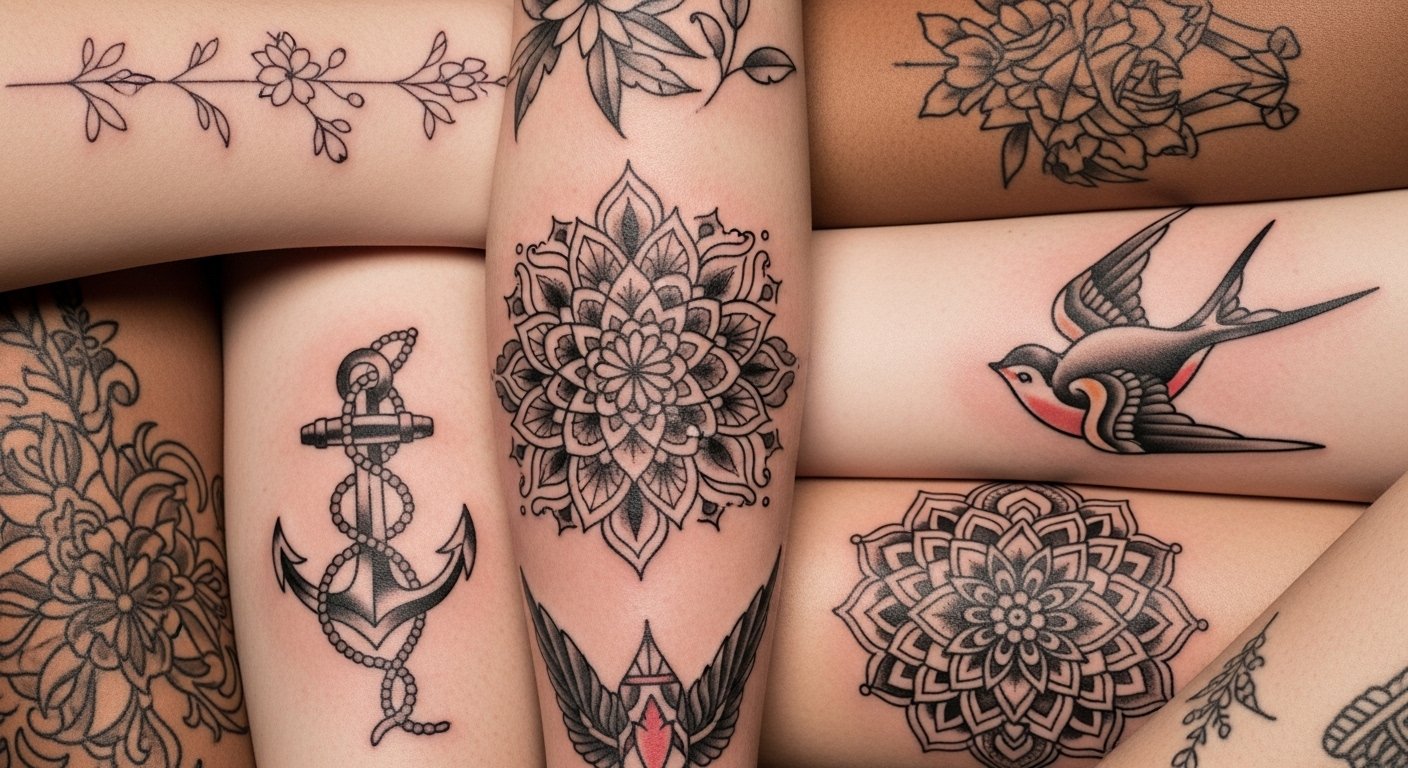
I spent months curating tattoo designs before I committed to my first sleeve. The real problem wasn’t finding art — it was choosing styles that age well together. Patchwork tattoos solve that: they let you collect pieces over time while still feeling intentional and “collected.”
Quick context: This list focuses on patchwork-ready styles — fine line, traditional, blackwork, micro-realism, and neo-traditional. These ideas work for arms, chest, thighs, and legs. Trends in 2025 favor curated, mismatched sets that read cohesive from a distance (minimalist motifs + bold anchors).
Two quick stats: About 31% of U.S. adults have at least one tattoo (Statista, 2021). Dermatologists recommend daily SPF to slow fading (American Academy of Dermatology).
Fine Line Botanical Cluster on Inner Forearm
Style/Technique: Fine Line / Illustrative
Pain Level: Medium (3-4/10)
Session Time: 1-3 hours per piece
Best For: First-timers, easy to hide

I love how tiny botanical pieces stack naturally into a patchwork. Fine line gives a delicate, meaningful vibe. Inner forearm pain is moderate; each small piece heals in 2–3 weeks on the surface. Avoid overly thin lines too close together — they blur if spaced wrong. Ask for demonstrations of healed fine-line work.
Bold Traditional Rose on Upper Arm
Style/Technique: Traditional / American Traditional
Pain Level: Low-Medium (2-3/10)
Session Time: 2-4 hours
Best For: Timeless anchor piece
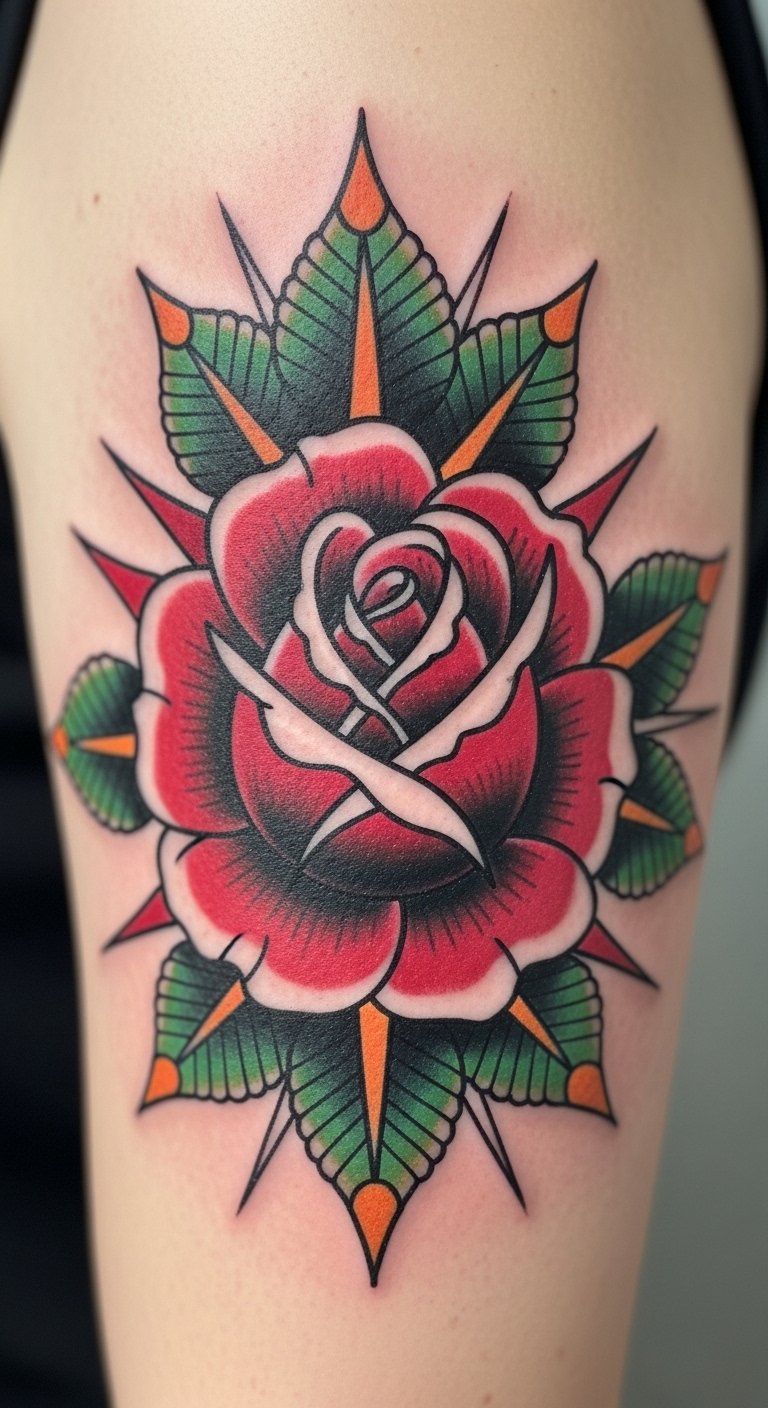
A bold traditional rose is a classic anchor in patchwork layouts. The upper arm is forgiving and low pain. Traditional holds up exceptionally well over years; outlines maintain clarity even as colors soften. Common mistake: too many tiny color details—traditional reads best with clean shapes and strong black.
Mini Blackwork Symbols Around Wrist
Style/Technique: Blackwork / Minimalist
Pain Level: Medium (4/10)
Session Time: 30–90 minutes each
Best For: Collectible micro pieces

Blackwork micro symbols age gracefully and tie diverse pieces together visually. Wrist placement is noticeable but can fade faster from sun and friction. Expect higher pain near bone. Keep motifs bold; tiny cross-hatching will blur. These are ideal filler pieces between larger elements.
Micro-Realism Pet Portrait on Thigh
Style/Technique: Micro-Realism / Portrait
Pain Level: Low-Medium (3/10)
Session Time: 2–4 hours
Best For: Meaningful statement piece

Micro-realism packs huge emotional payoff in a small area. Thigh is a forgiving canvas with low pain and great aging — less sun exposure. Healing takes standard 2–3 weeks for surface. Mistake to avoid: insisting on tiny size for extreme detail; scale affects likeness as it heals.
Watercolor Patch Blooms on Shoulder Blade
Style/Technique: Watercolor / Painterly
Pain Level: Low (2-3/10)
Session Time: 1-3 hours per patch
Best For: Soft, artistic clusters
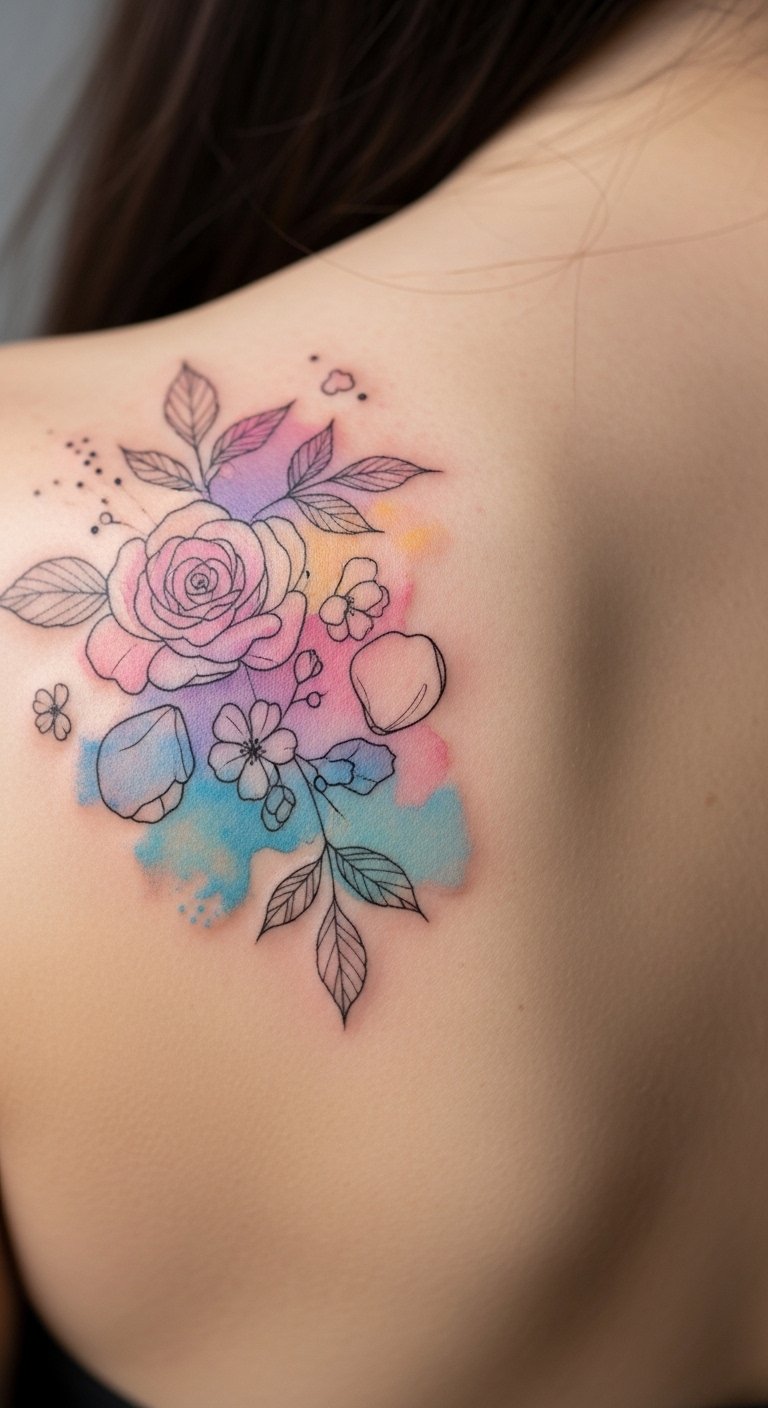
Watercolor patches add energy and color contrast in a patchwork. Shoulder blade heals well and is easy to cover. Color fades faster than black, so choose saturated pigments and plan touch-ups. Avoid too-messy edges that look muddy when healed; ask the artist for healed photos.
Neo-Traditional Animal Head on Upper Thigh
Style/Technique: Neo-Traditional / Bold Color
Pain Level: Low (2-3/10)
Session Time: 2–5 hours
Best For: Strong focal pieces

Neo-traditional pieces are perfect focal points in collected layouts. Thigh placement keeps it private but visible when you want. Expect surface healing in a few weeks; colors may soften over year one. Don’t cram too many competing colors nearby—give the piece breathing room.
Geometric Blackwork Strip Down Ribcage
Style/Technique: Blackwork / Geometric
Pain Level: High (7/10)
Session Time: Multiple short sessions
Best For: Statement, body-mapped designs

Ribcage geometric strips read striking and collected when mixed with other smaller patches. Pain is higher here. Blackwork holds up well when blocks are large; tiny dotwork can blur on rib flexing areas. Plan sessions and expect slow healing in this flex zone.
Collage-Style Polaroid Frames on Chest
Style/Technique: Illustrative / Collage
Pain Level: Medium (4-5/10)
Session Time: 1–3 hours per frame
Best For: Memory collection, customizable
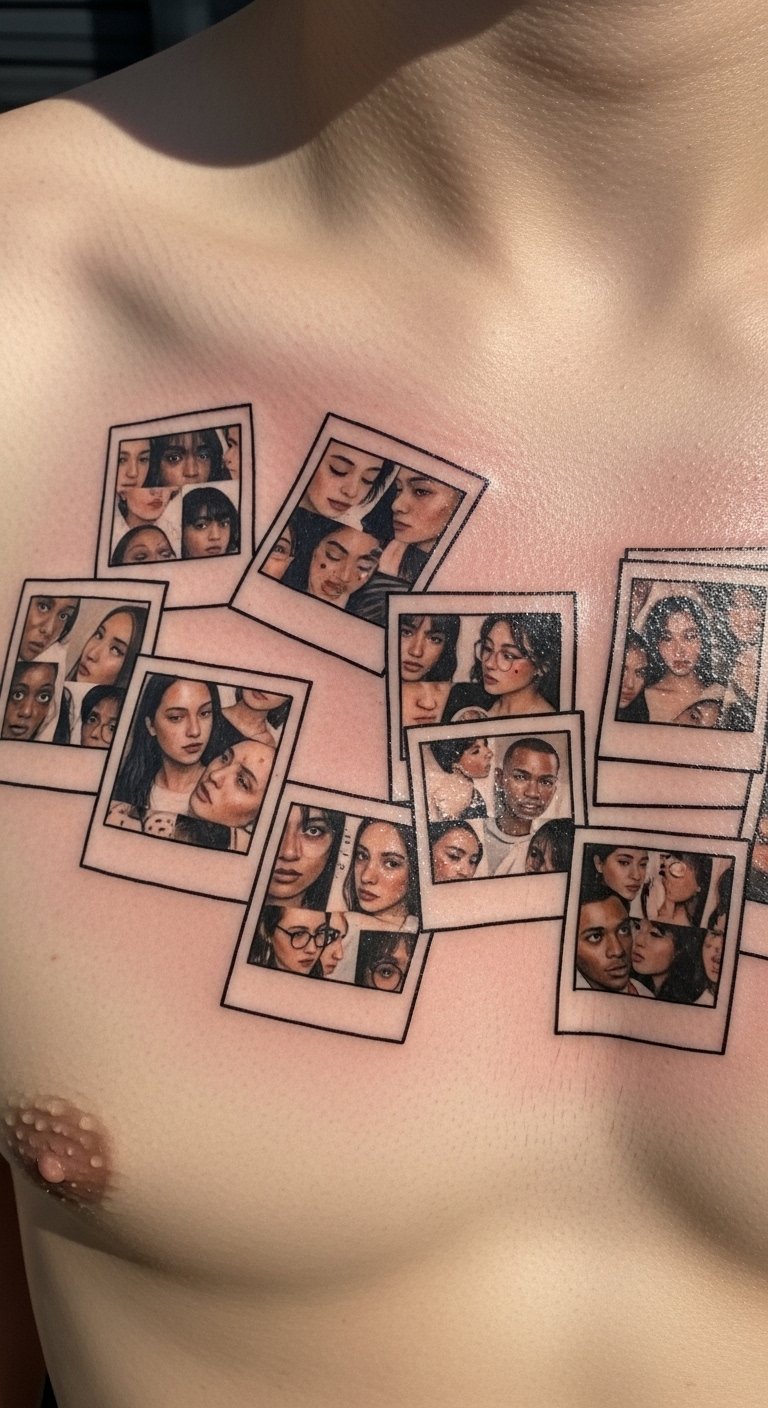
Polaroid frames let you collect moments without committing to full sleeves. Chest placement gives a central, curated look. Healing is straightforward but watch for stretching on larger chests. Avoid tiny image details that lose clarity; bold silhouettes inside frames read better long-term.
Scar-Friendly Soft Line Pieces Near Scars
Style/Technique: Soft Line / Camouflage
Pain Level: Variable (depends on scar)
Session Time: 1–2 hours per piece
Best For: Scar concealment, skin texture blending

Patchwork offers smart ways to incorporate scars. Soft shading and slightly bolder lines around scars avoid uneven healing. Pain can be unpredictable on scar tissue. Ask for healed examples on similar skin and avoid white ink as it disappears on textured areas.
Tiny Script Words Along Collarbone
Style/Technique: Fine Line / Script
Pain Level: Medium (4/10)
Session Time: 30–60 minutes
Best For: Personal, visible micro text
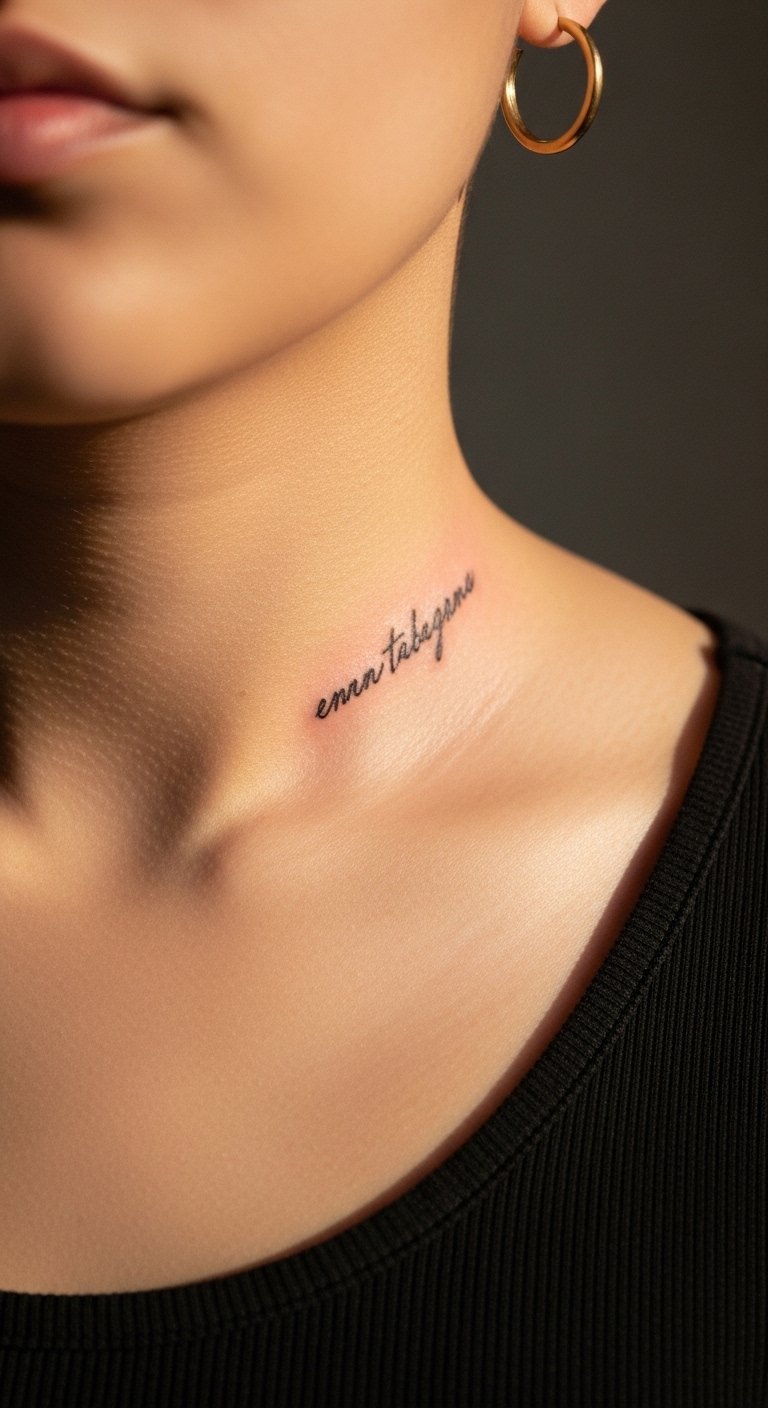
Collarbone script is intimate and reads as part of a collection. Expect moderate pain and slow surface healing due to movement. Keep lettering larger than you think; tiny script often blurs. Choose timeless phrasing and request healed examples.
Patchwork Nautical Icons on Calf
Style/Technique: Traditional / Iconic
Pain Level: Low (2-3/10)
Session Time: 30–90 minutes each
Best For: Theme-based collectors
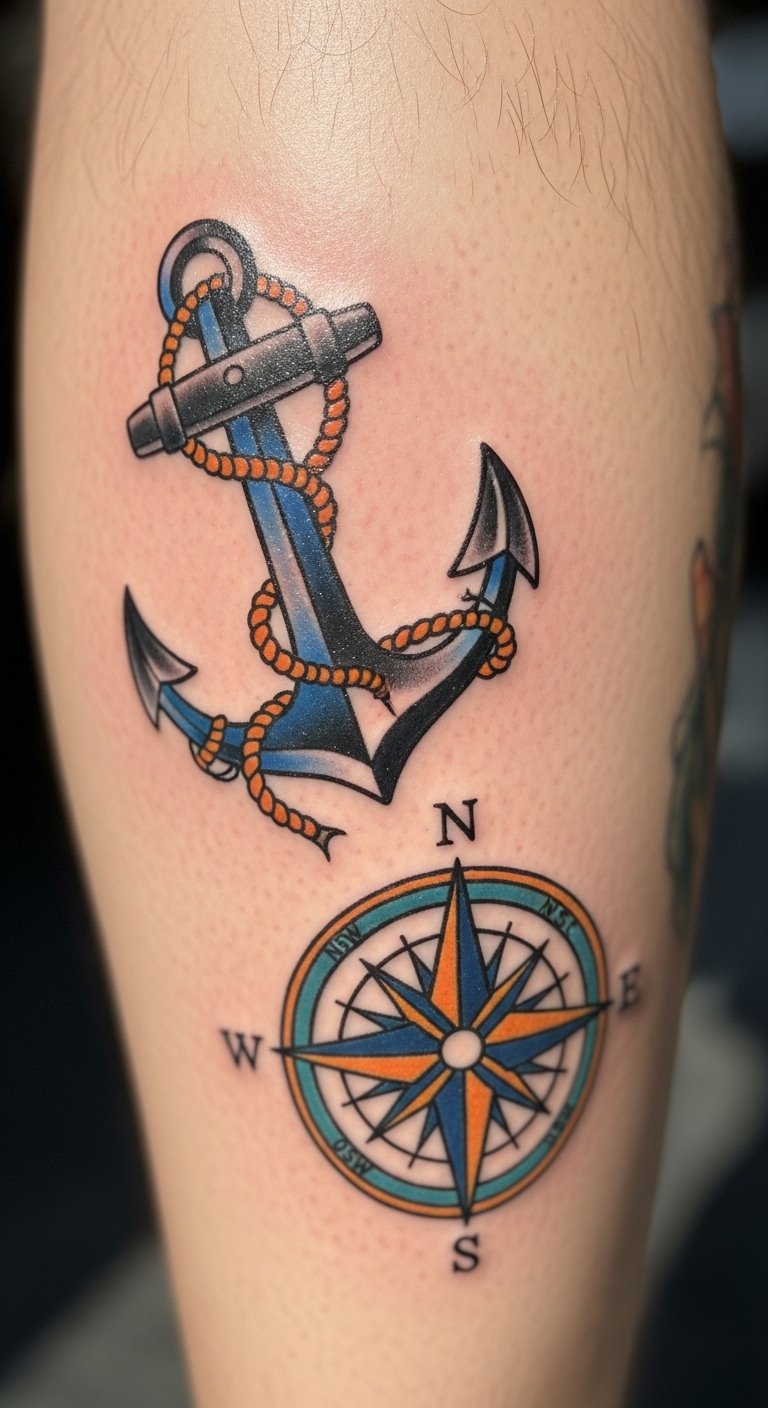
Calf patches are visible, low-pain, and stack easily. Traditional nautical icons tie different pieces together and age well. Avoid tiny fine-line details that won't hold on this canvas. Calf skin tolerates touch-ups well for maintenance.
Abstract Line Patches Behind Ear and Neck
Style/Technique: Minimalist / Abstract Line
Pain Level: High (6-7/10 behind ear)
Session Time: 30–60 minutes each
Best For: Subtle, peek-a-boo pieces
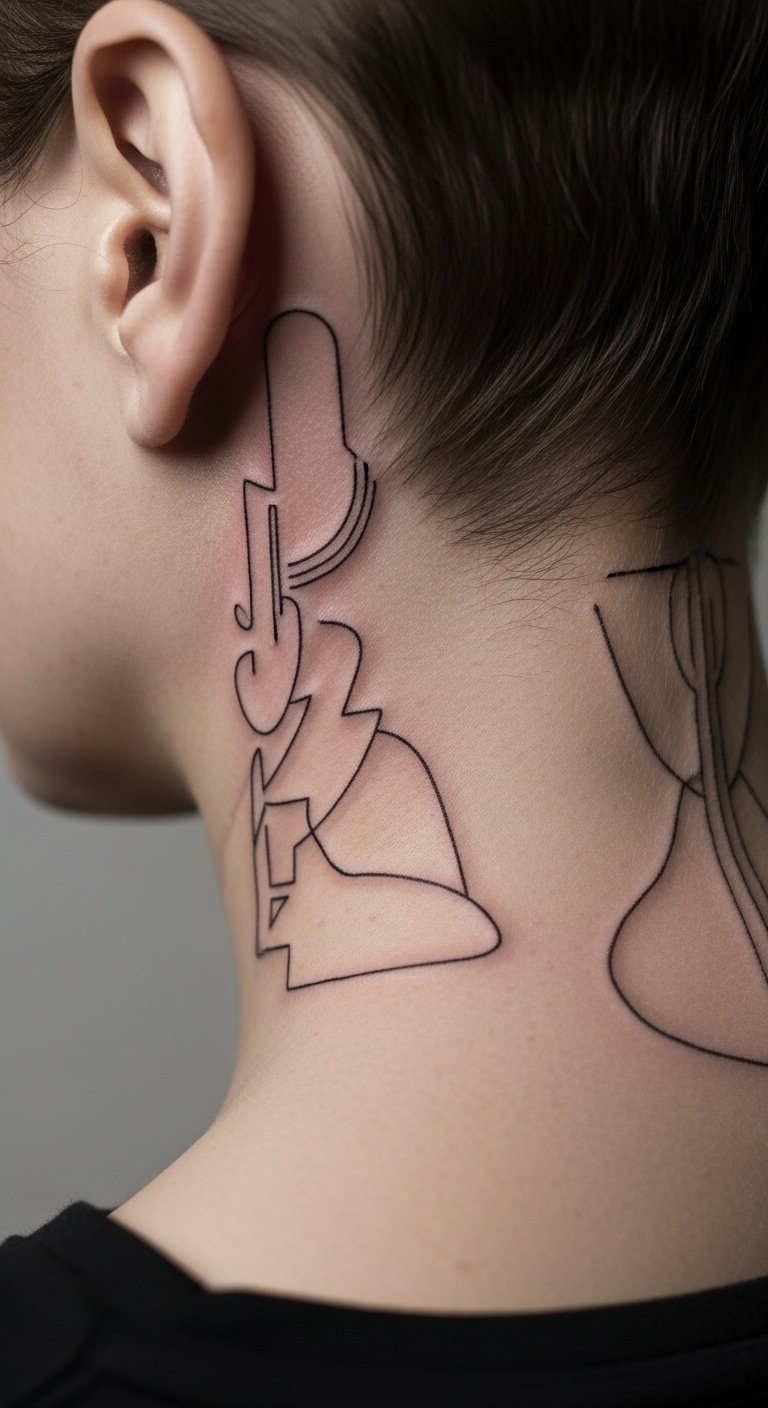
Small abstract lines behind the ear add an intentional, collected feel. Pain is higher in thin-skin spots. Healed lines can thin; ask for slightly bolder line weight. These are excellent for alternating visible and hidden pieces in your patchwork.
Botanical Neo-Blackwork on Thigh Wrap
Style/Technique: Neo-Blackwork / Botanical
Pain Level: Low (2-3/10)
Session Time: 2–4 hours per session
Best For: Large cohesive patches
Dense black botanical patches create contrast when mixed with lighter fine-line pieces. Thighs tolerate large blackwork and age predictably. Heavy black may require longer healing; keep moisturized. Avoid tiny vignette details that get lost against heavy fill.
Polka-Dot Stipple Filler on Upper Arm
Style/Technique: Dotwork / Stippling
Pain Level: Low-Medium (3-4/10)
Session Time: 1–2 hours per area
Best For: Texture, subtle cohesion
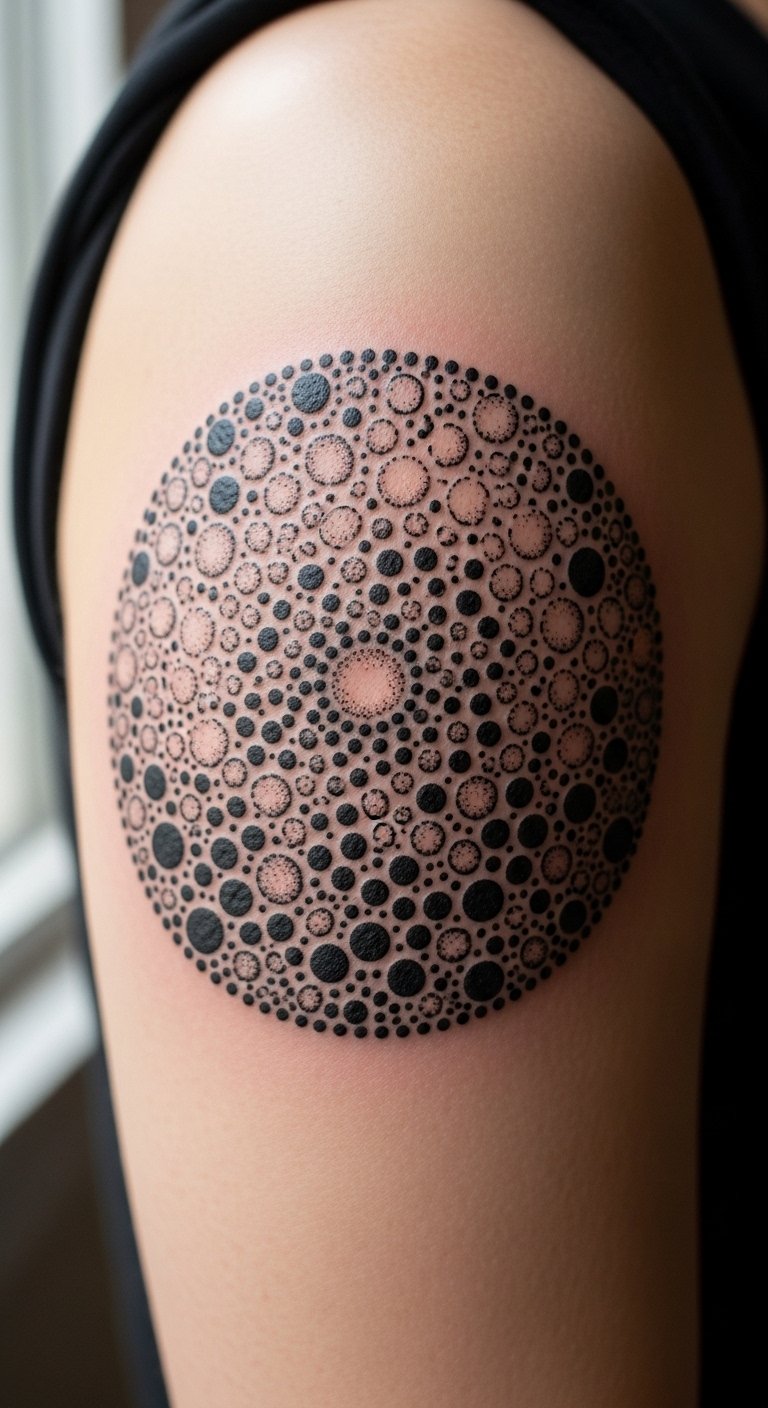
Stipple filler is an understated way to link disparate patches visually. Upper arm is forgiving; dotwork ages without heavy blur if dots are spaced. Pitfall: overly dense stippling can look muddy when healed—ask for examples on healed skin.
Micro-Illustrative Icons Along Finger Sides
Style/Technique: Micro-Illustrative / Minimalist
Pain Level: High (7-8/10 for fingers)
Session Time: 15–45 minutes each
Best For: Tiny signature marks

Finger pieces are intimate but finicky — they fade faster and need touch-ups. Pain is high on digits. Choose bold simplified shapes. If you want a test spot, try a hidden finger location first and accept they’ll be maintenance pieces in a patchwork.
Geometric Mandala Half-Sleeve on Outer Arm
Style/Technique: Geometric / Mandala
Pain Level: Medium (4-5/10)
Session Time: Multiple sessions
Best For: Collected arm compositions
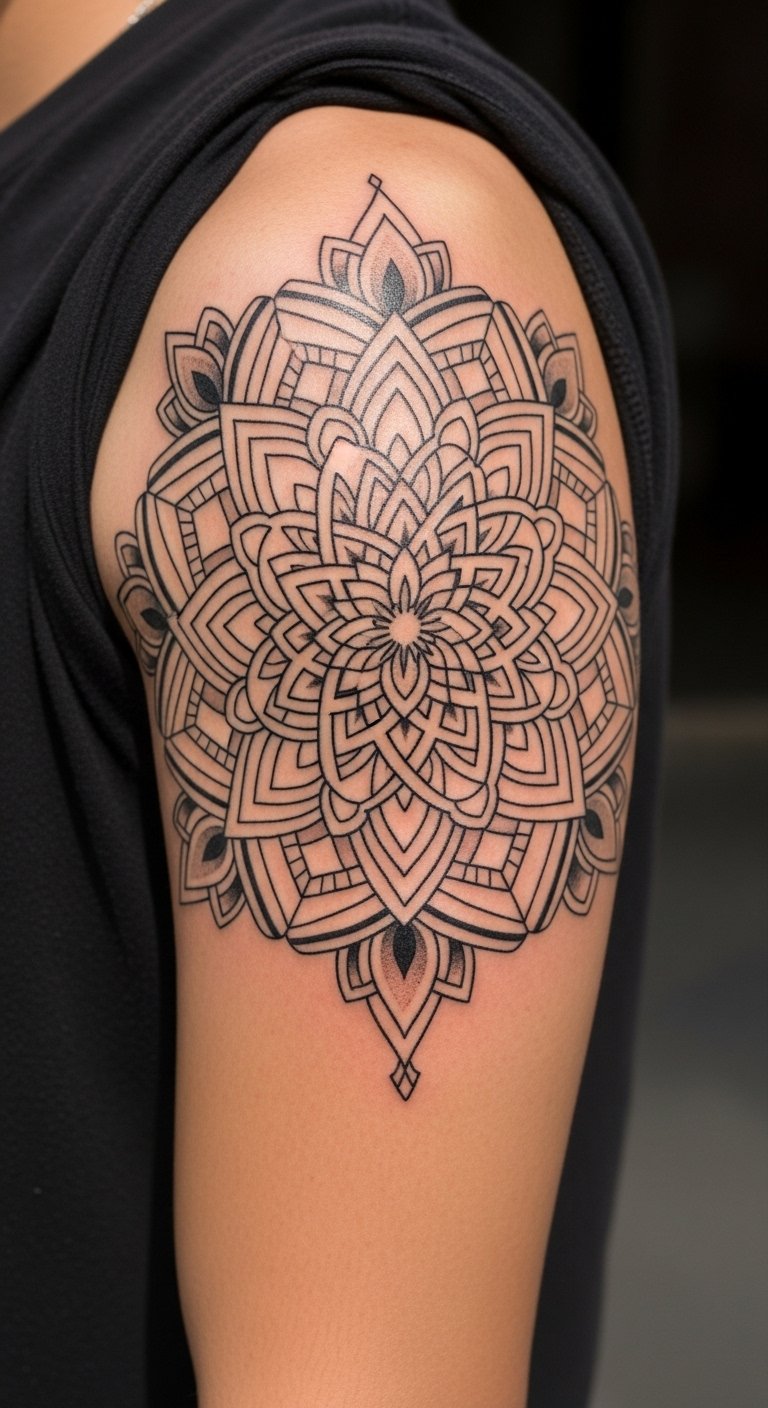
Mandala geometry provides visual anchors for mixed collections. Outer arm is lower pain and sunlight exposure varies—protect it with SPF. Precision matters; ask for healed close-ups. Tiny radial lines can blur, so scale up critical details.
Patchwork Travel Stamps On Rib Cage
Style/Technique: Illustrative / Stamp-style
Pain Level: High (6-8/10)
Session Time: 1–2 hours each
Best For: Travel memories, curated collection

Stamp-style pieces feel collected by design. Rib placement hurts more but looks great in a patchwork across torso. Healed stamps should be bold and legible; avoid tiny text. Plan spacing so new stamps don’t crowd older ones.
Negative Space Portrait Patches on Upper Back
Style/Technique: Illustrative / Negative Space
Pain Level: Low-Medium (3-4/10)
Session Time: 1–3 hours per piece
Best For: Subtle realism within patchwork

Negative space portraits add sophistication and read beautifully with surrounding patches. Upper back heals well and is easy to conceal. Avoid overworking fine shading; negative space relies on crisp contrast to remain legible.
Tiny Celestial Cluster on Ankle
Style/Technique: Minimalist / Celestial
Pain Level: High (6-7/10)
Session Time: 30–90 minutes
Best For: Delicate visible spots

Ankle clusters are delicate and photograph nicely in a patchwork. Pain is higher near bone. Fine dot stars may fade quicker; choose slightly bolder dots. These pieces pair well with larger wraps higher on the leg.
Mixed-Media Collage Forearm Band
Style/Technique: Mixed (Blackwork + Watercolor)
Pain Level: Medium (4/10)
Session Time: Multiple sessions
Best For: Eclectic collectors

A forearm band that mixes styles feels intentionally collected. Expect standard forearm healing but plan for touch-ups where watercolor meets black. Mistake: letting color overlap thin black lines—insist on clear separation during design.
Tiny Botanical Ankle Garland
Style/Technique: Fine Line / Minimalist
Pain Level: High (6/10)
Session Time: 30–90 minutes
Best For: Feminine, low-visibility spots
Ankle garlands are charming connectors between leg patches. Pain near ankle bone is higher. Fine lines may blur with time; ask for slightly stronger line weight if you want longevity.
Painterly Brushstroke Back-of-Arm Accent
Style/Technique: Painterly / Watercolor Brushstroke
Pain Level: Medium (4/10)
Session Time: 1–2 hours
Best For: Artistic accents between pieces
Brushstroke accents are modern and make collections feel curated. Back-of-arm placement flexes and heals predictably. Colours need maintenance; choose pigments that hold. Avoid overly diffuse edges that can become indistinct.
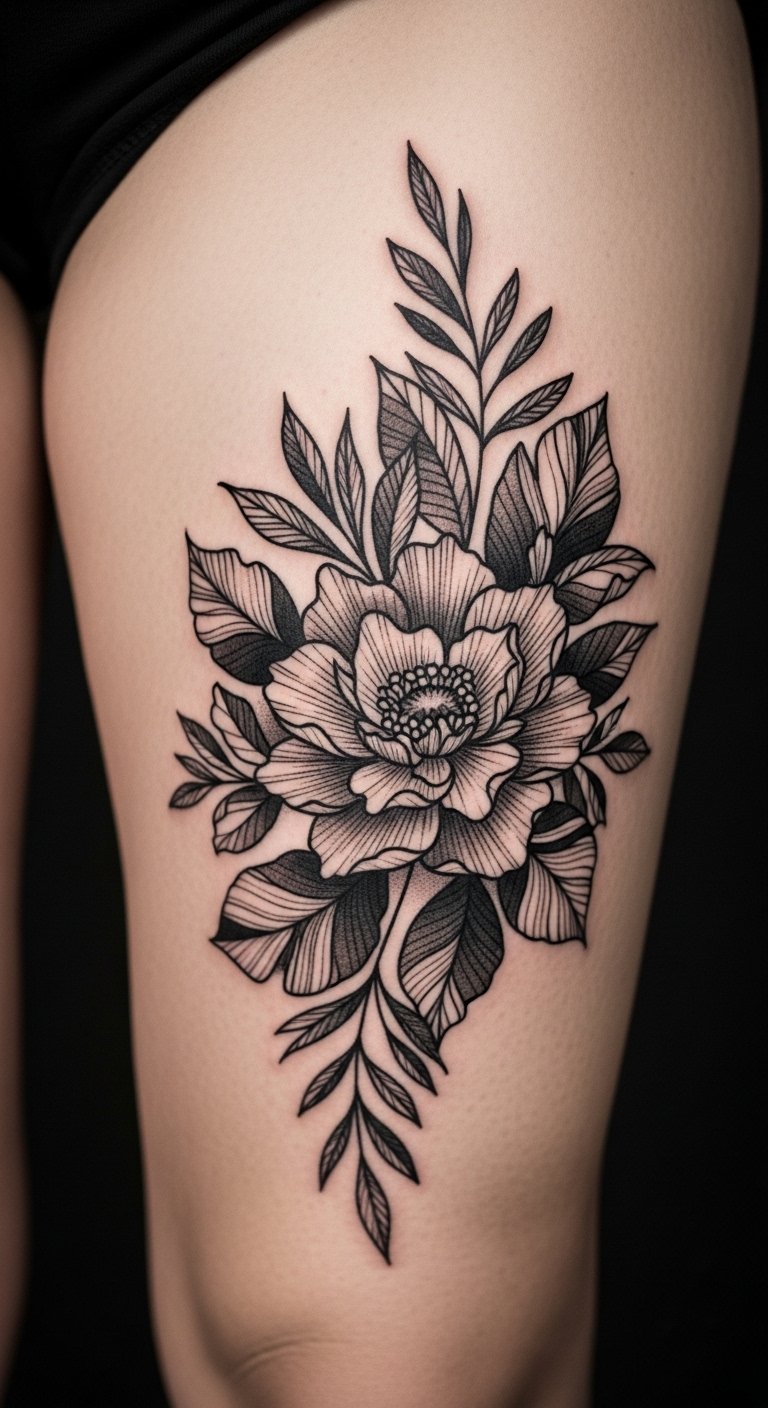
Collaged Botanical and Script Thigh Panel
Style/Technique: Neo-Illustrative / Mixed
Pain Level: Low (2-3/10)
Session Time: Multiple sessions
Best For: Heavier leg collections

Thigh panels let you add big collected statements while keeping options to add micro pieces around them. Script pairs nicely with florals. Keep lettering bold enough to survive healing and future additions.
QR-Style Micro Patch (Hidden Meaning) on Inner Bicep
Style/Technique: Micro-Illustrative / Conceptual
Pain Level: Medium (4/10)
Session Time: 30–60 minutes
Best For: Secret, meaningful additions

A QR-style or coded patch gives a modern, collected feel. Inner bicep is moderate pain and easy to hide. Avoid insisting on ultra-fine detail that won’t scan later; this is more symbolic than functional.
Tattoo Prep and Aftercare Essentials
Aftercare Essentials:
- Aquaphor Healing Ointment, 14oz tube — Recommended first 3–5 days
- Saniderm Transparent Adhesive Bandage, 6-inch roll — Second-skin healing option
- CeraVe Fragrance-Free Moisturizing Lotion, 12oz — Days 4–14
Before Your Appointment:
- Numbing Cream 5% Lidocaine — Use only if your artist approves
- Tattoo Stencil Transfer Paper, 10 sheets — For at-home mockups
Long-Term Maintenance:
- SPF 50 Sunscreen Stick for Tattoos — Daily protection
- Mad Rabbit Tattoo Balm, 2oz — Keeps healed ink vibrant
- Hustle Butter Deluxe, 4oz — Vegan aftercare alternative
Optional Comfort Items:
- Tattoo Numbing Spray — For touch-ups
- Hydrocolloid Bandages, pack — Small spot protection
Frequently Asked Questions
Q: How bad does a tattoo actually hurt?
A: Pain depends on placement. Outer arm/thigh = low–medium (2–4/10). Ribcage/ankle/fingers = higher (6–8/10). Numbing creams help on sensitive areas—ask your artist about numbing cream 5% lidocaine.
Q: How long to heal?
A: Surface healing 2–3 weeks; full healing 2–3 months. Keep clean, moisturized, and avoid picking. Use Aquaphor first days, then fragrance-free lotion.
Q: How do I prevent fading?
A: Sunscreen is essential. Use an SPF 50 stick daily. Black ink fades slowest; light colors need more upkeep.
Q: Can I work out after getting inked?
A: Wait 48–72 hours before intense sweat. For flex areas give it a week. Sweat risks infection and ink loss.
Q: Will tattoos look different on my skin tone?
A: Yes. Black and grey show consistently; bright colors may read different. Ask to see healed examples on your skin tone.
Q: What if I’m indecisive about placement?
A: Start with a small patch in a less visible spot and build. Patchwork is forgiving — pieces can be added around anchors over time.
Conclusion
Start with one collected piece and let it grow. Patchwork tattoos read intentional when you balance fine-line fillers with a few bold anchors. Protect new and healed work with Aquaphor and daily SPF. Which patch are you tempted to start with?
